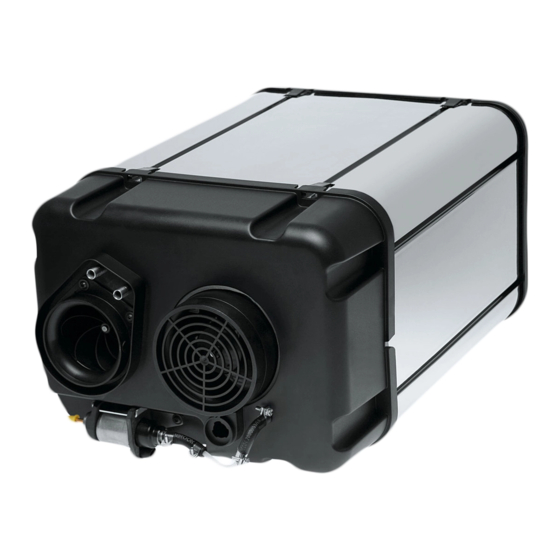
Webasto Dual Top ST 6 Workshop Manual
Hide thumbs
Also See for Dual Top ST 6:
- Operating instructions manual (19 pages) ,
- Installation instructions manual (32 pages)
Table of Contents
Advertisement
Quick Links
Advertisement
Table of Contents

Related Manuals for Webasto Dual Top ST 6


Summary of Contents for Webasto Dual Top ST 6
- Page 1 Workshop Manual Dual Top ST 6 / 8 English...
-
Page 2: Table Of Contents
Inhaltsverzeichnis Inhaltsverzeichnis Introduction........ 3 11 Technical Data ........ 37 About this document.......... 3 11.1 Fuel for the Dual Top ST ........... 37 Using the Integrated Air and Water Heater .... 3 11.2 Technical data ............ 38 Additional documentation to be used...... 3 Safety .......... 3 Statutary regulations governing installation .... -
Page 3: Introduction
The document is part of the product and contains all the in- Dual Top ST 6 / 8 heaters have been type-tested and approved formation, settings and instructions necessary to maintain the in accordance with the regulations ECE-R 10 (EMC) and ECE-R product. -
Page 4: Working On The Vehicle
The heat exchanger on Dual Top ST heaters is exposed to of the vehicle. very high thermal stress and must be replaced by genuine Webasto spare parts ten years after these are used for NOTE the first time. The heater must then be provided with a Replace component: sign which bears the date of sale and the word "Original... -
Page 5: General Description
General description ger or driver's compartment on the vehicle. The integrated Dual Top ST 6 and 8 heaters have been designed The fuel lines (Mecanyl hose) must not be in direct contact with according to the evaporator principle and mainly consist of: the exhaust pipe and must be thermally insulated if necessary, to avoid the risk of fire. -
Page 6: Functional Description
Heat exchanger Frost protection mode Combustion pipe Drainage boiler Water temperature switch Example of the Dual Top ST 6 or 8 programmable control panel: Water temperature sensor Housing cover with hot air outlet Air temperature sensor Air temperature switch Temperature switch for the heat exchanger... -
Page 7: Summer Mode
Summer mode between 1,500 W and 6,000 W (Dual Top ST 6) or 1,500 W and The heater provides hot water. The water is heated up to, and 8,000 W (Dual Top ST 8), depending on the output requirement kept at 40 °C or 70 °C / 104 °F or 158 °F. -
Page 8: Fault Code Output
5 | Troubleshooting Cause Result Heater lifted by heating air Heater warped, noise blower Heater installed without vi- Noise bration damper Water lines connected with Leakage incorrect hose connectors Unfavourable position of Noise, overheating, low efficiency cold air inlet chosen Heater installed unprotec- Blockage in cooling air blower Hot air hoses fastened with... - Page 9 Fault message output LED Fig. 2 The manual control panel is used for Dual Top ST 6 heaters only. The heater is able to identify faults on individual components during the operation. The control panel displays fault messages by flashing pulses.
- Page 10 11. Switch on heater on control panel. Deleting failures can also be done with the Webasto Thermo Test PC-Diagnosis. If a fault occurs, the heater stops. In case of electrical safety/drain valve fault (17 red flashes), heating of the interior is still possible.
- Page 11 Troubleshooting | 5 If heating air blower assembly and wiring harness have been checked and Dual Top ST still doesn’t run: Replace the com- plete Dual Top ST . Overheating water temperat- Check water level. ure sensor Reset heater (by switching off for at least 5 sec.) or select Exceeding gradient water winter mode, heating without hot water production.
- Page 12 5.1.2 Programmable control panel Fig. 4 The programmable control panel is used for Dual Top ST 6 and 8 heaters. The heater can identify faults on individual components during the operation. The control panel gives out the fault message. Rectify the cause of the fault.
- Page 13 Troubleshooting | 5 Fault message output on Dual Top ST 6 and 8 with programmable control panel Message Meaning Code from con- Remedy trol unit to con- trol panel [hex] Message 00, 01 No communication Check battery charge. No data connec- between control Check control panel connections.
- Page 14 5 | Troubleshooting 4-pin connector) If not, check external wiring harness: routing wiring harness and pins of 12 pin connector. In case there is a bad connector, bad wiring harness or defect PWM module: Replace defective part. If heating air blower assembly and wiring harness have been checked and still doesn’t run: Replace complete Dual Top ST .
- Page 15 Check control panel and connectrions on control panel. rupted Check internal wiring harness connections Y9, Y10. For Dual Top ST 6 and 8: Check for overheating (see messages 10, 11, 12, 13 and 14). Reset heater (by pressing OK or switching off for at least 5 sec.)
- Page 16 5 | Troubleshooting 36, 37, 38, 39, 40, 41 Message 42 Electric heater (230 Check water system related for a permanent open hot water tap Failure 230 V V) defect OR heavy leakages. heating element No relevant temper- Check cable 230 V from relay box to heater and corresponding (Only Dual Top ature increase detec- connectors.
-
Page 17: Function Tests
5,373.00 5,190.00 5,556.00 NOTE The resistance test must be carried out with an ohm- 4,241.00 4,102.00 4,379.00 meter suitable for small resistance values or Webasto 3,372.00 3,266.00 3,479.00 Thermo Test PC Diagnosis. 2,700.00 2,619.00 2,781.00 A resistance test with a simple digital multimeter is too 2,175.00... -
Page 18: Resistance Measurement For External Room Temperature Sensor
CO setting. This also applies on replacement of the control unit. The CO setting is carried out with Webasto Thermo Test PC Diagnostics. The heater is optimally set to a CO value at the factory for op- Fig. 7 Sensor positions eration at altitudes up to 2,200 m above sea level. -
Page 19: Servicing Work
5.0 to 8.0 % vol. under partial load (2 kW). 7.8.2 Control panel: removal and installation At full load (6 kW) it should be 9.0 to 13.0 % vol. after setting Disassembly manual control panel (Dual Top ST 6) the CO value. Disconnect the battery. -
Page 20: Start Up
8 | Repair 8.3.1 Removing the housing cover Loosen two T20 screws below hot and cold water connect- ors 1 to 2 turns (just enough to move the cover of the heat- ing air blower). Fig. 9 Disassembling the programmable control panel Installation See Installation instructions. - Page 21 Repair | 8 NOTE Loosen 2 screws T20 that hold the metal plate (with air temperature sensor and air temperature switch) of the sensor wiring harness on the housing cover. Fig. 15 Remove boiler 8.3.4 Removing the ventilation / overpressure valve and solenoid valve Fig. 13 Removing housing cover, gasket and metal retaining plate Remove the drain hose from the ventilation / overpressure 8.3.2...
- Page 22 8 | Repair 5. Disconnect 8-pin plug of sensor wiring harness from internal NOTE wiring harness. Avoid that the screwdriver makes scratches on the tube. Scratches will cause leakage. Alternative: use a plastic tool. Fig. 22 Remove water temperature switch and sensor 6.
- Page 23 Repair | 8 3. Disconnect the five plugs of the internal wiring harness from 8.3.6 Removing the electrical heating element control unit. This subchapter only applies on Dual Top ST 8. 4. Loosen screw T20 that attaches the brown wire to the con- Disconnect the two X1 plugs (2-pin, 1x grey/black, 1 x trol unit.
-
Page 24: Assembling
8 | Repair 3. Loosen 3 T20 screws to remove combustion air intake incl. 6. Loosen 2 T20 screws to remove combustion pipe assembly connection gasket from drive assembly. and metal crimp sealing from heat exchanger. Fig. 31 Remove combustion air intake and gasket Fig. 34 Remove combustion pipe assembly and gasket 8.3.9 Removing the evaporator housing... - Page 25 Repair | 8 Fig. 36 Install evaporator housing assembly and glow plug Fig. 30 Install heat exchanger and gasket 9. Fix evaporator housing assembly to heat exchanger with NOTE clamping yoke and 2 screws T20. When assembling, leave out the cooling shell gasket and do not use any other gaskets or sealants.
- Page 26 8 | Repair 5. Put the exhaust gasket on the exhaust and cooling air outlet. Fig. 44 Install overheating protection 4. Fit 4 springs on heat exchanger. Fig. 42 Install exhaust gasket 5. Select a uniform positioning of the springs so that the thermo 8.4.4 Installing the electrical heating elements unit is positioned at an equal distance from the boiler on all...
- Page 27 Repair | 8 Fig. 46 Install water temperature switch and sensor Fig. 49 Install solenoid valve 8. Put thermo unit into boiler and fix with 4 screws T30. 4. Attach the self-adhesive insulation ventilation / overpressure valve (top) and solenoid valve (bottom). NOTE NOTE Make sure that clearance between heat exchanger and...
- Page 28 8 | Repair Fig. 52 Install drain hose (standard version) Fig. 54 Install insulating elements and boiler Dual Top ST immersion pump version: Only for Dual Top ST 8: n Fix the green/yellow ground wire to the housing using Connect drain hose to 1 opening on ventilation/overpres- screw T30 and hex nut SW10.
- Page 29 Sensor and switch shall face towards housing cover ive groove of grommets for wiring harnesses (1 pc. for with hot air outlet (not towards heat exchanger). Dual Top ST 6). Overheating protector on heat exchanger shall not touch metal plate (with air temperature sensor and air temperature switch) of sensor wiring harness.
-
Page 30: Replacing The Aluminium Boiler
Item nr. Name Use Webasto Thermo Test’s component test to run heating air blower at 30, 60 and 90%. When doing 9041048C03 INSULATION COMBI-VALVE so, allow the blower to run for at least 30 seconds 9041053C03 INSULATION MAGNETIC-VALVE on each level. -
Page 31: Packaging/Storage And Shipping
General You must clean and package the heater or its components which are sent to Webasto for testing, so that they are protec- ted against damage when handled, transported and stored. For storage, the ambient temperature must be between + 85 °C and –... -
Page 32: Circuit Diagramms
Manual or programmable control panel Vehicle‘s service battery Fuse 5 A Fuse 15 A Fuse 15 A Fuel pump Interior temperature sensor Fig. 63 Schematic diagram of electrical connections Dual Top ST 6 Wiring interior temperature sensor 32 / 39 9019782C WSH Dual Top ST... - Page 33 230 V power supply X0 (2-pin) Of room temperature sensor to control panel Webasto Thermo Test PC-diagnosis and Webasto Telestart / Thermo Call (For optional pro- grammable control panel) X4 (4-pin) Of wiring harness to control panel Fig. 65 Mounting the manual control panel back...
- Page 34 Webasto Telestart / ThermoCall X4 (4-pin) Of wiring harness to control panel X6 (6-pin) Of wiring harness to control panel Fig. 66 Electrical connections of the programmable control panel Fig. 67 Circuit diagram Dual Top ST 6 34 / 39 9019782C WSH Dual Top ST...
-
Page 35: Legend For Circuit Diagrams
Circuit diagramms | 10 Fig. 68 Wiring diagram for Dual Top ST 8 10.2 Legend for circuit diagrams Wiring colours blue brown yellow green grey orange black violet white Item Description Comment Control unit Pin 1 not assigned (loose end also tied in) Water temperature sensor Air temperature sensor External room temperature... - Page 36 Plug connector, 8-pin to relay box (for Dual Top ST 8 only) Plug connector, 12-pin to Dual Top ST 6 / 8 heater Wire end 4X to relay box, 1 to earth (for Dual Top ST 8 only) Fuel pump...
- Page 37 Technical Data | 11 Technical Data Except where limit values are specified, the technical data refer to the usual heater tolerances of ± 10 % at an ambient temper- ature of + 20 °C and at the rated voltage and in rated condi- tions.
- Page 38 11 | Technical Data 11.2 Technical data Heater Operation Dual Top ST 6 Dual Top ST 8 Type approval heater: EMC: E1 10R-06 5000 E1 122R-00 0195 Model Air heater with evaporator Air heater with evaporator burner burner and electric heater...
- Page 39 These are the original instructions. The English language is binding. You can request your language if it is missing. The telephone number of each country can be found in the Webasto ser- vice centre leaflet or the website of the respective Webasto representative of your country.
Need help?
Do you have a question about the Dual Top ST 6 and is the answer not in the manual?
Questions and answers