Table of Contents
Advertisement
Quick Links
acorn
®
c e i l i n g f a n s p e c i a l i s t
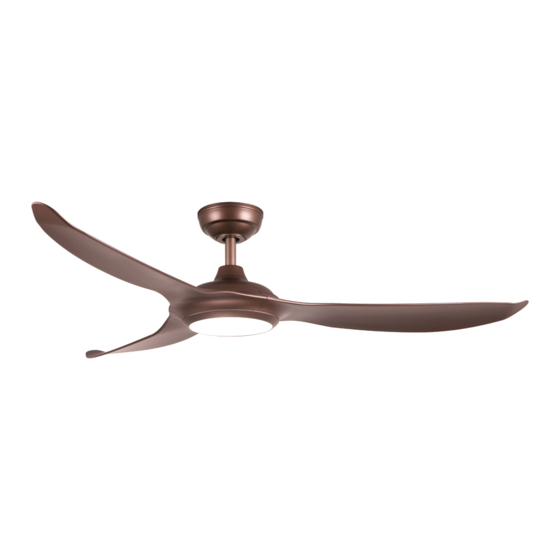
Model: DC-368 / DC-368H
Instruc�on Manual
A�en�on:
This appliance is not intended for use by persons (including Children)
with reduced physical, sensory or mental capabili�es or lack of
experience and knowledge unless they have been given supervision or
instruc�on concerning use of the appliance by a person responsible for
their safety. Children should be supervised to ensure that they do not
play with the appliance.
Advertisement
Table of Contents

Related Manuals for Acorn DC-368


Summary of Contents for Acorn DC-368
- Page 1 ® c e i l i n g f a n s p e c i a l i s t Model: DC-368 / DC-368H Instruc�on Manual A�en�on: This appliance is not intended for use by persons (including Children) with reduced physical, sensory or mental capabili�es or lack of...
-
Page 2: Table Of Contents
CONTENTS: Safety Precau�on ..............Page 2 Fan Structure Drawing (Hanger Bracket) ………………………..Page 3 Fan Structure Drawing (Hugger/Flush Mount) .…..…………..Page 4 4. DC- Installa�on of Hanger Bracket ……........Page 5 Installa�on of Downrod/Hanger Ball ….……….…………..… Page 5 Hanging of Ceiling Fan ….……………………………………….…… Page 6 Wiring of Ceiling Fan ………………………….………………………... -
Page 3: Safety Precau�On
SAFETY PRECAUTION: IMPORTANT: PLEASE READ BEFORE INSTALLATION The installa�on work must be carried out by a qualified wiring installer. Turn off the Electrical Main Switch at the circuit breaker fuse box. Using power supply 220 – 240V ~ / 50Hz. When moun�ng the fan, to ensure the safety cable is loop across the ceiling moun�ng ‘J’... -
Page 4: Fan Structure Drawing (Hanger Bracket)
FAN STRUCTURE DRAWING (DC-368):... -
Page 5: Fan Structure Drawing (Hugger/Flush Mount)
FAN STRUCTURE DRAWING (DC-368H):... -
Page 6: A) Installa�On Of Hanger Bracket
DC-368 INSTALLATION OF HANGER BRACKET: fig 1 fig 2 To use four Expansion Setscrew to install the hanger bracket firmly (fig 1). Install the ‘J’ hook onto the concrete ceiling and fasten firmly. Note the place of ‘J’ hook as (fig 2). -
Page 7: Hanging Of Ceiling Fan
HANGING OF CEILING FAN: Carefully li� the fan and assembly into hanger bracket which is a�ached to the outlet box. Ensure the rod ball’s groove is lined up with tab on the hanger bracket (fig 5). fig 5 A�ach the safety wire (cord) to the expansion ‘J’... -
Page 8: Wiring Of Ceiling Fan
WIRING OF CEILING FAN: fig 7 Total three groups of wires from the top of the motor: * White, Black, Yellow wires with small connector - for lightkit * Black(L1), Red(L2), Brown(L3) wires with big connector - live wire for fan * Green/Yellow - ground wire Plug the connector from the motor into the remote control receiver: big connector to the big socket, small connector to the small socket (Do not... -
Page 9: E) Installa�On Of Canopy
INSTALLATION OF CANOPY: fig 8 fig 9 A�ach the canopy to the hanger bracket by pushing up the twist to locate screws in the two keyholes. Check and make sure the canopy does not press on any wires as the wires might breakdown and caused short-circuited. -
Page 10: G) Installa�On Of Lightkit
INSTALLATION OF LIGHTKIT: fig 11 fig 12 fig 13 Remove one screw from the motor round piece, unscrew the other two screws out by 3 to 4mm. A�ach the lightkit to the fan, fix the first screw back to the hole and �ghten all the three screws firmly (fig 11). -
Page 11: Pre-Fix The Ceiling Fan
PRE-FIX THE CEILING FAN: Remove the two opposite screws from the hanging plate (fig 15). *It will be use on the step ‘INSTALLATION OF CEILING FAN’ Install the safety cable to the expansion ‘J’ hook (fig 15). fig 15 WIRING & INSTALLATION OF CEILING FAN: Connect the motor wires and receiver wires to the AC wires (fig 16). -
Page 12: Remote Control Manual (Wiring Diagram)
REMOTE CONTROL MANUAL (Wiring Diagram): This manual is to use for the controller of ceiling fan and lightkit. Disconnect power supply before wiring. Install the Receiver inside the canopy of ceiling fan to ensure proper protec�on. Adopt RF wireless digit emission technique, biunique controlled, coincident code rate is less than one millionth. -
Page 13: Remote Control Manual (Bu�On Func�On)
REMOTE CONTROL MANUAL (Bu�on Func�on): Model: DC-FT310 Short Press: Speed Down, Long Press: Fan OFF Timer Short Press: Light Dim Down, Long Press: Light OFF Short Press: Speed Up, Long Press: Fan OFF Natural Wind Main ON & OFF (with last memory func�on) Short Press: Light Bright Up, Long Press: Light OFF Warm Light Day Light... -
Page 14: Maintenance Tips
MAINTENANCE TIPS: Because of the fan’s natural movement, some connec�ons may be loose. To check the support connec�ons, brackets and blades a�achments 2 �mes a year. Make sure they are all secured (It is not necessary to dismantle the en�re fan from ceiling). Clean your fan periodically to help maintain its appearance over the years. -
Page 15: Troubleshoo�Ng
TROUBLESHOOTING: PLEASE CHECK THE FOLLOWING BEFORE LODGING A SERVICE REPORT PROBLEM REASON SOLUTION Fan not 1) Main cables not 1) Check mains & sub circuit moving connected. breakers or fuse. 2) Check the line wires. 2) Check the line wires connec�ons to the fan &... -
Page 16: Notes
NOTES: DRAWING SHOWING THE ASSEMBLY OF WIRES THROUGH FAN MOTOR SHAFT FOR DECORATIVE CEILING FAN...
Need help?
Do you have a question about the DC-368 and is the answer not in the manual?
Questions and answers