Table of Contents
Advertisement
Quick Links
Notice d'installation
et d'utilisation
Instruction manual
Instrukcja montazu i obslugi
Manual de instalación y de uso
Instruções de instalação e de utilização
Montage und bedienanleitung
Installatie- en gebruiksvoorschriften
Émotion barres Digital
Radiateurs électriques
&
Chau e-eau EnR
PANNEAU RAYONNANT
SÈCHE-SERVIETTES
RADIANT PANEL HEATER -
KITCHEN AND BATHROOM
ELEKTRYCZNY CIEPLA -
DO KUCHNI LUB LAZIENKI
EMISOR RADIANTE - COCINA Y BAÑO
EMISSOR RADIANTE - COZINHA
E CASA DE BANHO
WÄRMEWELLEN-HEIZGERÄT -
KÜCHE UND BAD
STRAALPANEEL - KEUKENS EN BADEN
Advertisement
Chapters
Table of Contents

Related Manuals for Thermor Émotion barres Digital


Summary of Contents for Thermor Émotion barres Digital
- Page 1 Notice d’installation et d’utilisation Radiateurs électriques & Chau e-eau EnR Instruction manual Instrukcja montazu i obslugi Manual de instalación y de uso Instruções de instalação e de utilização Montage und bedienanleitung Installatie- en gebruiksvoorschriften Émotion barres Digital PANNEAU RAYONNANT SÈCHE-SERVIETTES RADIANT PANEL HEATER - KITCHEN AND BATHROOM ELEKTRYCZNY CIEPLA -...
- Page 2 Émotion barres Digital PANNEAU RAYONNANT SÈCHE-SERVIETTES RADIANT PANEL HEATER - KITCHEN AND BATHROOM ELEKTRYCZNY CIEPLA - DO KUCHNI LUB LAZIENKI EMISOR RADIANTE - COCINA Y BAÑO EMISSOR RADIANTE - COZINHA E CASA DE BANHO WÄRMEWELLEN-HEIZGERÄT - KÜCHE UND BAD STRAALPANEEL - KEUKENS EN BADEN Nous vous remercions de lire attentivement cette notice de façon à...
-
Page 3: Table Of Contents
Sommaire Mise en garde Installation Entretien Présentation Utilisation Réglages avancés... -
Page 4: Mise En Garde
Mise en garde Attention surface très chaude. Caution hot surface. ATTENTION : Certaines parties de ce produit peuvent devenir très chaudes et provoquer des brûlures. Il faut Attention : Surface très prêter une attention particulière en présence d’enfants chaude Caution hot surface et de personnes vulnérables. - Page 5 risque de mauvais fonctionnement Les références de votre appareil C Code commercial E N° de série...
-
Page 6: Installation
Installation ÉTAPE 1 : PRÉPARER L’INSTALLATION DU RAYONNANT Règles d’installation (NFC 15-100 pour la France) Tenir l’appareil éloigné d’un courant d’air susceptible de perturber son fonctionnement (ex : sous une Ventilation Mécanique Centralisée,etc...) Volume 1 Volume 2 Volume 3... - Page 7 ÉTAPE 2 : DEVERROUILLER LA PATTE D’ACCROCHAGE DU RAYONNANT rieurs S2 rieurs S1...
- Page 8 ÉTAPE 3 : FIXER LA PATTE D’ACCROCHAGE AU MUR B vous pouvez éventuellement utiliser un niveau Les points de perçage A donnent la Les points de perçage B donnent la ex : plaque de plâtre...
- Page 9 ÉTAPE 4 : RACCORDER LE RAYONNANT Règles de raccordement - Le raccordement à la terre est interdit. (30mA) ex : salle de bains...
- Page 10 Schéma de raccordement du rayonnant Deux cas possibles Confort, Eco, ...
-
Page 11: Entretien
ÉTAPE 5 : VERROUILLER LE RAYONNANT SUR LA PATTE D’ACCROCHAGE CLIC ENTRETIEN Ne jamais utiliser de produits abrasifs et de solvants. -
Page 12: Présentation
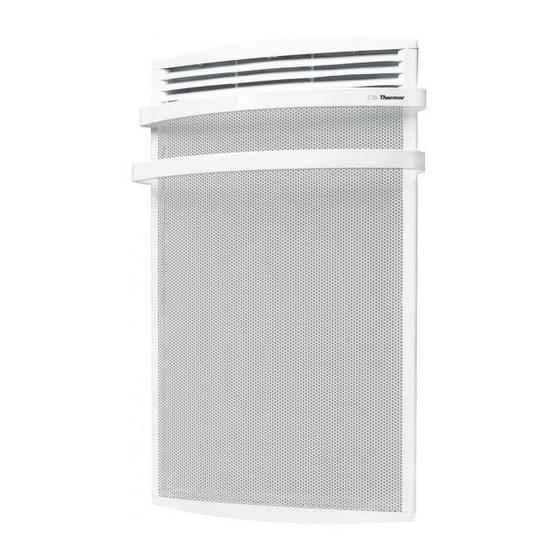
Présentation Le boîtier de commande Indicateurs mode et allure en cours Activation fonction Eco détection détection Indicateur de consommation Réglage programmation interne Verrouillage Réglage heure et jour Témoin de chauffe Affichage du programme Menu installateur Les modes de chauffage Mode (La température Confort conseillée est de 19°C). -
Page 13: Utilisation
Utilisation ÉTAT A LA PREMIERE MISE SOUS TENSION (page 12 sous METTRE EN MARCHE/EN VEILLE LE RAYONNANT... - Page 14 RÉGLER L’HEURE ET LE JOUR ou sur ou sur ou sur ou sur ou sur cours...
- Page 15 UTILISER LE MODE CONFORT (voir cha- pitre E NDICATEUR NDICATEUR DE CONSOMMATION sous OMMENT MODIFIER LA TEMPÉRATURE CONFORT Attendre 5 secondes ou sur...
- Page 16 ou sur ou sur (indicateurs orange et rouge). UTILISER LE MODE ECO OMMENT MODIFIER LA TEMPÉRATURE ou sur...
- Page 17 (écart conseillé) (au mini- mum de 0,5° C) UTILISER LE MODE HORS GEL curseur soit sous UTILISER LE MODE PROGRAMMATION INTERNE (voir chapitre RÉGLER L’HEURE ET LE JOUR)
- Page 18 Confort de 5 H à 23 H Eco de 23 H à 5 H Confort de Confort de 5 H à 9 H 17 H à 23 H soir Eco de Eco de 23 H à 5 H 9 H à 17 H Confort de 17 H 12 H...
- Page 19 ou sur OMMENT ACTIVER LA PROGRAMMATION INTERNE curseur soit sous UTILISER LE MODE PROGRAMMATION CENTRALISÉE soit sous vers...
- Page 20 UTILISER LES FONCTIONS D’ÉCONOMIES D’ÉNERGIE ECO DETECTION ’ ÉTECTION D OUVERTURE ET DE FERMETURE DE FENÊTRE le temps de détection est variable Zone d'emplacement la plus optimale (emplacement de votre rayonnant par rapport à la fenêtre) OMMENT DÉSACTIVER ACTIVER CETTE FONCTION ou sur...
- Page 21 NDICATEUR NDICATEUR DE CONSOMMATION (15,5° C en...
- Page 22 VERROUILLER/DÉVERROUILLER LES COMMANDES condes sauf Mise en Marche et arrêt Réglages avancés voir «ENREGISTRER UN CODE D’ACCÈS ENREGISTRER UNE TEMPÉRATURE MAXI ou sur secondes et sur...
- Page 23 AJUSTER LA TEMPÉRATURE ou sur cours BRIDER LES RÉGLAGES ou sur et sur la température de consigne du mode en cours reste ou sur...
- Page 24 ENREGISTRER UN CODE D’ACCÈS ou sur secondes secondes sur et sur ou sur secondes entre 000 et 999 condes sur et sur et sur RETOUR AU RÉGLAGE DE BASE USINE 19° C, 15.5° C, program- mation interne initiale, activées ou sur...
- Page 25 DÉLESTAGE EN CAS DE PROBLÈME ROBLÈME RENCONTRÉ ÉRIFICATION À FAIRE mode (porte ouverte à proximité, sortie d’air par le cache câble à l’arrière de l’appareil) ou (ther- mostat bloqué...) (fusible, disjoncteur) (porte fer- mée) (nous vous préconisons en moyenne 100 W/m pour une hauteur de plafond de 2,50 m ou 40W/m...
- Page 26 ROBLÈME RENCONTRÉ ÉRIFICATION À FAIRE (ventilation, entrée d’air, etc. (nous vous préconisons 100 W/m pour une hauteur sous plafond de 2,50 m ou 40W/m voir «ENREGISTRER UN CODE D’ACCÈS» (voir sa notice d’utilisation) Si vous n’avez pas réussi à résoudre votre problème, contactez un professionnel en vous munissant préala- blement des références de votre rayonnant relevées sur la plaque signalétique (code commercial (C), N°...
- Page 27 The device you have just purchased was submitted to many tests and checks ensuring its quality. Contents Warning Installation Operation Use Eco mode Installer Mode...
-
Page 28: Warning Gb
Warning Caution, hot surface. WARNING : Some parts of this product may become very hot and cause burns on contact. Special care must Attention : Surface très chaude be taken if children and vulnerable adults are present. Caution hot surface around 10°... -
Page 29: Installation
Installation PREPARING THE INSTALLATION OF THE DEVICE Installation guidelines Keep the device away from any draughts that may interfere e.g.: under a centrally controlled fan, etc... Volume 1 Volume 2 Volume 3 device... - Page 30 UNLOCKING THE DEVICE’S HANGING FRAME...
- Page 31 FIXING THE HANGING FRAME TO THE WALL B you can also use a level Drilling points A show the position Drilling points B show the position for the lower fastenings. for the upper fastenings. e.g. plasterboard wall...
- Page 32 CONNECTING THE DEVICE Connection rules and regulations Wiring diagram for the heating panel Panel heater cable Live=brown LIVE Electricity grid NEUTRAL Neutral=blue Pilot wire=Black Two possible cases The pilot wire end is insulated 1st case: only one heater and not further connected The pilot wire of all heaters in a 2nd case: multiple heaters control group, up to a maximum...
- Page 33 Comfort, Eco, etc. MEASU- -115 BETWEEN...
- Page 34 LOCKING THE DEVICE ONTO THE HANGING FRAME CLIC push the slider towards the wall Lift the device while holding the slider in place with your screwdriver MAINTENANCE Never use abrasive products or solvents...
-
Page 35: Operation
Operation The different displays System in progress Activate Airing function detection function Consumption indicator Setting internal programming Controls locked Setting day and time Heating indicator Display of programs Menu of installeur The heating modes Mode When to use this mode? -
Page 36: Use
SWITCH THE DEVICE ON ACTIVATE THE SCREEN PUTTING THE DEVICE IN STANDBY MODE... - Page 37 SET THE TIME AND THE DAY...
- Page 38 USE COMFORT MODE mode HOW TO CHANGE THE TEMPERATURE ?
-
Page 39: Use Eco Mode
USE ECO MODE To use OW TO CHANGE THE TEMPERATURE... - Page 40 USE THE FROST MODE USE INTERNAL PROGRAMMING MODE...
- Page 41 Confort de 5 H à 23 H ECO mode from 0 h to 10 h, Comfort mode from 10 h to 0 h Eco de 23 H à 5 H Confort de Confort de 5 H à 9 H 17 H à 23 H mode from 0 h to 6 h and from 9 h to 17 h, Comfort mode from 5 h to 9 h and from 17 h to 23 h Eco de...
- Page 42 Monday OW TO ACTIVATE THE PROGRAMMING MODE USE THE CENTRALISED PROGRAMMING times on...
- Page 43 HOW TO USE THE ENERGY ECONOMY FUNCTIONS IRING FUNCTION Optimum zone the location of your device in relation to the window) OW TO DEASACTIVATE ACTIVATE THIS FUNCTION...
- Page 44 ONSUMPTION INDICATOR 15.5°C in Eco mode...
-
Page 45: Installer Mode
LOCKING/UNLOCKING THE CONTROLS Installer mode MAXIMUM TEMPERATURE seconds on... - Page 46 CALIBRATE THE TEMPERATURE LOCK SETTINGS to se- the set- point temperature for the current to se- the set-point tempe- rature for the current mode re-...
- Page 47 RECORD AN ACCESS CODE to enter to en- between 000 and 999 RETURNING TO THE STANDARD FACTORY SETTINGS conds...
- Page 48 SHEDDING IN CASE OF PROBLEM ROBLEMS ENCOUNTERED HECKS TO BE MADE if you have one blocked thermostat... fuse, circuit breaker on average, we recommend 100 W/m² for a ceiling height of 2.50 m ventila- tion, vent duct, etc.
- Page 49 ROBLEMS ENCOUNTERED HECKS TO BE MADE recommend 100W / m (curtains, etc.) The device is not res- refer to the user manual check the batteries, fuse, etc. If you do not succeed in solving your problem, contact your local installer and have the details of your device’s references, the room’s temperature and the program-...
- Page 50 WARRANTY CONDITIONS...
- Page 51 Radiateurs électriques & Chau e-eau EnR Émotion barres digital PANNEAU RAYONNANT SÈCHE-SERVIETTES Ä STRAALP Thermor, l’expert de la chaleur Thermor, r l’expert de la cha Retrouvez toutes nos solutions et nos conseils sur FAUCHET...
Need help?
Do you have a question about the Émotion barres Digital and is the answer not in the manual?
Questions and answers