Table of Contents
Advertisement
Available languages
Available languages
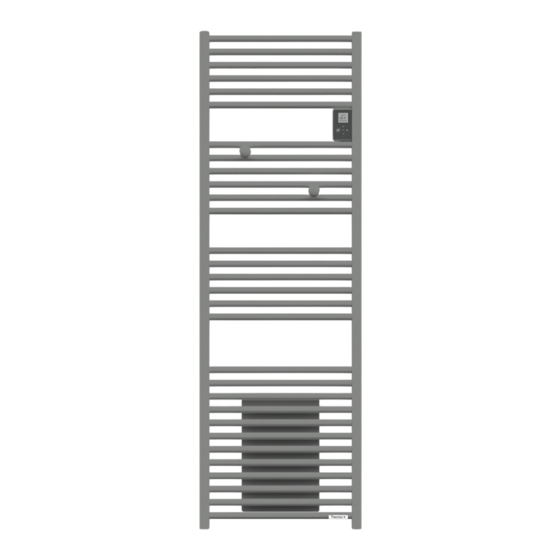
Radiateur
sèche-serviettes
• Format standard :
de 500 à 1000 W avec ou
sans soufflerie (1000 W)
• Format étroit :
de 300 à 500 W avec ou
sans soufflerie (1000 W)
Electric towel radiator
Elektrische radiator handdoekdroger
www.thermor.fr
NOTICE D'INSTALLATION
ET D'UTILISATION
INSTALLATION AND OPERATING MANUAL
GEBRUIKS- EN INSTALLATIEHANDLEIDING
Riva 4
Advertisement
Chapters
Table of Contents

Related Manuals for Thermor Riva 4


Summary of Contents for Thermor Riva 4
- Page 1 NOTICE D’INSTALLATION ET D’UTILISATION INSTALLATION AND OPERATING MANUAL GEBRUIKS- EN INSTALLATIEHANDLEIDING Riva 4 Radiateur sèche-serviettes • Format standard : de 500 à 1000 W avec ou sans soufflerie (1000 W) • Format étroit : de 300 à 500 W avec ou sans soufflerie (1000 W)
- Page 2 RIVA 4 Radiateur sèche-serviettes Electric towel radiator Elektrische radiator handdoekdroger Nous vous remercions de lire attentivement cette notice de façon à : • rendre votre installation conforme aux normes, • optimiser les performances de fonctionnement de votre appareil. Notre responsabilité ne saurait être engagée pour des dommages...
- Page 3 PRISE EN MAIN RAPIDE UTILISATEUR RIVA 4 Radiateur sèche-serviettes BOÎTIER DE COMMANDES Visualiser les informations Activer ou désactiver le mode Boost Valider/Allumer-Éteindre (appui long) / Verrouiller - D éverrouiller (appui long) Naviguer dans les menus / Augmenter-Diminuer Retour à l’écran précédent Je mets en marche l’appareil pour la première fois...
- Page 4 Je verrouille les commandes ÉTAPE 5 Pour verrouiller les commandes : Je fais un appui long sur la touche Pour plus d’informations, Pour déverrouiller, Éteindre veuillez vous référer je fais de nouveau un appui long sur la touche Verrouiller à la notice complète. www.thermor.fr...
-
Page 5: Table Of Contents
Sommaire Mise en garde ............2 Installation. -
Page 6: Mise En Garde
Mise en garde Attention surface très chaude. Caution hot surface. ATTENTION : Certaines parties de ce produit peuvent devenir très chaudes et provoquer des brû- Attention : Surface très lures. Il faut prêter une attention particulière en pré- chaude sence d’enfants et de personnes vulnérables. Caution hot surface Il convient de maintenir à... - Page 7 A la première mise en chauffe, une légère odeur peu apparaître correspondant à l’évacuation des éventuelles traces liées à la fabrication de l’appareil. La notice d’utilisation de cet appareil est disponible en vous connec- tant sur le site Internet du fabricant indiqué sur le bon de garantie présent dans cette notice.
-
Page 8: Installation
Installation PRÉPARER L’INSTALLATION DE L’APPAREIL Règles d’installation Cet appareil a été conçu pour être installé dans un local résidentiel. Dans tout autre cas,veuillez consulter votre distributeur. L’installation doit être faite dans les règles de l’art et conforme aux normes en vigueur dans le pays d’installation (NFC 15-100 pour la France). -
Page 9: Raccorder L'appareil
RACCORDER L’APPAREIL Règles de raccordement L’appareil doit être alimenté en 230 V Monophasé 50Hz. L’alimentation de l’appareil doit être directement raccordée au réseau après le disjoncteur et sans interrupteur intermédiaire. Le raccordement au secteur se fera à l’aide du câble de l’appareil par l’intermédiaire d’un boîtier de raccordement. -
Page 10: Entretien
Pour vérifier la bonne transmission des ordres de programmation, procédez aux vérifications suivantes : arrêt du confort confort confort hors gel chauffage -1° c -2° c délestage signal à transmettre m e s u r e -115 + 115 volt volt entre le fil volt... -
Page 11: Utilisation
Utilisation PRINCIPE DE FONCTIONNEMENT Augmenter ou diminuer la température sans avoir besoin de valider ; Changer la durée du Boost ; Naviguer dans les menus. Naviguer dans les sous-menus ; Valider ; Éteindre ; Verrouiller, déverrouiller. Retour à l’écran précédent Activation ou désactivation du Boost PREMIERE MISE EN MARCHE Choisissez la langue, puis la date et l’heure. -
Page 12: Mettre En Marche / Arrêter L'appareil
METTRE EN MARCHE / ARRÊTER L’APPAREIL Pour arrêter l’appareil, faites un appui long sur Confirmez «Eteindre» en appuyant sur Pour mettre en marche l’appareil, faites un appui sur et sélection- nez «Allumer». VERROUILLAGE DES COMMANDES Afin d’éviter les manipulations par des enfants, vous pouvez verrouiller les commandes de votre appareil en faisant un appui long sur Sélectionnez «Verrouiller»... -
Page 13: Régler La Température
RÉGLER LA TEMPÉRATURE En mode PROG inactive : Augmentez avec (max 28°C). Diminuez avec (min 12°C). ° Diminuez encore jusqu’à 7°C (température Hors Gel non modifiable) avec Diminuez encore jusqu’à Eté avec (l’appareil ne chauffe plus. La fonction Boost reste accessible). En mode PROG active : Si l’écran affiche PROG, vous êtes sur une plage de PROG... -
Page 14: Le Menu
Le menu Pour régler les plages de température Confort sur un jour de la semaine (3 plages possibles) puis copier ces plages sur d’autres jours. Consommation Pour régler l’abaissement de température par rapport à la température Confort (de -1°C à -9°C, par défaut à -3.5°C). FONCTIONNEMENT DU BOOST Cette fonction vous permet de lancer le chauffage à... -
Page 15: Utiliser La Programmation Interne
UTILISER LA PROGRAMMATION INTERNE Anticipation de la chauffe Votre appareil est équipé d’une fonction qui permet d’anticiper la chauffe lorsque vous uti- lisez la programmation. Lorsque vous réglez la programmation de votre appareil, celui-ci va anticiper la chauffe en fonction du temps de montée en température pour que votre pièce soit à la bonne tempé- rature à... -
Page 16: Le Menu Expert
Le menu EXPERT Pour accéder aux fonctions avancées de l‘appareil, appuyez en même temps sur pendant plus de 3 secondes. MENU... -
Page 17: Installation Des Patères
Information sur le pourcentage de fonctionnement . Identi cation de l’appareil. Identi cation de la version. Installation des patères Vous disposez de 2 patères amovibles. Délestage Nos appareils sont compatibles avec différents systèmes de délestage. Vous ne devez toute- fois pas utiliser de délestage par coupure d’alimentation secteur car ce système est incom- patible avec nos appareils. -
Page 18: En Cas De Problème
En cas de problème Problème rencontré Vérifications à faire L’écran du boîtier Vérifiez que l’interrupteur situé à l’arrière de l’appareil est bien de commande ne sur I (marche). s’allume pas. Vérifiez que l’appareil est bien alimenté électriquement. température Il est nécessaire d’attendre 6 heures au minimum pour que la tem- d’ambiance pérature se stabilise. - Page 19 Problème rencontré Vérifications à faire L’appareil est très Il est normal que l’appareil soit chaud lorsqu’il fonctionne, la tem- chaud en surface. pérature maximale de surface étant limitée conformément à la norme NF Electricité Performance. Si toutefois vous jugez que votre appareil est toujours trop chaud, vérifiez que la puissance est adaptée à...
-
Page 20: Caractéristiques
Caractéristiques Références du modèle TRI DIGITAL Caractéristique Symbole Valeur Unité Puissance thermique Puissance thermique nominale P nom 0,5 à 2 500 à 2000 Puissance thermique minimale P min Puissance thermique maximale continue P max,c 2000 Consommation d’électricité auxiliaire A la puissance thermique nominale el max 0,000 A la puissance thermique minimale... - Page 21 Summary Warning ............. . 18 Installation.
-
Page 22: Warning
Warning Caution hot surface. WARNING : Some parts of this product may be- come very hot and cause burns on contact. Spe- Attention : cial care must be taken if children and vulnerable Surface très chaude adults are present Caution hot surface Children under 3 years must be kept away from this device, unless they are constantly supervised. - Page 23 For safety reasons, it is strictly forbidden to top up unmixed devices. If necessary, contact the manufacturer’s After-Sales Service or a qualified technician. To ensure proper operation of the fan (depending on model), it is recommended not to obstruct or cover the air outlet (especially with a towel).
-
Page 24: Installation
Installation INSTALLING THE DEVICE Where to install your device? This equipment was designed to be installed in a residence. Please ask your distributor before using it for any other purpose. The device should be installed according to normal trade practice and incompliance with legislation in the relevant country (NFC 15-100 for France). -
Page 25: Electrical Connection Of The Device
ELECTRICAL CONNECTION OF THE DEVICE Wiring rules The device must be powered with single phase 230 V 50 Hz. The power supply to the device must be directly connected to the household power system after the circuit breaker and without intermediate switch. -
Page 26: Maintenance
Complete Negative Positive Commands No current altermation Half/altermation Half/altermation Received 230 V – 115V + 115V Oscilloscope Ref/Neutral Mode STOP HEATING COMFORT ANTI - FREEZE obtained LOAD SHEDDING MAINTENANCE To retain the performance of the device, it is necessary about twice a year to carry out dust removal using a vacuum cleaner or a brush at the air inlets and outlets. -
Page 27: Using
Using OPERATING PRINCIPAL Increase or reduce the temperature without needing to validate ; Change Boost Time ; Browsing in the menus. Browsing in the sub menus ; Validate ; Switch off ; Lock, unlock Back to previous screen Enabling or Disabling Boost SWITCHING THE DEVICE ON FOR THE FIRST TIME Select the language, then the date and time. -
Page 28: Locking Commands
LOCKING COMMANDS To avoid the commands being changed by children, you may lock your device's commands by pressing and holding Select "Lock" and validate with Do the same to unlock the commands by selecting "Unlock" DESCRIPTION OF THE MODES 2 operating modes are proposed : ctive - The device follows the internal program defined for each day of the week. -
Page 29: Adjusting The Temperature
ADJUSTING THE TEMPERATURE In inactive Prog mode : Increase with (max 28°C). Lower with (min 12°C). ° Reduce again to 7°C (Frost Protection temperature not modifiable) with Decrease until Summer with the device no longer heating up). In active Prog mode : If the screen displays PROG, you are in a programming PROG range in Comfort mode. -
Page 30: The Menu
The menu To adjust the Comfort temperature ranges over a day of the week (3 ranges possible) then copy these ranges to other days. Consumption To adjust the lowering of the temperature in relation to the Comfort temperature (from -1°C to -9°C, by default at -3.5°C). -
Page 31: Using Internal Programming
USING INTERNAL PROGRAMMING Anticipation of heating Your device is equipped with a function that allows your device to anticipate the heating when you use programming. When you set the programming of your device, it will anticipate the heating according to the time of rise in temperature so that your room is at the right temperature when you arrive. -
Page 32: The Expert Menu
The EXPERT menu To access the device’s advanced functions, press and at the same time for over 3 seconds. MENU Information about the appliance's power. Appliance identi cation. Version identi cation. -
Page 33: Trouble Shooting
Trouble Shooting Problems Check The control panel Check if the switch on the back of the unit is on the I (on) posi- display does not turn tion. Make sure the device is electrically powered room You have to wait at least 6 hours for the temperature to stabilize. temperature Depending on your installation, the temperature you read may be different from the... - Page 34 Problems Check Traces of dirt appear When functioning, the device will be normally warm; the maxi- on the wall around mum surface temperature being limited in accordance with the the device. NF Electricity Performance standard. However, if you find that your device is still too warm, make sure the power is adapted to the size of your room (we recommend 100 W/m2 for a ceiling height of 2.50 m or 40 W/m3) and the unit is not placed in an air...
-
Page 35: Characteristic
Characteristic Model references TRI DIGITAL Characteristic Symbol Value Unit Heat output Rated heat output P nom 0,5 to 2 500 to 2000 Minimum heat output P min Maximum continuous heat output P max,c 2000 Auxiliary electricity consumption At rated heat output el max 0,000 At minimum heat output... -
Page 36: Warranty Conditions
Warranty conditions -The guarantee period is two years from the date of installation or purchase and may not exceed 30 months from the date of manufacture in the absence of a receipt. -The guarantee covers the replacement and supply of components recognised as being defective, excluding any damages or interest. - Page 37 2 ans à compter de la date d’installation ou d’achat du produit. • La garantie de votre radiateur Thermor est assurée par le dernier revendeur. • Les conditions d’application de la garantie sont précisées dans les Conditions Générales de Vente mais il est rappelé...
- Page 38 BOUTIQUE OFFICIELLE THERMOR Produits certifiés d’origine constructeur PAIEMENT 100% SÉCURISÉ LIVRAISON GRATUITE À PARTIR DE 30€TTC Livraison en France métropolitaine entre 3 et 10 jours U0655122 THERMOR ZA CHARLES BEAUHAIRE 17, RUE CROIX FAUCHET • BP 46 45141 SAINT-JEAN-DE-LA-RUELLE...
Need help?
Do you have a question about the Riva 4 and is the answer not in the manual?
Questions and answers