
Subscribe to Our Youtube Channel
Related Manuals for AT&T DLP73290


Summary of Contents for AT&T DLP73290
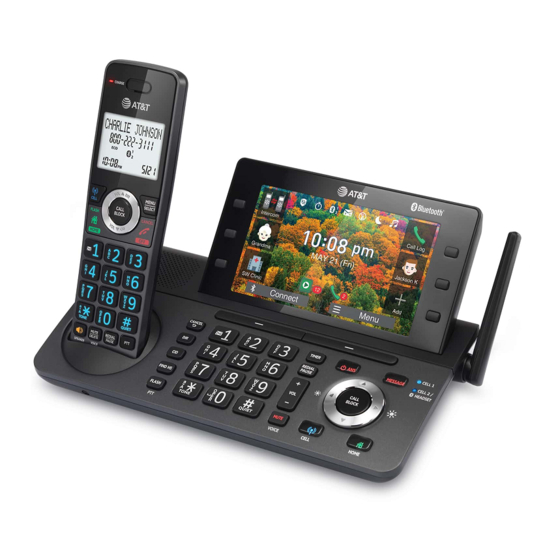
- Page 1 Quick start guide DLP73290/DLP73390/DLP73490/ DLP73590 DECT 6.0 cordless telephone/ answering system with BLUETOOTH® wireless technology...
-
Page 2: Parts Checklist
1 (800) 222-3111 1 (866) 288-4268 or call . In Canada, dial Please refer to the online DLP73290/DLP73390/DLP73490/DLP73590 DECT 6.0 cordless telephone/answering system with BLUETOOTH® wireless technology Complete user’s manual for a full set of installation and operation instructions at https://telephones.att.com/manuals... -
Page 3: Important Safety Information
Important safety information This symbol is to alert you to important operating or servicing instructions that may appear in this user’s manual. Always follow basic safety precautions when using this product to reduce the risk of injury, fire, or electric shock. Safety information Read and understand all instructions in the user’s manual. - Page 4 Important safety information CAUTIONS: Use only the power adapter provided with this product. To obtain a replacement, https://telephones.att.com visit our website at or call 1 (800) 222-3111 1 (866) 288-4268 . In Canada, dial Use only the supplied rechargeable battery or replacement battery (model BT162342/ BT262342).
- Page 5 Important safety information The RBRC Seal means that the manufacturer is voluntarily participating in an industry program to collect and recycle nickel- metal hydride rechargeable batteries when taken out of service within the United States. These batteries may be taken to a participating local retailer of replacement batteries or recycling center.
- Page 6 Install Telephone base Notes: Plug one end of the telephone line cord into a telephone jack or a DSL filter. If you have DSL high-speed Internet service, a DSL filter (not included) is required. Charger Caution: Use only the power adapter(s) provided with this product.
- Page 7 Install Battery Install the battery, as shown below. Raise the antenna Charge your handset(s) before initial use. The battery is fully charged after 11 The CHARGE light on the top of the handset is on hours of continuous charging. during charging. Caution: Use only the supplied rechargeable battery or replacement battery (model BT162342/BT262342).
-
Page 8: Handset Overview
Handset overview Handset CHARGE light On when the handset is charging in the telephone Ì base or charger. p DIR VOL p DIR Press to show directory entries when the Ì handset is not in use. Press to scroll up while in menus. Ì... - Page 9 Handset overview Press to make or answer a home call. HOME/ Ì During a call, press to answer an incoming home call FLASH Ì when you receive a call waiting alert. While reviewing a caller ID log entry, press repeatedly Ì...
- Page 10 Handset overview Press repeatedly to display other dialing options when Ì reviewing a caller ID log entry. Press and hold to enter the QUIET mode setting (pound key) Ì screen, or to deactivate QUIET mode. PTT (PUSH Press to initiate a one-to-one or one-to-group Ì...
-
Page 11: Telephone Base Overview
Handset overview Time with AM and PM. 10:30 The handset ringer is turned off. The message number currently playing and total number of new/ MSG # 10/16 old messages recorded. Telephone base overview Telephone base While in a menu, press to cancel an operation, Ì... - Page 12 Telephone base overview While reviewing a caller ID log entry, press Ì repeatedly to add or remove 1 in front of the telephone number before dialing or saving it in the directory. Press and hold to set or dial your voicemail Ì...
- Page 13 Telephone base overview Adjust LCD display brightness. Ì Press left to dim, and press right to increase Ì the LCD brightness. Press to navigate in the menu options. Ì CELL 1 Flash when searching and pairing the Ì bluetooth device (s). CELL 2/HEADSET Illuminate when the bluetooth device(s) are Ì...
- Page 14 Telephone base overview Jason Ke Intercom Grandma Clinic Connect Menu Telephone base display Connect Connect Bluetooth device. Menu Option(s) displays above a softkey. Smart call blocker is on. Timer is set and counting down. Flashes when the countdown reaches. Bluetooth device is paired and active. Displays when Home line is in use.
-
Page 15: Date And Time
Initial basic settings After you install your telephone or power returns following a power outage, the handset and telephone base will prompt you to set the date and time. To OFF/CANCEL on the handset or press skip setting the date and time, press on the telephone base. -
Page 16: Lcd Language
Initial basic settings Smart call blocker setup via voice guide You can follow the voice guide to set up Smart call blocker. Using the telephone base: 1. Press Menu softkey -> Smart call blocker -> Voice guide -> Next 3. Press 1 if you want to screen home calls with telephone numbers that are not saved in your Directory or Star name list;... -
Page 17: Smart Keys
Smart keys On the telephone base, there are six Smart keys along the left and right of the LCD screen. Smart keys allow you to access the speed dial number, emergency number and other menu options quickly. You can reset the Smart keys anytime you want. Add a speed dial number Press + Add... -
Page 18: Add An Emergency Number
Smart keys Add a speed dial number via directory + Add Press to add a Smart key function. Speed dial Press 3. Press Copy from Directory 4. Press smart key next to your desired entry. 5. Press to save. SMART KEY 1 SETTING SPEED DIAL NUMBER Speed dial Which function... - Page 19 Smart keys Change a smart key function You may want to change your existing smart key to another. For instance, from Directory to a speed dial number, an emergency number, or another menu option. Press softkey Menu on the telephone base. Smart key Press to scroll to...
- Page 20 Add a Bluetooth cell phone/headset ® Note: Your DLP73290/DLP73390/DLP73490/DLP73590 is compatible with Bluetooth version 2.0 or above devices. To use a Bluetooth enabled cellular phone or headset with your telephone, you must first pair and connect your Bluetooth cellular phone or headset with the telephone base.
- Page 21 ® Bluetooth To pair and connect a headset using the telephone base: Menu Bluetooth -> to scroll to the next page -> Add device Add headset Press the softkey to select -> Next 3. Follow the on-screen instructions and press 4.
- Page 22 ® Bluetooth Download your cell phone phonebook using the base Note: Before downloading the phonebook, make sure cell phone is paired, active, and connected to the system. Menu Bluetooth -> to scroll to the next page -> Phonebook download Press smart key.
-
Page 23: Connect To Cell
Connect to Cell™ application (consists of Caller ID manager and Alerts manager) using the Google Play® Store app to extend the flexibility of your DLP73290/DLP73390/ DLP73490/DLP73590. Scan the QR code on the right to download the application. - Page 24 ® Bluetooth Make sure you have turned on or logged in to the applications on your cell phone that you will be sending your voice commands, such as GPS, e-mail and social networking accounts. Your cell phone’s data or Wi-Fi signal is in full strength and your cell phone can connect to the Internet.
- Page 25 Operate Operation Steps Making a home or Using a cordless handset: cell call HOME/FLASH or /SPEAKER -> Enter the Press telephone number. CELL -> Enter the telephone number -> Press MENU/SELECT. Using the telephone base: Press /HOME -> Enter the telephone number. Press /CELL ->...
-
Page 26: Review The Caller Id Log
Operate Operation Steps Redial Using a cordless handset: Press REDIAL repeatedly to select the desired entry -> HOME/FLASH, CELL or /SPEAKER to call. Using the telephone base: Press REDIAL/PAUSE repeatedly to select the desired /HOME or /CELL to call. entry -> Using a cordless handset: Volume control VOL q... -
Page 27: Save A Caller Id Log Entry To The Directory
Caller ID Save a caller ID log entry to the directory Using a cordless handset: 1. Press CID on the handset in idle mode. 2. Press to scroll through the list. 3. When your desired caller ID entry displays on the handset, press MENU/SELECT to choose To Directory. -
Page 28: Dial A Caller Id Log Entry
Caller ID CONTACT NAME CONTACT NUMBER Mike Smith 800-595-9512_ Backspace Next Backspace Next COLOR SELECTION PROFILE PICTURE Select Select Dial a caller ID log entry Using a cordless handset: 1. Press CID on the handset in idle mode. 2. Press to scroll through the list. -
Page 29: Delete A Caller Id Log Entry
Caller ID Delete a caller ID log entry Using a cordless handset: When your desired caller ID entry displays on the handset, press VOICE/MUTE/DELETE. Using the telephone base: 1. When your desired caller ID entry displays on the screen, press the smart key next to of your desired entry to go to the caller entry page. - Page 30 Directory The directory can store up to 1,000 entries, which are shared by all system devices. Each entry may consist of a telephone number up to 30 digits, and a name up to 15 characters. Adding an entry in the directory Using a cordless handset: MENU/SELECT ->...
-
Page 31: Review Directory Entries
Directory COLOR SELECTION PROFILE PICTURE Select Select PREVIEW Mike Smith 800-595-9512 Edit Save Review directory entries Using a cordless handset: DIR -> Press to browse the entries. Using the telephone base: There are 3 ways to access Directory before adding an entry. Press DIR to access the directory;... -
Page 32: Dial A Directory Entry
Directory Dial a directory entry Using a cordless handset: DIR-> Press to browse the entries. 2. When your desired entry displays on the handset, press HOME/FLASH, /SPEAKER or CELL to dial. Using the telephone base: Option 1 Press DIR -> to browse the entries. -
Page 33: Delete A Directory Entry
Directory Delete a directory entry Using a cordless handset: 1. When your desired directory entry displays on the handset, press VOICE/MUTE/DELETE. 2. Press MENU/SELECT to confirm. Using the telephone base: 1. When your desired directory entry displays on the screen, press the smart key next to of your desired entry. -
Page 34: Smart Call Blocker
Smart call blocker * § If you have subscribed to caller ID service, then you can use the Smart call blocker feature to screen incoming calls. Not familiar with Smart call blocker? Want to know more? Smart call blocker is an effetive call screening tool, which allows your phone system to screen ALL home calls. - Page 35 Smart call blocker Overview Unknown callers Family and friends Schools and pharmacies Robocalls and telemarketers Smart call blocker Search and screen based on caller ID Welcome calls Unwelcome calls Unknown calls (for home calls only) Robocalls and telemarketing Family and friends with calls: numbers: 1.
- Page 36 Smart call blocker Set up Directory Enter and save telephone numbers of frequently called businesses, family members and friends, so that when they call, your telephone rings without having to go through the screening process. Add contact to directory There are 3 ways to access Directory before adding an entry. Press DIR to access the directory;...
-
Page 37: Block List
Smart call blocker COLOR SELECTION PROFILE PICTURE Select Select PREVIEW Mike Smith 800-595-9512 Edit Save Block list Add numbers that you want to prevent their calls from ringing through. Cell calls with numbers that have been added to your block list will also be blocked. Add a block list entry Menu Block list... - Page 38 Smart call blocker Star name list Add caller names to your star name list to allow their calls to get through to you without having to go through the screening process. Add a star name list entry Menu Smart call blocker Star name list.
- Page 39 Smart call blocker Senarios of Smart call blocker configuration Settings SCB screening SCB screening SCB settings - Base options - Handset options - Base Scenarios Screen unknown I want to screen SCB will screen your Screen any home calls unknown callers by asking from numbers them to leave their...
- Page 40 Smart call blocker Settings SCB screening SCB screening SCB settings - Base options - Handset options - Base SCB SCREENING Screen Scenarios Screening unknown UnknownToAns.S I want to send Block Unknown to unknown any home calls Ans. system from numbers UnknownToAns.S not saved in the Directory or...
- Page 41 Smart call blocker You hear a voice prompt “Hello! This voice guide will assist you with the basic setup of Smart call blocker...” Set up your Smart call blocker feature by inputting the designated numbers, as instructed in the voice guide. To skip the set up, press Press 1 if you want to screen home calls with telephone numbers that are not saved in your directory or star name list;...
- Page 42 Smart call blocker Block calls on the block list only (2) - Default settings In your block list Call rejected Robocalls Telemarketers Search and No caller ID Smart screen based on call blocker caller ID Uncategorized calls Telephone ringing Caller Menu Smart call blocker SCB screening...
- Page 43 Smart call blocker Set SCB screening option Menu Smart call blocker SCB screening 1. Press softkey -> -> Screen unknown 2. Press and select Screen all unknown calls displays and confirms. Set screening announcement Menu Smart call blocker Screening annc 1.
- Page 44 Smart call blocker Add numbers from caller ID log to block list and star name list Adding CID log Using a cordless handset: entry to block list 1. Press CID on the handset in idle mode -> MENU/SELECT 2. Press when the desired entry appears.
- Page 45 Smart call blocker Block the caller while on a call When you are on a home or cell call and speaking to the caller, and you do not want to continue the call, you can end the call with block announcement and add the number to the block list.
-
Page 46: Answering System
Answering system About answering system and voicemail Your telephone has separate indicators for two different types of voice messages: those left on the built-in answering system and those left at your telephone service provider’s voicemail. To listen to messages recorded on the built-in answering system, refer to the Message playback section;... -
Page 47: Set Number Of Rings
Answering system Set number of rings You can set the answering system to answer an incoming call after 2, 3, 4, 5, or 6 rings. You can also select toll saver. If you choose toll saver, the answering system answers a call after two rings when you have new messages, or after four rings when there are no new messages. -
Page 48: Turn Answering System On Or Off
Answering system Turn answering system on or off The answering system must be turned on to answer and record messages. Using a cordless handset: MENU/SELECT -> -> Answering sys -> MENU/SELECT. -> Answer on/off -> MENU/SELECT. to choose On or Off-> MENU/SELECT. When the answering system is on, the handset shows ANS ON. -
Page 49: Delete All Old Messages
Answering system Feautre On the telephone base On a handset Press 6 Skip to the next Delete Playing Message message 1 Mike Smith JAN 10 800-595-9512 12:00pm 2 Nancy Parker JAN 19 800-696-2523 12:00pm Skip Repeat Skip Press Repeat the message Press Repeat Press 4... -
Page 50: Countdown Timer
Timer Countdown timer You can use the timer, which is only available on the telephone base, to count down from a specified time. There are several ways to set the duration of time. When time is up, the alert sounds and a text message pops up. Set the countdown timer 1. -
Page 51: For C-Ul Compliance
For C-UL compliance In compliance with the bilingual requirements for safety, caution, and warning markings of Canadian Federal and Provincial/Territorial statutes and regulations, the French version of Important safety information is included. Mesures de sécurité importantes Ce symbole vous alertera d’informations importantes ou d’instructions d’entretien pouvant apparaître dans ce guide d’utilisation. - Page 52 For C-UL compliance Si le produit ne fonctionne pas correctement, consultez la section Dépannage (Troubleshooting) du guide d’utilisation. Si vous ne pouvez pas régler le problème, ou si le produit est endommagé, consultez la section Garantie limitée (Limited warranty) des pages 55-57. N’ouvrez pas ce produit, sauf tel qu’indiqué...
- Page 53 For C-UL compliance Spécifiquement en rapport avec les téléphones sans fil Confidentialité : Les mêmes caractéristiques qui rendent les téléphones sans fil si pratiques créent également des restrictions. Les appels téléphoniques sont transmis entre le socle du téléphone et le combiné par le biais d’ondes radio, et il se peut que vos conversations téléphoniques soient interceptées par d’autres équipements de réception d’ondes radio au sein de la portée du téléphone sans fil.
- Page 54 For C-UL compliance Mesures préventives pour les utilisateurs de stimulateurs cardiaques implantés dans l’organisme Stimulateurs cardiaques (ne s’applique qu’aux téléphones sans fil numériques) : L’organisme ‘Wireless Technology Research, LLC (WTR)’, une firme de recherche indépendante, a mené une évaluation pluridisciplinaire des interférences entre les téléphones sans fil portatifs et les stimulateurs cardiaques implantés dans l’organisme.
-
Page 55: Fcc Part 68 And Acta
FCC Part 68 and ACTA This equipment complies with Part 68 of the FCC rules and with technical requirements adopted by the Administrative Council for Terminal Attachments (ACTA). The label on the back or bottom of this equipment contains, among other things, a product identifier in the format US:AAAEQ##TXXXX. -
Page 56: Fcc Part
Industry Canada This device contains licence-exempt transmitter(s)/receiver(s) that comply with Innovation, Science and Economic Development Canada’s licence-exempt RSS(s). Operation is subject to the following two conditions: (1) This device may not cause interference. (2) This device must accept any interference, including interference that may cause undesired operation of the device. -
Page 57: Limited Warranty
This device complies with Part 15 of the FCC Rules. Operation is subject to the following two conditions: (1) this device may not cause harmful interference, and (2) this device must accept any interference received, including interference that may cause undesired operation. Privacy of communications may not be ensured when using this telephone. - Page 58 Advanced American Telephones will retain defective parts, modules, or equipment. Replacement of Product, at Advanced American Telephones’ option, is your exclusive remedy. You should expect the replacement to take approximately 30 days. 3. How long is the limited warranty period? The limited warranty period for SynJ®...
- Page 59 you, transportation, delivery or handling charges prepaid. Advanced American Telephones assumes no risk for damage or loss of the Product in transit. 6. What must you return with the PRODUCT to get warranty service? 1. Return the entire original package and contents including the Product to the Advanced American Telephones service location along with a description of the malfunction or difficulty;...
-
Page 60: Technical Specifications
Technical specifications RF frequency band 1921.536MHz — 1928.448MHz Channels Telephone base voltage 96 — 129 Vrm (AC voltage, 60Hz) Telephone base voltage 6VDC @600mA (DC adapter output) Handset battery 2.4 VDC, AAA x 2, Ni-MH Charger voltage (AC adapter output) 6VDC @400mA Operating times* Talk time (handset): up to 10 hours...
Need help?
Do you have a question about the DLP73290 and is the answer not in the manual?
Questions and answers
HOW TO DELETED MISS CALLS