Table of Contents
Advertisement
Available languages
Available languages
Quick Links
Read and understand all of the instructions and safety information
in this manual before operating or servicing this tool.
Register this product at www.TempoCom.com
52031021 REV 6
INSTRUCTION MANUAL
© 2020 Tempo Communications Inc
EML100
Marker-Mate
Electronic Marker
Locator
®
English .........4–16
Français .....17–30
Español.......31–44
Deutsch ......45–58
11/20
Advertisement
Chapters
Table of Contents

Related Manuals for Tempo Communications Marker-Mate EML100


Summary of Contents for Tempo Communications Marker-Mate EML100
- Page 1 Locator English ..4–16 Français ..17–30 Español..31–44 Deutsch ..45–58 Read and understand all of the instructions and safety information in this manual before operating or servicing this tool. Register this product at www.TempoCom.com 52031021 REV 6 © 2020 Tempo Communications Inc 11/20...
- Page 2 Menu Quick Start Guide Guide de démarrage rapide Guía de inicio rápido Menü-Kurzanleitung • High / Alto / Hoch / Eleve Volume • Medium / Medo / Mittel / Moyen Volumen • Low / Bajo / Baixo / Basso / Niedrig / Faible Lautst •...
- Page 3 EML100 Button Press Exit Pulse el botón Salida Pressione o botão Saida Premere il pulsante Uscita Taste drücken Ausfahrt Appuyez sur le bouton Sortie Battery Bateria Batteria Batterie Pile Contrast • High / Alto / Hoch / Eleve Contraste • Medium / Medo / Mittel / Moyen Contrasto •...
-
Page 4: Table Of Contents
For details on how to switch to Standard mode if outside the European Union, go to www.TempoCom.com and select the EML100 Product Support Page. All specifications are nominal and may change as design improvements occur. Tempo Communications Inc. shall not be liable for damages resulting from misapplication or misuse of its products. -
Page 5: Important Safety Information
EML100 Important Safety Information SAFETY ALERT SYMBOL This symbol is used to call your attention to hazards or unsafe practices which could result in an injury or property damage. The signal word, defined below, indicates the severity of the hazard. The message after the signal word provides information for preventing or avoiding the hazard. -
Page 6: Product Features
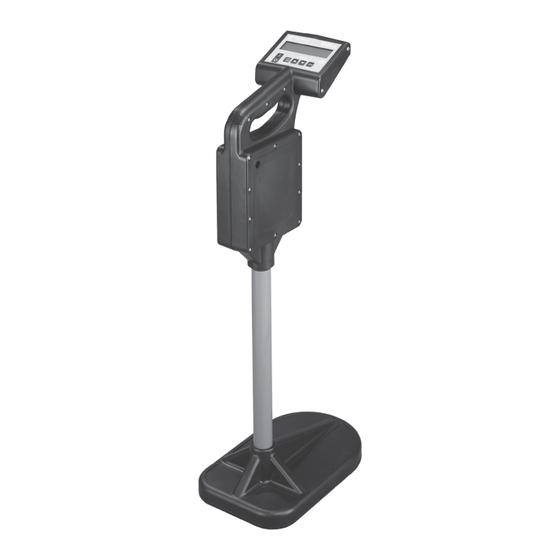
Product Features The EML100 Marker-Mate Electronic Marker Locator is designed to llocate nine standard ® utility frequencies used in buried markers such as the Omni Marker II and the Spike Marker products. Main Features • Depth range of over 1.5 m (5 ft). •... -
Page 7: Display Overview
EML100 Display Overview Note: x’s shown in the figures in this manual indicate numeric readings on the display. LCD indicates: • Mode: SCAN mode (with detected marker type shown), or single marker mode (i.e., Power, Water, etc.) (Figures 12 and 13) •... - Page 8 MENU Key Note: The EML100 is active as soon as it is turned on and completes the Power-On Sequence. The bottom line of text on the display shows available options when using the MENU key. Press the MENU key to cycle through the following sub-menus: Volume Control Use the p or q key to select Off, Low, Medium, or High;...
- Page 9 EML100 Display Contrast The display screen’s contrast may be changed to adapt to differing lighting conditions. Use the p or q key to select Low, Medium, or High. Pressing the MENU key again will display the English (Language) sub-menu where Marker Color, English Oil &...
-
Page 10: Operation
GAIN – HI – LO Keys Menu Navigation The HI – LO (qp arrows) are used to navigate through menus while using the MENU key. Refer to the “MENU Key” section above. Pinpoint Feature The HI – LO (pq arrows) are used to toggle the Pinpoint feature ON and OFF. The advanced Pinpoint feature allows the adjustment of the detection threshold, making it possible to narrow the detection area to a precise location (Figures 10 and 11). - Page 11 EML100 Scan Operation To locate all compatible markers using the SCAN mode: 1. Perform steps 1 through 6 under “Normal Operation” above. 2. Press EXIT to enter the SCAN mode and locate all compatible markers. 3. Press the EXIT key repeatedly to toggle between the SCAN mode and a specific marker type mode.
- Page 12 To activate the Pinpoint feature: 1. Select a marker mode as described in “Normal Operation” above. When a marker has been detected, the display will show a reading similar to the “Normal Displays” shown in Figure 14. 2. Without moving the EML100, press the q key to enter the Pinpoint feature. Press the p key to return to the normal display.
- Page 13 EML100 EML100 Marker Search Pattern A search pattern should be used when locating markers. All marker locators are dependent on the type of marker, depth of marker, and external noise as to how broad a footprint can be detected. The highest probability of locating a marker of unknown type and depth requires a tight search pattern.
-
Page 14: Specifications
Specifications Battery EML100 ......................(12) 1.5 volt AA Battery Life (nominal) ....................20 hrs Physical Length ......................77.8 cm (30.7 in) Width ......................19.8 cm (7.8 in) Height ......................32.5 cm (12.8 in) Weight (with batteries) ...................2.04 kg (4.5 lb) Operating and Storage Conditions Operating Temperature ............. -
Page 15: Compatible Markers
EML100 Compatible Markers EML-100 is compatible with all industry standard electronic markers from ourselves , including older Omni-Marker and Uni-Marker products previously sold under our older brands Industrial Technology and Greenlee, and other manufacturers. At time of writing, Tempo is the only company supplying a specific Fiber Optic marker. Omni Marker II™... - Page 16 Omni Marker and Omni Marker II Signals These markers each emit a distinct type of signal as shown in Figures 21 and 22. The Omni Marker tools produce a uniform, spherical RF field in every direction, while the Omni Marker II , Spike Marker and previous Uni Marker plus the majority of competitor markers emit dipole field signals primarily up and down.
- Page 17 Lire et comprendre toutes les instructions et les informations sur la sécurité figurant dans ce manuel avant d’utiliser ou de procéder à l’entretien de cet outil. Enregistrez votre produit en ligne, www.TempoCom.com 52031021 REV 6 © 2020 Tempo Communications Inc 12/20...
-
Page 18: Sécurité
Toutes les caractéristiques sont nominales et peuvent changer conjointement aux améliorations apportées. Tempo Communications Inc. décline toute responsabilité pour les dommages résultant d’un emploi détourné ou abusif de ses produits. -
Page 19: Informations De Sécurité Importantes
EML100 Informations de sécurité importantes SYMBOLE D’AVERTISSEMENT Ce symbole met en garde contre les risques et les manipulations dangereuses pouvant entraîner des blessures ou des dégâts matériels. Les mots indicateurs ci-dessous définissent la gravité du danger, et sont suivis d’informations permettant de prévenir ou d’éviter le danger. -
Page 20: Caractéristiques Du Produit
Caractéristiques du produit Le détecteur de marqueurs électroniques EML100 Marker-Mate est conçu pour localiser ® sept marqueurs électroniques standard, dont les produits Omni MarkerII™ et le Spike Marker. Caractéristiques principales • Portée de plus de 1,5 m de profondeur • Détecte jusqu’à neuf types de marqueurs différents •... -
Page 21: Vue D'ensemble De L'affichage
EML100 Vue d’ensemble de l’affichage Remarque : Les « x » dans les illustrations de ce manuel représentent des valeurs numériques à l’écran. L’afficheur à cristaux liquides (LCD) indique : • Le mode : mode SCAN (avec indication du type de marqueur détecté) ou mode marqueur individuel (électricité, eau, etc.) (Figures 12 et 13) •... - Page 22 Touche MENU Remarque : L’EML100 est actif dès qu’il est mis en marche et a effectué sa séquence de démarrage. La ligne de texte inférieure de l’écran affiche les options disponibles lors de l’utilisation de la touche MENU. Appuyer sur la touche MENU pour afficher successivement les sous-menus suivants : Réglage du volume Utiliser la touche p ou pour sélectionner Éteint, Faible, Moyen ou Élevé...
- Page 23 EML100 Contraste d’affichage Le contraste de l’écran d’affichage peut être modifié en fonction des conditions d’éclairage. Utiliser la touche p ou q pour sélectionner Faible, Moyen ou Élevé. Appuyer une nouvelle fois sur la touche MENU pour afficher le sous-menu English, qui donne accès aux modes de couleur de marqueur, English Oil &...
-
Page 24: Fonctionnement
Touches GAIN – HI – LO Navigation du menu Les touches HI – LO (flèches pq) s’utilisent pour naviguer à travers les menus lors de l’utilisation de la touche MENU. Voir la section « Touche MENU » ci-dessus. Fonction de repérage précis Les touches HI –... - Page 25 EML100 6. Appuyer sur EXIT pour commencer la recherche du type de marqueur sélectionné. Remarque : Ces réglages sont sauvegardés et seront utilisés lors de la mise en marche suivante de l’appareil. Opération de balayage Pour localiser tous les marqueurs compatibles au moyen du mode SCAN : 1.
- Page 26 Pour activer la fonction de repérage précis : 1. Sélectionner un mode de marqueur comme décrit dans la section « Fonctionnement normal » ci-dessus. Lorsqu’un marqueur est détecté, l’écran affiche une mesure semblable à celle des « Affichages normaux » de la Figure 14. 2.
- Page 27 EML100 Tracé de recherche de marqueur de l’EML100 Il est conseillé de suivre un tracé de recherche pour localiser des marqueurs. La taille de l’empreinte pouvant être détectée par tout détecteur de marqueur dépend du type de marqueur, de sa profondeur et du bruit externe. La probabilité de localiser un marqueur de type et de profondeur inconnus sera d’autant plus élevée que le tracé...
-
Page 28: Caractéristiques Techniques
Caractéristiques techniques Piles EML100 ....................(12) 1,5 V AA/LR06 Autonomie des piles (nominale) ..................20 h Caractéristiques physiques Longueur ......................... 77,8 cm Largeur ........................19,8 cm Hauteur ........................32,5 cm Poids (avec les piles)....................2,04 kg Conditions d’utilisation et d’entreposage Température d’utilisation ................–20 °C à... -
Page 29: Marqueurs Compatibles
EML100 Marqueurs compatibles EML-100 est compatible avec tous les marqueurs électroniques standard de l'industrie, y compris les anciens produits Omni-Marker et Uni-Marker précédemment vendus sous nos anciennes marques Industrial Technology et Greenlee, et d'autres fabricants. Au moment de la rédaction de cet article, Tempo est la seule entreprise à fournir un marqueur fibre optique spécifique. - Page 30 Signaux Omni Marker et Uni Marker Ces marqueurs émettent chacun un type de signal distinct. L’outil Omni Marker produit un champ RF sphérique uniforme dans toutes les directions, tandis que l'Omni Marker II, le Spike Marker et l'ancien Uni Marker ainsi que la majorité des marqueurs concurrents émettent des signaux de champ dipolaire principalement de haut en bas.
- Page 31 Marker-Mate ® Lea y entienda todas las instrucciones y la información sobre seguridad que aparecen en este manual, antes de manejar esta bomba o darle mantenimiento. Registre este producto en www.TempoCom.com 52031021 REV 6 © 2020 Tempo Communications Inc. 12/20...
- Page 32 EML100. Todas las especificaciones son nominales y podrían cambiar según se hagan mejoras en el diseño. Tempo Communications Inc. no será responsable por daños que resulten de la aplicación o uso indebidos de sus productos. Marker-Mate es marca comercial registrada y Omni Marker y son marcas comerciales de Tempo...
-
Page 33: Información Importante Sobre Seguridad
EML100 Información importante sobre seguridad SÍMBOLO DE ALERTA SOBRE SEGURIDAD Este símbolo se utiliza para indicar un riesgo o práctica poco segura que podría ocasionar lesiones o daños materiales. Cada uno de los siguientes términos denota la gravedad del riesgo. El mensaje que sigue a dichos términos le indica cómo puede evitar o prevenir dicho riesgo. -
Page 34: Características Del Producto
Características del producto El localizador de marcadores electrónicos EML100 Marker-Mate está diseñado para localizar siete ® tipos de marcadores electrónicos estándar que incluyen los productos Omni Marker II™ y tambien de los productos de Spike Markers. Características principales • Alcance de profundidad de más de 1,5 m (5 pies). •... -
Page 35: Descripción General De La Pantalla
EML100 Descripción general de la pantalla Aviso: Las "x" que se muestran en las figuras en este manual indican lecturas numéricas en la pantalla. La pantalla LCD indica lo siguiente: • Modo: Modo SCAN (con el tipo de marcador detectado que se indica), o en modo marcador único (cables de energía eléctrica, tubería de agua, etc.) (Figuras 12 y 13) •... - Page 36 Tecla MENU Aviso: El localizador EML100 se activa tan pronto se enciende y finaliza la secuencia inicial. El renglón inferior de texto en la pantalla muestra las opciones disponibles cuando se usa la tecla MENU. Pulse la tecla MENU para realizar un ciclo a través de los submenús siguientes: Control de volumen Utilice la tecla p o q para seleccionar Off (Apagado), Low (Bajo), Medium (Intermedio) o High (Alto);...
- Page 37 EML100 Contraste de la imagen La pantalla de contraste de la imagen se puede cambiar para adaptarse a diferentes condiciones de iluminación. Utilice las teclas p o q para seleccionar Low (Bajo), Medium (Intermedio) o High (Alto). Al volver a pulsar la tecla MENU aparecerá el submenú Inglés (Idioma) desde donde se puede acceder a los modos Color de Marcador, Petróleo y Gas en Inglés, e Idiomas Alternativos.
-
Page 38: Operación
Teclas GAIN – HI – LO Navegación de Menú Las flechas HI – LO (pq) se utilizan para navegar en los menús utilizando la tecla MENU. Consulte la sección "Tecla MENU". Característica Pinpoint (Localización con exactitud) Las flechas HI – LO (pq) se utilizan para activar o desactivar la característica Pinpoint. La característica avanzada Pinpoint permite el ajuste del umbral de detección, con lo cual se hace posible reducir el área de detección a una ubicación precisa (Figuras 10 y 11). - Page 39 EML100 6. Pulse EXIT para comenzar a buscar el tipo de marcador seleccionado. Aviso: Estos ajustes se guardarán y se utilizarán la próxima vez que se encienda la unidad. Operación Scan Para localizar todos los marcadores compatibles utilizando el modo SCAN: 1.
- Page 40 Para activar la característica Pinpoint: 1. Seleccione un modo de marcador según se describe en la sección "Operación normal" en párrafos anteriores. Cuando se detecta un marcador, la pantalla mostrará una lectura similar a la de las "Pantallas normales" que se muestran en la Figura 14. 2.
- Page 41 EML100 Patrón de búsqueda de marcadores de la unidad EML100 Al localizar marcadores se recomienda utilizar un patrón de búsqueda. Todos los localizadores de marcadores dependen del tipo de marcador, profundidad del marcador y ruido externo para determinar el mayor ancho de huella que se pueda detectar. La máxima probabilidad de localizar un marcador de tipo y profundidad desconocidos requiere la aplicación de un patrón de búsqueda ajustado.
-
Page 42: Especificaciones
Especificaciones Batería EML100 ......................(12) 1,5 V AA Vida útil de las baterías (nominal) ................20 horas Aspectos físicos Longitud ....................77,8 cm (30,7 pulg.) Ancho ......................19,8 cm (7,8 pulg.) Altura.....................32,5 cm (12,8 pulg.) Peso (con baterías) ..................2,04 kg (4,5 lb) Condiciones de funcionamiento y almacenamiento Temperatura de funcionamiento...........–20 °C a 50 °C (–4 °F a 122 °F) Temperatura de almacenamiento ........-40 °C a 70 °C (-40 °F a 158 °F) Mantenimiento... - Page 43 EML100 Marcadores compatibles EML-100 es compatible con todos los marcadores electrónicos estándar de la industria de nosotros mismos, incluidos los productos Omni-Marker y Uni-Marker más antiguos vendidos anteriormente con nuestras marcas más antiguas Industrial Technology y Greenlee, y otros fabricantes. En el momento de redactar este artículo, Tempo es la única empresa que suministra un marcador de fibra óptica específico.
- Page 44 Señales Omni Marker y Uni Marker Cada uno de estos marcadores emite un tipo distinto de señal como se muestra en las Figuras 21 y 22. Las herramientas del Omni Marker producen un campo de RF esférico uniforme en todas las direcciones, mientras que el Omni Marker II, el Spike Marker y el Uni Marker anterior más la mayoría de los marcadores de la competencia Emiten señales de campo dipolo principalmente hacia arriba y hacia abajo.
- Page 45 EML100 Marker-Mate ® Ortungsgerät für elektronische Marker Vor Bedienung oder Wartung dieses Messgerätes bitte alle Anweisungen und Sicherheitsinformationen in diesem Handbuch genau durchlesen und beachten. Registrieren Sie dieses Produkt unter www.TempoCom.com 52031021 REV 6 © 2020 Tempo Communications Inc. 12/20...
-
Page 46: Beschreibung
Alle technischen Daten sind Nennwerte. Bei Designverbesserungen sind Änderungen der Nennwerte vorbehalten. Tempo Communications Inc. haftet nicht für Schäden, die sich aus der falschen Anwendung oder dem Missbrauch seiner Produkte ergeben. Marker-Mate ist eine eingetragene Marke und Omni Marker sind Marken von Tempo Communications... -
Page 47: Wichtige Sicherheitsinformationen
EML100 Wichtige Sicherheitsinformationen SICHERHEITS-WARNSYMBOL Dieses Symbol macht auf gefährliche oder riskante Praktiken aufmerksam, die zu Schäden oder Verletzungen führen können. Das Signalwort, wie nachfolgend definiert, gibt den Schweregrad der Gefahr an. Der dem Signalwort folgende Hinweis informiert darüber, wie die Gefahr verhindert oder vermieden wird. Akute Gefahr, die bei Nichtvermeiden zu schweren Verletzungen oder zum Tod FÜHRT. -
Page 48: Produktmerkmale
Produktmerkmale Der elektronische Marker-Locator EML100 Marker-Mate® dient zur Zuordnung von neun Standard- Nutzfrequenzen, die in vergrabenen Markern wie dem Omni Marker II und den Spike Marker- Produkten verwendet werden. Hauptmerkmale • Tiefenreichweite von über 1,5 m. • Erkennt bis zu neun verschiedene Markertypen •... -
Page 49: Anzeigeübersicht
EML100 Anzeigeübersicht Hinweis: Alle „x“ in den Abbildungen in diesem Handbuch beziehen sich auf numerische Messungen auf der Anzeige. LCD zeigt: • Modus: SCAN-Modus (gezeigt mit erkanntem Markertyp) oder Einzelmarkermodus (d. h. Strom, Wasser usw.) (Abbildungen 12 und 13) • Numerische Anzeige und Balkendiagramm (Abbildung 3) •... - Page 50 MENÜ-Taste Hinweis: Das EML100 ist sofort nach Einschalten und Durchlaufen der Einschaltsequenz aktiv. Die unterste Zeile auf der Anzeige zeigt verfügbare Optionen bei Verwendung der MENÜ-Taste an. Durch Drücken der MENÜ-Taste kann man die folgenden Untermenüs erreichen: Lautstärkeregelung Die Tasten p verwenden, um Aus, Leise, Mittel oder Laut zu wählen und mit der EXIT-Taste den MENÜ-Bildschirm verlassen (Abbildung 4).
- Page 51 EML100 Anzeigekontrast Der Kontrast der Bildschirmanzeige kann geändet werden, um unterschiedlichen Beleuchtungsbedingungen zu entsprechen. Die Tasten p oder q verwenden, um Niedrig, Mittel oder Hoch zu wählen. Durch erneutes Drücken der MENÜ-Taste wird das englischsprachige Untermenü angezeigt, in welchem auf die Markerfarbe, Englisch Oil & Gas und alternative Sprachmodi zugegriffen werden kann.
-
Page 52: Bedienung
Tasten für GAIN (Verstärkung) – HI – LO Menü-Navigation Die Tasten HI – LO (p oder q Pfeile) werden während der Verwendung der MENÜ-Taste zur Navigation durch die Menüs verwendet. Siehe hierzu den oben stehenden Abschnitt „MENÜ-Taste“. Punktortungsfunktion Die Tasten HI – LO (pq Pfeile) werden zur Aktivierung der Punktortungsfunktion (ON/OFF) verwendet. - Page 53 EML100 5. Durch erneutes Drücken der MENÜ-Taste, wird die geschätzte BATTERIENUTZUNGSDAUER angezeigt. 6. Die EXIT-Taste drücken, um nach dem Markertyp zu suchen. Hinweis: Diese Einstellungen werden gespeichert und beim nächsten Einschalten des Geräts wieder verwendet Scan-Bedienung Ortung aller kompatiblen Marker im SCAN-Modus: 1.
- Page 54 Aktivieren der Punktortungsfunktion: 1. Marker-Modus auswählen, wie oben in „Normale Bedienung“ beschrieben. Wenn ein Marker erkannt wurde, zeigt die Anzeige einen ähnlichen Wert, wie in „Normale Anzeigen“ in Abbildung 14 gezeigt. 2. Drücken der q Taste, um die Punktortungsfunktion zu aktivieren, ohne des EML100 zu bewegen.
- Page 55 EML100 EML100 Marker-Suchmuster Ein Suchmuster sollte bei der Ortung von Markern angewendet werden. Die Funktionsfähigkeit aller Markerortungsgeräte hängt in Bezug auf eine breitgefächerte Erkennung von dem Markertyp, der Tiefe des Markers und dem externen Geräuschpegel ab. Für die höchste Wahrscheinlichkeit der Ortung eines Markers unbekannten Typs und unbekannter Tiefe ist ein engmaschiges Suchmuster notwendig.
-
Page 56: Technische Daten
Technische Daten Batterie EML100 ......................(12) 1,5 Volt AA Batterienutzungsdauer (nominell) ................20 Std. Abmessungen/Gewicht Länge ........................77,8 cm Breite........................19,8 cm Höhe ........................32,5 cm Gewicht (mit Batterien) ..................... 2,04 kg Betriebs- und Lagerbedingungen Betriebstemperatur ..................–20 °C bis 50 °C Lagertemperatur .................. -
Page 57: Kompatible Marker
EML100 Kompatible Marker Elektronischer Marker „Uni Marker™“ EML-100 ist mit allen branchenüblichen elektronischen Markern von uns kompatibel, einschließlich älterer Omni-Marker- und Uni-Marker-Produkte, die zuvor unter unseren älteren Marken Industrial Technology und Greenlee sowie anderen Herstellern verkauft wurden. Zum Zeitpunkt des Schreibens ist Tempo das einzige Unternehmen, das einen bestimmten Glasfasermarker anbietet. - Page 58 Signale der Omni Marker und Uni Marker Diese Marker senden jeweils einen bestimmten Signaltyp aus, wie in den Abbildungen 21 und 22 gezeigt. Die Omni Marker-Werkzeuge erzeugen ein gleichmäßiges, sphärisches HF-Feld in alle Richtungen, während der Omni Marker II, der Spike Marker und der vorherige Uni Marker plus die Mehrheit der Konkurrenzmarker emittieren Dipolfeldsignale hauptsächlich nach oben und unten.
- Page 59 EML100...
- Page 60 One-Year Limited Warranty Garantie limitée d’un an Garantía limitada de un año Eingeschränkte Ein-Jahres-Garantie Tempo Communications Inc 1390 Aspen Way • Vista, CA 92081 • USA Customer Service: 800-642-2155 Fax: 760-598-9263 Telephone: (760) 510-0558 UK (EMEA) Tempo Europe Limited Inc.
Need help?
Do you have a question about the Marker-Mate EML100 and is the answer not in the manual?
Questions and answers