Table of Contents
Advertisement
Advertisement
Table of Contents

Related Manuals for Ross Acuity


Summary of Contents for Ross Acuity
- Page 1 Acuity Operation Manual v9.2...
- Page 2 9. We will go above and beyond in times of crisis. If there's no one to authorize the required action in times of company or customer crisis - do what you ii • Thank You For Choosing Ross — Acuity Operation Manual (v9.2)
- Page 3 Wireshark Foundation. to important operating and maintenance (servicing) instructions within the Product Manual Documentation. Failure to heed this information may present a major risk of damage or injury to persons or equipment. Acuity Operation Manual (v9.2) — Document Information • iii...
- Page 4 24. To reduce the risk of fire, replacement fuses must Servicing is required when the apparatus has been be the same type and rating. damaged in any way, such as when the power-supply iv • Document Information — Acuity Operation Manual (v9.2)
- Page 5 Modifications can impair CAUTION: The Aux Power connectors PS1 and regulatory compliance, or performance and may PS2 on the back of the Acuity control panels void your warranty. are for use with the following Acuity approved accessories: Touchscreen Display...
- Page 6 FOB Ross dock. If repairs are conducted at the European Union customer site, reasonable out-of-pocket charges will apply. At the discretion of Ross, and on a temporary loan This equipment is in compliance with the essential basis, plug in circuit boards or other replacement parts...
- Page 7 Technical Support Use of Hazardous Substances in Electrical and At Ross Video, we take pride in the quality of our Electronic Products (China RoHS) products, but if a problem does occur, help is as close as Ross Video Limited has reviewed all components and the nearest telephone.
- Page 8 ® for the Evertz IP Input Blade product. ® • Evertz IPG-IPBLADE-OP-10GE User Manual — operation, installation, and configuration ® information for the Evertz IP Output Blade product. viii • Document Information — Acuity Operation Manual (v9.2)
-
Page 9: Table Of Contents
Transition Preview..............44 To Set Up SoftPanel..........30 To Perform a Transition Preview......44 To Uninstall SoftPanel..........30 Key Priority Transitions............44 To Perform a Key Priority Transition......44 To Manually Set the Current Key Priority....44 Transition Limits..............45 Acuity Operation Manual (v9.2) — Contents • ix... - Page 10 To Set Audio Properties.........78 Masks..................63 Managing Media Files and Directories........79 To Set Up a Box Mask...........63 To Rename and Renumber a Media File....79 To Set Up a Pattern Mask........64 To Create a Directory..........79 x • Contents — Acuity Operation Manual (v9.2)
- Page 11 Running Multiple Sequences.......113 To Assign an On-Air Run CC.........97 To Assign an Off-Air Run CC.........98 To Assign an On-PST Run CC.......98 Working in 3D Space........114 Copying and Moving Custom Controls........98 Moving in 3D Space............114 Acuity Operation Manual (v9.2) — Contents • xi...
- Page 12 Perspective................114 Relative Size............114 Parallax..............114 Rotation................114 X-Axis Rotation............115 Y-Axis Rotation............115 Z-Axis Rotation............115 Pre-Loaded Effects.........116 Simple Wipes..............116 Classic Wipes............116 Rotary Wipes............116 Matrix..............116 Special..............116 Glossary..........117 Index...........120 xii • Contents — Acuity Operation Manual (v9.2)
-
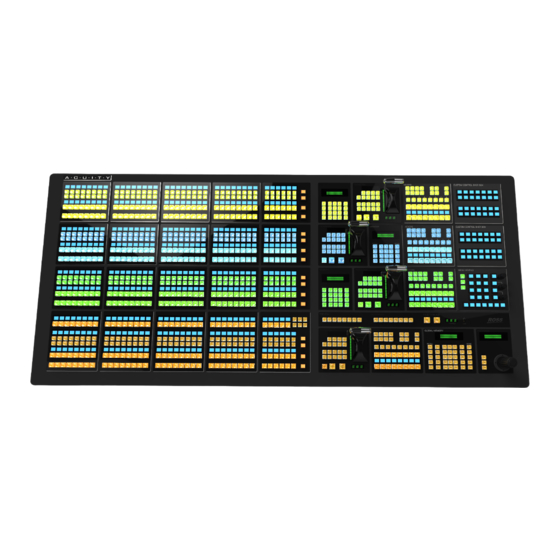
Page 13: Acuity Control Panel Overview
Record allows you to record a custom control without using the menu system. ® Acuity Operation Manual (v9.2) — Acuity Control Panel Overview • 13... -
Page 14: Global Memory Module
SELF KEY Assign the selected keyer as self key. PST PATT Assign the selected keyer as preset pattern key. ® 14 • Acuity Control Panel Overview — Acuity Operation Manual (v9.2) -
Page 15: Memory Module
Allows you to recall a memory on a panel selected keyer independent of the fill. row that does not include the program and preset bus selections. Only the keyer selections are recalled. ® Acuity Operation Manual (v9.2) — Acuity Control Panel Overview • 15... -
Page 16: Menu Keypad Module
ME on the Preview output. Table 6: Preview Button Functions Button Function ME X Allows you to select the ME to assign to the preview output. ® 16 • Acuity Control Panel Overview — Acuity Operation Manual (v9.2) -
Page 17: Preview Overlay
TIME CLOCK Allows you to turn the time clock preview overlay element on or off. DISS Allows you to select a dissolve as the next transition type. ® Acuity Operation Manual (v9.2) — Acuity Control Panel Overview • 17... -
Page 18: Panel Rows
Tip: To quickly assign a button row to a bus on the standard panel, press and hold the SEL button and use the source buttons ® 18 • Acuity Control Panel Overview — Acuity Operation Manual (v9.2) -
Page 19: Assigning A Row To An Aux Bus
Row X) that you want to assign to the bus. Tip: Toggle Lock Key Row to On to lock the assignment of the key bus row to the current selection. ® Acuity Operation Manual (v9.2) — Acuity Control Panel Overview • 19... -
Page 20: Carbonite Black Control Panel Overview
Power assigned to the button directly below it. The mnemonic display-name and color for each video source or custom control can be adjusted. 20 • Carbonite Black Control Panel Overview — Acuity Operation Manual (v9.2) -
Page 21: Power And Cabling
• Previous Owner First Name: Ross Video • Previous Owner Last Name: Ross Video • Previous Owner Company: Ross Video • Previous Owner Zip Code: K0E 1K0 Acuity Operation Manual (v9.2) — Carbonite Black Control Panel Overview • 21... - Page 22 Use the mnemonic buttons to enter the new rate new rate and press BANK/ENTER. The display to the right of the memory New Key rate: module stated with the new FTB rate. 22 • Carbonite Black Control Panel Overview — Acuity Operation Manual (v9.2)
-
Page 23: Bus Selection
Change the network setting of a Carbonite Black control auto-follows and always remain on the current menu. panel. 1. Double-click on the CarbonitePanel node and click on the Ethernet tab. Acuity Operation Manual (v9.2) — Carbonite Black Control Panel Overview • 23... -
Page 24: Control Panel Dip Switches
Default Boot Boot from memory card Note: When you force the static IP, the IP address that the control panel expects to find the frame is also set (192.168.0.123). 24 • Carbonite Black Control Panel Overview — Acuity Operation Manual (v9.2) -
Page 25: Menu System
Double-tapping the knob defaults the value for that knob. Acuity Operation Manual (v9.2) — Menu System • 25... -
Page 26: Auto-Follow Menus
Personality Custom Controls action. The typical action of these buttons is to mimic the keypad on the global memory module. Calibration Recall Factory 26 • Menu System — Acuity Operation Manual (v9.2) - Page 27 Positioner Menu Border Setup VDCP Status Non-Sync Status MediaStore Remote Control Tx / Rx Status Global-Store Remote Control Capture VTR Clips Input Status View Still-Store Defaults VTR Clips Preview Overlay Still-Store Cache Acuity Operation Manual (v9.2) — Menu System • 27...
-
Page 28: Punchpad
• CLOSE WINDOW — closes the punchpad without changing any values. • DEFAULT — sets the active knob to the default values. • Copy — copies the value of the active knob (Mem:). 28 • Menu System — Acuity Operation Manual (v9.2) -
Page 29: Help Features
VirtualBox for information on configuring the virtual machine. Online Manuals • Ross Video recommends using a static IP address on A complete copy of these manuals are available on the the computer running SoftPanel. switcher and can be stored to a USB drive. -
Page 30: To Set Up Softpanel
To Uninstall SoftPanel 1. Navigate to the Control Panel from the Start menu. 2. Under Programs, select Uninstall a program. 3. Select SoftPanel from the list of programs and click Uninstall. 30 • Menu System — Acuity Operation Manual (v9.2) -
Page 31: Switcher Basics
ME8 Background Requires Additional Yes (every odd ME2 Background Hardware number ME) ME3 Background Program Assignable to ME4 Background any Output BNC Proc Amps and Color Correctors Figure 6: Video Layering Keyers Acuity Operation Manual (v9.2) — Switcher Basics • 31... -
Page 32: Me Re-Entry
Including or excluding a key from a program output does not change the on-air status of the key, only whether the key is included in a particular output when the key is 32 • Switcher Basics — Acuity Operation Manual (v9.2) -
Page 33: Switcher Reset And Shutdown
USB drive from the USB port on the control panel before (Interlaced at 59.94 Hz) powering the control panel up. • Key:008 — Key transition rate is 8 frames 1. Press HOME > More > System Shutdown. (Interlaced at 59.94 Hz) Acuity Operation Manual (v9.2) — Switcher Basics • 33... -
Page 34: Look Ahead Preview
If the Global-Store 4 Mode personality option is set to Still-Store, the preview overlay is not available. Tip: Press More > Reset to reset the center position to the default setting. 34 • Switcher Basics — Acuity Operation Manual (v9.2) -
Page 35: Hide
2. Use the Safe ID knob to select the Safe ID you want To Set the Preview Overlay Time Clock to adjust the values for. 1. Press HOME > More > Effects > More > More > Preview Overlay > Time Clock Setup. Acuity Operation Manual (v9.2) — Switcher Basics • 35... -
Page 36: Vtr Timecode
Keep the following in mind when copying MEs. The VTR Timecode overlay is made up of three elements, the video source of the clip, the on-air status, the 36 • Switcher Basics — Acuity Operation Manual (v9.2) -
Page 37: Bus Copy/Swap
• Key XV — key X video of the selected ME • Key XV — key X video of the selected ME • Key XA — key X alpha of the selected ME Acuity Operation Manual (v9.2) — Switcher Basics • 37... -
Page 38: Keyer Copy/Swap
3. In the Destination region, select the keyer on the ME that you want to copy or swap to. 4. Press Copy to copy the keyer, or Swap to swap the keyers. 38 • Switcher Basics — Acuity Operation Manual (v9.2) -
Page 39: Transition
Keyers Module. with the transition. This allows you to dissolve keys on/off-air while the 6. Perform the transition. Acuity Operation Manual (v9.2) — Transition • 39... -
Page 40: Split Me Functionality
To Set a Key Rate 1. Press and hold KEY RATE on the Global Memory Transition Rates module. Transition rates set how much time, in frames, the switcher takes to perform an Auto Transition. For 40 • Transition — Acuity Operation Manual (v9.2) -
Page 41: Fade To Black Rate
Preset bus are on-air. Only after the transition has • X — move the pattern horizontally, or use the completed do the crosspoint selection flip-flop between positioner. the buses. • Y — move the pattern vertically, or use the positioner. Acuity Operation Manual (v9.2) — Transition • 41... -
Page 42: Dve Wipes
• Size — select the number of tiles that are used 1. Press DVE on the Transition module. in the matrix. The available selection depend on the selected shape of the tiles. 42 • Transition — Acuity Operation Manual (v9.2) -
Page 43: Fade To Black
Insert a transition to black as the next transition without • Yes — use the ME Rate as the transition rate losing what is currently selected as the next transition. for the WhiteFlash. The Onset, Hold, and Fade Acuity Operation Manual (v9.2) — Transition • 43... -
Page 44: To Copy And Paste Whiteflash Settings
This procedure provides an example of setting a key 3. Perform the transition you want to preview. priority. Any combination of keys can be used in place of those used. 44 • Transition — Acuity Operation Manual (v9.2) -
Page 45: Transition Limits
1. Press TRANS LIMIT on the Transition module that you want to perform the transition limit on. The segment in the transition progress bar blinks where the transition limit has been set. Acuity Operation Manual (v9.2) — Transition • 45... -
Page 46: Keying
• Off — turn unshaped keying on for the source. • On — turn shaped keying on for the source. • Off — turn unshaped keying on for the source. 46 • Keying — Acuity Operation Manual (v9.2) -
Page 47: Chroma Key
This is the background color of your Chroma foreground colors to be corrected for background Key that will be replaced. color spill. From the Personality menu, you can change the default color that UltraChrome uses. Acuity Operation Manual (v9.2) — Keying • 47... -
Page 48: Chroma Key Fine Tuning Tips
5. Press Initialize Key. 6. Press Shadow and use the Range and Gain knobs to extract a shadow from the background. This is the actual shadow that the foreground subject is casting onto the screen. 48 • Keying — Acuity Operation Manual (v9.2) - Page 49 Decreasing the hue value moves clockwise of saturation values to be included in the around the color wheel while selecting a base background. color. Acuity Operation Manual (v9.2) — Keying • 49...
-
Page 50: Chroma Key Alpha And Color Map
A Preset Pattern key is a key in which a hole is cut based semi-transparent reflections (like reflections from on a wipe pattern that you select. The pattern, which acts glasses). Increasing the reflections value increases the brightness of semi-transparent 50 • Keying — Acuity Operation Manual (v9.2) -
Page 51: To Set Up A Preset Pattern Key
Although the operation of the AuxKey is similar to that of the existing ME, there are some notable differences as follows: • AuxKeys can only perform Cuts or Dissolves. • AuxKeys have independent transition rates for the Background and Keyer transitions. Acuity Operation Manual (v9.2) — Keying • 51... -
Page 52: Key Modifiers
2D world and the 2. On the Keyers Module, select the Keyer you want proportion part of the key that has been cropped off. to fly and press 2D DVE. 52 • Key Modifiers — Acuity Operation Manual (v9.2) -
Page 53: To Set Up A 3D Dve Fly Key
The pivot point is unique to for each key. of the key. Acuity Operation Manual (v9.2) — Key Modifiers • 53... -
Page 54: To Apply A Dve Border To A Dve Key
The dotted line is the edge of the key and the 3. Next to Layering select how the channels interact in 3D space. 54 • Key Modifiers — Acuity Operation Manual (v9.2) -
Page 55: To Copy And Paste Channel Settings
The size of the tiles can be adjusted both horizontally and vertically. You can apply up to four ambient or directional color lighting effects to DVE keys in 3D space. Lighting is Acuity Operation Manual (v9.2) — Key Modifiers • 55... -
Page 56: To Apply The Colorize Effect To A Key
• Field 2 — strobe is only applied to the second 3. Use the Horiz. Tiles and Vert. Tiles and Both field of video. knobs to adjust the size of the tiles. 56 • Key Modifiers — Acuity Operation Manual (v9.2) -
Page 57: 3D Dve Warp Effects
Menu > Warp. effect. Tip: At the top of the menu it states how many 3D DVE • Y-Pos — select the vertical position of the Warp resources are available. effect. Acuity Operation Manual (v9.2) — Key Modifiers • 57... -
Page 58: To Apply The Lens Flare 3D Dve Warp
4. Press Shape and use the Shape, Aspect Ratio, • Brightness — adjust the brightness of the light and Magnification knobs to adjust the appearance source, flares, and washout light. of effect. 58 • Key Modifiers — Acuity Operation Manual (v9.2) -
Page 59: To Apply The Melt 3D Dve Warp
• Slope — adjust the angle of the melt effect. • Phase — adjust the position of the waves across the trailing edge of the melt effect. Acuity Operation Manual (v9.2) — Key Modifiers • 59... -
Page 60: To Apply The Page Roll 3D Dve Warp
The greater the variation, the fuzzier the image appears. • Softening — adjust the amount of softness around the edges of the effect. 60 • Key Modifiers — Acuity Operation Manual (v9.2) -
Page 61: To Apply The Split 3D Dve Warp
Soft Trails are best applied to a stationary background with moving elements in the foreground. To Apply an XFX Border 1. Press BORDER on the Effects Keyer module. Acuity Operation Manual (v9.2) — Key Modifiers • 61... -
Page 62: Hard Trails
• Decay To — select the type of decay that is select Trails. used. 3. Use the Trails Mode knob to select Hard. • Video — use the video content of the key to create the trail. 62 • Key Modifiers — Acuity Operation Manual (v9.2) -
Page 63: Key Smear Trails
• Y — move the mask up and down. • Size — adjust the size of the mask. Acuity Operation Manual (v9.2) — Key Modifiers • 63... -
Page 64: To Set Up A Pattern Mask
4. Press Invert to toggle it to On to reverse the mask. The portion of the image that was masked out is now visible, and the portion that was visible is masked. 64 • Key Modifiers — Acuity Operation Manual (v9.2) -
Page 65: Memory Functions
• The Attributes (ATTRIB) button allows you to view the ME Memory Attributes menu, or override the attributes stored with the memory. To override Acuity Operation Manual (v9.2) — Memory Functions • 65... -
Page 66: To Delete A Memory
Effects Dissolve or Keys Only setting with has been unlocked. a memory. When working with locked memory registers, the following rules apply: 66 • Memory Functions — Acuity Operation Manual (v9.2) -
Page 67: To Lock A Memory
Transition module Transition Module selections. when you store the memory so that the desired In addition to setting which sources to recall with the memory, effects such as performing an auto transition Acuity Operation Manual (v9.2) — Memory Functions • 67... -
Page 68: To Set Aux Bus Memory Attributes
The memory that you are currently setting the memory is you want to effects dissolve back from the attributes for is listed near the top left of the menu. second memory to the first. 68 • Memory Functions — Acuity Operation Manual (v9.2) -
Page 69: To Set The Effects Dissolve Rate
Only the destination memory has the settings from the source. • Swap — copy the settings from the source memory to the destination, and the settings from the destination memory the source. The settings Acuity Operation Manual (v9.2) — Memory Functions • 69... -
Page 70: Switcher Setups
You cannot store or recall files from the USB on the those sets, messages for one device can be sent to the other Acuity Rack Panel server. You must store or recall the files resulting in invalid messages or unexpected behavior. -
Page 71: To Name A Setup
You cannot store or recall files from the USB on the to the latest format. You can then make changes and store to Acuity Rack Panel server. You must store or recall the files individual registers if needed. from the Local Disk and access it over the network. Point 1. -
Page 72: Managing Setups Externally
Set list and clicking Delete Set. To Upload a Setup From a Computer 1. Open a web browser and navigate to the IP address of the switcher frame. You are prompted to enter a 72 • Switcher Setups — Acuity Operation Manual (v9.2) -
Page 73: Media-Store
Parameter Specification functionality. File Type Targa (.tga) In addition to the video channels of the Global-Store, an additional set of audio channels are provided. Portable Network Graphics (.png) JPEG (.jpg or .jpeg) Acuity Operation Manual (v9.2) — Media-Store • 73... -
Page 74: File Naming
Anim_0000.tga and end with Anim_0089.tga the Global-Store or ME-Store caches when needed. Media files can be loaded either by navigating to the file on the hard drive, or my entering the media number on 74 • Media-Store — Acuity Operation Manual (v9.2) -
Page 75: To Load A Media File
• Audio files should be 24-bit uncompressed WAV files at a 48kHz sample rate. Bit depth of 8, 16, or 32 are also supported, but playback bit-depth is not changed. Acuity Operation Manual (v9.2) — Media-Store • 75... -
Page 76: To Associate An Audio File With Video
You must save the 8. Press More. captured media item to disk before performing another capture, or loading another media item into that 76 • Media-Store — Acuity Operation Manual (v9.2) -
Page 77: To Capture To A Media-Store
• 1 Chan — capture the first channel of audio. • 2 Chan — capture the first 2 channels of audio. • 4 Chan — capture the first 4 channels of audio. Acuity Operation Manual (v9.2) — Media-Store • 77... -
Page 78: To Set Media File Properties
1. Press the source button for the media-store channel, animation automatically starts to play when it is taken on-air (On), or not (Off). or press Press HOME > More > Effects > Media Store. 78 • Media-Store — Acuity Operation Manual (v9.2) -
Page 79: Managing Media Files And Directories
2. Navigate to the directory that you want to create a You can view what media files are currently loaded into directory in. cache or remove a currently loaded file to free up space. Acuity Operation Manual (v9.2) — Media-Store • 79... -
Page 80: To Remove A Media File From Cache
Press HOME > More > Effects > Media Store. 2. Press More > View Video Cache. 3. Use the middle knob to select the media file that you want to remove. 4. Press Remove From Cache. 80 • Media-Store — Acuity Operation Manual (v9.2) -
Page 81: Custom Controls
If the the custom control immediately after recording it, Multiple Custom Control feature is turned off, TIME CLOCK is turned off. inserting a Run Custom Control command ends the Acuity Operation Manual (v9.2) — Custom Controls • 81... -
Page 82: Custom Control Banks
5. Use the Color knob to select the color you want to directly to a panel button or use the Bank function button use for the mnemonics. This can be the background to allow you to select any bank. 82 • Custom Controls — Acuity Operation Manual (v9.2) -
Page 83: Custom Control Interfaces
Instead, the relative custom Keep the following in mind when running custom control will act like a normal custom control when run. controls from the Global Memory module: Acuity Operation Manual (v9.2) — Custom Controls • 83... -
Page 84: Recording Custom Controls
You can still start a custom control from another controls will continue to play out until they reach the control panel. end, or loop. 84 • Custom Controls — Acuity Operation Manual (v9.2) -
Page 85: Special Custom Control Events
Reset Fader Reset the audio fader channel assignments back to the default setting of the audio fader map. Audio Mixer Press Insert Event > Special. Acuity Operation Manual (v9.2) — Custom Controls • 85... - Page 86 1. Use the Group knob to select the audio group that you want to turn PFL on or off for. 2. Use the PFL knob to turn PFL on (ON) or off (OFF). 86 • Custom Controls — Acuity Operation Manual (v9.2)
-
Page 87: Audio Server
Cue the audio server to a selected cut or command to the camera, wait another 3 track. You must select the clip. frames for the camera preroll, and then move to the next command. Acuity Operation Manual (v9.2) — Custom Controls • 87... -
Page 88: Character Generators
Use the Bank and Macro knobs to select Play Play an animation on the character specific custom control you want to stop. generator. 88 • Custom Controls — Acuity Operation Manual (v9.2) -
Page 89: Dve
Advance boundary. Key Frame Cue the DVE effect to the previous Reverse keyframe boundary. Pause Send the pause command to the DVE. Play Send the play command to the DVE. Acuity Operation Manual (v9.2) — Custom Controls • 89... -
Page 90: Liveedl
OverDrive: On-Air Send the command to OverDrive to run one of the custom controls in rundown control. • Use the CC knob to select the custom control you want to run. 90 • Custom Controls — Acuity Operation Manual (v9.2) -
Page 91: Pbus
Deselect Cam event is run. Disable Camera Disable control of the selected robotic camera. When a camera is disabled, you cannot control it from the switcher. Acuity Operation Manual (v9.2) — Custom Controls • 91... - Page 92 (On) or unshaped (Off). KEYSTATE Returns whether a key is on-air or off-air on an ME. Select the ME X and Key X for the key you want to get the sate for. 92 • Custom Controls — Acuity Operation Manual (v9.2)
- Page 93 Press Layer ID and use the Layer TypeInCmd Enter a manual RossTalk command. ID knob to select the layer you want Move the current selection in the to use. Sequencer to the item above in the list. Acuity Operation Manual (v9.2) — Custom Controls • 93...
-
Page 94: Router
AuxKey and bus that you want to select a source on and use the XPT knob to Keys Trans Transition keys on or off on a particular select the source you want to assign to that bus. 94 • Custom Controls — Acuity Operation Manual (v9.2) -
Page 95: Vtr
Stop/Eject The VTR performs a stop and eject. This clip. command stops the selected channel, and unloads the clip. Acuity Operation Manual (v9.2) — Custom Controls • 95... -
Page 96: Starting And Stopping Custom Controls
The custom control cannot be running when you try to name it. Delete Event delete the currently selected event. 3. Press Modify Name. 96 • Custom Controls — Acuity Operation Manual (v9.2) -
Page 97: To Edit A Custom Control Event
To Insert a Custom Control Event 1. Press HOME > Custom Controls. 2. Use the Bank and Button knobs to select the custom control that you want to edit. 3. Press Edit. Acuity Operation Manual (v9.2) — Custom Controls • 97... -
Page 98: To Assign An Off-Air Run Cc
Shift and that button. If you 1. Press HOME > Custom Controls > Copy/Move assign the ME to a different panel row, the custom control Macros. attachment follows the ME to the new panel row. 98 • Custom Controls — Acuity Operation Manual (v9.2) -
Page 99: To Attach A Custom Control To A Panel Button
The switcher does not wait for the custom custom control. • Press the button for the control to complete before executing the normal custom control you want to function of the button. delete. Acuity Operation Manual (v9.2) — Custom Controls • 99... -
Page 100: To Create A Custom Control Shortcut
• Bank >>> — allows you to display the next set custom controls that you want to resume. of Bank X selection buttons. This button is only visible when the Bank button is held. 100 • Custom Controls — Acuity Operation Manual (v9.2) -
Page 101: Device Transport Commands
You can then adjust that variable for changes in latency, and all your custom controls that use that variable are updated. Acuity Operation Manual (v9.2) — Custom Controls • 101... -
Page 102: Patterns, Washes, And Mattes
Speed knob to select the rate at which the horizontal. pattern continuously rotates. Selecting a positive value rotates the pattern clockwise, and selecting • Amplitude — adjust the height of ripples. 102 • Patterns, Washes, and Mattes — Acuity Operation Manual (v9.2) -
Page 103: To Edit Wash And Matte Generator Assignments
• Video — apply an unaltered video signal with no color effects applied. Note: If the switcher is operating in a UHDTV1 video format, only one wash generator is available. Acuity Operation Manual (v9.2) — Patterns, Washes, and Mattes • 103... -
Page 104: To Set Up A Noise Wash
If the Matte Limit personality option is active, the RGB color space is not available. You will only be able to make color selection in the HSL color space. 104 • Patterns, Washes, and Mattes — Acuity Operation Manual (v9.2) -
Page 105: Auxiliary Control Panels
14 custom controls from the shot Bank 1: Aux 6 Assign +4 and Assign 2 box pages. Shot Box Pages are assigned to the Auxiliary Bank 1: Aux 7 Assign +4 and Assign 3 Acuity Operation Manual (v9.2) — Auxiliary Control Panels • 105... - Page 106 Assign +8 and Assign 1 Bank 2: Aux 2 Assign +8 and Assign 2 Bank 2: Aux 3 Assign +8 and Assign 3 Bank 2: Aux 4 Assign +8 and Assign 4 106 • Auxiliary Control Panels — Acuity Operation Manual (v9.2)
-
Page 107: Ultritouch
7. Tap the connected devices button to see a table of all the devices Ultritouch is connected to. 8. Tap Acuity > Slot 0: Acuity and tap AUX to open that tab. Ultritouch is now connected to the switcher. -
Page 108: Acuity Virtual Panel
Acuity control panel with menu • Block Multiple Users — prevent multiple system. The virtual panel is hosted either from the Acuity ® users form logging in to the same Acuity Rack Rack Panel (ARP) server or a physical Acuity control Panel. - Page 109 • Select Bank on Row — Point to this item and click the custom control bank that you want to assign the row to. Acuity Operation Manual (v9.2) — Acuity Virtual Panel • 109...
- Page 110 • There are no serial Remote ports or Tally ports on the Acuity Rack Panel. • If the connection to the Acuity Rack Panel is lost, a popup is shown asking you to refresh the webpage. This can happen if you shutdown the switcher or the panel is rebooting after an upgrade.
-
Page 111: Dve Sequences
This replaces the existing keyframe with the newly edited one. can make the path effectively come to a point at Don’t forget to save your sequence. a keyframe and then abruptly move away towards the next keyframe. Acuity Operation Manual (v9.2) — DVE Sequences • 111... -
Page 112: To Assign A Dve Wipe To A Pattern Button
5. Use the fader or press AUTO TRANS to run the 5. Press Rename Sequence and enter the new name sequence. for the sequence. 6. Press Accept New Name. 112 • DVE Sequences — Acuity Operation Manual (v9.2) -
Page 113: Running Multiple Sequences
SEQ. The DVE Sequence Runtime menu shows all the sequences on the keys you have selected. Each sequence can be run and paused independently except when the sequence is being run from the fader. Acuity Operation Manual (v9.2) — DVE Sequences • 113... -
Page 114: Working In 3D Space
-Y space. • Moving above the center point locates the channel in +Y space. • Moving closer to you locates the channel in -Z space. 114 • Working in 3D Space — Acuity Operation Manual (v9.2) -
Page 115: X-Axis Rotation
The key rotates about the Z-Axis. A positive rotation will spin the key clockwise and a negative rotation will spin the image counter-clockwise. – Z Axis Figure 35: Z-Axis Rotation Acuity Operation Manual (v9.2) — Working in 3D Space • 115... -
Page 116: Pre-Loaded Effects
Rotary Wipes Rotary wipes, unlike Classic wipes, involve rotation of a pattern to reveal the destination source. Matrix Matrix wipes use a series of blocks to create the pattern for the wipe. 116 • Pre-Loaded Effects — Acuity Operation Manual (v9.2) -
Page 117: Glossary
The terms mix or cross-fade to the Foreground edges to help it blend in with the are often used interchangeably with dissolve. underlying background image that it is being keyed over. Acuity Operation Manual (v9.2) — Glossary • 117... - Page 118 Video or Source. In practice, this signal controls when amount of red. This allows you to add a red tint to the a video mixer circuit will switch from background to key fill video. 118 • Glossary — Acuity Operation Manual (v9.2)
- Page 119 Unlike Interlaced, with Progressive scan the entire image is drawn at one time, in a single pass. This means that there are no fields in a Progressive scan image. Acuity Operation Manual (v9.2) — Glossary • 119...
-
Page 120: Index
Muting Alpha Trim Color Map AUTO SELECT Button Modes Auto Select Key CHROMA KEY Button Auto-Follow Classic Wipes Aux Panels Clean Feed Auxiliary Control Panel CLEAR Button Remote Aux Panel CLEAR Buttons 120 • Index — Acuity Operation Manual (v9.2) - Page 121 Special, KEYSTATE Special, Assign Audio Special, Load Layout Special, Assign Fader Special, LOADSET Special, Assign Monitor Wall Channel Special, Loop CC Special, Audio All Off Special, MEAUTO Special, Audio CH Off Special, MECUT Acuity Operation Manual (v9.2) — Index • 121...
- Page 122 DISS Button Special, SeqOut Dissolves Special, Set PST BKGD Xpt DVE Borders Special, Set Show DVE Button Special, Set Split ME DVE Channel Management Special, Set Xpt DVE Pattern Button Special, SETVIDMODE 122 • Index — Acuity Operation Manual (v9.2)
- Page 123 Internal Video Sources ME PV Buttons ME RATE Button ME Reset ME-Store, See Media-Store MEDIA Button Key Bus Media-Store 73–77, KEY Button Cache Key Combiner Capture Key Copy and Swap Copy/Paste KEY INV Button Acuity Operation Manual (v9.2) — Index • 123...
- Page 124 VTR Timecode Preview Overlay Module Naming Custom Controls Preview, Look Ahead Naming Memories Profile CC Naming Setups PST BKGD PST BKGD Button Network Connection Panel Setup PST PATT Button Punchpad PV Buttons 124 • Index — Acuity Operation Manual (v9.2)
- Page 125 Seq Previous CG Wipe Seq Take CG Trigger CC Sequence Sequences Creating Set CG Folder Setups 70–72 UltraChrome Delete Ultritouch External Computer Aux Panel Naming UNDO Buttons Recalling Unlocking Memories Store Individual User-Controlled Rotation Acuity Operation Manual (v9.2) — Index • 125...
- Page 126 Variable Pause Ripple Video Layering Split Video Sources Stretch Virtual Panel Warp Effects VTR TC Button Washes VTR Timecode WhiteFlash WIPE Button Wipes 41, Classic Warp 57–61 Film Heart Lens Flare XFX Border 126 • Index — Acuity Operation Manual (v9.2)
Need help?
Do you have a question about the Acuity and is the answer not in the manual?
Questions and answers