Table of Contents
Advertisement
Quick Links
Advertisement
Table of Contents

Related Manuals for Ross Carbonite Series


Summary of Contents for Ross Carbonite Series
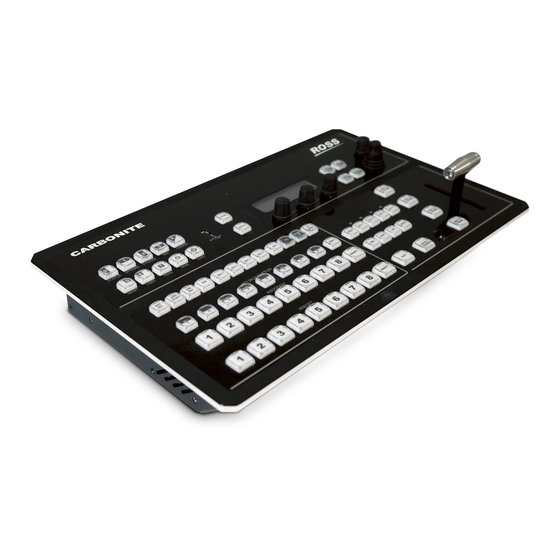
- Page 1 Carbonite SETUP MANUAL v10.0 rossvideo www. .com...
- Page 2 Our employees truly care about doing a great job and delivering a high quality customer experience every day. This code of ethics hangs on the wall of all Ross Video locations to guide our behavior: 1. We will always act in our customers' best interest.
- Page 3 It may also be used to related marks are trademarks or registered trademarks of alert against unsafe practices. Ross Video Limited. All other trademarks are the property of their respective companies. PATENTS Warning Hazardous Voltages: This symbol is ISSUED and PENDING.
- Page 4 Important: Changes or modifications to this protective earth connection be provided. A grounding equipment not expressly approved by Ross Video conductor in the equipment's supply cord provides this Limited could void the user's authority to operate this protective earth. To reduce the risk of electrical shock to the equipment.
- Page 5 FOB Ross dock. If repairs are conducted at the Company Address customer site, reasonable out-of-pocket charges will apply. At the discretion of Ross, and on a temporary loan Ross Video Limited — 8 John Street Iroquois, Ontario, basis, plug in circuit boards or other replacement parts...
- Page 6 Supporting Documentation • SideBox Installation (4802DR-304) — installation and mounting instruction for SideBox module Ross Video provides a wide variety of helpful documentation for the setup and support of your • Auxiliary Control Panel Installation equipment. Most of this documentation can be found (4802DR-305) —...
-
Page 7: Table Of Contents
To Set Up a Source Name..........21 Contents To Assign a TSL ID to a Video Input........21 Control Panel Button Inserts..........21 To Install a Button Insert...........21 Bus Maps................22 To Create a Bus Map............22 Features............9 To Reset the Bus Map............22 Analog Reference Input and Output........9 GPI Device Control..............22 To Assign a GPI to a Video Source........22 3G and 1080p 29.97 Video Formats........9... - Page 8 Memory Bank Button Behavior (C2S/C2X/C3S/C3X)...35 To Stop Capturing and Save EDL Data......45 To Set the Bank Button Behavior........35 Memory Button Behavior (Not available on C1-A or C10)..35 To Set the Memory Button Behavior.........35 Diagnostics and Calibration.....46 Memory Recall Behavior (C10/C1)........36 Switcher Information and Logs..........46 To Set the Memory Recall Behavior.........36 Switcher Status in DashBoard..........46...
-
Page 9: Features
Features controls from the control panel. Custom controls can be recorded and run from the Custom Control node in DashBoard. Thank you for buying a Ross Video Carbonite Series Device Control Multi-Definition Live Production Switcher. The The switcher can control a number of external devices, Carbonite series builds on the Ross Video reputation for such as video servers and robotic cameras. -
Page 10: General Purpose Interface
NLE suite. Memory System For information on using the LiveEDL feature, visit the Storage for 100 complete switcher snapshots per ME, Ross Video Website (rossvideo.com). ™ MiniME , and MultiScreen comes standard with all switchers. All of these memories can be stored to a USB... -
Page 11: Minime
Half ME Full ME Key Types Auto Select and Auto Select, Self Self Key Key, Chroma Key, and DVE Transition Types Dissolve, Cut, Dissolve, Cut, and MediaWipe Wipe, DVE, and MediaWipe Pattern Mask ™ MiniME ™ The MiniME is an additional ME that is provided with the switcher to perform basic dissolves and cuts. -
Page 12: Pattern And Matte/Wash Generators
compensate for the overlap in projector outputs, or the outside bezel of your display. ™ Each screen in the MultiScreen output uses a MiniME to create the background and keys of the output. This allows you to have two MultiScreen generators with two screens each, or one MultiScreen generator with three or four screens. -
Page 13: Video Reference
Input Reference Usable Format Video Reference 1080p 29.97Hz 1080p 59.94Hz (A) The flexible reference system in the switcher allows you 1080i 50Hz 576i to use an Interlaced video format as the reference to operate the switcher in a video format of the same 576i 16:9 frequency. -
Page 14: Frame Sync And Format Conversion
Tip: Reference settings can also be set up from the Reference Supported FSFC Input Mode Video Formats tab on the Configuration node in DashBoard. FSFC can only convert between specific video formats at a given frequency. The available conversions also 1. -
Page 15: Fsfc For Carbonite Frame
Switcher Video Formats Allowable Input Formats • LttrBx — Black bars are added to the top and bottom of a 16:9 image to display 1080p 59.94Hz (HDMI only) correctly in a 4:3 video format. 576i 50Hz 576i 50Hz (aspect ratio •... -
Page 16: Fsfc For Carbonite Multimedia/Carbonite+ Frames
• PllrBx — Black bars are added to the right • LttrBx — Black bars are added to the top and left of a 4:3 image to display correctly and bottom of a 16:9 image to display in a 16:9 video format. correctly in a 4:3 video format. -
Page 17: To Set Color Framing For Analog Reference
is introduced but the edges of the video signal may be 8. Press the Confrm knob to assign the output cropped. reference synchronizer. If you select an analog reference format (NTSC/PAL) you must set whether you want to use color framing for the reference output or not. -
Page 18: To Set The Switching Field
To Set the Switching Field If you are using a Frame Sync or Format Conversion (FSFC), transitions are locked to F1. 1. Press MENU > SYSTEM > NEXT. 2. Use the FldSwt or FrmSwt knob to select which field video transitions occur on. •... -
Page 19: Video Input Setup
and look at the source on the preview monitor. If there Video Input Setup are color errors in the video, select the other color-space. Video sources come into the switcher through the input 4. Use the Format or F/Frmt knob to select the BNCs. -
Page 20: Auto Key Setup
• 480i To Set Up an Auto Key Association • 576i As well as input sources, internally generated sources, • 720p 59.94 such as media-stores and color backgrounds, can be set • 720p 50 up as an auto key. • 1080i 59.94 1. -
Page 21: To Set Up A Source Name
Use the Char knob to select the character button names with those of a different language. you want to place at the selected position. Button insert templates can be downloaded from Ross Video. 4. Enter the remaining characters in the new name. -
Page 22: Bus Maps
3. Place the Insert Film into the Lens so the • BK — black readable side is facing up. The notches on the • 1-24 — video inputs (number of inputs sides of the Lens must be at the sides of the text depends on hardware) on the Insert Film. - Page 23 2. Use the Input knob to select the video source that you want to assign a GPI output to. If you are using the GPI to control the device, the video source should be video output coming from the device. 3.
-
Page 24: Video Outputs
Ancillary Data Video Outputs Ancillary data is information such as closed captioning or embedded audio, for example, that is included in the The frame has a number of output BNCs that can be non-active video portions of the video signal. These assigned to any video source in the switcher, including portions include the Horizontal Ancillary Data Space Media-Store channels, aux bus, and clean feed. -
Page 25: To Set Up Clean Feed
Keep the following in mind when working with clean MultiViewer feeds: The MultiViewer allows you to view multiple video • Recalling a memory register using Memory AI may sources from a single output BNC. Any video source, or cause the Clean Feed output to look different than bus, on the switcher, including Program, Preview, and expected. -
Page 26: To Set Up A Multiviewer Clock
5. Use the Transp knob to adjust the transparency 17. Use the Border knob to turn the border around of the background behind the source label for the MultiViewer box off (Off), white (White), the selected MultiViewer. or black (Black). 6. -
Page 27: Multiscreen
• If you are using DVE keys with your MultiScreen, 5. Press NEXT. you should set these resources as floating. 6. Use the X Pos, Y Pos, and Size knobs to ™ MiniME Assignment position the clock and change the size. ™... -
Page 28: To Set Up A Pre-Tiled Source
value to compensate for the bezel on the • ME — the program output of a ME. outside of a display. • Aux — the output of an Aux bus. • If you are using projectors for your • MiniME — the program output of the MultiScreen display, you can use the negative ™... - Page 29 • PGM — program bus • PV — preview bus • CLN — clean feed • PGM1 — ME 1 program bus (if installed) • PRV1 — ME 1 preview bus (if installed) • CLN1 — ME 1 clean feed (if installed) ™...
-
Page 30: Color Correction
a) Use the Cntrl knob to select LmGain. Color Correction b) Use the Value knob to adjust the luminance gain only. Color correction in the switcher is performed by either Processing Amplifiers (Proc Amps) in the HSL 6. Adjust the hue rotation as follows: (Y-Cr-Cb) color space or by RGB Color Correctors in a) Use the Cntrl knob to select HueRot. -
Page 31: Rgb Color Correction (Carbonite+ And Carbonite Multimedia Only).31
7. Adjust the gamma value of the selected color b) Use the Value knob to adjust the offset of component(s) as follows: the Cb. a) Use the Cntrl knob to select GamVal. RGB Color Correction (Carbonite+ b) Use the Value knob to adjust the gamma value of the component(s). -
Page 32: Viewcontrol
3. Turn on FSFC for the selected video input. ViewControl • Standard Inputs — use the FSFC knob to select On. ViewControl integrates the MultiViewer output of the • MultiMedia Inputs — use the Type knob switcher with a graphical overlay from DashBoard to to select SDI-FC. - Page 33 6. Double-press the Clip knob to select the default 6.3%. 7. Press NEXT > NEXT > NEXT. 8. Use the Box knob to select box one for the MultiViewer you are using for ViewControl. For example, if you are assigning MultiViewer one (1) to ViewControl, select MV1:1.
-
Page 34: Switcher Personality
• HltRev — the transition is halted and then Switcher Personality reverses directions when the transition button is pressed again • Rev — the transition immediately reverses There are a number of settings for how the switcher will directions when the transition button is react to different situations, or how switcher elements pressed appear to the operator. -
Page 35: To Create A Custom Panel Color Scheme
transitions, or recall memories, among the supported 5. Press the Confrm knob. commands. Refer to the GVG100 Supported Protocol Document To Create a Custom Panel Color Scheme for a list of supported commands. Custom colors are created using standard hue, saturation, To Set the Switcher to Editor Mode and luminance values. -
Page 36: Memory Recall Behavior (C10/C1)
2. Use the MemBtn knob to select whether both To Set the Next Transition Follow Behavior of the store and recall buttons act together 1. Press MENU > PERS > NEXT > NEXT > (Single), or as separate ME specific buttons Trans Area. -
Page 37: Roll Gpo/Roll Clip
3. Use the Sleep/PwrSve knob to set the amount To Turn Undo Memory Recall Off of time that the switcher will wait without user 1. Press MENU > PERS > NEXT > NEXT > input before going into sleep or power-save NEXT. -
Page 38: Switcher Resources
1. Transition Area — if a DVE transition is not in Switcher Resources progress 2. Off-Air DVE key — highest number resource is taken first The switcher has a number of resources that it must share 3. On-Air DVE key — current DVE Key is converted across keyers or MEs. -
Page 39: Switcher Modes
• In a 3G, 1080p 29.97Hz, or 2.5 ME mode, the Switcher Modes Carbonite and Carbonite eXtreme switchers do not support the use of a color background as a source on a DVE or chroma key. The switcher mode allows you to set the features and •... -
Page 40: Network Connections
2. Press MENU > SYSTEM > NEXT > NEXT > Network Connections IP Addr. 3. Use the left knob to select the network port that The switcher is equipped with two Ethernet ports to allow you want to set to DHCP. Only one port can be remote access. -
Page 41: Ftp Connection (Rosslinq)
• xpression – used when creating a connection from a Ross Video XPression Motion Graphics System directly to the Media-Store channels on the switcher, as well as any USB drive installed in the switcher •... -
Page 42: Gpi Control
4. Press the Edit knob. GPI Control 5. Use the Event knob to select the action you want to assign to the selected GPI input pin. General Purpose Interface (GPI) is a high/low voltage • <none> — no action is taken signalling protocol that allows the switcher to send simple •... -
Page 43: To Set Up A Gpi Output
• Edge triggered GPI outputs remain triggered for To Set Up a GPI Output the configured duration. A GPI output can be set as a Normal GPI output, or as • Level triggered GPI outputs toggle between high a Tally output. As a tally output, the GPI output must be and low each time they are triggered. -
Page 44: Live Edit Decision Lists
Timecode Setup Live Edit Decision Lists The switcher uses timecode data to mark the EDL file so that it can be used in the non-linear editing suite along Edit Decision Lists are files used by non-linear editing with the feeds from the video servers. The timecode data (NLE) suites to aid in post-production. -
Page 45: Liveedl Data Capture
To Stop Capturing and Save EDL Data a) Use the Field knob to select the hours, minutes, or seconds that you want to adjust. 1. Press MENU > USER > LiveEDL. The timecode is shown in the 2. Press the Stop knob to stop recording. [HH:MM:SS]>... -
Page 46: Diagnostics And Calibration
Note: If you are having problems with your switcher, please To View the Software Version contact Ross Video Technical Support for assistance. • Press MENU > STATUS. Switcher Information and Logs The current software version (SW Ver) and reference format are displayed. -
Page 47: System Real-Time Clock
Description System Real-Time Clock This DIP switch is unused and should be left in the The switcher uses an internal clock to generate the time default up (off) position. for the clock overlay for the MultiViewer. This DIP switch is used to set the IP address of the frame to the default value (192.168.0.123). -
Page 48: To Run The Ram Test
DDR memory. The problem persists, contact last RAM test. 1 Not Found; switcher may be used but Ross Video Technical or DDR 0 & 1 many features will be limited Support for assistance. 2. Press the Reboot knob to run the test. -
Page 49: Specifications
Audio Specifications Specifications Specification Value Audio Depth 24-bit AES3 in HD (20-bit in The information is this section is subject to change without notice. Sample Rate 48kHz Operating Temperature Channels 8 Stereo Pairs (16 channels) The Carbonite switchers have been qualified at an Synchronization Locked to Video operational temperature range of 0-40°C (32-140°F). -
Page 50: Gpi Port
Signal Signal GPI I/O 25 GPI I/O 26 GPI I/O 27 GPI I/O 28 GPI I/O 29 Ground Ground Ground GPI I/O 30 GPI I/O 31 GPI Port GPI I/O 32 GPI I/O 33 The GPI I/O port on the back of the frame supports 34 GPI I/O pins. -
Page 51: Glossary
to fall outside the allowable range. Generally, increasing Glossary the gain for a specific color component causes the video signal colors to become increasingly saturated with that color. Similarly, decreasing the gain for a specific color component progressively removes that color component Auto Key from the output video signal. - Page 52 RossTalk An ethernet based protocol that allows the control over Ross devices using plain english commands. Standard-Definition A standard definition (480i or 576i) video signal. 52 • Glossary — Carbonite Setup Manual (v10.0)
- Page 53 Index Diagnostics 1080p 29.97Hz Mode 46–47 3G Mode Copy Logs Software Version DIP Switches 47–48 Analog 1 (RAM test) 3 (IP address) Formats Double-Press Rate Ancillary Data Ancillary Mode Aspect Ratio Aspect Ratio Conversion Editor Mode Full External Reference Letterbox Pillarbox Zoom Audio Mixer Control...
- Page 54 LiveEDL Personality (continued) 44–45 Editor Capture Editor Mode Store KAuto 2 MAuto 2 MemBnk MemME Memories Memory Bank Button Memory Recall Behavior Recall Behavior NextBn Func2 Memory Bank Button NEXT Button Memory Button Next Trans Follow Memory Undo, Personality Option Next Trans Reset MiniME Power-Save Mode...
- Page 55 Specifications 49–50 Video Inputs GPI I/O 19–22 Status Auto Key Substitution Table, MultiScreen Button Names Switcher Mode Component Switching Field Composite System Real-Time Clock GPI Device Control HDMI Mnemonic Names Video Mode Tallies Setup Video Output Temperature OK 24–25 Time-Clock Ancillary Data Timecode Clean Feed...
Need help?
Do you have a question about the Carbonite Series and is the answer not in the manual?
Questions and answers