Advertisement
Quick Links
Advertisement

Subscribe to Our Youtube Channel
Related Manuals for Ross ACO-4400A


Summary of Contents for Ross ACO-4400A
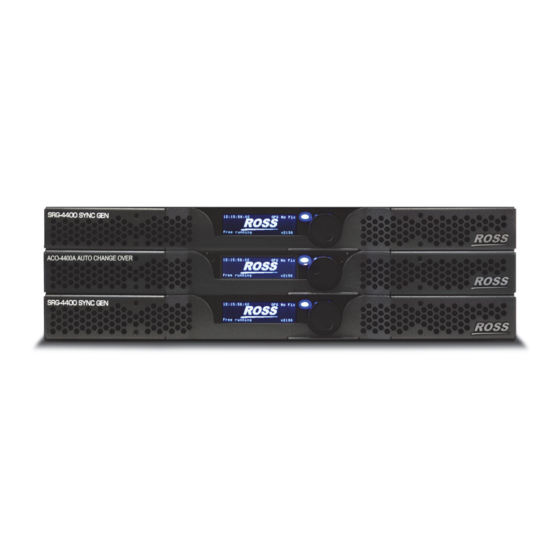
- Page 1 ACO-4400A Automatic Changeover System for the SRG-4400 User Manual...
- Page 2 Ross has become well known for the Ross Video Code of Ethics. It guides our interactions and empowers our employees. I hope you enjoy reading it below. If anything at all with your Ross experience does not live up to your expectations be sure to reach out to us at solutions@rossvideo.com.
- Page 3 © 2017 Ross Video Limited. Ross®, openGear®, and any related marks are trademarks or registered trademarks of Ross Video Ltd. All other trademarks are the property of their respective companies. PATENTS ISSUED and PENDING. All rights reserved. No part of this publication...
- Page 4 Important Regulatory and Safety Notices to Service Personnel Before using this product and nay associated equipment, refer to the “Important Safety Instructions” listed below to avoid personnel injury and to prevent product damage. Product may require specific equipment, and/or installation procedures to be carried out to satisfy certain regulatory compliance requirements.
- Page 5 Support using the numbers listed under the “Contact Us” section on the last page of this manual. This Ross Video product is covered by a generous 3-year warranty and will be repaired without charge for materials or labor within this period. See the “Warranty and Repair Policy” section in...
- Page 6 The crossed out wheelie bin symbol invites you to use these systems. If you need more information on the collection, re-use, and recycling systems, please contact your local or regional waste administration. You can also contact Ross Video for more information on the environmental performance of our products.
- Page 7 Company Address Ross Video Limited Ross Video Incorporated 8 John Street P.O. Box 880 Iroquois, Ontario, K0E 1K0 Ogdensburg, New York Canada USA 13669-0880 General Business Office: (+1) 613 • 652 • 4886 Fax: (+1) 613 • 652 • 4425 Technical Support: (+1) 613 •...
- Page 9 Initial Product Inspection..................... 2-3 Operating Environment Requirements ................2-4 Rack Mount Installation....................... 2-5 Installing the ACO-4400A into a Rack Unit ............2-5 Installing the Rear Support Brackets..............2-5 Connecting an SRG-4400 to an ACO-4400A..............2-6 Connecting the Primary SRG-4400 to the ACO-4400A ........2-6 Connecting the Backup SRG-4400 to the ACO-4400A........
- Page 10 Do Calibration?....................5-20 P NSig, B NSig ....................5-21 DashBoard Menu System Using DashBoard ......................... 6-2 Adding the ACO-4400A to the Tree View............6-2 Using DashBoard to Access the ACO-4400A............6-3 Slot 0 - ACO-4400A Interface ..................... 6-4 Status Tabs......................6-4 PSU Status Tab ......................
- Page 11 RS232 Connector ......................... 8-4 Connector Pinouts ....................8-4 Breakout Cable ...................... 8-4 Pin Views of Chassis Connectors................8-5 Calibration Procedure Overview..........................9-2 Calibrating the ACO-4400A ....................9-3 Service Information User Maintenance ......................10-2 General Care......................10-2 Exterior Cleaning....................10-2 Preventive Maintenance ..................10-2 Servicing......................
- Page 12 • Contents ACO-4400A User Manual (Iss. 03)
- Page 13 SRG-4400. Thank you for joining the group of worldwide satisfied Ross Video customers! Should you have a question pertaining to the installation or operation of your ACO-4400A, please contact us at the numbers listed on the back cover of this manual. Our technical support staff is always available for consultation, training, or service.
- Page 14 The ACO-4400A also provides internal termination for unswitched BNC inputs. The ACO-4400A includes 12 channels in a 1U rack. Each BNC channel consists of a Primary Input, a Backup Input, and an Output. All BNC channel relays switch in unison upon fault detection in any active BNC channel, front-panel command, or remote command.
- Page 15 Features The ACO-4400A includes the following key features: • 12 channels in 1U rack height • All BNC channels are signal agnostic • All BNC channels are measured on both Primary and Backup inputs • Ethernet (100-BaseT) interface remote control •...
- Page 16 PRIMARY Fault Indications PEAK PEAK DISPLAY DETECT DETECT OTHER CHANNELS PRIMARY LEVEL CHECK REFERENCE GENERATORS BACKUP LEVEL CHECK OTHER CHANNELS OTHER CHANNELS *Including unmonitored multi-way channels Figure 1.1 ACO-4400A — Functional Diagram 1–4 • Introduction ACO-4400A User Manual (Iss. 03)
- Page 17 The following terms and conventions are used throughout this manual. Terms The following terms are used: • “Operator” and “User” refer to the person who uses ACO-4400A. • “System” and “Video system” refer to the mix of interconnected production and terminal equipment in your environment.
- Page 18 1–6 • Introduction ACO-4400A User Manual (Iss. 03)
- Page 19 Physical Installation In This Chapter This chapter provides instructions for installing the ACO-4400A. The following topics are discussed: • Before You Begin • Initial Product Inspection • Operating Environment Requirements • Rack Mount Installation • Connecting an SRG-4400 to an ACO-4400A •...
- Page 20 Always exercise proper grounding precautions when working on circuit boards and related equipment. Unpacking Unpack each ACO-4400A you received from the shipping container and ensure that all items are included. If any items are missing or damaged, contact your sales representative or Ross Video directly.
- Page 21 2. Remove the instrument from the shipping carton. 3. Check that the ACO-4400A has not been damaged in transit. The exterior should not have any scratches or impact marks. Prior to shipment the ACO-4400A is thoroughly inspected for mechanical defects.
- Page 22 3” (75mm), so that cables are not compromised. The ACO-4400A does not currently have an internal fan to assist with ventilation or cooling. Therefore, when you install the unit in an equipment bay, it is imperative that you ensure there is sufficient space all around the unit to allow the airflow to vent away any excess heat generated by the unit.
- Page 23 Rack Mount Installation You can install the ACO-4400A into an equipment rack. It is recommended to loom the cables so that they do not introduce extra weight or twisting force on the front panel rack mountings or rear panel connectors. If installed in a mobile application, the rack mount kit is essential.
- Page 24 Connecting an SRG-4400 to an ACO-4400A Each SRG-4400 (Primary and Backup) can connect directly to the ACO-4400A rear panel via an Interface Cable (4400CR-100-01). The Breakout PCB Kit that came with your SRG-4400 will be mounted and installed in the chapter “Installing the Breakout PCB” on page 4-1.
- Page 25 Connecting the Backup SRG-4400 to the ACO-4400A The Backup SRG-4400 connects directly to the ACO-4400A via its BALANCED connector and a second Interface Cable (4400CR-100-01). This cable has red and violet wires, and two 30-pin Connectors. To connect the Backup SRG-4400 to the ACO-4400A 1.
- Page 26 Unpacking Unpack each SRG-4400 Install Kit you received from the shipping container and ensure that all items are included. If any items are missing or damaged, contact your sales representative or Ross Video directly. Required Equipment Table 2.1 summarizes the items that are required...
- Page 27 Installing the Breakout PCB on the Rack Tray The Breakout PCB for the ACO-4400A enables you to cable a Primary SRG-4400 and a Backup SRG-4400 to the ACO-4400A and provide access to the AES, DARS, and Analog Audio connections on balanced 3-pin connectors. You will need a Phillips screwdriver to affix the Breakout PCB to the rack tray using the four M3 10mm screws that were included in the SRG-4400 Install Kit.
- Page 28 Cabling the Breakout PCB to the ACO-4400A The Breakout PCB connects to the ACO-4400A rear panel via the provided Interface Cable (4400CR-100-01) and the middle 30-pin on the ACO-4400A rear panel. This cable type has red and violet wires, and two 30-pin Connectors.
- Page 29 3. Repeat steps 1 and 2 for each wire on each connector. 4. Once the cables are wired to the connectors, install the connectors on the terminal blocks of the Breakout PCB. ACO-4400A User Manual (Iss. 03) Physical Installation • 2–11...
- Page 30 Ensure easily accessible socket outlets are available near the ACO-4400A to power the unit. Caution — If two entry connectors are preset on the rear panel, the ACO-4400A will still be powered until both power cords are removed. 2–12 • Physical Installation...
- Page 31 Figure 2.12 Removing the Power Supplies from the Chassis 5. Install the new power supply as follows: a) Sliding the new power supply into the available slot. b) Secure the power supply into its slot via the provided screws. ACO-4400A User Manual (Iss. 03) Physical Installation • 2–13...
- Page 32 3. Position the faceplate over the power supplies. 4. Secure the faceplate on the chassis using the provided screws. ACO-4400A AUTO CHNG Figure 2.13 Re-installing the Faceplate 2–14 • Physical Installation ACO-4400A User Manual (Iss. 03)
- Page 33 The following accessories are shipped with the ACO-4400A. User Documentation A Documents disk is included with your ACO-4400A. Power Cords All ACO-4400A are shipped with one of the following power cord options: • Power cords for use in the United Kingdom are BS1363 approved. •...
- Page 34 2–16 • Physical Installation ACO-4400A User Manual (Iss. 03)
- Page 35 Start-up In This Chapter Perform the following procedures if you are operating the ACO-4400A for the first time (to verify that the ACO-4400A shipped without damage), or you suspect that the ACO-4400A is not working properly. The following topics are discussed: •...
- Page 36 The following equipment is required for the functional check: • Video Test Signal Generator • Waveform / Picture Monitors (multi-format) • 75ohm BNC cables • 75ohm terminations • Breakout cable/box for the rear panel 30-way multi-way connector (optional/not supplied) 3–2 • Start-up ACO-4400A User Manual (Iss. 03)
- Page 37 These procedures will guide you through the steps required to check the operation of the ACO-4400A. The most common scenarios will be explored to enable the user to familiarize themselves with the operation of the unit. Although some steps are included which suggest cycling through menu options in order to check operation, this is not mandatory - a simple check for presence or absence of a signal will suffice.
- Page 38 Initial Power-Up 1. Ensure that the ACO-4400A is not powered on. 2. Connect the ACO-4400A as shown in Figure 3.1. Ensure that the ACO-4400A output is properly terminated at the monitoring device. TV SIGNAL GENERATOR Analog Color Black Composite Video...
- Page 39 You need to press the button a suitable number of times to get back to the stand-by screen (the one with the “Ross Video” logo, one press “up” from the “Top Level” Menu) - this will save any changes that you have made to the non-volatile memory.
- Page 40 Initial Configuration The ACO-4400A should arrive configured to a “factory default” condition, i.e. all channels set for Type = Color Black, Operational Mode = Automatic, Output = Primary. To ensure that you have a suitable channel configuration for the purposes of this Functional Check, you should perform the following procedures.
- Page 41 6. Select “Operational Mode” = < Auto >. Loss of the Primary Signal From the “Top Level” menu: 1. Press the [Back] button once to enter the Stand-By screen - “Ross Video” Logo. 2. Disconnect the Primary input signal (Composite Video). Note —...
- Page 42 4. Restore power to the mains inlet. The fault indication changes to show that the “fault” is fixed. 5. Turn off the power to both mains inlets. The channel output changes to the Primary input signal (Composite Video) and the unit powers down. 3–8 • Start-up ACO-4400A User Manual (Iss. 03)
- Page 43 The ACO-4400A will automatically switch to the Primary inputs whenever it loses power. So, you should connect the Backup SRG-4400 and one mains input on the ACO-4400A to the same power source, and connect the Primary SRG-4400 (and the second mains input on the ACO-4400A) to a second power source.
- Page 44 (an example is shown below in Table 3.1). This will be helpful to refer to in the future in order to quickly find out whether, for example, a previously unused channel requires a menu change relating to the new signal to be monitored. Table 3.1 ACO-4400A Channel Configuration Channel Channel Type Signal Attached 3–10 •...
- Page 45 Operating Basics In This Chapter This chapter outlines the basics of operating the ACO-4400A. The following topics are discussed: • Front Panel Overview • Rear Panel Overview • Operating Basics • Software Upgrades • Troubleshooting ACO-4400A User Manual (Iss. 03)
- Page 46 You need to press the button a suitable number of times to get back to the stand-by screen (the one with the “Ross” logo, one press “up” from the top level Menu) - this will save any changes that you have made to the non-volatile memory.
- Page 47 Dangerous high voltages are present within the unit. The ACO-4400A operates from an AC line frequency of 48Hz to 63Hz, over the range of 85VAC to 250VAC, without the need for user configuration. Refer to the chapter “Specifications” on page 7-1 for additional information on power and environment requirements.
- Page 48 GPI/O functionality. This port is not implemented. 5. 100-Base T This rear-panel connector is a standard RJ45 Ethernet connector. This is used for DashBoard communication. After installation, it may be used to upload software updates. 4–4 • Operating Basics ACO-4400A User Manual (Iss. 03)
- Page 49 Error threshold levels are pre-defined during initial testing, and are not adjustable. Operating Mode The ACO-4400A can be operated in one of two modes, selected from within the menu system. The options are either Automatic or Manual control. When “Auto” is selected, the ACO-4400A will automatically switch if a fault is detected.
- Page 50 1. Connect the SRG-4400 via an Ethernet cable to your local network. 2. Connect a Windows PC to the network, such that the ACO-4400A is visible. 3. Verify that the Ross System Update Tool and data files are in the same folder on the PC. 4–6 • Operating Basics...
- Page 51 The Ross System Update dialog opens. Ross System Update Dialog 2. Set the IP Address and IP Mask fields to the values for the ACO-4400A you want to upgrade. Note that all octets must be entered as 3-digits. For example, 255.0.0.0 should be entered as 255.000.000.000.
- Page 52 Expand the ACO-4400A main node in the tree view. d) Double-click the Slot 0: ACO-4400A sub-node. e) Select the System Report tab. f) Verify the values in the provided fields match the file(s) you uploaded. Your ACO-4400A is now upgraded and ready for use.
- Page 53 Troubleshooting The ACO-4400A is reliable under normal steady state operating conditions. If you are having problems, select the symptom from the list below that closely relates to your particular problem, and perform the checks / actions listed. Notice — Observe all cautions and warnings listed in the front of this manual.
- Page 54 4–10 • Operating Basics ACO-4400A User Manual (Iss. 03)
- Page 55 Front Panel Menu System In This Chapter The ACO-4400A provides the user with a menu interface to control the functions and options of the instrument. The following topics are discussed: • Menu Screens and Maps • Main Menu • Signal Strength Menu •...
- Page 56 Software version number By pressing the rotary control, you access the Top Level Menu. This menu gives you access to the three key menus that are used to control and configure the ACO-4400A: 1. Signal Strength Menu 2. Channel Setup Menu 3.
- Page 57 Number of Channels Auto Recover from Fault Event Warnings WebServer (fixed) DHCP (fixed) IP Address xxx.xxx.xxx.xxx Subnet Mask xxx.xxx.xxx.xxx Port (fixed) xxxxx Figure 5.1 ACO-4400A — Menu Map (Pictorial Example) ACO-4400A User Manual (Iss. 03) Front Panel Menu System • 5–3...
- Page 58 Figure 5.2 is a basic menu tree structure of the ACO-4400A. Signal Strength Screen Logo Screen Channel Setup Menu System Setup Menu Temp Report Event Report System Report Configuration Network DashBoard Calibration Figure 5.2 ACO-4400A — Menu Map (Diagrammatic) 5–4 • Front Panel Menu System...
- Page 59 Audio Figure 5.3 Main Menu Example Operational Mode This menu line displays the current mode of operation of the ACO-4400A. The options for the field are: Auto, Manual. Auto When set to Auto, fault detection is enabled, the outputs will automatically default to the Primary inputs, and, when applicable, automatic switching of inputs occurs when a fault is encountered: Table 5.1 Fault Actions...
- Page 60 Press the push-button to return to the Main Menu. The options displayed in the fields “POK” or “BOK” are: • PErr / BErr Primary / Backup - Error Detected 5–6 • Front Panel Menu System ACO-4400A User Manual (Iss. 03)
- Page 61 • POK / BOK Primary / Backup - No error detected. The values displayed in the fields “X” represent the actual detected signal levels of the selected input channel. ACO-4400A User Manual (Iss. 03) Front Panel Menu System • 5–7...
- Page 62 Another scenario is one where more signals are required to be switched than monitored. On the ACO-4400A, when a fault occurs, ALL channels switch, regardless of how many inputs are populated or configured. So, for this case, the user can either: •...
- Page 63 4V Pulses- LOS After making your selection, press the rotary control to confirm the selection. Select additional channels to adjust. When finished, press the push-button to return to the Main Menu. ACO-4400A User Manual (Iss. 03) Front Panel Menu System • 5–9...
- Page 64 “ +3v3 Regulator 42 Depending on the exact configuration and options in the ACO-4400A, one or more of the sensors might not be installed. In this case, the description in the relevant line appears as seen in Figure 5.7. These menu lines report the power cycle counts and “in service” times for both of the PSUs installed in the N+1 Dual Redundant PSU ACO-4400A.
- Page 65 03.22.18.700.13 Figure 5.8 Event Report Menu Example The Event Report provides access to the last 99 events recorded by the ACO-4400A. These events may relate to normal expected functionality or to systemic errors. This information might be useful in monitoring and diagnosing a system problem outside the ACO-4400A, or a reliability problem within the ACO-4400A.
- Page 66 ACO-4400A. ACO-4400A 192.xxx.xxx.xxx This field reports the user programmed Ethernet IP Address of the ACO-4400A. The options in the sub-fields appear as: 0 through 255. Frame Serial Number Field This field reports the serial number for the ACO-4400A.
- Page 67 The Hardware field indicates the hardware version in use. This is not usually modified by field upgrades as it relates to the motherboard hardware components in the ACO-4400A. The Firmware field indicates the firmware version in use. This is not usually modified by field upgrades as it relates to the motherboard firmware components in the ACO-4400A.
- Page 68 The minimum allowable number is 1; the maximum number is 12. Recover from Fault This menu row allows the user to determine how the ACO-4400A will recover after a fault is rectified. The options are: •...
- Page 69 When set to ON, the ACO-4400A will automatically switch back from Backup to Primary upon return of the Primary signal. When set to OFF, the ACO-4400A will need to be manually switched from Backup to Primary after the fault is corrected.
- Page 70 This menu line allows the user to enter the pre-determined Gateway address of the ACO-4400A. Typically, this might be the IP address of a network hub to which the ACO-4400A is connected. The options in the sub-fields are: 000 through 255 where “000” is the default “no action” setting.
- Page 71 This menu item cannot be changed - the MAC address is stored in a hardware device. This address is unique to each ACO-4400A, and is also used to provide unique update keys when enabling options within the unit. NTP, DashBoard, Backup Device These menu lines provide access to the subsequent menu levels, as indicated.
- Page 72 PC-based Remote Control Program. Port This menu line allows the user to set the Ethernet Port through which the ACO-4400A communicates with the external PC-based Remote Control Program. The options in the sub-field are: 5253 (default), and 6666.
- Page 73 When you edit a pre-programmed Dashboard Password, start from character position 1; do not use spaces between the characters (see above); overtype with spaces (char.#32) any extraneous characters at the end of the password. ACO-4400A User Manual (Iss. 03) Front Panel Menu System • 5–19...
- Page 74 Disclaimer The Calibration Menu contains fundamental settings relating to the functionality and accuracy of the ACO-4400A. These settings are determined during initial testing and through subsequent configuration and alignment. They should not normally require re-configuration during service. It is a good idea to make a manual record of these settings in case they become corrupted or are inadvertently changed.
- Page 75 Table 5.3 Channel Calibration Primary Backup Channel NSig Fail NSig Fail ACO-4400A User Manual (Iss. 03) Front Panel Menu System • 5–21...
- Page 76 5–22 • Front Panel Menu System ACO-4400A User Manual (Iss. 03)
- Page 77 DashBoard Menu System In This Chapter The ACO-4400A provides the user with a menu interface to control the functions and options of the instrument. The following topics are discussed: • Using DashBoard • Slot 0 - ACO-4400A Interface • Slot 1 - Channel Setup Interface •...
- Page 78 DashBoard, refer to the DashBoard User Manual. Adding the ACO-4400A to the Tree View You must add the ACO-4400A to the Tree View in DashBoard before you can access the setup and monitoring interfaces. This requires manually adding the ACO-4400A by specifying its IP address and providing it with a unique name for identification within the Tree View.
- Page 79 The ACO-4400A includes three DashBoard interfaces that display as sub-nodes: Slot 0: ACO-4400A, Slot 1: Channel Setup, and Slot 16: System Setup. Each interface is accessed by expanding the main ACO-4400A node in the DashBoard Tree View and double-clicking the appropriate sub-node.
- Page 80 Slot 0 - ACO-4400A Interface The Slot 0 - ACO-4400A interface includes tabs that report the overall status of the hardware and software. Example of Slot 0 - ACO-4400A Interface in DashBoard Status Tabs The following read-only tabs display in the left side of the interface window.
- Page 81 “ +3v3 Regulator 42 Depending on the exact configuration and options in the ACO-4400A, one or more of the sensors might not be installed. In this case, the description in the relevant line appears as: ACO-4400A User Manual (Iss. 03)
- Page 82 6th Error PSU Status Tab The PSU Status tab enables you to monitor the power supply units in use by the ACO-4400A. From this tab you can review the following for each PSU: overall status, and the number of hours in use.
- Page 83 The Status tab provides read-only information on the auto recover settings, and monitors the errors encountered on the primary and backup channels. This information is a duplicate of the fields on the Slot 0: ACO-4400A interface as outlined in Table 6.2 on page 6-6. Configuration Tab The Configuration tab enables you to specify the auto recover settings.
- Page 84 If the Changeover Mode is set to Manual, use the On Air menu to specify which SPG-4400 is on air. There are two options: Backup is On Air and Primary is On Air. Auto Recovery Settings The menus in this area enable you to specify the behavior of the ACO-4400A when the primary SRG-4400 goes off-line. •...
- Page 85 The number channels displayed is determined by the No of Channels menu in the Configuration tab. No ancillary signals present, i.e. only Sync & Burst. With one or some ancillary signals present. ACO-4400A User Manual (Iss. 03) DashBoard Menu System • 6–9...
- Page 86 The Status tab provides read-only information on the auto recover settings, and monitors the errors encountered on the primary and backup channels. This information is a duplicate of the fields on the Slot 0: ACO-4400A interface as outlined in Table 6.2 on page 6-6. Network Tab The Network tab includes two sub-tabs: Ethernet and SNMP.
- Page 87 Calibration Procedure. Contact Ross Video for further instructions. For More Information on... • on calibrating your ACO-4400A, refer to the chapter “Calibration Procedure” on page 9-1. Enabling Manual Calibration The Enable manual Calibration box enables the user to start the calibration process at the channel number selected in the previous menu line.
- Page 88 Table 6.5 Channel Calibration Primary Backup Signal Channel Type Signal Fail Signal Fail Signal Signal 6–12 • DashBoard Menu System ACO-4400A User Manual (Iss. 03)
- Page 89 Specifications In This Chapter This chapter lists the electrical, mechanical, and environmental characteristics, as well as the national and international standards to which the ACO-4400A complies. Note that specifications are subject to change without notice. The following topics are discussed: •...
- Page 90 The electrical characteristics listed on the following pages are valid under the following conditions: • The ACO-4400A must be in an environment where the temperature, altitude, humidity, and vibration conditions are within the operating limits described in the section “Balanced (Unmonitored Channels, Relay Changeover)” on page 7-4.
- Page 91 30V DC (30V AC) Voltage Maximum Switched 0.5A Current Based on Relay characteristics: Set time: typ. 3.5 ms, Relay Switch Time Release time: typ. 2.5 ms, Set/Release: max. 10mS <1ns Insertion Delay ACO-4400A User Manual (Iss. 03) Specifications • 7–3...
- Page 92 48 V DC (24 V AC) Voltage Maximum Switched Current Based on Relay characteristics: Set time: max. 3 ms, Relay Switch Time Release time: max. 2 ms, Set/Release: min. 9mS. <1ns Insertion Delay 7–4 • Specifications ACO-4400A User Manual (Iss. 03)
- Page 93 — This port is not implemented. Table 7.3 RS-232 Interface Category Performance Requirement Reference Information Molex® MicroClasp™ 2mm, 30-pin Connector Type Pin 2: GND Outputs Pin 4: RS232 TX Pin 3: RS232 RX Inputs ACO-4400A User Manual (Iss. 03) Specifications • 7–5...
- Page 94 Ethernet Interface Table 7.4 Ethernet Interface Category Performance Requirement Reference Information 1 x RJ45 - 8P8C Connector Type IEEE 802.31-1990 10BASE-T IEEE Standards Compliance IEEE 802.3u-1995 100BASE-TX 7–6 • Specifications ACO-4400A User Manual (Iss. 03)
- Page 95 Fuse identification marking T2A H250V < 130mA @ 230VAC Operational AC Current < 200mA @ 120VAC <40A @ 230VAC Surge Current <20A @ 120VAC 46VA (~ 21W - calculated) Power Consumption Each PSU ACO-4400A User Manual (Iss. 03) Specifications • 7–7...
- Page 96 2.65m/s2 (0.27Grms), 5Hz to 500Hz, Operating 10 minutes per axis, three axes Vibration 22.3m/s2 (2.28Grms), 5Hz to 500Hz, Non-operating 10 minutes per axes, three axes Non-operating 294m/s2 (30G), half-sine, 11ms Shock duration 7–8 • Specifications ACO-4400A User Manual (Iss. 03)
- Page 97 Connector Pinouts In This Chapter This chapter lists the pinouts of various multi-way connectors available on the rear panel of the ACO-4400A. Note that specifications are subject to change without notice. The following topics are discussed: • Balanced Signal Connectors •...
- Page 98 Table 8.1 applies to the three 30-pin, Molex® 2mm micro-clasp connector located on the ACO-4400A rear panel. Table 8.1 Balanced Pinouts Signal/Function Ground Ground LTC1-4/AES1-8/DARS/2.0484MHz LTC1-4/AES1-8/DARS/2.0484MHz LTC1-4/AES1-8/DARS/2.0484MHz LTC1-4/AES1-8/DARS/2.0484MHz LTC1-4/AES1-8/DARS/2.0484MHz LTC1-4/AES1-8/DARS/2.0484MHz LTC1-4/AES1-8/DARS/2.0484MHz LTC1-4/AES1-8/DARS/2.0484MHz AES2 AES1 DARS AUD1 Left AUD2 Right Ground Ground 8–2 • Connector Pinouts ACO-4400A User Manual (Iss. 03)
- Page 99 Connector Pinout Assignment Figure 8.1 illustrates the pinout assignment on the ACO-4400A rear panel, and Figure 8.2 illustrates the mating connector on the Interface Cable. Figure 8.1 Chassis Connectors (Molex #55959-3030) Figure 8.2 Mating Connectors (Molex #51353-3000) ACO-4400A User Manual (Iss. 03)
- Page 100 RS232 - TX GP Input 1 - TTL compatible GP Input 2 - TTL compatible GP Output 1 - Open Collector GP Output 2 - Open Collector ONAIR - Open Collector Ground 8–4 • Connector Pinouts ACO-4400A User Manual (Iss. 03)
- Page 101 Pin Views of Chassis Connectors Connectors are Molex™ Micro Clasp 2mm series. Figure 8.3 Chassis Connectors (Molex #55959-1030) Figure 8.4 Mating Connectors (Molex # 51353-1000) ACO-4400A User Manual (Iss. 03) Connector Pinouts • 8–5...
- Page 102 8–6 • Connector Pinouts ACO-4400A User Manual (Iss. 03)
- Page 103 Calibration Procedure In This Chapter This chapter provides an overview of the characters available for use in idents. The following topics are discussed: • Overview • Calibrating the ACO-4400A ACO-4400A User Manual (Iss. 03) Calibration Procedure • 9–1...
- Page 104 The Calibration Menu contains fundamental settings relating to the functionality and accuracy of the ACO-4400A. These settings are programmed during initial testing and through subsequent configuration and alignment. It is a good idea to make a manual record of these settings in case they become corrupted or are inadvertently changed.
- Page 105 Calibrating the ACO-4400A The ACO-4400A Calibration Procedure should ideally be performed on a test bench. Easy access to the rear panel BNCs is required. The following specific equipment is required to perform this procedure: • At least 2 x 75ohm BNC terminations (certified) •...
- Page 106 9–4 • Calibration Procedure ACO-4400A User Manual (Iss. 03)
- Page 107 Service Information In This Chapter This chapter contains procedures for cleaning and performing preventive maintenance on the ACO-4400A, general servicing information, and the warranty policies. The following topics are discussed: • User Maintenance • Troubleshooting Checklist • Warranty and Repair Policy ACO-4400A User Manual (Iss.
- Page 108 Clean the instrument whenever needed (using the guidelines outlined above), based on the operating environment. Dirty conditions may require more frequent cleaning than a conventional “clean room” environment. 10–2 • Service Information ACO-4400A User Manual (Iss. 03)
- Page 109 If your problem cannot be resolved, contact Ross Video for further advice. If you ordered a Service Option, then removing the unit from the bay and returning it to Ross Video for updating will provide the user with the opportunity to inspect the unit for any problems relating to the operating conditions/environment.
- Page 110 Troubleshooting Checklist Routine maintenance to this Ross Video product is not required. In the event of problems with your ACO-4400A, the following basic troubleshooting checklist may help identify the source of the problem. If the unit still does not appear to be working properly after checking all possible causes, please contact your Ross Video products distributor, or the Technical Support department at the numbers listed under the “Contact Us”...
- Page 111 THREE (3) years from the date of shipment from our factory. In the event that your ACO-4400A proves to be defective in any way during this warranty period, Ross Video Limited reserves the right to repair or replace this piece of equipment with a unit of equal or superior performance characteristics.
- Page 112 Contact Us Contact our friendly and professional support representatives for the following: • Name and address of your local dealer • Product information and pricing • Technical support • Upcoming trade show information Telephone: +1 613 • 652 • 4886 Technical After Hours Emergency: +1 613 •...
Need help?
Do you have a question about the ACO-4400A and is the answer not in the manual?
Questions and answers