
Related Manuals for Westinghouse Havanna 7254635


Summary of Contents for Westinghouse Havanna 7254635
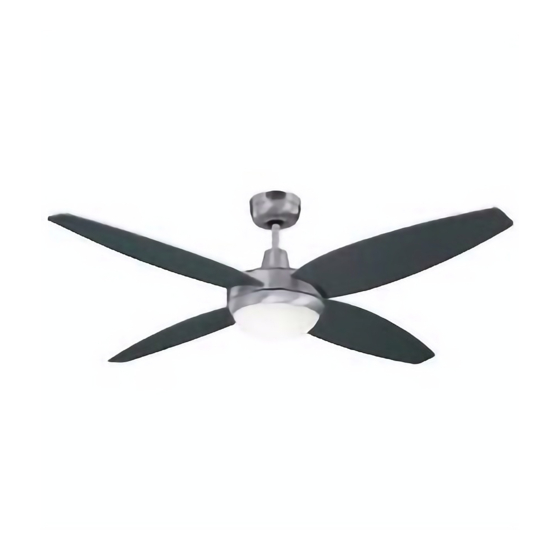
- Page 1 SAA-Havanna-Australia-WH18 OWner'S MAnuAl Havanna Please write model number here for future reference: / 7254635 leD Module#: SMJD-3V16W2P3 net Weight: 240V~50Hz...
-
Page 2: Safety Tips
SAA-Havanna-Australia-WH18 SAfETy TIpS READ AND SAVE THESE INSTRUCTIONS WARNING: TO REDUCE THE RISK OF FIRE, ELECTRIC SHOCK, OR INJURY TO PERSONS, OBSERVE THE FOLLOWING: 1. Proceed with caution. Read all instructions before beginning the installation. 2. Only an authorized electrician should execute the installation. 3. - Page 3 SAA-Havanna-Australia-WH18 FeAtureS DOWNROD INSTALLATION COMBO-BLADE Combo-Blades feature two high quality finishes on one blade. Select the one that best complements For normal ceilings your decor, or change the style with just a flip of the blade. NOTE: Combo-Blade finishes vary, depending upon model.
-
Page 4: Preparing For Installation
SAA-Havanna-Australia-WH18 PrePArInG FOr InStAllAtIOn Use metal outlet box suitable for fan support (must support 35 lbs). Before attaching fan to outlet box, ensure the outlet box is securely Unpack and inspect fan carefully to be certain all contents are included. fastened by at least two points to a structural ceiling member (a loose Turn off power at fuse box to avoid possible electrical shock. -
Page 5: Mounting Bracket Installation
SAA-Havanna-Australia-WH18 MOuntInG brACKet InStAllAtIOn WIrInG OPtIOnS Wiring: TERMINAL BLOCK From House: Connector: Light Live (L) Fan Live (L) Neutral (N) Ground Follow diagram above to make wiring connections to the terminal block on the mounting bracket. Install mounting bracket to outlet box in ceiling using the screws and washers provided with the outlet box. -
Page 6: Blade Installation
SAA-Havanna-Australia-WH18 blADe InStAllAtIOn Insert the blades through the slots on the motor housing as shown, and use the pro- vided blade screws and fabric washers to tighten the blades to the pre-attached blade Remove the two screws holding the decorative cover to the top of the motor housing. brackets. - Page 7 SAA-Havanna-Australia-WH18 MOuntInG blADe InStAllAtIOn Carefully lift fan assembly onto mounting bracket. Rotate fan until notch on Replace the decorative cover onto the top of the motor housing, securing with the downrod ball (1) engages the ridge on the mounting bracket (2). This will allow for two screws previously removed.
- Page 8 SAA-Havanna-Australia-WH18 SeCure tO CeIlInG MOuntInG Loosen the 2 screws on the bottom of mounting bracket. (do not remove) Raise the canopy up and align the keyholes on the bottom of the canopy with the 2 screws With bracket holding fan assembly, attach the male/female plug connection (1) from on the bottom of mounting bracket.
-
Page 9: Light Fixture Installation
SAA-Havanna-Australia-WH18 lIGHt FIxture InStAllAtIOn WAll COntrOl InStAllAtIOn LIGHT Locate the indentations on the neck of the glass and align with the protrusions on the inside Remove the front cover of the wall control by unsnapping the cover (1) from the of the light kit. - Page 10 SAA-Havanna-Australia-WH18 WIrInG tO tHe WAll COntrOl Connect the light control wire from the fan to the terminal block on the wire marked “For light - L”, as line art shown on “1”; Connect the 240V hot house wire to the terminal block on the wire marked “TO AC-L240V/50HZ”, as line art shown on “2”; Connect the fan control wire from the fan to the terminal block on the wire marked “For fan-L”, as line art shown on “3”.
- Page 11 SAA-Havanna-Australia-WH18 OPerAtIOn WAll COntrOl InStAll WAll COntrOl tO Outlet bOx Operation: Fan Rotary Control OFF - Fan Speed OFF 3 - Fan Speed HIGH 2 - Fan Speed MEDIUM 1 - Fan Speed LOW Operation: Light Switch LIGHT Light Off Light On When wiring is complete, make sure no bare wires are exposed from the terminal connections on the back of the fan control unit.
- Page 12 SAA-Havanna-Australia-WH18 InStAll WAll COntrOl tO Outlet bOx LIGHT Replace the front cover of the wall control unit by snapping the cover (1) onto the control unit (2).
-
Page 13: Operation And Maintenance
SAA-Havanna-Australia-WH18 OPERATION AND MAINTENANCE Operation Turn on the power and check operation of fan. The wall controls the fan speeds as follows: 1 - low; 2 - medium; 3 - high; 4 - off. Speed settings for warm or cool weather depend on factors such as room size, ceiling height, number of fans and so on. The slide switch controls direction, forward or reverse. Warm weather/down position - (Forward) Fan turns counterclockwise direction. -
Page 14: Troubleshooting Guide
SAA-Havanna-Australia-WH18 If you have difficulty operating your new ceiling fan, it may be the result of incorrect assembly, installation, or wiring. In some cases, these TROublEshOOTINg guIDE installation errors may be mistaken for defects. If you experience any faults, please check this Troubleshooting chart. If a problem cannot be remedied, please consult with your authorized electrician and do not attempt any electrical repairs yourself. -
Page 15: Parts List
SAA-Havanna-Australia-WH18 PARTs lIsT Description 1 ..... . Mounting Bracket 2 ..... . Blade 3 . - Page 16 SAA-Havanna-Australia-WH18 Westinghouse Lighting, Philadelphia, PA 1029-19154, U.S.A. www.westinghouselighting.com , WESTINGHOUSE, and INNOVATION YOU CAN BE SURE OF are trademarks of Westinghouse Electric Corporation. Used under license by Westinghouse Lighting All rights reserved. AS/NZS Approval No. SAA-181731-EA Made in China...
Need help?
Do you have a question about the Havanna 7254635 and is the answer not in the manual?
Questions and answers