Brother FAX-2480C User Manual
Brother fax machines user's guide
Hide thumbs
Also See for FAX-2480C:
- User manual (143 pages) ,
- Setup manual (18 pages) ,
- Quick setup manual (23 pages)
Table of Contents
Advertisement
Quick Links
Advertisement
Table of Contents

Related Manuals for Brother FAX-2480C


Summary of Contents for Brother FAX-2480C
- Page 1 USER’S GUIDE FAX-2480C FAX-2580C Version B...
- Page 2 Register your product on-line at http://www.brother.com/registration/ By registering your product with Brother, you will be recorded as the original owner of the product. Your registration with Brother: may serve as confirmation of the purchase date of your product should you lose your receipt;...
-
Page 3: Brother Numbers
Register your product By registering your product with Brother International Corporation, you will be recorded as the original owner of the product. Your registration with Brother: may serve as confirmation of the purchase date of your product should you lose your receipt;... -
Page 4: Service Center Locator (Usa Only)
For the location of a Brother authorized service center, call 1-877-BROTHER. Brother fax back system (USA only) Brother has installed an easy-to-use fax back system, so you can get instant answers to common technical questions and product information for all Brother products. This system is available 24 hours a day, 7 days a week. -
Page 5: Ordering Accessories And Supplies
If you cannot find the accessory you need and you have a Visa, MasterCard, Discover, or American Express credit card, you can order accessories directly from Brother. (In the USA, you can visit us online for a complete selection of the Brother accessories and supplies that are available for purchase.) -
Page 6: Compilation And Publication Notice
LIABILITY OR OTHERWISE), WILL BE LIMITED TO $50. Compilation and Publication Notice Under the supervision of Brother Industries Ltd., this manual has been compiled and published, covering the latest product descriptions and specifications. The contents of this manual and the specifications of this product are subject to change without notice. - Page 7 Consumable and Accessory Items at no charge to you for parts or labor. The decision as to whether to repair or replace the Machine and/or accompanying Accessory Items is made by Brother in its sole ® -brand parts and serial Brother...
- Page 8 PARTICULAR PURPOSE, ARE HEREBY DISCLAIMED. This Limited Warranty is the only warranty that Brother is giving for this Product. It is the final expression and the exclusive and only statement of Brother's obligations to you. It replaces all other agreements and understandings that you may have with Brother or its representatives.
- Page 9 This warranty states Brother's entire liability and your exclusive remedy against Brother for any failure of the MFC/Facsimile machine to operate properly. Neither Brother nor anyone else involved in the development, production, or delivery of this MFC/Facsimile machine shall be liable for any indirect, incidental, special, consequential, exemplary, or punitive damages, including lost profits, arising from the use of or inability to use the product, even if advised by the end user/purchaser of the possibility of such damages.
-
Page 10: Table Of Contents
Paper Size ...20 Volume Settings...20 Ring Volume ...20 Beeper Volume ...20 Speaker Volume ...21 Handset Volume (FAX-2480C only) ...21 Choosing the Handset Volume (For Volume Amplify) (FAX-2480C only) ...21 Setting Volume Amplify (FAX-2480C only)...22 Automatic Daylight Savings Time ...22 LCD display ...23 LCD Contrast ...23... - Page 11 Delayed Batch Transmission (Black & White only) ... 33 Checking and canceling waiting jobs...33 Sending a fax manually ... 34 Sending a fax at the end of a conversation (FAX-2480C only) ...34 Out of Memory message ... 34 Receiving a Fax Receive modes ...
- Page 12 Additional receiving operations ...39 Printing a reduced incoming fax ...39 Receiving a fax at the end of a conversation (FAX-2480C only) ...40 Printing a fax from the memory ...40 Telephone Services and External devices Voice operations ...41 Making a telephone call ...41 Answering calls with the Speaker Phone (FAX-2580C only)...41...
- Page 13 Managing your messages ... 58 Message Indicator ...58 Playing voice messages ...58 Printing fax messages ...58 Erasing incoming messages... 58 Additional Message Center operations... 59 Setting maximum time for incoming messages ... 59 Setting toll saver ...59 ICM Recording Monitor...60 Remote fax options (Black &...
- Page 14 Checking the print quality ...109 Checking the printing alignment ...110 Checking the ink volume ...111 Uninstalling the handset and handset cradle (FAX-2480C) ...111 Uninstalling and installing the cradle and the bracket (FAX-2580C) ...113 Machine Information ...114 Checking the serial number ...114...
- Page 15 Menu and Features On-screen programming... 118 Menu table ...118 Memory storage... 118 Menu keys ... 119 Menu Table...120 Entering Text ...127 Specifications General... 128 Print media... 130 Fax... 131 Message Center (FAX-2580C only) ... 132 Digital Cordless Handset (FAX-2580C only) ... 133 Cordless handset...
- Page 17 Section I General General Information Loading documents and paper General setup Security features...
- Page 18 Chapter 1...
-
Page 19: General Information
General Information Using the documentation Thank you for buying a Brother machine! Reading the documentation will help you make the most of your machine. Symbols and conventions used in the documentation The following symbols and conventions are used throughout the documentation. -
Page 20: Control Panel Overview
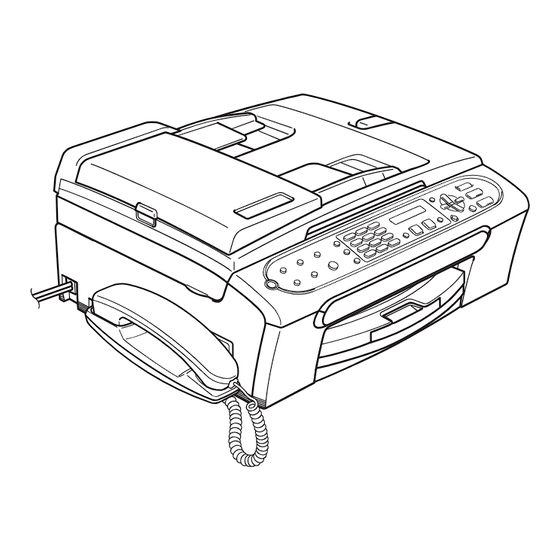
Chapter 1 Control panel overview FAX-2480C FAX-2580C... - Page 21 General Information Note Most of the illustrations in this User’s Guide show the FAX-2480C.
- Page 22 3 Shift When held down, lets you access the One- Touch numbers in the gray squares. 4 Ink (FAX-2480C) Lets you clean the print head, check the print quality, and check the available ink volume. 5 Fax Resolution Lets you temporarily change the resolution when sending a fax.
-
Page 23: Loading Documents And Paper
Loading documents and paper Loading documents You can send a fax, make copies, and scan from the ADF (automatic document feeder) and from the scanner glass. Using the ADF The ADF can hold up to 10 pages and feeds each sheet individually. Use standard 20 lb (80 g/m ) paper and always fan the pages before putting them in the ADF. -
Page 24: Using The Scanner Glass
Chapter 2 Using the scanner glass You can use the scanner glass to fax, copy or scan pages of a book or one page at a time. Document Sizes Supported Length: Up to 11.7 in. (297 mm) Width: Up to 8.5 in. (215.9 mm) Weight: Up to 4.4 lb (2 kg) How to load documents... -
Page 25: Scannable Area
Paper Type setting of the menu (See Right (4) Paper Type on page 20). 0.16 in. When you print on Brother photo paper, (4 mm) load the instruction sheet included with the 0.04 in. photo paper in the paper tray first, and... -
Page 26: Recommended Media
Chapter 2 Recommended media To get the best print quality, we suggest using Brother paper. (See table below.) We recommend using ‘3M Transparency Film’ when you print on transparencies. Brother paper Paper Type Item Letter Plain BP60PL (USA only) Letter Glossy Photo... -
Page 27: Choosing The Right Media
Choosing the right media Paper type and size for each operation Paper Type Paper Size Cut Sheet Letter Legal Executive JIS B5 Cards Photo Photo 2L Index Card Post Card 1 Post Card 2 (Double) Envelopes C5 Envelope DL Envelope COM-10 Monarch JE4 Envelope... -
Page 28: Paper Weight, Thickness And Capacity
Chapter 2 Paper weight, thickness and capacity Paper Type Weight Plain Paper 17 to 32 lb (64 to 120 g/m Sheet Inkjet Paper 17 to 53 lb (64 to 200 g/m Glossy Paper Up to 58 lb (Up to 220 g/m Cards Photo 4"... -
Page 29: Loading Paper And Other Media
Loading paper and other media If the paper support flap is open, close it, and then pull the paper tray completely out of the machine. Lift the output paper tray cover (1). Loading documents and paper Press and slide the paper side guides (1) and paper length guide (2) to fit the paper size. - Page 30 Chapter 2 Gently put the paper into the paper tray print side down and top edge first. Check that the paper is flat in the tray. Note When you use Legal size paper, press and hold the universal guide release button as you slide out the front of the paper tray.
-
Page 31: Loading Envelopes And Post Cards
Slowly push the paper tray completely into the machine. While holding the paper tray in place, pull out the paper support (1) until it clicks and unfold the paper support flap (2). Note Do not use the paper support flap for Legal paper. -
Page 32: Removing Small Printouts From The Machine
Chapter 2 How to load envelopes and post cards Before loading, press the corners and sides of the envelopes or post cards to make them as flat as possible. Note If the envelopes or post cards are ‘double- feeding,’ put one envelope or post card in the paper tray at a time. -
Page 33: Printable Area
Printable Area The printable area depends on the settings in the application you are using. The figures below show the unprintable areas on cut sheet paper and envelopes. The machine can only print in the shaded areas when the Borderless print feature is available and turned on. Cut Sheet Paper Top (1) Cut Sheet... -
Page 34: General Setup
General setup On/Off key When the machine is idle, you can turn it on and off by pressing the On/Off key. Note If you have connected an external telephone or TAD, it is always available. Turning the machine off Press and hold down the On/Off key until the LCD shows Shutting Down. -
Page 35: Mode Timer
Fax/Tel You cannot receive a fax with Black Start or Color Start. You can receive telephone calls by lifting the handset (FAX-2480C) or using the cordless handset (FAX-2580C). FAX-2480C (FAX-2580C) When an external TAD is connected and Easy Receive is turned on. -
Page 36: Paper Settings
To get the best print quality, set the machine for the type of paper you are using. Press Menu, 1, 2. Press a or b to choose Plain Paper, Inkjet Paper, Brother Photo, Other Photo or Transparency. Press OK. Press Stop/Exit. -
Page 37: Speaker Volume
This setting will stay until you change it again. Press Hook/Hold or Speaker Phone. Handset Volume (FAX-2480C only) Press Menu, 1, 4, 4. Press a or b to choose Low or High. Press OK. Press Stop/Exit. You can also adjust the handset volume any time you are talking on the telephone. -
Page 38: Setting Volume Amplify (Fax-2480C Only)
Setting Volume Amplify (FAX-2480C only) Please carefully read Choosing the Handset Volume (For Volume Amplify) (FAX-2480C only) on page 21 before you do the following steps: Press Menu, 1, 4, 5. Do one of the following:... -
Page 39: Lcd Display
LCD display LCD Contrast You can adjust the LCD contrast for a sharper and more vivid display. If you are having difficulty reading the LCD, try changing the contrast setting. Press Menu, 1, 7. Press a or b to choose Light or Dark. -
Page 40: Security Features
NOT available: Sending faxes Copying Note If you forget the TX Lock password, please call Brother Customer Service. Setting and changing the TX Lock password Note If you have already set the password, you will not need to set it again. -
Page 41: Turning The Tx Lock On/Off
Copying Cordless handset • Intercom • Transfer a call • Register cordless handset Note • To print the faxes in memory, turn off Memory Security. • If you forget the Memory Security password, please call Brother Customer Service. Security features... -
Page 42: Setting And Changing The Memory Security Password
Chapter 4 Setting and changing the memory security password Note If you have already set the password, you will not need to set it again. Setting a password for the first time Press Menu, 2, 0, 1. Enter a 4-digit number for the password. Press OK. - Page 43 Section II Sending a fax Receiving a Fax Telephone Services and External devices Dialing and storing numbers Message Center (FAX-2580C only) Remote fax options (Black & White only) Printing Reports Polling...
-
Page 44: Sending A Fax
Sending a fax Entering Fax mode To enter fax mode, press (Fax), and the key will glow green. The LCD will show the new job number and the memory available.The number of pages you can scan into the memory will vary depending on the data that is printed on them. -
Page 45: Faxing A4 Size Documents From The Scanner Glass
Note • If you did not use up any of the numbers for Groups, you can ‘broadcast’ faxes to as many as 140 (FAX-2480C) or 154 (FAX-2580C) different numbers. • The available memory will vary depending on the types of jobs in the memory and the number of locations used for broadcasting. -
Page 46: Canceling A Broadcast In Progress
Chapter 5 Canceling a Broadcast in progress Press Menu, 2, 6. The LCD will show the fax number being dialed. Press OK. The LCD will show the job number: XXXXXXXX 1.Clear 2.Exit Press 1 to clear. The LCD will then show the Broadcast job number and 1.Clear 2.Exit. -
Page 47: Contrast
Contrast If your document is very light or very dark, you may want to change the contrast. Use Light when sending a light document. Use Dark when sending a dark document. Make sure you are in Fax mode Load your document. Press Menu, 2, 2, 1. -
Page 48: Dual Access (Black & White Only)
Chapter 5 Dual access (Black & White only) You can dial a number and start scanning the fax into memory—even when the machine is sending from memory, receiving faxes or printing PC data. The LCD shows the new job number and available memory. The number of pages you can scan into the memory will vary depending on the data that is printed on them. -
Page 49: Overseas Mode
Overseas Mode If you are having difficulty sending a fax overseas due to possible interference on the phone line, we recommend that you turn on the Overseas mode. After you send a fax using this feature, the feature will turn itself off. -
Page 50: Sending A Fax Manually
Make sure you are in Fax mode Load your document. To listen for a dial tone do one of the following: (FAX-2480C) Press Hook/Hold or pick up the handset. (FAX-2580C) Press Speaker Phone on the machine. Dial using the machine’s dial pad. -
Page 51: Receiving A Fax
The diagrams below will help you choose the correct mode. For more detailed information about the receive modes see page 37. Choosing the Receive Mode FAX-2480C Do you use a Distinctive Ring subscriber service? Are you connecting an external telephone or external TAD (telephone... - Page 52 (telephone answering device)? To set a receive mode, follow the instructions below. Press Menu, 0, 1. Press a or b to choose Fax Only, Fax/Tel, External TAD (FAX-2480C only) or Manual. Press OK. Press Stop/Exit. See Message Center. See Distinctive Ring.
-
Page 53: Using Receive Modes
(See Message Center Mode on page 56.) External TAD (FAX-2480C only) External TAD mode lets an external answering device manage your incoming calls. Incoming calls will be handled in one of the following ways: Faxes will be automatically received. -
Page 54: Receive Mode Settings
Chapter 6 Receive mode settings Ring Delay The Ring Delay sets the number of times the machine rings before it answers in Fax Only or Fax/Tel mode. If you have external or extension phones on the same line as the machine or subscribe to the telephone company’s Distinctive Ring service, keep the ring delay setting of 4. -
Page 55: Easy Receive
Easy Receive If Easy Receive is On: The machine receives a fax call automatically, even if you answer the call. When you see Receiving on the LCD or when you hear “chirps” through the handset you are using, just replace the handset. Your machine will do the rest. -
Page 56: Receiving A Fax At The End Of A Conversation (Fax-2480C Only)
Chapter 6 Receiving a fax at the end of a conversation (FAX-2480C only) At the end of a conversation you can ask the other party to send you a fax before you both hang up. Ask the other party to place the document in their machine and to press Start or Send key. -
Page 57: Telephone Services And External Devices
If you have FAX-2580C, see the Digital Cordless Handset User’s Guide. Making a telephone call Do one of the following: (FAX-2480C) Pick up the handset. (FAX-2580C) Pick up the cordless handset and press (Talk) or press Speaker Phone on the machine. -
Page 58: Tone Or Pulse (Canada Only)
When the machine is in Fax/Tel mode, it will use the F/T Ring Time (pseudo/double- ringing) to alert you to pick up a voice call. (FAX-2480C) If you are at the machine, you can lift the handset. (FAX-2580C) Use the cordless handset or press Speaker Phone on the machine to answer. -
Page 59: Telephone Services
If you have Voice Mail on your phone line, please read the following carefully. Distinctive Ring Brother uses the term ‘Distinctive Ring’ but different telephone companies have other names for this service such as SmartRing, RingMaster, Teen-Ring, Indent-a-Call or Indent-a-Ring. - Page 60 Before you choose the ring pattern to register You can only register one Distinctive Ring pattern with the machine. Some ring patterns cannot be registered. The ring patterns below are supported by your Brother machine. Register the one your telephone company gives you. Ring Rings...
-
Page 61: Caller Id
Caller ID The Caller ID feature lets you use the Caller ID subscriber service offered by many local telephone companies. Call your telephone company for details. This service shows the telephone number, or name if it is available, of your caller as the line rings. After a few rings, the LCD shows the telephone number of your caller (and name, if available). -
Page 62: Connecting An External Tad (Telephone Answering Device)
Chapter 7 Connecting an external TAD (telephone answering device) You may choose to connect an external answering device. However, when you have an external TAD on the same telephone line as the machine, the TAD answers all calls and the machine ‘listens’ for fax calling (CNG) tones. -
Page 63: Recording An Outgoing Message (Ogm) On An External Tad
Set the TAD to answer calls. Do one of the following: (FAX-2480C) Set the Receive Mode to External TAD. (See Choosing the Receive Mode on page 35.) (FAX-2580C) Set the Receive Mode to Manual with Easy Receive turned Recording an outgoing... -
Page 64: Converting Telephone Wall Outlets
Chapter 7 Converting telephone wall outlets There are three ways to convert to an RJ11 jack. The first two ways may require help from the telephone company. You can change the wall outlets from one RJ14 jack to two RJ11 jacks. -
Page 65: Multi-Line Connections (Pbx)
Multi-line connections (PBX) We suggest you ask the company who installed your PBX to connect your machine. If you have a multi line system we suggest you ask the installer to connect the unit to the last line on the system. This prevents the machine being activated each time the system receives telephone calls. -
Page 66: Using A Non-Brother Cordless External Telephone (Fax-2480C Only)
Receive on page 39.) Using a non-Brother cordless external telephone (FAX-2480C only) If your non-Brother cordless telephone is connected to the EXT. jack of the machine and you typically carry the cordless handset elsewhere, it is easier to answer calls during the Ring Delay. -
Page 67: Dialing And Storing Numbers
Press all of the digits of the fax number. One-Touch dialing Press the One-Touch key that stores the number you want to call. (FAX-2480C) (FAX-2580C) To dial the One-Touch numbers shown in the gray squares, hold down Shift as you press the One-Touch key. -
Page 68: Search
Chapter 8 Search You can search for names you have stored in the One-touch and Speed-Dial memories. Press Search/Speed Dial and the navigation keys to search, or use the dial pad to search alphabetically. 1 To search numerically. 2 To search alphabetically, you can use the dial pad to enter the first letter of the name you are looking for. -
Page 69: Storing Numbers
Entering Text on page 127 to help you enter letters. Press OK. Press OK to store the number without a name. Do one of the following: To store another One-Touch number, go to step b. To finish storing One-Touch numbers press Stop/Exit. (FAX-2480C) (FAX-2580C) -
Page 70: Storing Speed-Dial Numbers
Chapter 8 Storing Speed-Dial numbers You can store up to 80 (FAX-2480C) or 100 (FAX-2580C) 2-digit Speed-Dial locations with a name. When you dial you will only have to press a few keys (For example: Search/Speed Dial, #, the two-digit number, and Black Start or Color Start). -
Page 71: Setting Up Groups For Broadcasting
One-Touch or Speed-Dial numbers. You can have up to six small Groups, or you can assign up to 79 (FAX-2480C) or up to 99 (FAX-2580C) numbers to one large Group. Press Menu, 2, 3, 3. -
Page 72: Message Center (Fax-2580C Only)
Message Center (FAX-2580C only) Message Center Mode The Message Center feature will store up to 99 incoming messages. Messages are stored in the order in which they are received. Voice messages can be up to 3 minutes in length, and can also be picked up remotely (See Setting a Remote Access Code on page 64.) The number of messages you can store will depend on how much... -
Page 73: Fax/Tel Ogm (Announcement)
(Announcement) If your machine is set to Fax/Tel receive mode, this message will be played by your Brother machine to a caller. Unlike the Msg Ctr OGM, the caller will not be able to leave a message. To record your Fax/Tel OGM, follow the instructions on page 56 and choose F/T OGM (not Msg Ctr OGM). -
Page 74: Managing Your Messages
Chapter 9 Managing your messages Message Indicator light flashes if you have any new messages waiting for you.The LCD displays the total number of voice and fax messages stored in the Message Center memory. Voice:03 Fax:00 Fax messages are only stored when Fax Storage is turned on. -
Page 75: Additional Message Center Operations
To erase all of your messages Press Erase. Press a or b to choose one of the options below. Then press OK. Erase All Voice? All voice message All fax messages Erase All Fax? All voice and fax Erase All Msg.? message Do one of the following: Press 1 to erase all of your... -
Page 76: Icm Recording Monitor
Chapter 9 Press a or b to choose Toll Saver. Press OK. Press a or b to choose On (or Off). Press OK. Press Stop/Exit. ICM Recording Monitor This feature lets you turn the speaker volume for voice messages On or Off. When you turn the monitor Off, you will not hear messages as they come in. -
Page 77: Remote Fax Options (Black & White Only)
Remote fax options (Black & White only) You can only use one remote fax option at a time: Fax Forwarding Paging Fax Storage You can change your selection at any time. If received faxes are still in the machine’s memory when you change the remote fax options, an LCD question will appear. -
Page 78: Paging
Chapter 10 Paging When you choose Paging, your machine dials the pager number you have programmed, and then dials your PIN (Personal identification Number). This activates your pager so you will know that you have a fax message in the memory. If you have set Paging, a backup copy of the received fax will automatically be printed at the machine. -
Page 79: Turning Off Remote Fax Options
Turning off Remote Fax Options Press Menu, 2, 5, 1. 1.Fwd/Page/Store Press a or b to choose Off. Press OK. Note The LCD will give you options if there are received faxes still in your machine’s memory. (See Changing Remote Fax Options on page 63.) Press Stop/Exit. -
Page 80: Remote Retrieval
Chapter 10 Remote Retrieval You can call your machine from any touch tone telephone or fax machine, then use the remote access code and remote commands to retrieve fax messages. Setting a Remote Access Code The remote access code lets you access the remote retrieval features when you are away from your machine. -
Page 81: Remote Fax Commands
Fax Forwarding number on page 67.) Once you have registered the number, Fax Forwarding will work. Enter the number of a remote fax machine to receive stored fax messages. (See Retrieving fax messages on page 67.) If you hear one long beep, fax messages have been erased from the memory. - Page 82 Chapter 10 Remote commands Check the receiving status (FAX-2580C only) 1 Fax 2 Voice Change the Receive Mode (FAX-2480C only) 1 External TAD 2 Fax/Tel 3 Fax Only Change the Receive Mode (FAX-2580C only) 1 Msg Ctr 2 Fax/Tel 3 Fax Only...
-
Page 83: Retrieving Fax Messages
Press 9 0 to reset the machine when you’ve finished. Hang up after you hear your machine beep. Your machine will call the other fax machine, which will then print your fax messages. Remote fax options (Black & White only) Changing your Fax... -
Page 84: Printing Reports
Printing Reports Fax reports You need to set up the Transmission Verification Report and Journal Period using the Menu keys. Transmission Verification Report You can use the Transmission Report as proof that you sent a fax. This report lists the time and date of transmission and whether the transmission was successful (OK). -
Page 85: Reports
Reports The following reports are available: 1.Transmission Prints a Transmission Verification Report for your last transmission. 2. Help List A help list about how to quickly program your machine. 3. Quick-Dial Lists names and numbers stored in the One-Touch and Speed-Dial memory, in numerical order. -
Page 86: Polling
It also lets you call somebody else’s fax machine and receive a fax from it, so you pay for the call. The polling feature needs to be set up on both machines for this to work. -
Page 87: Polled Transmit (Black & White Only)
The document will be stored and can be retrieved by any other fax machine until you delete it from the memory. (See Checking and canceling waiting jobs on page 33.) - Page 88 Chapter 12...
-
Page 89: Section Iii Copy
Section III Copy Making copies... -
Page 90: Making Copies
Making copies How to copy Entering Copy mode Press (Copy) to enter Copy mode. The default setting is Fax. You can change the number of seconds or minutes that the machine stays in Copy mode. (Mode Timer on page 19.) The LCD shows the default copy setting: 1 Copy Ratio 2 Quality... -
Page 91: Copy Options
Press Quality Normal Fast Best Enlarge/ 50%/69%/78%/ Reduce 83%/93%/97%/ 100%/104%/142%/ 186%/198%/200%/ Custom(25-400%) Paper Type Plain Paper Inkjet Paper Brother Photo Other Photo Transparency Paper Size Letter Legal 4”(W)× 6”(H) Brightness -nnonn+ Stack/ Stack Sort Sort Page Off(1 in 1) Layout... -
Page 92: Changing Copy Quality
Chapter 13 Changing copy quality You can choose from a range of quality settings. The default setting is Normal. To temporarily change the quality setting, follow the instruction below: Press Normal Normal is the recommended mode for ordinary printouts. This produces good copy quality with good and then... -
Page 93: Making N In 1 Copies Or A Poster
Choose one of the options below: to choose the enlargement or reduction ratio you want. Press OK. Use a or b to choose Custom (25–400%). Press OK. Use the dial pad to enter an enlargement or reduction ratio from 25% to 400%. (For example, press 5 3 to enter 53%.) Press OK. -
Page 94: Sorting Copies Using The Adf (Black & White Only)
Chapter 13 Place your document face down in the direction shown below: 2 in 1 (P) 2 in 1 (L) 4 in 1 (P) 4 in 1 (L) Poster (3x3) You can make a poster size copy of a photograph. Sorting copies using the ADF (Black &... -
Page 95: Adjusting Brightness, Contrast And Color
Adjusting Brightness, Contrast and Color Brightness To temporarily change the brightness setting, follow the instruction below: Make sure you are in Copy mode Load your document. Use the dial pad to enter the number of copies (up to 99). Press Copy Options and a or b to choose Brightness. -
Page 96: Paper Options
Paper Type. Press OK. Press to choose the type of paper you are using (Plain Paper, Inkjet Paper, Brother Photo, Other Photo or Transparency). Press OK. Press Black Start or Color Start. Note To change the default paper type setting see Paper Type on page 20. - Page 97 Section IV Appendixes Safety and Legal Troubleshooting and Routine Maintenance Menu and Features Specifications Glossary...
-
Page 98: Safety And Legal
• DO NOT connect your machine to electrical outlets on the same circuit as large appliances or other equipment that might disrupt the power supply. • Avoid interference sources, such as speakers or the base units of non-Brother cordless phones. -
Page 99: To Use The Machine Safely
AC power outlet for more than 24 hours. (To print the faxes in memory, see Printing a fax from the memory on page 40. To save the faxes in memory, see Transferring faxes to another fax machine on page 101.) WARNING There are high voltage electrodes inside the machine. - Page 100 DO NOT put your hands on the edge of the machine under the document cover or the scanner cover. Doing this may cause injury. DO NOT put your hands on the edge of the paper tray under the output paper tray cover. Doing this may cause injury.
- Page 101 AC power outlet. Call Brother Customer Service (See Brother numbers on page i.). If metal objects, water or other liquids get inside the machine, immediately unplug the machine from the AC power outlet. Call Brother Customer Service. (See Brother numbers on page i.)
- Page 102 WARNING • Use caution when installing or modifying telephone lines. Never touch telephone wires or terminals that are not insulated unless the telephone line has been unplugged at the wall jack. Never install telephone wiring during a lightning storm. Never install a telephone wall jack in a wet location.
-
Page 103: Important Safety Instructions
Refer all servicing to a Brother Authorized Service Center. For the location of your nearest Brother Authorized Service Center, please call the following:... -
Page 104: Standard Telephone And Fcc Notices (These Notices Are In Effect On Models Sold And Used In The United States Only)
15 Unplug this product from the AC power outlet and refer all servicing to Brother Authorized Service Personnel under the following conditions: When the power cord is damaged or frayed. If liquid has been spilled into the product. If the product has been exposed to rain or water. - Page 105 If you have questions about what will disable alarm equipment, call your telephone company or a qualified installer. If you are not able to solve a problem with your machine, call Brother Customer Service. (See Brother numbers on page i.)
-
Page 106: Federal Communications Commission (Fcc) Declaration Of Conformity (Usa Only)
OET65. This equipment should be installed and operated with at least 20cm and more between the radiator and person’s body (excluding extremities: hands, wrists, feet and legs). IMPORTANT Changes or modifications not expressly approved by Brother Industries, Ltd. could void the user's authority to operate the equipment. -
Page 107: Industry Canada Compliance Statement (Canada Only)
Industry Canada Compliance Statement (Canada only) This Class B digital apparatus complies with Canadian ICES-003. Cet appareil numérique de la classe B est conforme à la norme NMB-003 du Canada. Legal limitations for copying Color reproductions of certain documents are illegal and may result in either criminal or civil liability. -
Page 108: Trademarks
Trademarks The Brother logo is a registered trademark of Brother Industries, Ltd. Brother is a registered trademark of Brother Industries, Ltd. Multi-Function Link is a registered trademark of Brother International Corporation. © 2006 Brother Industries, Ltd. All rights reserved. Windows and Microsoft are registered trademarks of Microsoft in the U.S. and other countries. -
Page 109: B Troubleshooting And Routine Maintenance
If you think there is a problem with your machine, check the chart below and follow the troubleshooting tips. Most problems can be easily resolved by yourself. If you need additional help, the Brother Solutions Center offers the latest FAQs and troubleshooting tips. Visit us at http://solutions.brother.com. -
Page 110: Phone Line Or Connections
You probably had a bad connection, with static or interference on the telephone line. Ask the other party to send the fax again. problem is with the sending machine. Try receiving from another fax machine. Replace the color ink cartridges that are empty or nearly empty, and then ask the other person to send the color fax again. -
Page 111: Receiving Faxes
Receiving Faxes Difficulty Cannot receive a fax Sending Faxes Difficulty Cannot send a fax Transmission Verification Report says ‘Result:NG’ or ‘Result:ERROR’. Poor fax send quality. Vertical black lines when sending. Troubleshooting and Routine Maintenance Suggestions Check all line cord connections. Make sure the machine is in the correct receiving mode for your setup. -
Page 112: Handling Incoming Calls
For example: If you subscribe to Call Waiting or some other custom service and its signal comes through the line while your machine is sending or receiving a fax, the signal can temporarily interrupt or disrupt the faxes. Brother's ECM feature should help overcome this problem. This condition is related to the telephone system industry and is common to all devices that send and receive information on a single, shared line with custom features. -
Page 113: Error Messages
As with any sophisticated office product, errors may occur. If this happens, your machine identifies the error and shows an error message. The most common error messages are shown below. You can correct most errors by yourself. If you need more help, the Brother Solutions Center offers the latest FAQs and troubleshooting tips. - Page 114 Open the scanner cover and remove any foreign objects inside the machine. If the error message continues, do one of the following: (FAX-2480C) See Transferring your faxes or Fax Journal report on page 101 before disconnecting the machine, so you will not lose any important messages.
- Page 115 Error Message Cause One or more of the ink cartridges Near Empty are running out of ink. If a sending machine has a color fax, the machine's ‘handshake’ will ask that the fax be sent as black and white. If the sending machine has the ability to convert it, the color fax will be received into memory as a black and white fax.
- Page 116 Open the scanner cover and remove any foreign objects inside the machine. If the error message continues, do one of the following: (FAX-2480C) See Transferring your faxes or Fax Journal report on page 101 before disconnecting the machine, so you will not lose any important messages.
-
Page 117: Transferring Your Faxes Or Fax Journal Report
Scan Unable XX or Tel Disabled XX, we recommend transferring your faxes to another fax machine. (See Transferring faxes to another fax machine on page 101.) You can also transfer the Fax Journal report to see if there are any faxes you need to transfer. -
Page 118: Printer Jam Or Paper Jam
Document is jammed inside the ADF unit Take out any paper from the ADF that is not jammed. Lift the document cover. Pull the jammed document out to the left. Close the document cover. Press Stop/Exit. Printer jam or paper jam Take out the jammed paper depending on where it is jammed in the machine. -
Page 119: Dial Tone
Put the Jam Clear Cover back on. Make sure the cover is set properly. Using both hands, use the plastic tabs on both sides of the machine to lift the scanner cover (1) until it locks securely into the open position. Make sure that there is no jammed paper left in the corners of the machine. -
Page 120: Phone Line Interference
Phone line interference If you are having problems sending or receiving a fax due to possible interference on the phone line, we recommend that you adjust the Equalization for compatibility to reduce the modem speed for fax operations. Press Menu, 2, 0, 2. Press a or b to choose Normal (or Basic). - Page 121 Each color has its own correct position. Insert the ink cartridge in the direction of the arrow on the label. brother Lift each lock release lever and push it until it clicks, and then close the ink cartridge cover.
-
Page 122: Cleaning The Outside Of The Machine
DO NOT dismantle or tamper with the ink cartridge, this can cause the ink to leak out of the cartridge. Brother strongly recommends that you do not refill the ink cartridges provided with your machine. We also strongly recommend that you continue to use only Genuine Brother Brand replacement ink cartridges. -
Page 123: Cleaning The Scanner
Clean the outside of the machine as follows: Pull the paper tray (1) completely out of the machine. Wipe the outside of the machine with a soft cloth to remove dust. Remove anything that is stuck inside the paper tray. Lift the output paper tray cover and wipe the inside and outside of the paper tray with a soft cloth to remove dust. -
Page 124: Cleaning The Machine Printer Platen
Cleaning the machine printer platen WARNING Unplug the machine from the AC power outlet before cleaning the printer platen (1). If ink is scattered on or around the printer platen, wipe it off with a soft, dry, lint-free cloth. Clean the machine printer platen (1). Cleaning the paper pick-up roller Pull the paper tray completely out of the... -
Page 125: Cleaning The Print Head
CAUTION DO NOT touch the print head. Touching the print head may cause permanent damage and may void the print head's warranty. Press Ink (FAX-2480C) or b (FAX-2580C). Press a or b to choose Cleaning. Press OK. Press a or b to choose Black, Color or All. -
Page 126: Checking The Printing Alignment
You may need to adjust the printing alignment after transporting the machine if your printed text becomes blurred or images become faded. Press Ink (FAX-2480C) or b (FAX-2580C). Press a or b to choose Test Print. Press OK. Press a or b to choose Alignment. -
Page 127: Checking The Ink Volume
Select Best #5 Press Stop/Exit. Checking the ink volume You can check the ink that is left in the cartridge. Press Ink (FAX-2480C) or b (FAX-2580C). Press a or b to choose Ink Volume. Press OK. The LCD shows the ink volume. -
Page 128: Installing The Handset And Handset Cradle
Attach the side cover. Installing the handset and handset cradle Remove the side cover. Note If you cannot open the cover with your hand, use a coin to open it. Align the recessed arrows on the cradle with those on the machine, and then slide the cradle toward the front of the machine until it clicks into place. -
Page 129: Uninstalling And Installing The Cradle And The Bracket (Fax-2580C)
Uninstalling and installing the cradle and the bracket (FAX-2580C) Uninstalling the cradle and the bracket If you want to use the cordless handset separately from the machine, you can remove the cradle and the bracket. Unplug the AC adapter from AC power outlet. -
Page 130: Machine Information
Align the recessed arrows on the bracket with those on the machine, and then slide the bracket toward the front of the machine until it clicks into place. Make sure you plug the connector into the jack (1) and route the cable through the hook (2) as shown below. -
Page 131: Packing And Shipping The Machine
Packing and shipping the machine When you transport the machine, use the packing materials that came with your machine. If you do not pack the machine properly, you could void your warranty. CAUTION It is important to allow the machine to ‘park’ the print head after a print job. - Page 132 Note If you are returning your machine to Brother as part of the Exchange Service, pack only the machine. Keep all separate parts and printed materials to use with your ‘Exchange’ machine.
- Page 133 Troubleshooting and Routine Maintenance (FAX-2480C) (FAX-2580C) Close the carton and tape it shut.
-
Page 134: C Menu And Features
Menu and Features On-screen programming Your machine is designed to be easy to use with LCD on-screen programming using the menu keys. User-friendly programming helps you take full advantage of all the menu selections your machine has to offer. Since your programming is done on the LCD, we have created step-by-step on-screen instructions to help you program your machine. -
Page 135: Menu Keys
Menu keys Access the menu. Go to the next menu level. Accept an option. Go back to the previous menu level. Delete an incorrect letter when you need to enter text into the machine. Scroll through the current menu level. Go back to the previous menu level. -
Page 136: Menu Table
Menu Selections Options — 0 Sec 30 Secs 1 Min 2 Mins* 5 Mins — Plain Paper* Inkjet Paper Brother Photo Other Photo Transparency — Letter* Legal 4”×6” to accept to exit Descriptions Page Sets the time to return to Fax mode. - Page 137 Main Menu Submenu Menu Selections 1.General 4.Volume 1.Ring Setup (Continued) 2.Beeper 3.Speaker 4.Handset (FAX-2480C only) 5.Volume Amplify (FAX-2480C only) — 5.Auto Daylight — 6.On/Off Setting — 7.LCD Contrast — 8.Echo Control (FAX-2580C only) The factory settings are shown in Bold with an asterisk.
- Page 138 (In Fax mode only) 2.Setup Send (In Fax mode only) The factory settings are shown in Bold with an asterisk. Menu Selections Options 1.Ring Delay (FAX-2480C only) 1.Ring Delay Ring Delay (FAX-2580C only) Toll Saver Off* 2.F/T Ring Time 20 Sec*...
- Page 139 Main Menu Submenu Menu Selections 2.Fax 2.Setup Send 3.Delayed Fax (Continued) (In Fax mode only) (Continued) 4.Batch TX 5.Real Time TX 6.Polled TX 7.Overseas Mode 0.Scan Size 3.Set Quick- 1.One-Touch Dial Dial 2.Speed-Dial 3.Setup Groups 4.Report 1.Transmission Setting 2.Journal Period The factory settings are shown in Bold with an asterisk.
- Page 140 1.OGM Msg Ctr OGM F/T OGM 2.ICM Max.Time 30 Sec* 60 Sec 120 Sec 180 Sec 3.ICM Rec.Monitr — 1.TX Lock (FAX-2480C only) — 1.Mem Security (FAX-2580C only) 2.Compatibility Normal* Basic 3.Distinctive Off* Set (On) 4.Caller ID Display#* Print Report...
- Page 141 Main Menu Submenu Menu Selections — 3.Copy 1.Quality — 2.Brightness — 3.Contrast 4.Color 1.Red Adjust 2.Green 3.Blue The factory settings are shown in Bold with an asterisk. Menu and Features Options Descriptions Chooses the Copy Best resolution for your type of Fast document.
- Page 142 Menu Selections Options — — — — — — — — — — — — — Fax Only* Fax/Tel External TAD (FAX-2480C only) Manual — — — Fax: Name: — Tone* Pulse — Detection No Detection* — — — English* French...
-
Page 143: Entering Text
Entering Text When you are setting certain menu selections, such as the Station ID, you may need to enter text into the machine. Most dial pad keys have three or four letters printed on keys. The keys for 0, # and l do not have printed letters because they are used for special characters. -
Page 144: Specifications
100 Sheets [20 lb (80 g/m Ink Jet Piezo with 94 × 1 nozzles Black: Piezo with 94 × 3 nozzles Color: AC 120 V 50/60 Hz (FAX-2480C) Off Mode: Average 4 W Standby: Average 6 W Operating: Average 29 W... - Page 145 (FAX-2580C) 7.1 in. (180 mm) 15.7 in. (398 mm) 18.7 in. (476 mm) 18.1 lb (8.2 kg) (FAX-2480C) 19 lb (8.6 kg) (FAX-2580C) Operating: 50 dB or less Operating: 50° F to 95° F (10 to 35° C) Best Print Quality: 68°...
-
Page 146: Print Media
Print media Paper Input Paper Output Use only transparencies recommended for inkjet printing. For glossy paper or transparencies, we recommend removing printed pages from the output paper tray immediately after they exit the machine to avoid smudging. See Paper type and size for each operation on page 11. Paper Tray Paper type: Plain paper, inkjet paper (coated paper), glossy paper... -
Page 147: Fax
196 line/in. (7.7 line/mm) (Color) Fine 196 line/in. (7.7 line/mm) (Black/Color) Photo 196 line/in. (7.7 line/mm) (Black) Superfine 392 line/in. (15.4 line/mm) (Black) 10 stations (5 × 2) (FAX-2480C) 4 stations (2 × 2) (FAX-2580C) 80 stations (FAX-2480C) 100 stations (FAX-2580C) Specifications... -
Page 148: Message Center (Fax-2580C Only)
Memory Transmission Out of Paper Reception ‘Pages’ refers to the ‘Brother Standard Chart No. 1’ (a typical business letter, Standard resolution, MMR code). Specifications and printed materials are subject to change without prior notice. ‘Pages’ refers to the ‘ITU-T Test Chart #1’ (a typical business letter, Standard resolution, MMR code). Specifications and printed materials are subject to change without prior notice. -
Page 149: Digital Cordless Handset (Fax-2580C Only)
Digital Cordless Handset (FAX-2580C only) Cordless handset Frequency Technology Multi Handset Capability Dimensions Weight (including battery) LCD (liquid crystal display) 16-Digit, 3-Line (+1-Line for Pict), Backlit (Orange) Charge Indicator Full Charge Time While in Use (TALK) While Not in Use (Standby) 200 hours When Voice Enhance is set to On. -
Page 150: Battery Cradle
Battery cradle Dimensions Weight Power Consumption (during charge) AC adapter Type Input Output 2.64 in. (67 mm) 3.35 in. (85 mm) 2.53 oz (71.6 g) Charging: Average 2 W BCL-ADA AC 100 to 240 V 50/60 Hz DC 11.0 V 2.72 in. -
Page 151: Copy
Multiple Copies Enlarge/Reduce Resolution Based on Brother standard pattern. (Fast mode/Stack Copy) Copy speeds vary with the complexity of the document. Yes/Yes ADF Width: 5.8 in. to 8.5 in. (148 mm to 215.9 mm) ADF Height: 5.8 in. to 14 in. (148 mm to 355.6 mm) Scanner Glass Width: Max. -
Page 152: Printer
Printer Note You can download the free Brother Printer Driver and PC-FAX Send driver from the Brother Solutions Center for use. Visit us at: http://solutions.brother.com • Please download the printer driver first before connecting the machine to your computer with the USB cable. -
Page 153: Interface
Interface Your machine has a USB 2.0 Full-speed interface. This interface is compatible with USB 2.0 Hi-Speed; however, the maximum data transfer rate will be 12 Mbits/s. The machine can also be connected to a computer that has a USB 1.1 interface. -
Page 154: Consumable Items
Consumable items The machine uses individual Black, Yellow, Cyan and Magenta ink cartridges that are separate from the print head assembly. Service Life of The first time you install the ink cartridges, the machine will use Ink Cartridge extra ink to fill the ink delivery tube. This is a one-time process that enables high quality printing. -
Page 155: Glossary
Glossary This is a comprehensive list of features and terms that appear in Brother manuals. Availability of these features depends on the model you purchased. ADF (automatic document feeder) The document can be placed in the ADF and scanned one page at a time automatically. - Page 156 A telephone that is plugged into the EXT jack of your machine. F/T Ring Time The length of time that the Brother machine rings a pseudo/double-ring (when the Receive Mode setting is Fax/Tel) to notify you to pick up a voice call that it answered.
- Page 157 A resolution setting that uses varying shades of gray for the best representation of photographs. Polling The process of a fax machine calling another fax machine to retrieve waiting a fax message. Pulse (Canada only) A form of rotary dialing on a telephone line.
- Page 158 Touch Tone telephones. Transmission The process of sending faxes over the phone lines from your machine to the receiving fax machine. Transmission Verification Report A printed report for each fax sent, that shows its date, time and number.
-
Page 159: Index
... 80 poster ... 77 Cordless handset (FAX-2580C only) See Digital Cordless Handset User’s Guide ... Cordless phone (non-Brother) ... 50 Custom telephone features on a single line ... 96 Dialing access codes and credit card numbers ... 54 Groups ... - Page 160 Comm. Error ...97 Init. Unable ...98 Ink Empty ...98 Near Empty ...99 No Paper Fed ...99 Not Registered ...51 Out of Memory ...99 Print Unable ...100 Scan Unable ...100 Tel Disabled ...101 Extension telephone, using ...50 External telephone, connecting ...49 Fax codes changing ...
- Page 161 LCD (liquid crystal display) ... 118 Contrast ...23 Help List ...69 ® Macintosh ...136 Maintenance, routine ...104 Manual dialing ...51 receive ...35 Memory Security ...26 Memory Storage ...118 Menu Table ...118 Message Center mode ...56 erasing messages ...58 Fax/Tel OGM (announcement) ...57 Msg Ctr OGM (outgoing message) ...56 playing voice messages ...58 printing faxes from memory ...58...
- Page 162 Receive Mode ...35 External TAD ... 35 Fax Only ... 35 Fax/Tel ... 35 Manual ... 35 Redial/Pause key ... 52 Reducing copies ...76 incoming faxes ...39 Remote Retrieval ...64 access code ...64 commands ...65 getting your faxes ...67 Reports ...68 Caller ID List ...45 Fax Journal ...69 Journal Period ...68...
-
Page 163: Equipment Attachment Limitations
EQUIPMENT ATTACHMENT LIMITATIONS (Canada only) NOTICE This product meets the applicable Industry Canada technical specifications. NOTICE The Ringer Equivalence Number is an indication of the maximum number of devices allowed to be connected to a telephone interface. The termination on an interface may consist of any combination of devices subject only to the requirement that the sum of the RENs of all the devices does not exceed five. - Page 164 Brother International Corporation (Canada) Ltd. Visit us on the World Wide Web These machines are made for use in the USA and Canada only. We cannot recommend using them overseas because it may violate the Telecommunications Regulations of that country and the power requirements of your machine may not be compatible with the power available in foreign countries.
Need help?
Do you have a question about the FAX-2480C and is the answer not in the manual?
Questions and answers