Table of Contents
Advertisement
Quick Links
Advertisement
Table of Contents

Related Manuals for Bien Air 1601098-001


Summary of Contents for Bien Air 1601098-001
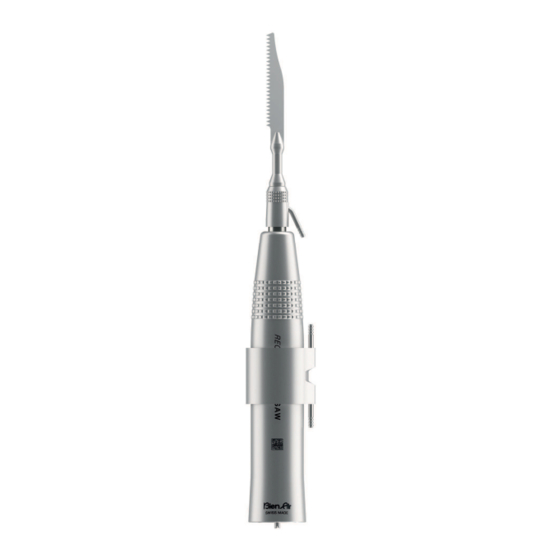
- Page 1 RECIPROCATING MICROSAW ENG INSTRUCTIONS FOR USE REF 2100358-0001/2021.08 Rx Only...
- Page 2 Set supplied (REF) RECIPROCATING MICROSAW RECIPROCATING O-rings MICROSAW Irrigation ring REF 1308430-001 REF 1601098-001 REF 1502918-001 Optional accessories (REF) Irrigation line Spraynet® Lubrifluid® Aquacare REF 1500984-010 REF 1600036-006 REF 1600064-006 REF 1600617-006 Irrigation ring REF 1502918-001 REF 2100358-0001/2021.08 RECIPROCATING MICROSAW • © Bien-Air Dental SA...
-
Page 3: Table Of Contents
Table of contents 5.4.2 Replacing the O-rings 1 Symbols 1.1 Description of symbols used 6 Cleaning and servicing 6.1 Maintenance - General in- 2 Identification & Intended Use 6 formation 2.1 Identification 6.1.1 Precautions for maintenance 2.2 Intended use 6.1.2 Suitable maintenance products 2.3 Intended patient population 6.1.3 Microsaw and irrigation ring 2.4 Intended User... -
Page 4: Symbols
ENG INSTRUCTIONS FOR USE 1 Symbols 1.1 Description of symbols used Description Description Manufacturer. Catalogue number. Sterilizable in a steam sterilizer (auto- Serial number. clave) up to the specified temperature. Caution: in accordance with federal law Data Matrix code for product information (USA), this device is only available for sale including UDI (Unique Device Iden- upon recommendation by an accredited... -
Page 5: Identification & Intended Use
2 Identification & Intended Use 2.1 Identification 2.5 Intended medical condition Medical device manufactured by Bien- Air Dental SA. Correction of craniofacial deformities, including but not limited to bone tumor, Type sleep apnea, cleft palate and bone graft- Reciprocating microsaw* handpiece, ing therapy. -
Page 6: Warnings And Precautions Of Use
3 Warnings and Precautions of use sharp instruments should be handled 3.1 General information with great care. The device must be used by qualified professionals in compliance with the WARNING current legal provisions concerning oc- Any modification of the medical device cupational safety, health and accident is strictly forbidden. -
Page 7: Description
4.2 Technical data The following technical data and performances apply to the reciprocating mi- crosaw device (the dispersion affecting these quantities is below or equal to 5%). Reciprocating microsaw Irrigation ring Technical data 1601098-001 1502918-001 Weight 118 g 12.3 g Overall length 117 mm 34.9 mm (19 mm W/O tubes) -
Page 8: Performances
4.3 Performances Performances Reciprocating microsaw Cutting speed ≥ 5.5 mm/s (***) Maximum distribution of physiological liquid ≥ 100 ml/min (**) Minimum distribution of physiological liquid ≥ 50 ml/min (**) Noise in no-load (at 1 meter) ‹ 75 dBA (*) Hand-transmitted vibrations in no-load ‹... -
Page 9: Operation
5 Operation 7. Operate without load the microsaw system for at least 5 seconds and check that it performs properly. 5.1 Operating conditions and procedure CAUTION Before operating the device, follow this Check the Microsaw handpiece for dam- procedure: age and loose parts before each use. 1. -
Page 10: Changing The Cutting Tool
FIG. 2 Description of pictograms used 5.2 Changing the cutting tool WARNING Make sure that the cutting tool is cor- 1. Pull the clamping ring to the rear and rectly inserted by moving and rotating gently insert the cutting accessory in the latter back and forth. -
Page 11: Removing The Irrigation Line And (Optionally) The Irrigation Ring
FIG. 3 FIG. 4 5.3.1 Removing the irrigation line and 5.3.2 Connect a new irrigation line 1. a) If the irrigation ring has been re- (optionally) the irrigation ring moved before reprocessing the 1. Gently pull out the irrigation line from device, inspect the irrigation ring. the rear side of the irrigation ring Make sure the two O-rings are in (FIG. 3... -
Page 12: Changing The O-Rings
5.4 Changing the O-rings 5.4.1 Missing or damaged O-rings In case of insufficient irrigation and leakage: Make sure that all O-rings are on the irrigation ring and are undamaged. If at least one O-ring is missing on the irrigation ring or damaged: replace the O-rings. -
Page 13: Cleaning And Servicing
6 Cleaning and automated washer/disinfector only (do ultrasonic servicing cleaner). As with all instruments, following each sterilization cycle, including 6.1 Maintenance - General in- drying, remove the device to avoid formation excess exposure to heat which can result in corrosion. Use only dynamic sterilizers: do WARNING not use a steam sterilizer with a... -
Page 14: Microsaw And Irrigation Ring
FIG. 5 6.2 Cleaning 6.1.3 Microsaw and irrigation ring For cleaning, disinfection, and ster- Preparation ilization, if present, the irrigation FIG. 5 ring may be either cleaned sep- 1. Disconnect the microsaw from the arately or left on the microsaw. motor. For the last case, after a maximal amount of 25 uses, the irrigation 2. -
Page 15: Disinfection
FIG. 6 6.3 Disinfection 6.3.1 Manual disinfection 1. Dip the devices (both the microsaw and the irrigation ring), separately or as- sembled bath containing disinfectant product (e.g. didecyldimethylammonium chloride, quaternary ammonium carbonate or neut- ral enzymatic product which are allowable chemical agents). Follow the concentration and duration recommended by the fabricant of the disinfection product. -
Page 16: Automatic Disinfection (Optional)
5. Eliminate the excess of disinfectant (e.g. foam residue) over the external sur- faces of the device by spraying it with Spraynet® and drying it with sterile non- woven compresses. 6. Spray inside the irrigation tube of the microsaw (and inside the tubes of the ir- rigation ring, if this latter has been left on the microsaw during reprocessing) with Spraynet®, using the appropriate nozzle. -
Page 17: Lubrication
FIG. 7 6.4 Lubrication the quantity of lubricant inserted be- fore sterilization or operate microsaw for 2 seconds after lub- 6.4.1 Verifying cleanliness rication and before sterilization. Before lubrication, visually inspect the device to ensure it is clean. Repeat the 6.5 Sterilization cleaning and disinfection procedure if necessary. -
Page 18: Procedure
6.5.1 Procedure 1. Pack the device in a packaging approved for steam sterilization. If the irrigation ring has be removed before reprocessing, the microsaw and the irrigation ring should be packed in two different sterilization pouches. If the irrigation ring is left on the microsaw during cleaning/decontamination and lubrication, it should be left on the microsaw during steam sterilization as well. -
Page 19: Packing And Storage
7 Transport 6.6 Packing and storage The device must be stored inside the & disposal sterilization pouch in a dry and dust free environment. If The temperature 7.1 Transport must not exceed 55°C (131°F). If the device will not be used for 7 days or There are no particular transport and more after the sterilization, extract the storage conditions required. -
Page 20: General Information
8 General 8.2 References information 8.2.1 Sets supplied (see cover) Legend 8.1 Terms of guarantee 1601098-001 RECIPROCATING MICROSAW Bien-Air Dental SA grants the user a 1502918-001 Irrigation ring warranty covering any operating fault, or material or manufacturing defect. 1308430-001 O-rings The warranty period for this medical 8.2.2 Optional accessories... - Page 21 Bien-Air Dental SA Länggasse 60 Case postale 2500 Bienne 6 Switzerland Tel. +41 (0)32 344 64 64 Fax +41 (0)32 344 64 91 dental@bienair.com Other adresses available at www.bienair.com...
Need help?
Do you have a question about the 1601098-001 and is the answer not in the manual?
Questions and answers