Bien Air iOptima Instructions For Use Manual
Hide thumbs
Also See for iOptima:
- Installation instructions manual (28 pages) ,
- Instructions for use manual (72 pages)

Subscribe to Our Youtube Channel
Related Manuals for Bien Air iOptima


Summary of Contents for Bien Air iOptima
- Page 1 ENG INSTRUCTIONS FOR USE. Other languages available on www.bienair.com/ifu Rx Only REF 2100279-0012/2022.03...
- Page 2 Set iOptima REF 1700563-001 REF 1600926-001 REF 1600677-001 REF 1600762-001 REF 1501938-001 REF 1501988-001 Set iOptima REF 1700544-001 REF 1600926-001 REF 1600677-001 REF 1600762-001 REF 1501938-001 Set iOptima REF 1700547-001 REF 1600926-001 REF 1600762-001 REF 1501938-001 REF 2100279-0012/2022.03 © Bien-Air Dental...
- Page 3 Options REF 1600036-006 Set iOptima REF 1700704-001 1502475-001 1600677-001 1600809-001 1601074-001 1500666-001 1502568-001 1300067-001 3300404-001 3300403-001 Set iOptima REF 1700705-001 1502475-001 1600677-001 1600809-001 1601075-001 1500666-001 1502568-001 1300067-001 3300404-001 3300403-001 REF 2100279-0012/2022.03 © Bien-Air Dental...
- Page 4 Set iOptima REF 1700563-001 PLUS 1502475-001 1600677-001 1600809-001 1600755-001 1600606-001 1601076-001 1500666-001 1502568-001 1300067-001 3300404-001 3300403-001 1303711-010 Set iOptima REF 1700730-001 REF 1601074-001 REF 1500666-001 REF 1600809-001 REF 1502568-001 REF 1300067-001 Set iOptima REF 1700731-001 REF 1601075-001 REF 1500666-001 REF 1600809-001...
- Page 5 Set iOptima REF 1700732-001 REF 1601076-001 REF 1500666-001 REF 1600809-001 REF 1600606-001 REF 1502568-001 REF 1300067-001 REF 1303711-010 Options REF 1502620-001 REF 1502621-001 REF 1502622-001 REF 1502623-001 REF 1502567-001 REF 2100279-0012/2022.03 © Bien-Air Dental...
-
Page 6: Table Of Contents
Table of contents iOptima description ......4 iOptimaINT description ....22 Symbols ............5 Symbols ............23 Description of symbols for iOptima unit ........5 Description of symbols for iOptima ........23 Description of symbols for iOptima accessories......6 Description of symbols for iOptima accessories.... - Page 7 13.1 Back up data..................41 19.3 Important..................... 75 13.2 Use of the Touch screen..............41 19.4 Replace 4VL seal................76 13.3 Launch iOptima app ................. 42 19.5 iOptima ................... 76 13.4 Quit iOptima app................42 20 Legal and general ......... 77 13.5 Welcome screen and disclaimer ..........
-
Page 9: Ioptima Description
Rx Only... -
Page 10: Symbols
1 Symbols 1.1 Description of symbols for iOptima unit Symbol Description Symbol Description CE Marking with number of the notified body. Non-ionizing electromagnetic radiation. Manufacturer. Alternating current. Catalogue number. OFF (power). Serial number. ON (power). Data Matrix code for product information including Medical device. -
Page 11: Description Of Symbols For Ioptima Accessories
1.2 Description of symbols for iOptima accessories Symbol Description Symbol Description Separate collection of electric and electronic CE Marking with number of the notified body. equipment. Manufacturer. Serial number. Electrical safety. Catalogue number. Applied part type B. Data Matrix code for product information including Medical device. -
Page 12: Identification, Intended Use And Notation
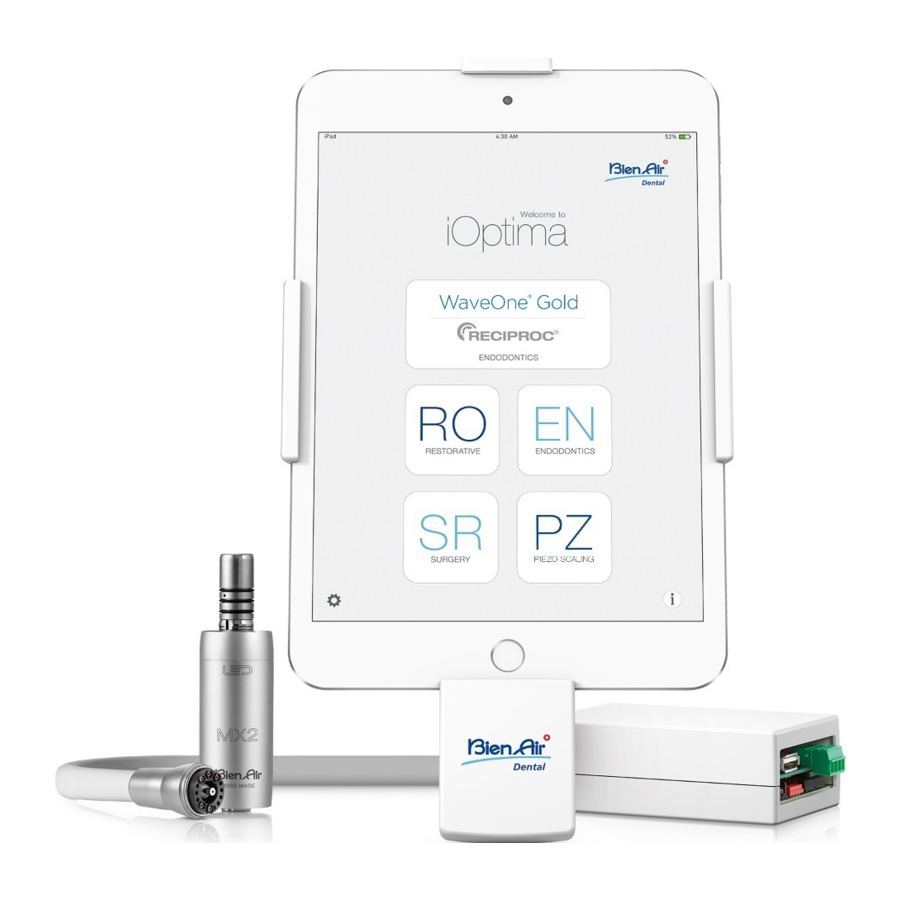
It is essential to connect a compatible iPod touch® using the FIG. 1 lightning connector. iOptima system connected to an iPod touch® that controls a MX2 motor. The unit provides power to the iPod touch® device as soon as it is connected. -
Page 13: Notation
2.3 Notation • A, B, C, etc. NOTES Text preceded by a letter indicates a procedure to be carried out step-by-step. • The technical specifications, illustrations and dimensions Indicates a procedure result. contained in these instructions are given only as a guide. They •... -
Page 14: User And Patient Safety: Warnings
• Never connect a handpiece on a running micromotor. breathing circuit exceeds 25 cm. • The power plug of the iOptima is the device used for The motor is not used simultaneously to the administra- disconnection in case of problems, it must be easily accessible at tion of the anaesthetic substances to the patient. -
Page 15: Description
4 Description 4.1 iOptima system overview The iOptima system consists of: • iOptima unit (3) with docking station for iPod touch® (4); • A MX2 micromotor (12) and MX2 hose (10, A); • A pneumatic 4-way connection input (6, B);... -
Page 16: Ioptima System Table
4.2 iOptima system table Summary of the iOptima functions and technological features. Product Device Technology Motor Restorative Endodontics Oral surgery Implantology Prophylaxis iOptima iPod touch® DMX2 4.3 Set supplied iOptima set REF 1700547-001 Designation REF number 4.3.1 iOptima system iOptima unit (1x) -
Page 17: Technical Data
Dimensions L x W x H shocks). iOptima unit..........125 x 145 x 75 mm iOptima unit (with iPod touch®)....125 x 145 x 160 mm Degree of protection MX2 hose ............L 1.7 m IP 40 (protection against insertion of objects larger than 1 mm) MX2 micromotor........Ø... -
Page 18: Environmental Protection And Information For Disposal
The conditions for and restrictions on use set by Apple must be respected (jailbreak, hardware modification, etc.). To ensure optimum operation of the iOptima application, iOS updates must be according to version used during validation of the application. -
Page 19: Electromagnetic Compatibility (Technical Description) For Ioptima
Portable RF communications equipment (including peripherals such as antenna cables and external antennas) should be used no closer than 30 cm (12 inches) to any part of the iOptima, including cables specified by the manufacturer. Otherwise, degradation of the performance of this equipment could result. - Page 20 Guidance and manufacturer’s declaration – Electromagnetic immunity The iOptima is intended for use in the electromagnetic environment specified below. The customer or the user of the iOptima must ensure that it is actually used in such an environment. Immunity test...
- Page 21 To assess the electromagnetic environment due to fixed RF transmitters, an electromagnetic site survey should be consid- ered. If the measured field strength in the location in which the iOptima is used exceeds the RF compliance level mentioned above, the iOptima should be observed to verify that it is operating normally.
-
Page 22: Installation
Note 2 ⚠ CAUTION FIG. 1 Ensure that the power switch (3) is off «O». A. Place the iOptima on a flat surface capable of bearing its ⚠ weight. CAUTION Before connecting the MX2 cable ensure that all o-rings are ⚠... - Page 23 FIG. 6 In order to conform to the IEC 60601-1-2 standards, take into F. Connect the 4-way hose (1) to the 4-way connector of the iOptima account the different routes of the wires through the system unit (2): (bend, fold, section etc.) (see chapter “4.1 iOptima system over-...
-
Page 24: Interface Overview
One long beep ENDO mode when selecting the first File 6.1.1 Compatibility Alternate short Message alert notifications beeps The iOptima application is compatible with iPod touch® from 6th generation. Micromotor REVERSE running indicator Alternate medium ENDO mode when the micromotor is beeps 6.1.2 Notation... -
Page 25: Ipod Touch® And Ioptima Connection / Disconnection Conditions
6.3 iPod touch® and iOptima connection / 6.3.3 iOptima unit switched ON disconnection conditions If the iOptima app is running and the iPod touch® plugged to the iOptima (switch ON): 6.3.1 Disconnection • The iPod touch® will charge up (even if the app is not running);... -
Page 27: Ioptimaint Description
Rx Only... -
Page 28: Symbols
7 Symbols 7.1 Description of symbols for iOptima Symbol Description Symbol Description CE Marking with number of the notified body. Non-ionizing electromagnetic radiation. Manufacturer. Alternating current. Catalogue number. OFF (power). Serial number. ON (power). Data Matrix code for product information including Medical device. -
Page 29: Accessories
7.2 Description of symbols for iOptima accessories Symbol Description Symbol Description Separate collection of electric and electronic CE Marking with number of the notified body. equipment. Manufacturer. Serial number. Electrical safety. Catalogue number. Applied part type B. Data Matrix code for product information including Medical device. -
Page 30: Identification, Intended Use And Notation
FIG. 1 8 Identification, Intended use and Notation 8.1 Identification The iOptima application indicates the operation steps, the ratio of the handpiece, tool speed, torque value, light intensity, footpedal mode and the micromotor rotation direction. iOptima application iOptima is compatible with Apple operating systems (iOS & iPadOS). -
Page 31: Intended Patient Population
According to the most complete installation scheme, iOptima system connected to an iPod touch®/iPad mini® controls a MX2 micromotor (endodontics + restorative), a MX-i LED micromotor NOTES which grants access to the surgery (SR) mode and a piezo scaler allowing access to the piezo scaling (PZ) mode: in this case, the... -
Page 32: Patient Contra-Indications And Side-Effects
• The main oral surgery treatments include: - Impacted teeth extraction: when a tooth partially or totally If an accident occurs, the iOptima must not be used until hidden in the jawbone needs to be removed; repairs have been completed by a qualified and trained technician authorized by the manufacturer. -
Page 33: Notation
8.8 Notation • A, B, C, etc. Text preceded by a letter indicates a procedure to be carried out step-by-step. • Indicates a procedure result. • (1), (2), (3), etc. Text preceded by a number indicates text used in conjunction with an illustration. -
Page 34: User And Patient Safety: Warnings
• Ensure that the micromotor hose is not bent. • Do not use iOptima outside the range of operating To prevent any risk of infection, the warnings below must be temperature. - Page 35 • The predefined settings contained in the iOptima app dental procedures are indicative only. Bien-Air Dental SA cannot be NOTES held liable for them. • The predefined torque and speed values are only intended as a guide. The file values used must be adapted according The predefined factory parameters may be subject to modifi- to the files manufacturer instructions.
-
Page 36: Description
• A unit as a docking station (2) for iPod touch®/iPad mini® device. • The iPod touch®/iPad mini® provide the user interface to the iOptima system, except speed reference input. • The electronic board (1), integrated in the dental unit system, is in charge to drive the micromotor (MX2 and/or MX-i LED), a piezo scaler (or an irrigation pump) and communicate with the interface through the Lightning connector. -
Page 37: Technical Data
⚠ 10.3 Technical data CAUTION Do not use iOptima outside the range of operating temperature. Electrical and pressure data Classification Voltage 100-240 VAC Class IIa in accordance with European Regulation 2017/745 Frequency 47-63 Hz concerning medical devices. Nominal power 90 W Electric insulation class Max. -
Page 38: Performances
Bien-Air Dental SA shall not be held liable for any non-compliant use of the iPod touch®/iPad mini®. The conditions for and restrictions on use set by Apple must be respected (jailbreak, hardware modification, etc.). To ensure optimum operation of iOptima the application, iOS updates must be according to version used during validation of the application. -
Page 39: Electromagnetic Compatibility (Technical Description) For Ioptima Int
Portable RF communications equipment (including peripherals such as antenna cables and external antennas) should be used no closer than 30 cm (12 inches) to any part of the iOptima , including cables specified by the manufacturer. Otherwise, degradation of the performance of this equipment could result. - Page 40 IEC 61000-3-3 Guidance and manufacturer’s declaration – Electromagnetic immunity The iOptima is intended for use in the electromagnetic environment specified below. The customer or the user of the iOptima must ensure that it is actually used in such an environment.
- Page 41 To assess the electromagnetic environment due to fixed RF transmitters, an electromagnetic site survey should be considered. If the measured field strength INT is used exceeds the RF compliance level mentioned above, the iOptima INT should be observed to verify that it is operating normally. If abnormal operation is...
-
Page 42: Installation
A. Open the "App Store". NOTES B. Search the iOptima application. C. Install the iOptima application designed by Bien-Air Dental. The iPod touch®/iPad mini® must be correctly connected to a Note 1 Wi-Fi network before the App Store is opened; refer to Apple's user guide for appropriate use of the iPod touch®/iPad mini®. -
Page 43: Interface Overview
Alternate short "18 List of errors & Troubleshooting" on beeps p.71.) The iOptima application is compatible with iPod touch® from 6th generation and iPad mini® from 4th generation. Micromotor REVERSE running indicator Alternate medium ENDO mode when the micromotor is beeps 12.1.2 Notation... -
Page 44: Disconnection Conditions
12.3 iPod touch®/iPad mini® and iOptima 12.3.3 iOptima unit switched ON connection / disconnection conditions If the iOptima app is running and the iPod touch®/iPad mini® plugged to the iOptima (switch ON): 12.3.1 Disconnection • The iPod touch®/iPad mini® will charge up (even if the app is not running);... -
Page 45: Ioptima/Ioptimaint Operation
operation... -
Page 46: Getting Started
FIG. 5 13 Getting started 13.1 Back up data 13.2.1 Display onscreen keyboard Use iTunes or iCloud to automatically back up your iOptima FIG. 5 application user-defined settings. • Tap a text field to display the onscreen keyboard; Refer to Apple's user guide for appropriate use of the iPod •... -
Page 47: Launch Ioptima App
D. Ensure that the latest application updates have been installed NOTES (see chapter “13.8 iOptima app update” on page 45). E. Tap the app icon (5) to launch the iOptima application. Note 2 The swipe gesture is only active in the delimited area (1). -
Page 48: Welcome Screen And Disclaimer
Refer to the current version of your device (1). This screen D. Tap RO (5) to enter the restorative mode. appears only at the first iOptima application start or in case of any notification to the user (new app version available, See chapter “14.1 Enter Restorative mode”... -
Page 49: Information
• Catalogue (4) (opens online catalogue (pdf file)); • Web TV (5) (opens Bien-Air web TV); • About (6) (displays About screen (FIG. 14, 9) with iOptima system and Bien-Air factory information); • Contact us (7) (opens email application with predefined email address iOptima@bienair.com);... -
Page 50: Settings
FIG. 17 FIG. 18 FIG. 19 FIG. 20 FIG. 21 13.7 Settings 13.8 iOptima app update FIG. 17 FIG. 21 When the application is launched, it will check whether a new A. Tap (1) to access iOptima/iOptima system Settings version is available on the App Store. -
Page 51: Software Update
⚠ CAUTION • The iPod touch®/iPad mini® must not be disconnected from the iOptima/iOptima dental unit during installation. • The iOptima application must not be closed during installation. • The iOptima/iOptima power supply must not be disconnected during installation. When the installation is completed, there are two possibilities: FIG. -
Page 52: Operation - Restorative Mode
Micromotor rotation mode: FORWARD and REVERSE operative screen displays the overheating symbol . In this Save (customize settings) case the iOptima unit automatically lowers the torque in order to Footpedal mode: PROGRESSIVE or ON/OFF mode avoid overheating of the micromotor. Light intensity... - Page 53 14.2.3 Light intensity In restorative mode, the air spray is always switched ON by the help of the electro-valve integrated in the iOptima unit. FIG. 7 Slide or tap the appropriate dot to set up the light intensity of the...
-
Page 54: Standard Use - Operating Mode (Start)
FIG. 10 FIG. 11 FIG. 12 FIG. 13 FIG. 14 14.3 Standard Use - Operating mode (Start) E. Tap the operation type above (1) or below (2) the selected operation type to navigate to the operation respectively preceding FIG. 10 or following the current one in the predefined operation list. - Page 55 FIG. 17 Swipe left to restore or delete. Note 17 - 18 12 If using iOptima system, each time you pull a motor from a holder, the operative mode previously used with that motor is dis- played by default (only from Home page).
-
Page 56: Create New Operations (User-Defined)
FIG. 20 FIG. 21 FIG. 22 FIG. 23 FIG. 24 14.4.4 Hide / show operations FIG. 24 D. Type the new Operation name (3) and tap Done (4). FIG. 20 E. Set handpiece ratio and operation settings. A. Do a long tap on an operation which is not hidden to activate F. - Page 57 NOTES 20 When an operation is hidden, it doesn’t show anymore in the operative screen, so the user can show only the operation that he wants to use. 21 Maximum storage of 20 user-defined operations, if reached icon disappears.
-
Page 58: Operation - Endodontics Mode
Footpedal mode: PROGRESSIVE or ON/OFF mode operative screen displays the overheating symbol . In this Light intensity case the iOptima unit lowers the torque automatically in order to Handpiece ratio avoid overheating of the micromotor. Maximum micromotor torque in Ncm, indicative percentage of... - Page 59 ⚠ CAUTION In endodontics mode, the air spray is always switched OFF by the Verify that the handpiece corresponds to your selection. help of the electro-valve integrated in the iOptima/iOptima unit. Note 5 - 6 - 7 Save and create buttons are disabled if a lock is set (see chapter “13.7 Settings”...
-
Page 60: Standard Use - Operating Mode (Start)
FIG. 9 FIG. 10 FIG. 11 FIG. 12 FIG. 13 15.2.5 Micromotor rotation direction The app navigates back to the operative screen, FIG. 14. E. Press the dental unit pedal to switch ON the micromotor. FIG. 9 ⚠ Tap to select the rotation mode of the micromotor: CAUTION •... - Page 61 (alternate medium beeps). FIG. 18 D. Customize the file system settings: 13 If using iOptima system, each time you pull a motor from a • tap any file (4) to open the File screen and modify motor holder, the operative mode previously used with that motor is dis- speed and torque values (tap (3) to go back);...
-
Page 62: Add, Sort Or Remove Files
FIG. 19 FIG. 20 FIG. 21 FIG. 22 FIG. 23 15.5 Add, sort or remove files Note 19 15.5.1 Add new files FIG. 19 A. Tap in the Add new file field to open the File screen. FIG. 20 - FIG. 21 B. -
Page 63: Restore (Default) And Delete (User-Defined) Systems
15.6.1 Default Systems Default operations are represented by FIG. 26 22 Predefined endo file systems foreseeing the reciprocating movement need activation on the iOptima system. In case the Dentsply Sirona movement wasn’t previously activated, taping it leads to the acti- Note 22 vation page. -
Page 64: Create New Brands And Systems
E. Tap Add new file (4), refer to chapter “15.5.1 Add new files” on FIG. 33 page 57. A. Swipe left on a user-defined brand. F. Tap the icons (6) to set the iOptima unit parameters: • Handpiece ratio A message box opens: Delete user brand. -
Page 65: Ca Endo / Reciproc Option
CA ENDO mode. • CA ENDO must be used only with specific tools. Predefined endo file systems foreseeing the reciprocating movement need activation on the iOptima system. In case the movement wasn’t previously activated, tapping it NOTES leads to the activation page. -
Page 66: Operation - Surgery Mode
FIG. 5 16 Operation - Surgery mode Handpiece ratio It is only possible to access the surgery mode with the iOptima Maximum MX-i LED micromotor torque in Ncm, indicative and MX-i LED micromotor system. percentage of maximum torque that can be delivered is also To set a holder with the MX-i LED micromotor, please contact a displayed (or according to settings, see chapter “13.7 Set-... - Page 67 When the power demand of the MX-i LED micromotor is excessive, the operative screen displays the overheating symbol NOTES . In this case the iOptima unit automatically lowers the torque in order to avoid overheating of the MX-i LED micromotor.
-
Page 68: Standard Use - Operating Mode (Start)
FIG. 8 FIG. 9 FIG. 10 FIG. 11 FIG. 12 16.2.4 Light intensity 16.3 Standard Use - Operating mode (Start) FIG. 8 FIG. 10 Slide or tap the appropriate dot to set up the light intensity of the A. Tap to enter the SURG mode, the operative screen opens. -
Page 69: Customize Default Operations
FIG. 13 FIG. 14 FIG. 15 FIG. 16 values of the selected operation. • Adjust the handpiece ratio, light intensity or rotation direction of the selected operation. NOTES • Tap Save (3) to validate the new settings. Note 17 The light intensity value is set for each operation. The default E. -
Page 70: Create New Operations (User-Defined)
FIG. 17 FIG. 18 FIG. 19 FIG. 20 FIG. 21 E. Select an operation. 16.4.4 Hide / show operations The app navigates back to operative screen. FIG. 20 A. Do a long tap on an operation which is not hidden to activate 16.4.1 Restore (default) and delete (user- the hide function and display the icons (2) and... - Page 71 FIG. 22 FIG. 23 FIG. 24 FIG. 24 D. Type the new Operation name (3) and tap Done (4). NOTES E. Set handpiece ratio and operation settings. F. Tap Cancel or Save (2) to validate user-defined operation and tap back, FIG. 23. ...
-
Page 72: Operation - Piezo Scaling Mode
17 Operation - Piezo scaling mode Note 2 It is only possible to access the piezo scaling mode with the iOptima and piezo scaler system. See chapter “17.3 Standard Use - Operating mode (Start)” on page 67. To set a holder with the piezo scaler, please contact a service engineer certified by Bien-Air Dental SA. -
Page 73: Customize Default Operations
FIG. 5 FIG. 6 FIG. 7 ⚠ CAUTION If the footpedal is pressed before entering in operative mode, an alert message «Please release pedal…» will be displayed. The NOTES piezo scaler will not start to run until the footpedal is released and pressed again. - Page 74 FIG. 8 FIG. 9 FIG. 10 FIG. 11 FIG. 12 FIG. 8 17.4.2 Default Operations B. Tap to customize an operation type. FIG. 11 The Operation screen opens. ⚠ CAUTION FIG. 9 The parameters contained in the dental procedures are given for C.
-
Page 75: Create New Operations (User-Defined)
FIG. 13 FIG. 14 FIG. 15 FIG. 16 FIG. 17 17.5 Create new operations (user-defined) FIG. 14 NOTES A. From the operative screen, tap Settings to open the Operations screen. Predefined PIEZO operations can not be deleted. But it is pos- FIG. -
Page 76: List Of Errors & Troubleshooting
18 List of errors & Troubleshooting 18.1 Alert messages (operating) Description Message Cause of alert Action Pedal is pressed when accessing operative page. Pedal remains pressed when Footpedal to be released Please release pedal … acknowledging any system Release footpedal and press it again. notification. -
Page 77: Device Operating Error
2. If problem persists, contact Bien-Air Dental SA. GEN ERROR [FailCode] 1. Switch OFF unit (see section 12.3.5 for iOpti- [FailCode] = EC100 : Motor maINT and section 6.3.4 B for iOptima). drive communication failure 2. Disconnect iPod touch®/iPad mini® device from [FailCode] = EC101 : Motor Electrical system fault ! unit. -
Page 78: Ios Compatibility Errors (Disclaimer Screen)
18.3 iOS compatibility errors (disclaimer screen), Color iOS version (identifier digit change) Text version Restriction (recommendations) • None. Currently installed iOS x.y.z text sec- Green • Currently installed iOS is identical to No restrictions tion is displayed in green color. iOS verified during app validation. - Page 79 NOTES It is imperative to read and understand this IFU before carry- ing out any troubleshooting on the iOptima. In case of unclear information or for any error message that is not listed in the following tables contact Bien-Air Dental SA.
-
Page 80: Maintenance
(corresponding to a service period of 4 to 6 years). Note 1 19.2 Cleaning • Clean the surfaces of the iOptima unit / iOptima dock-in and footpedal by gently rubbing for about 15 seconds with a clean cloth soaked in a suitable product (i.e. Bien-Air Dental Spraynet or isopropyl alcohol). -
Page 81: Replace 4Vl Seal
D. Remove the damaged 4VL seal (2). E. Replace with a new 4VL seal (REF 1302403-010). Refit hose, switch ON units and water. See chapter “5.1 Install the iOptima app” on page 17 for details. 19.5 iOptima Refer to the iOptima installation manual ⚠... -
Page 82: Legal And General
• 12 months for the hose • 12 months for the power supply • 12months for integrable electronic boards • 24 months for the iOptima/iOptima unit • 36 months for series MX2 LED electric micromotors from the date of invoicing. - Page 84 Länggasse 60 Case postale 2500 Bienne 6 Switzerland Tel. +41 (0)32 344 64 64 Fax +41 (0)32 344 64 91 dental@bienair.com Other adresses available at www.bienair.com Bien-Air France Sàrl EC REP 19-21 rue du 8 mai 1945 94110 Arcueil France REF 2100279-0012/2022.03 iOptima/iOptima © Bien-Air Dental...
Need help?
Do you have a question about the iOptima and is the answer not in the manual?
Questions and answers
What generation iPod is it
The Bien Air iOptima uses the iPod touch (6th Generation) and iPad mini (4th Generation).
This answer is automatically generated