Table of Contents
Advertisement
Quick Links
SENSIT 3 OPERATION AND SERVICE MANUAL
AUTOMATED MERCHANDISING SYSTEMS INC.
255 WEST BURR BLVD.
KEARNEYSVILLE, WV 25430
(304) 725‐6921
(304) 725‐6983 FAX
www.amsvendors.com
info@amsvendors.com
Glass Front Vendor
L0190 REV D
TM
INTERNATIONAL A.M.S. S DE RL DE CV
KM. 9 CARR. AL CASTILLO NO. 8200
MPIO. DE EL SALTO, JAL. MEXICO 45680
5233‐36‐88‐07‐17
5233‐36‐88‐13‐14 FAX
www.amsint.com.mx
servicio@amsint.com.mx
L0190D
i
Advertisement
Table of Contents
Troubleshooting

Related Manuals for AMS EPIC SENSIT 3


Summary of Contents for AMS EPIC SENSIT 3
- Page 1 L0190D TM SENSIT 3 OPERATION AND SERVICE MANUAL Glass Front Vendor L0190 REV D INTERNATIONAL A.M.S. S DE RL DE CV AUTOMATED MERCHANDISING SYSTEMS INC. KM. 9 CARR. AL CASTILLO NO. 8200 255 WEST BURR BLVD. MPIO. DE EL SALTO, JAL. MEXICO 45680 KEARNEYSVILLE, WV 25430 5233‐36‐88‐07‐17 (304) 725‐6921 5233‐36‐88‐13‐14 FAX (304) 725‐6983 FAX www.amsint.com.mx www.amsvendors.com servicio@amsint.com.mx info@amsvendors.com i ...
- Page 2 AMS or to the authorized dealer or distributor from whom the equipment was purchased for verification of the defect. Prior to returning any parts for replacement, the customer is to contact the AMS Service Department at (304) 725-6921 for return authorization.
-
Page 3: Table Of Contents
L0190D TABLE OF CONTENTS Title Page Upgrading Firmware Mode Switch LIMITED WARRANTY DEX Jack TABLE OF FIGURES VEND SENSOR Primary Sensor PUBLICATION NOTICE Secondary Sensor 1 INTRODUCTION LED TRIM LIGHTING SENSIT 3 SYSTEM Guaranteed Delivery DASHBOARD Instant Refund Validator and Card Reader Locations Adjustable Helix Motion Coin Changer Location Additional Benefits... - Page 4 L0190D Leveling the Vendor Coupled Motors MDB (MULTI-DROP BUS) SETTINGS 5 TRAY ADJUSTMENT AND CONFIGURATION Force Vend SNACK AND CANDY TRAY No Cheat Removal Change Bill Installation Hold Lost Credit Multi-Vend TRAY VERTICAL POSITIONS Lev2 Coin Mech Removal Instant Revaluation Installation Hide Card Value Card Refund...
- Page 5 L0190D SAVING AND TRANSFERRING MACHINE SETTINGS (CONFIGURATIONS) Saving a Configuration File Loading a Configuration File RECORDING DEX DATA ON SD CARD CLEANING THE VENDOR EXTERIOR CLEANING THE VENDOR INTERIOR SENSIT 3 UTILITY REPLACING THE POWER CORD AND GFCI TEST 37 STORING THE VENDOR 9 WIRING DIAGRAM 10 SUPPORTED DEX FIELDS...
-
Page 6: Publication Notice
L0190D Publication Notice L0190, Release D, ECN 4294, May 22, 2018 It is our intent to assist our customers with up-to-date documentation: however, this manual may not contain all updates and is subject to revision without notice. Please contact our Service Department with your requests or comments. Note 1 The Sensit 3 Control Board is sometimes referred to as the ‘VMC’... -
Page 7: Introduction
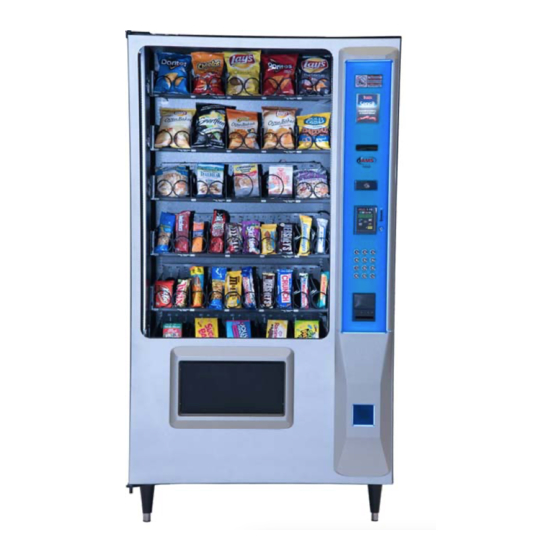
L0190D 1 INTRODUCTION Congratulations on the purchase of your new AMS Epic Sensit 3 MODEL IDENTIFICATION vendor. All Sensit 3 models are versatile, high-capacity vending machines. AMS machines are designed, tested, and built to When requesting service, replacement parts or technical... -
Page 8: General Specifications
GENERAL SPECIFICATIONS 6,520,373 6,708,079 6,794,634 7,191,915 Operating Environment These AMS vendors are designed for indoor use only. Indoor 7,343,220 7,742,837 temperatures must be between 35°F (1°C) and 110°F (43C). 7,446,302 8,003,931 The vendor should not be located in an area where it may be subjected to direct sunlight, a water jet, or rain. - Page 9 1 INTRODUCTION L0190D 72.3" ( Legs fully in ) 73.2" ( Legs fully out ) 4.42 2.79 34.41 28.06 28.06 34.86 39.45 35.8 39.30 34.76 120° Figure 1.2 39” Cabinet Dimensions 3 ...
-
Page 10: Merchandiser Configurations
L0190D 1 INTRODUCTION MERCHANDISER CONFIGURATIONS Figure 1.3 shows a typical configuration used in an AMS 39” The fourth tray down in the above example contains ten Epic model vendor. columns with small diameter helices. The pitch is 18 for all columns, so the configuration on this tray can hold 18 x 10 = 180 products. - Page 11 L0190D 1 INTRODUCTION AVAILABLE HELICES P/N & SUFFIX DESCRIPTION 20119—05 Helix, Candy Clockwise, 5-Pitch 20119—07 Helix, Candy Clockwise, 7-Pitch 20119—09 Helix, Candy Clockwise, 9-Pitch 20119—10 Helix, Candy Clockwise, 10-Pitch 20119—12 Helix, Candy Clockwise, 12-Pitch 20119—15 Helix, Candy Clockwise, 15-Pitch 20119--18 Helix, Candy Clockwise, 18-Pitch 20119--24 Helix, Candy Clockwise, 24-Pitch 20120—05...
- Page 12 L0190D THIS PAGE INTENTIONALY LEFT BLANK 6 ...
-
Page 13: Safety
L0190D 2 SAFETY Always disconnect power to the vendor before COMMITMENT TO SAFETY servicing. Allow only fully trained service technicians to service the vendor. Automated Merchandising Systems Inc. is committed to Always keep electrical connections dry. Do not designing and producing a safe product. As with all electrical or place the vendor in or near standing water. -
Page 14: Other Improper Conditions
Never attempt to lift or move the vendor by hand. Always use equipment with the proper load rating. AMS vending machines bearing the ETL mark have been tested Note that the Specification weight listed is empty and comply with the following standards: weight. -
Page 15: Vendor Systems And Components
L0190D 3 VENDOR SYSTEMS AND COMPONENTS SENSIT 3 SYSTEM OPERATION The Sensit 3 system is comprised of the primary sensor, the secondary sensor, and the control logic. The primary and secondary sensors are attached to the cabinet at opposite ends of the hopper and infrared light is passed between them. When a selection is made, the vend motor will begin to run. -
Page 16: Led Trim Lighting
L0190D 3 VENDOR SYSTEMS AND COMPONENTS combination that corresponds to the location of an item in the LED TRIM LIGHTING machine. The keypad is also used to enter data in operation and Your new Epic vending machine is equipped with energy- servicing of the vendor. efficient LED lighted trim, and features several lighting schemes to draw attention to the vendor. -
Page 17: Vend Motors
3 VENDOR SYSTEMS AND COMPONENTS L0190D Vend Motors Candy Pusher Bar Two types of motors may be used with this vendor. The On snack trays, 2 horizontal slots in the divider allow for the configuration of the machine will be different if all of one or installation of a candy pusher bar. - Page 18 L0190D THIS PAGE INTENTIONALLY LEFT BLANK 12 ...
-
Page 19: Vendor Preparation And Installation
½ HP y que muestren la marca CE en Checking the Outlet (U.S. and Canada) la placa de serie. Si este requerimiento se aplica a su AMS recommends using a dedicated outlet which can supply 7 dispensadora, verá una calcomanía con una terminología or more amps per vendor. -
Page 20: Vendor Preparation
See Figure 4.1 below. Mounting and Connecting Bill Validators and Card Readers The AMS vendor will support any NAMA-approved Multi-Drop Remove the four nuts that retain the steel cover Bus (MDB) bill validator or card reader. Please read the device panel. -
Page 21: Test Loading And Configuration
4 VENDOR PREPARATION AND INSTALLATION L0190D Test vend the product and adjust the position of Test Loading and Configuration helix ejector if necessary. The helix ejector is the Before putting the vendor on location, it is a good idea to plastic device installed on the front end of the helix determine the placement of products on the trays. -
Page 22: Leveling The Vendor
L0190D 4 VENDOR PREPARATION AND INSTALLATION The vendor is designed to meet the 2010 ADA guidelines for persons in wheelchairs using a parallel approach (side of wheelchair adjacent to front of vendor). Make sure there is adequate room to maneuver a wheelchair into this position in front of the vendor. -
Page 23: Tray Adjustment And Configuration
L0190D 5 TRAY ADJUSTMENT AND CONFIGURATION The trays in AMS Sensit 3 vendors are highly configurable. TRAY COLUMN POSITIONS Practically any combination of wide and narrow columns can be set up on a tray. Before changing the configuration of your trays, The tray columns used for snacks and candy can be configured make sure to order the parts you will need, such as new helices, by the user for up to 10 columns wide (for 39”... -
Page 24: Tray Motor Wire Colors Table
L0190D 5 TRAY ADJUSTMENT AND CONFIGURATION Tray Motor Wire Colors Motor- Wire Color Wire Color “0” = Leftmost Motor For Wide Tab For Narrow Tab “9” = Rightmost Motor (+Terminal) (-Terminal) Red/Black Blue “ Gray “ Violet “ Brown “ Yellow “ Green “ Orange “... -
Page 25: Helix Home Position
5 TRAY ADJUSTMENT AND CONFIGURATION L0190D HELIX HOME POSITION CANDY PUSHER BAR INSTALLATION Unless you are using the “Sensit Only” Motor Type, after a motor The candy pusher bar is an adjustable bar that mounts to any has been configured check to make sure all the helices are in tray divider to keep tall candies from falling sideways (See the home position. - Page 26 L0190D THIS PAGE INTENTIONALLY LEFT BLANK 20 ...
-
Page 27: Service Programming
L0190D 6 SERVICE PROGRAMMING CASHBOX COINS – Displays number and value of SERVICE MODE coins delivered to the cashbox since last reset. First the TOTAL Value of these coins is shown, then by pressing Access the service mode by pressing the yellow mode button on * you can step through each coin denomination. -
Page 28: Temperature
TEMPERATURE * -- Press to save the new setting and return to the ValueVend menu. This menu applies only to other AMS vendors and has no bearing CHANGE is used to select the group to change on Epic operations. (Group 1 through Group 10, or global). Pressing the “*”... -
Page 29: Tray Setup
6 SERVICE PROGRAMMING L0190D Calorie information for that selection. The values of CHECK JAMMED – The control will attempt to run nnnn can range from 0 (water or diet soda) to 9999. each motor that has caused a jammed motor error. This number will be stored in memory locations that The status of the motor will be displayed afterward. -
Page 30: Motor Types Table
Example: Entering 8 will program a delay Auto Sensor Recovery is an improvement to the AMS Sensit of 0.8 seconds. system, that allows certain vends even when the sensor system is blocked or malfunctioning. -
Page 31: Letter/Number
Level 3. There is a very specific and technical reason this could press 7 to couple selections 24 and 27. The second be used, and AMS recommends that this option remain as “N” for column could also be 5 or 6 for this set. In this example, the display will read COUPLE 24,27. -
Page 32: Hide Card Value
L0190D 6 SERVICE PROGRAMMING Regardless of this setting, if there is cash-based credit on the Due to the absence of a coin mech, the normal No Cheat logic is machine when a Card is inserted (or swiped) in a Cashless disabled, regardless of the VMC option setting. The VMC’s device of this type, the credit is immediately transferred to the fairness is limited to not taking in more money than the maximum Cashless Account. -
Page 33: Options
6 SERVICE PROGRAMMING L0190D Without at least one functioning MDB Device – unless operating OPTIONS in Free Vend Mode - the machine will be unusable. If all of your MDB devices become ‘unhealthy’, the machine will be disabled 1. Message and display “OUT-OF-SERVICE”. The user can customize the scrolling message that is displayed when the vendor is idle. -
Page 34: Serial Number
The synthesizer must be plugged into 9:00 p.m., and may be set to end at 6:00 a.m. (which the DEX plug on the control board. A utility cable (AMS P/N would be the following day). 20786, Harness, Chip Programming) may be used, but it must be... -
Page 35: Clock Settings
Temperature Menu. those users of advanced technical skill who wish to connect such a device to their AMS vendor and have sufficient electronic expertise to do so. Records will not be displayed if they haven’t been recorded yet –... -
Page 36: Energysensit
L0190D 6 SERVICE PROGRAMMING EnergySENSIT The EnergySensit feature is a way of reducing energy consumption. When enabled, EnergySensit predicts periods of inactivity and allows the internal temperature of the vendor to rise slightly – and the lighting turned off - to take advantage of these inactive times. -
Page 37: Troubleshooting
L0190D 7 TROUBLESHOOTING ERROR CODES – CAUSES AND SOLUTIONS TOP LEVEL SUB LEVEL CAUSES SOLUTIONS CODE ERROR CODE Clear any obstructions or dirt from around the Keypad selection button X has been selection buttons and make sure they can move NONE X STUCK depressed more than 2 minutes. -
Page 38: Out Of Service Message
L0190D 7 TROUBLESHOOTING OUT OF SERVICE MESSAGE Certain critical errors will disable the vendor. When this happens, an “OUT OF SERVICE” message will be displayed. To get the vendor back in service, press the mode switch on the control board. Any errors will be displayed immediately. Refer to the list of error codes and explanations below. -
Page 39: Machine Troubleshooting Chart
7 TROUBLESHOOTING L0190D MACHINE TROUBLESHOOTING CHART IF A REPLACEMENT PART IS NECESSARY, PLEASE CONTACT YOUR DISTRIBUTOR The following troubleshooting chart may be used to find quick remedies for electrical and mechanical failures in the vendor. Symptom Possible Cause Remedy No power from power cord. Check power cord, outlet or supply. - Page 40 L0190D MACHINE TROUBLESHOOTING CHART—CONTINUED Symptom Possible Cause Remedy Check that the 2-wire harness connection at the LED Control Board is secure. No Power from LED Control Board. Check that the ON-OFF switch on the LED Control Board is ON. Check that the 3-wire harness connection at the LED Control Board is secure.
-
Page 41: Maintenance
To upgrade firmware, you must first obtain the new file from the micro SD card, available at most electronics retailers. AMS website and store it in a micro SD card. Then follow the steps below to transfer that new firmware into the Control Board’s memory. -
Page 42: Settings (Configurations)
8 MAINTENANCE L0190D This is helpful if you are replacing the Control Board in a certain RECORDING DEX DATA ON SD CARD machine and is especially useful if you are setting up a number of machines that have the same number of motors, prices and DEX data can be saved to a file on the microSD card for options settings. -
Page 43: Sensit 3 Utility
Clean the inside of the vendor using the general vendor configurations, and upgrade firmware. Please contact directions given in CLEANING THE VENDOR your distributor or AMS for more information. INTERIOR on page 36. Leave the vendor door open for a day to allow the interior to thoroughly dry. - Page 44 L0190D THIS PAGE INTENTIONALLY LEFT BLANK 38 ...
-
Page 45: Wiring Diagram
L0190D 9 WIRING DIAGRAM Epic Model Note: Transformer part numbers are forma ed as ‐ 120 V (220V) 39 ... - Page 46 L0190D THIS PAGE INTENTIONALLY LEFT BLANK 40 ...
-
Page 47: Supported Dex Fields
L0190D 10 SUPPORTED DEX FIELDS NOTE: Certain fields may not be reported if the value is zero. BA101 Bill Validator Serial Number DA101 Cashless 1 Serial Number BA102 Bill Validator Model Number DA102 Cashless 1 Model Number BA103 Bill Validator Software Revision DA103 Cashless 1 Software Revision CA101 Coin changer serial number DA201 Value of cashless 1 sales since initialization... - Page 48 – contact AMS for details sent if motor present) 3 DDCMP is for special use only – contact AMS for details Receiving devices should not be designed to expect any PA201 Number of products vended since initialization particular transmission order.
-
Page 49: Optional Equipment
L0190D 11 OPTIONAL EQUIPMENT Part No. 20449 - Kit, Candy Pusher The candy pusher is an adjustable bar that mounts to any tray divider to keep tall candies from falling sideways. Four of these are provided with the standard glass front vendor. Part No. - Page 50 L0190D THIS PAGE INTENTIONALLY LEFT BLANK 44 ...
-
Page 51: Time And Date Daylight Savings Display Clock 12/24 Format
L0190D SERVICE MENU MAP SERVICE MODE Open door and press the yellow switch on the con- MDB SETTINGS trol board to enter SERVICE MODE. FORCE VEND Press “#” or “*” to scroll through the functions. NO CHEAT Return to vend mode by closing the door or press- CHANGE BILL ing the mode switch. - Page 52 L0190D THIS PAGE INTENTIONALLY LEFT BLANK 46 ...
Need help?
Do you have a question about the EPIC SENSIT 3 and is the answer not in the manual?
Questions and answers