
Related Manuals for Rockwell Automation Allen-Bradley VisiSight 42JT Series


Summary of Contents for Rockwell Automation Allen-Bradley VisiSight 42JT Series
- Page 1 User Manual 42JT VisiSight™ Photoelectric Sensors with IO-Link Interface 42JT-D*LAT1-*, 42JT-P*LAT1-* ,42JT-E2LAT1-*, 42JT-R*LAT1-*...
- Page 2 If this equipment is used in a manner not specified by the manufacturer, the protection provided by the equipment may be impaired. In no event will Rockwell Automation, Inc. be responsible or liable for indirect or consequential damages resulting from the use or application of this equipment.
-
Page 3: Table Of Contents
Rockwell Automation Solution ........ - Page 4 Appendix E — Abbreviations........89 Rockwell Automation Publication 42JT-UM001A-EN-P...
-
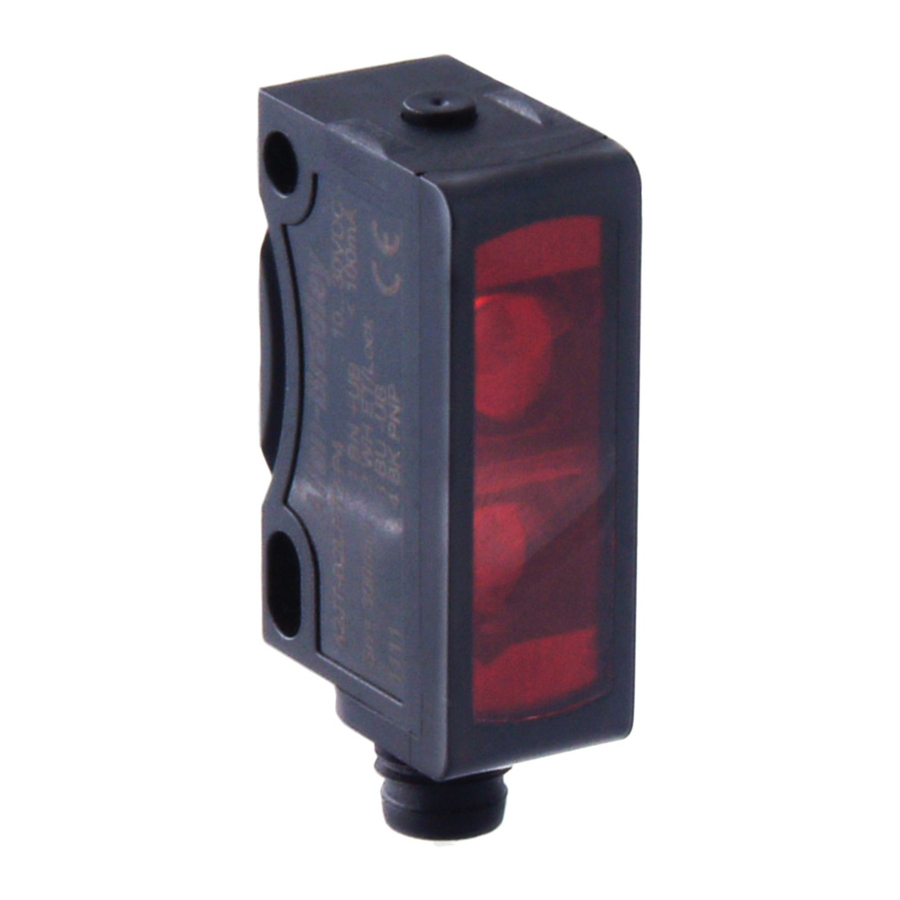
Page 5: Product Overview
• Teach push button for sensitivity and L.O./D.O. selection for ease of setup • Excellent background suppression performance • Alignment indication to aid in the installation of sensors with long range. Rockwell Automation Publication 42JT-UM001A-EN-P... - Page 6 PLC if a sensor has lost connectivity due to failure or faulty wiring. – Margin Low Alarm helps minimize downtime by indicating when the sensor is about to fail due to insufficient light being reflected. Rockwell Automation Publication 42JT-UM001A-EN-P...
-
Page 7: Installation
LED in the Alignment Mode, as follows: 1. Press and release the push button twice within three seconds. After three seconds, the green LED turns OFF for 0.5 second indicating the sensor is in the alignment mode. Rockwell Automation Publication 42JT-UM001A-EN-P... -
Page 8: Specifications
Securely mount the sensor on a firm, stable surface, or support. An application, Mounting which is subject to excessive vibration or shifting, can cause intermittent operation. For installation convenience, Rockwell Automation® offers a wide range of brackets for mounting (see the Accessories section for more details). Rockwell Automation Publication 42JT-UM001A-EN-P... -
Page 9: Dimensions
25.4 (1.34) (1.0) (0.11) (0.10) (0.79) (0.47) 22.9 (0.90) 25.4 (1.34) (1.0) M8 x 1 (0.10) Margin Curves Typical Response Curves Standard Diffuse [800 mm (31.49 in.)] 1000 (0.4) (7.87) (15.75) (23.6) (31.5) Distance [mm (in.)] Rockwell Automation Publication 42JT-UM001A-EN-P... - Page 10 = vertical horizontal = vertical (7.87) (15.75) (23.6) (31.5) Distance [mm (in.)] Laser Diffuse [250 mm (9.84 in.)] (1.96) (3.94) (5.91) (7.87) (9.84) Distance [mm] Distance [mm (in.)] Adonis: what is this referring to? Rockwell Automation Publication 42JT-UM001A-EN-P...
- Page 11 = vertical (1.96) (3.94) (5.91) (7.87) (9.84) Distance [mm (in.)] Red Polarized Retroreflective [6 m (19.68 ft)] 92-109 92-125 92-108 (3.3) (6.6) (9.9) (13.1) (16.4) (19.7) (23) Distance [m (ft)] Adonis: what is this referring to? Rockwell Automation Publication 42JT-UM001A-EN-P...
- Page 12 (19.7) (23) Distance [m (ft)] Laser Polarized Retroreflective — Margin Curve [13 m (42.65 ft)] 92-118 (9.9) (19.7) (29.5) (39.4) (49.2) Distance [m (ft)] Laser Polarized Retroreflective — Spot Size (16.4) (32.8) (49.2) Distance [m (ft)] Rockwell Automation Publication 42JT-UM001A-EN-P...
-
Page 13: Wiring
Distance [m (ft)] Red Transmitted Beam—Spot Size 1200 1000 horizontal = vertical (9.9) (19.7) (29.5) (39.4) (49.2) Distance [m (ft)] Wiring Micro (M12) Male QD on Pigtail and Integral Pico (M8) Male QD M12 Male M8 Male Rockwell Automation Publication 42JT-UM001A-EN-P... - Page 14 Push-button lock: connect to -V. See the Push-Button Lock/Unlock section. For Normal operation, white wire (pin two) and black wire (pin four) needs no connection. To disable light source, connect white wire (pin two) to +V or disable light source via IO-Link. Rockwell Automation Publication 42JT-UM001A-EN-P...
-
Page 15: Teaching The 42Jt In Standard Io (Sio) Mode
< 3 s Place the target at the desired maximum distance. Press and hold the button for three seconds until the yellow LED starts flashing. Release the button. The first condition has now been taught. Target Rockwell Automation Publication 42JT-UM001A-EN-P... -
Page 16: Polarized Retroreflective Teach Procedure
1. To teach the reflector (first condition): t < 3 s Align the sensor to the reflector. Press and hold the button for three seconds until the yellow LED starts flashing. Release the button. The Reflector first condition has been taught. Rockwell Automation Publication 42JT-UM001A-EN-P... -
Page 17: Transmitted Beam Teach Procedure
RUN mode without learning the new Target setting. Restore to factory default setting of maximum range: Perform steps one and two with “no target” in the sensor field of view and no emitter. Rockwell Automation Publication 42JT-UM001A-EN-P... -
Page 18: Light Or Dark Operate Selection
The following applications are covered with dedicated PNP or dedicated NPN selection: • Parallel wiring of multiple sensor outputs: select dedicated PNP or dedicated NPN setting, as needed. • NPN configuration to another power supply or load enabling contact: select dedicated NPN. Rockwell Automation Publication 42JT-UM001A-EN-P... -
Page 19: Push Button Lock/Unlock
+V for more than three seconds to teach the “target,” disconnect from the +V; remove the target and connect to the +V for less than one second to teach “no target.” All push-button functions can also be implemented via RT. Rockwell Automation Publication 42JT-UM001A-EN-P... -
Page 20: Jt Visisight Sensor With Io-Link Overview
• No special cables required • Connectivity options remain the same • Access IO-Link functionality by simply connecting an IO-Link enabled device to an IO-Link master • Analog devices no longer require a dedicated input card Rockwell Automation Publication 42JT-UM001A-EN-P... -
Page 21: How Does Io-Link Work
In this case, it could be possible to monitor/configure the sensor through IO-Link on pin four of the sensor while connecting pin two (if the sensor offers a second output) of the sensor to a standard input card. Rockwell Automation Publication 42JT-UM001A-EN-P... -
Page 22: Io-Link Data Types
(See Product Specifications for minimum product cycle time.) IO-Link Data Types There are four data types available through IO-Link: → Process data Cyclic data → Value status Cyclic data → Device data Acyclic data → Events Acyclic data Rockwell Automation Publication 42JT-UM001A-EN-P... -
Page 23: Accessing Io-Link Data
The controller accesses these using Explicit Messaging. The use of the index and subindex ranges allows targeted access to the device data (for example, for reassigning the device or master parameters during operation). Rockwell Automation Publication 42JT-UM001A-EN-P... -
Page 24: Start-Up Of The I/O System
Rockwell Automation Overview and Benefits Solution Rockwell Automation is the only supplier who provides every piece of the Connected Enterprise solution from top to bottom. Plus, exclusive features, and Premier Integration between Allen-Bradley® components and an Integrated Architecture system allow for a seamless connection and commission of control components. -
Page 25: Premier Integration
Allen-Bradley IO-Link enabled devices into the system. To simplify the integration of the Rockwell Automation IO-Link devices to the Rockwell Automation architecture, there is an IO-Link Add-on Profile (AOP) available for the 1734-4IOL master module. The use of an AOP simplifies the setup of devices by providing the necessary fields in an organized manner that allows set up and configuration of the systems in a quick and efficient manner. -
Page 26: 42Jt Io-Link Features
Enable or Disable Light Source: Turns the 42JT light source ON or OFF. Lock and Unlock User Interface: Disables the push button interface preventing unauthorized users from changing sensor settings. In addition to these parameters, the 42JT allows you to perform remotely the following teach operations: Rockwell Automation Publication 42JT-UM001A-EN-P... - Page 27 ASN parameter within each sensor makes it easy to identify the sensor during commissioning and the lifetime of the machine when collecting data. Name resides in the project and the sensor itself. Rockwell Automation Publication 42JT-UM001A-EN-P...
- Page 28 42JT VisiSight Sensor with IO-Link Overview Tag Naming for I/O Data: Rockwell Automation system solutions provide tag names that are based on the Allen-Bradley sensor connected. I/O data is converted, formatted, and named based on the Allen-Bradley sensor applied. Reduces commissioning time by the OEM and reduces troubleshooting time by the end user when searching for sensor data.
-
Page 29: Setting Up The 42Jt For Io-Link Mode
• RJ45 network cable for EtherNet/IP connectivity: 1585J-M8TBJM-1M9* • 889D cordsets (optional): 889D-F4AC-5** (IO-Link maximum acceptable cable length is 20 m) Software: • Studio 5000 software, version 20 and higher • Sensor specific IODD • 1734-4IOL IO-Link Add-on Profile (AOP) Rockwell Automation Publication 42JT-UM001A-EN-P... - Page 30 2. Connect the 1734-AENTR to the Allen-Bradley controller with the recommended RJ45 Ethernet cable. 3. Wire the sensor cable to the desired location on the IO-Link master (in this example, we are showing the sensor that is wired to the channel 0). Rockwell Automation Publication 42JT-UM001A-EN-P...
- Page 31 LED indicator on the sensor should flash at a 1 Hz rate indicating that it is operating in IO-Link mode. The green indicator associated with the channel that the sensor is wired into on the right-hand side of the master module should also pulse at a 1 Hz rate. Rockwell Automation Publication 42JT-UM001A-EN-P...
-
Page 32: Creating A Project
Chapter 7 “Configuring the IO-Link Master.” 1. Double-click the Studio 5000 icon. 6. Click New Project. 7. To program the controller, select the controller that is used. In this example, it is the “1769 L24ER” CompactLogix. Rockwell Automation Publication 42JT-UM001A-EN-P... - Page 33 8. After selecting the controller, name the project and click “Next.” In this example, the project name is “Project42JT.” 9. Once the project opens up, setup the IP address of the controller to help ensure communication. To set the IP address, click the browsing icon. Rockwell Automation Publication 42JT-UM001A-EN-P...
-
Page 34: Aop Installation
20 or higher of Studio 5000 supports this module and AOP. To verify that the 1734-4IOL is installed, helps ensure the 1734 AENT(R) contains the 1734–4IOL in the library. If the AOP is required to be downloaded, reference Appendix A for more information. Rockwell Automation Publication 42JT-UM001A-EN-P... -
Page 35: Configuring Io-Link Master
12. In the controller organizer tree, find Ethernet under I/O Configuration and right-click to “add new module.” 13. The module window pops up and show the available modules. Select the “1734-AENTR, 1734 Ethernet adapter, two-port, twisted-pair media” and click Create. Rockwell Automation Publication 42JT-UM001A-EN-P... - Page 36 14. Name the Ethernet adapter (in this example our adapter name is “adapter”), set the chassis size, check the module revision and set-up the adapter IP address. Click OK and then Close. 15. The 1734 AENTR now appears in the Controller Organizer tree. Rockwell Automation Publication 42JT-UM001A-EN-P...
- Page 37 Configuring the IO-Link Master 16. Right-click on 1734-AENTR adapter, and then select “New Module.” Rockwell Automation Publication 42JT-UM001A-EN-P...
- Page 38 Configuring the IO-Link Master 17. Select “1734-4IOL” and click Create. 18. Another screen appears showing the IO-Link Configuration screen. 19. Name the IO-Link Master and click OK. Rockwell Automation Publication 42JT-UM001A-EN-P...
- Page 39 Configuring the IO-Link Master The 42JT can now be configured. To configure the sensor, a sensor specific IODD (IO Device Description) file is required. The next steps will show how to register the IODD file. Rockwell Automation Publication 42JT-UM001A-EN-P...
-
Page 40: Registering The 42Jt Iodd
Once the IODD is registered, there’s no need to register the IODD again unless it is manually deleted from the Master Tree. 1. Double-click the 1734-4IOL in the Controller Organizer Tree. 20. Select the IO-Link configuration tab. Rockwell Automation Publication 42JT-UM001A-EN-P... - Page 41 Registering the 42JT IODD The IO-Link configuration screen appears. 21. Right-click the left section of the screen where the channel information is located and click “Register IODD.” Rockwell Automation Publication 42JT-UM001A-EN-P...
- Page 42 Registering the 42JT IODD 22. Select the IODD file that is needed for the sensor being configured and double-click. Rockwell Automation Publication 42JT-UM001A-EN-P...
- Page 43 Registering the 42JT IODD Rockwell Automation Publication 42JT-UM001A-EN-P...
- Page 44 Registering the 42JT IODD 23. Then click “Exit.” The IODD registration is complete. Rockwell Automation Publication 42JT-UM001A-EN-P...
-
Page 45: Connecting The 42Jt To The Io-Link Master
IO-Link master. The controller must always be off line to add a device to the IO- Link Master. 1. Right-click the channel number where the sensor is configured and click “Change.” 24. Click on … to select the appropriate sensor. 25. Select the appropriate sensor and double-click or click “Create.” Rockwell Automation Publication 42JT-UM001A-EN-P... - Page 46 27. Go online to communicate The following pages describe each tab of the 1734-4IOL AOP in detail and how to teach the sensor. The following pages describe each tab of the 1734-4IOL AOP in detail and how to teach the sensor. Rockwell Automation Publication 42JT-UM001A-EN-P...
-
Page 47: Exploring The 42Jt Io-Link Parameters
Parameter Tab: Displays and allows the user to change the IO-Link parameters offered by the 42JT VisiSight Sensor. Diagnosis Tab: Offers the different teach functions available in the 42JT. Rockwell Automation Publication 42JT-UM001A-EN-P... -
Page 48: Io-Link Configuration
Device ID: Displays the unique device ID as defined in the IO-Link specifications IO-Link Revision: Displays the current IO-Link version supported by the device Hardware Revision: Displays the latest sensor hardware information Firmware Revision: Displays the latest sensor firmware information Rockwell Automation Publication 42JT-UM001A-EN-P... - Page 49 The User Specific Information contains the Application Specific Name (ASN) where you can name the sensor with a unique text string for identification. The ASN allows a unique identity of each sensor. These fields can be custom (that is populated and is Read/Write). Rockwell Automation Publication 42JT-UM001A-EN-P...
- Page 50 Static Teach: Is intended for applications where the target can be stopped or is stationary during the teach process. This process requires you to present the target and select the Show Target. Then you remove the target to press the Show Background button. Rockwell Automation Publication 42JT-UM001A-EN-P...
- Page 51 Set Point Value 1. This parameter should not be changed via IO-Link as it impacts the sensing range of the device. (unless you have an understanding of the impact to your application of this change in the parameter). Rockwell Automation Publication 42JT-UM001A-EN-P...
- Page 52 (ro) values for the Minimum Cycle Time (response time of the sensor) and the Master Cycle Time (time that is used by the master to address the sensor) while in IO-Link mode. The user can also visualize the IO-Link Revision of the sensor in this section. Rockwell Automation Publication 42JT-UM001A-EN-P...
- Page 53 The changes can be done on a per channel basis. Before you proceed with this task, take note that the Refresh function: • Is only enabled in online mode. • Is performed initially when the Add-on Profile is launched in online mode. Rockwell Automation Publication 42JT-UM001A-EN-P...
- Page 54 Communication errors (if applicable) are indicated in the dialog for each channel. A link becomes available for you to click to retry communication. Rockwell Automation Publication 42JT-UM001A-EN-P...
- Page 55 • Use Project Values: Downloads the parameter values from the project to the connected IO-Link device. 3. Click “OK.” If you click the “OK” button without fixing the errors, the read/ write parameters of the affected channels are displayed. Rockwell Automation Publication 42JT-UM001A-EN-P...
- Page 56 Exploring the 42JT IO-Link Parameters Rockwell Automation Publication 42JT-UM001A-EN-P...
-
Page 57: Teaching The 42Jt On Io-Link
Device will appear. Click on “Yes.” If you click on the refresh button, the Static Teach – Status will be updating to indicate “Waiting for Command.” This means that the unit received the first entry and is waiting for the next step. Rockwell Automation Publication 42JT-UM001A-EN-P... - Page 58 Device will appear. Click on “Yes.” If you click on the refresh button, the Static Teach – Status will be updating to indicate “Waiting for Command.” This means that the unit received the first entry and is waiting for the next step. Rockwell Automation Publication 42JT-UM001A-EN-P...
- Page 59 Click on “Yes.” If you click on the refresh button, the Static Teach – Status will be updating to indicate “Waiting for Command.” This means that the unit received the first entry and is waiting for the next step. Rockwell Automation Publication 42JT-UM001A-EN-P...
- Page 60 Teaching the 42JT on IO-link 2. Remove the target from the sensor field of view and click “Teach - Stop.” Upon clicking the button a pop-up message asking to send the command to the Device will appear. Click on “Yes.” Rockwell Automation Publication 42JT-UM001A-EN-P...
- Page 61 (signal strength is above 0.5X and below 2X) and zero when the light levels are above the operating margin if the triggered bit is active. The table below describes the significance of both bits when evaluated together: Triggered MarginLowAlarm Description No target is present No target present, item in background is very close to the sensor threshold Target is present and sensor signal is not marginal Target is present and signal strength is marginal (0.5x < signal < 2X) Rockwell Automation Publication 42JT-UM001A-EN-P...
-
Page 62: Setting Up The Sensor With Studio 5000
Before you continue, please be sure that the 1734-AENTR Point IO and the IMPORTANT 1734-4IOL IO-Link master have been added to the project. The 42JT IODD must also be assigned to the respective channel for the sample code to work. Rockwell Automation Publication 42JT-UM001A-EN-P... - Page 63 Setting up the Sensor with Studio 5000 Rockwell Automation Publication 42JT-UM001A-EN-P...
- Page 64 Setting up the Sensor with Studio 5000 3. The “Import Configuration” box displays, accept the default settings, and click “OK.” Rockwell Automation Publication 42JT-UM001A-EN-P...
-
Page 65: Sample Routines
Setting up the Sensor with Studio 5000 Sample Routines 4. From the MainRoutine create a rung of code that runs the subroutine Read_Vendor_Name. Note that you can select any other subroutine as part of this example. Rockwell Automation Publication 42JT-UM001A-EN-P... - Page 66 Instruction, click the square button to open the message configuration. 6. The Message configuration pop-up box is displayed. Click the “Communication” tab. Select the “Browse” button. 7. Browse the Ethernet Network to the 1734-AENTR and select the 1734-4IOL Master. Click “OK.” Rockwell Automation Publication 42JT-UM001A-EN-P...
- Page 67 Setting up the Sensor with Studio 5000 Notice that the path is now set to Master_1 in the communication path. Click “Apply” then “OK.” 8. Repeat Step 8. For the message instructions about the MSG instruction use. Rockwell Automation Publication 42JT-UM001A-EN-P...
- Page 68 Setting up the Sensor with Studio 5000 9. Verify that the routine is free of errors. 10. Download the program to the controller. 11. Put the controller in “Run” mode. Rockwell Automation Publication 42JT-UM001A-EN-P...
-
Page 69: Initial Setup
2. Remove the target. Right click the Teach and select “Toggle Bit” or press Ctrl + T to run the message routine that teaches the background. 3. The last rung automatically executes the Teach Apply command to save the teach process settings. Rockwell Automation Publication 42JT-UM001A-EN-P... -
Page 70: Precision Teach
Precision Teach contact to run the message routine that initiates the precision teach process. Upon successful transfer of the explicit message the last rung automatically executes the Teach Apply command to save the teach process settings. Precision Teach Sample Code Rockwell Automation Publication 42JT-UM001A-EN-P... -
Page 71: Dynamic Teach
Upon successful transfer of the explicit message to stop the Teach Dynamic Teach, the last rung automatically executes the Teach Apply command to save the teach process settings. Rockwell Automation Publication 42JT-UM001A-EN-P... -
Page 72: Read A 42Jt Visisight Parameter Using Explicit Messages
The example below demonstrates how to read the vendor name from a 42JT VisiSight using the MSG Instruction. Refer to Appendix C for specific information on how to configure the MSG parameter for explicit messaging. Rockwell Automation Publication 42JT-UM001A-EN-P... -
Page 73: Instructions
42JT VisiSight User Defined Data Type Information The VisiSight User Defined Data Type helps users integrate the sensor parameters into their PLC program by providing the preformatted data types that make part of the sensor parameters. Rockwell Automation Publication 42JT-UM001A-EN-P... -
Page 74: Troubleshooting
Make sure that the C/Q communication the sensor is not connected to the the device port is connected to the IO-Link master. IO-Link master Push button does not Local operation has been de- Activate local operation. respond to user interface activated. Rockwell Automation Publication 42JT-UM001A-EN-P... -
Page 75: Appendix A - Installing The Add-On Profile
RSLogix™ 5000 program. Add-on Profiles are files that users add to their Rockwell Automation library. These files contain the pertinent information for configuring a device that is added to the Rockwell Automation network. The Add-on Profile simplifies the setup of devices because it presents the necessary fields in an organized fashion. - Page 76 Installing the Add-on Profile 3. Select “Next” in order to install the IO-Link module profiles, accept the license agreements, select “Next” and follow the module-profiles installation wizard. Rockwell Automation Publication 42JT-UM001A-EN-P - September 2015...
- Page 77 Installing the Add-on Profile 4. Be sure the “Install” option is selected, select “Next, ” review the install details and select “Install.” Rockwell Automation Publication 42JT-UM001A-EN-P - September 2015...
- Page 78 Installing the Add-on Profile 5. The installation process begins. The process may take several minutes. Once completed the “Next” button is available, select “Next.” Rockwell Automation Publication 42JT-UM001A-EN-P - September 2015...
- Page 79 Installing the Add-on Profile 6. Select “Finish” and review the release notes for any additional information. The IO-Link AOP installation is completed. Rockwell Automation Publication 42JT-UM001A-EN-P - September 2015...
-
Page 80: Appendix B - Device Parameters
Application Specific Name 0x18 0x00(0) Blank STRING(32) Application Specific Name (User Input) Revision Information Hardware Revision 0x16 0x00(0) Hardware Revision STRING(64) Hardware Revision Firmware Revision 0x17 0x00(0) Firmware Revision 1.01 STRING(64) Firmware Revision Rockwell Automation Publication 42JT-UM001A-EN-P - September 2015... - Page 81 Light Source 0x50 0x01(1) 1000 1: ON Low Gain or High Gain. 0 : LOW Gain Select 0x53 0x01(1) Depends on Sensing Mode BOOL Parameter is only available in 1: HIGH Diffuse sensors Rockwell Automation Publication 42JT-UM001A-EN-P - September 2015...
-
Page 82: Diagnosis Tab
0x05(5) Integer (8) IO-Link Version 1.1 Process Data Index Sub-Index Hex(Dec) Access Default Value Data Type (Length) Allowed Values Process Data Trigger 0x00 BOOLEAN ON or OFF MarginLowAlarm 0x01 BOOLEAN ON or OFF Rockwell Automation Publication 42JT-UM001A-EN-P - September 2015... -
Page 83: Configuring A Message Instruction
Size of all the Parameters that are available in the 42JT. To complete the dialog box, the Service Code and Source Length needs to be provided. A table of the different Read and Write Service Codes and their associated Source Lengths are shown on page Rockwell Automation Publication 42JT-UM001A-EN-P - September 2015... - Page 84 Message Structure and Configuration Example Configuration Examples Rockwell Automation Publication 42JT-UM001A-EN-P - September 2015...
- Page 85 This box contains the number of bytes of service data to be sent or received in 1 byte message. Defined in Data Structure Tables. Destination Element First element of the destination Array. Read_Assembly[0] Rockwell Automation Publication 42JT-UM001A-EN-P - September 2015...
- Page 86 The screen capture that is shown is the Message Configuration dialog box that shows all of the information that is needed to Write to the Application Specific Rockwell Automation Publication 42JT-UM001A-EN-P - September 2015...
- Page 87 Message Structure and Configuration Example Configuration Examples Name Parameter in the 42JT. To open the Message Instruction dialog box, click the blue square box in the Message Instruction. Rockwell Automation Publication 42JT-UM001A-EN-P - September 2015...
- Page 88 1. Click the 1734-4IOL in the IO Configuration. 2. A pop-up box is displayed, advising that changes within the sensor have been detected. Expand the settings and to see that the Application Specific Name has changed to Test. Rockwell Automation Publication 42JT-UM001A-EN-P - September 2015...
- Page 89 Reads an entire index (all parameters within an index) Required Required Read Subindex from the IO-Link device (uses subindex 0) Writes an entire index (all parameters within an index) Required Write Subindex from the IO-Link device (uses subindex 0) Rockwell Automation Publication 42JT-UM001A-EN-P - September 2015...
- Page 90 Write Index (4E) Message Data Format: Byte 0 Byte 1 Byte 2 Byte 3 Channel Number Data 0 Data 1 Data 3 Source Length= 1 byte + Number of bytes of data being written Rockwell Automation Publication 42JT-UM001A-EN-P - September 2015...
-
Page 91: Appendix D - Error Coes And Events
Index not available 0x8011 Subindex not available 0x8012 Service temporarily not available 0x8022 Access denied 0x8023 Parameter value out of range 0x8030 Parameter length overrun 0x8033 Parameter length underrun 0x8034 Invalid parameter set 0x8040 Rockwell Automation Publication 42JT-UM001A-EN-P - September 2015... - Page 92 Error Codes and Events Event Codes Event Codes Code Data storage - Upload request 0xFF91 Rockwell Automation Publication 42JT-UM001A-EN-P - September 2015...
-
Page 93: Appendix E - Abbreviations
Automatic Device Configuration Add-on Instruction Add-on Profile Application Specific Name International Electrotechnical Commission IODD I/O Device Description National Electric Code Quick Disconnect Red, Green, Blue Standard I/O Teach Background Teach Dynamic Teach Mark Rockwell Automation Publication 42JT-UM001A-EN-P - September 2015... - Page 94 Abbreviations Rockwell Automation Publication 42JT-UM001A-EN-P - September 2015...
- Page 96 New Product Satisfaction Return Rockwell Automation tests all of its products to help ensure that they are fully operational when shipped from the manufacturing facility. However, if your product is not functioning and needs to be returned, follow these procedures.
Need help?
Do you have a question about the Allen-Bradley VisiSight 42JT Series and is the answer not in the manual?
Questions and answers