Table of Contents
Advertisement
ALLEN + ROTH and logo design are trademarks or registered
trademarks of LF, LLC. All rights reserved.
ATTACH YOUR RECEIPT HERE
Serial Number__________________ Purchase Date__________________
Questions, problems, missing parts? Before returning to your retailer, call our customer service
department at 1-866-439-9800, 8 a.m. - 8 p.m., EST, Monday - Sunday.
You could also contact us at partsplus@lowes.com or visit www.lowespartsplus.com.
xxxxxxx
welcoming
•
sophisticated
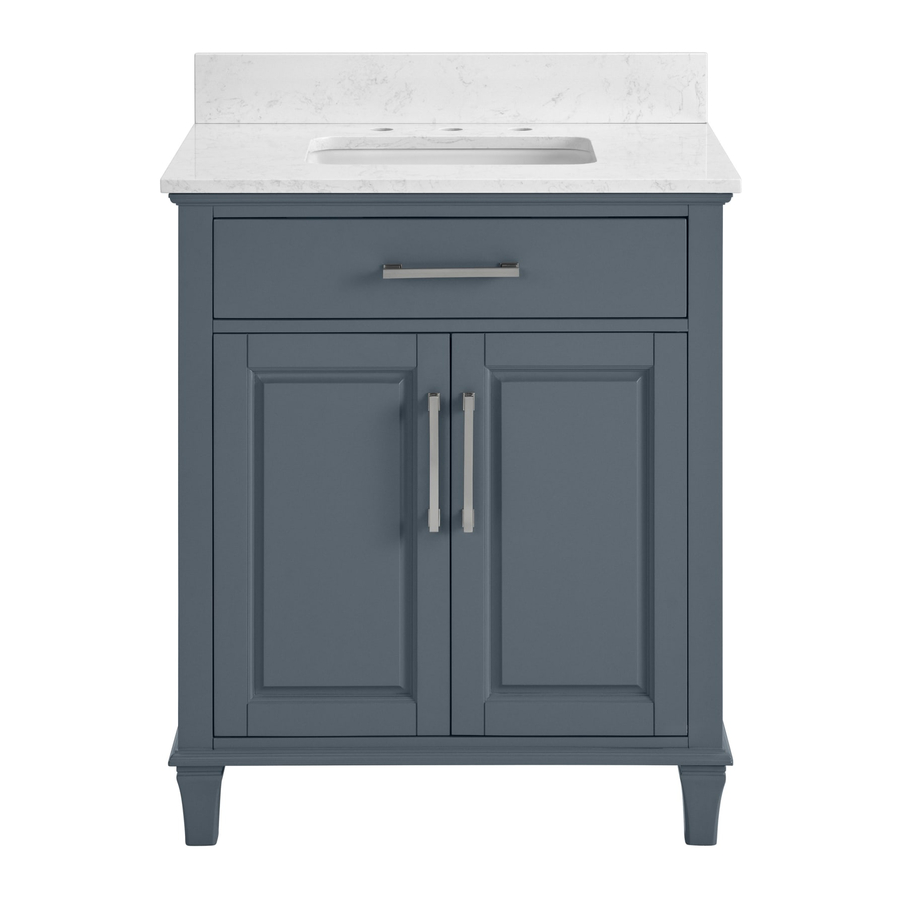
VANITY WITH TOP
1
•
inspiring
ITEM #2694516
MODEL #1789VA-30-310
Français p. 11
Español p. 21
Advertisement
Table of Contents

Related Manuals for Allen + Roth 1789VA-30-310


Summary of Contents for Allen + Roth 1789VA-30-310
- Page 1 • sophisticated • inspiring ALLEN + ROTH and logo design are trademarks or registered ITEM #2694516 trademarks of LF, LLC. All rights reserved. VANITY WITH TOP MODEL #1789VA-30-310 Français p. 11 Español p. 21 ATTACH YOUR RECEIPT HERE Serial Number__________________ Purchase Date__________________ Questions, problems, missing parts? Before returning to your retailer, call our customer service department at 1-866-439-9800, 8 a.m.
-
Page 2: Table Of Contents
TABLE OF CONTENTS Package Contents...........................3 Hardware Contents..........................3 Safety Information..........................3 Preparation............................4 Assembly or Installation Instructions ....................4 Care and Maintenance........................9 Warranty............................9 Replacement Parts List........................10... -
Page 3: Package Contents
PACKAGE CONTENTS PART DESCRIPTION QUANTITY Vanity Top (preassembled to vanity (A)) Backsplash Tip-out Door (preassembled to Vanity (A)) Left Door (preassembled to Vanity (A)) Right Door (preassembled to Vanity (A)) Shelf Floor Plumbing Cutout Lid HARDWARE CONTENTS (NOT SHOWN ACTUAL SIZE) Touch Up Pen Qty. -
Page 4: Preparation
PREPARATION Before beginning assembly of product, make sure all parts are present. Compare parts with package contents list and hardware contents list. If any part is missing or damaged, do not attempt to assemble the product. Estimated Installation Time: 45 minutes (24 hours for silicone caulk to dry). Tools Required for Installation (not included): Phillips screwdriver, utility knife or scissors, silicone caulk, power drill with drill bit Helpful Tools (not included): Measuring tape, level... - Page 5 INSTALLATION INSTRUCTIONS Note: Clean area where the vanity (A) will be permanently located prior to beginning installation, ensuring the vanity (A) will not interfere with any water supply and drain lines once mounted. 2. With two people, carefully place vanity (A) against the wall in its final location.
- Page 6 INSTALLATION INSTRUCTIONS 4. Apply silicone caulk (not included) to unpolished side and bottom of backsplash (C). Position backsplash (C) on top (B) and against wall. Clean any excess caulk before allowing to dry. 5. The back of the vanity is open for accessibility for drain(s) and water line(s) hookup.
- Page 7 INSTALLATION INSTRUCTIONS 6. From the front of the assembly, insert shelf pins at desired height, ensuring they are level. Place shelf (H) on top of shelf pins. 7. If you need to adjust the doors, do so in the following manner. To adjust door up or down, loosen screws (a) on both hinges, adjust door, and retighten screws.
- Page 8 INSTALLATION INSTRUCTIONS 8. Gently open the top tip-out door (E). 9. Gently push up to close the top tip-out door (E). Assembly is now complete. Install desired faucet and drain assemblies (neither included) per the manufacturers’ instructions to complete the installation.
-
Page 9: Care And Maintenance
CARE AND MAINTENANCE • Dust the vanity regularly with a soft, non-lint producing cloth or household dusting product. • You can clean the vanity with a gentle, non-abrasive household cleaner. • Make sure to dry the wood immediately with a soft cloth or towel. •... -
Page 10: Replacement Parts List
310 FP LID Tip-out Tray 1789VA-30-310-TRAY Touch-up pen M-1128 Shelf Pin B1044 Pull (with screw) 1789VA-BN HANDLE Hinge C-90-107 Leveler T-1007 Printed in Vietnam ALLEN + ROTH and logo design are trademarks or registered trademarks of LF, LLC. All rights reserved.
Need help?
Do you have a question about the 1789VA-30-310 and is the answer not in the manual?
Questions and answers