
Subscribe to Our Youtube Channel
Related Manuals for Inficon D-TEK CO2


Summary of Contents for Inficon D-TEK CO2
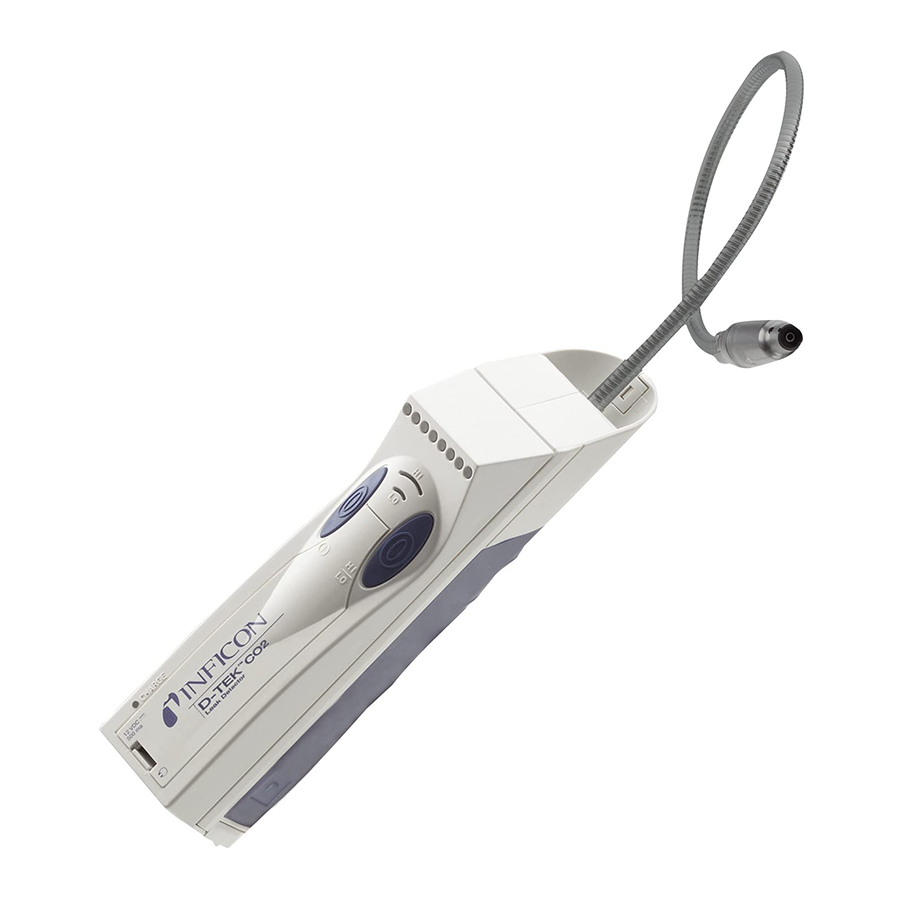
- Page 1 O P E R A T I N G M A N U A L D-TEK™ CO2 Carbon Dioxide Leak Detector EN·ES·FR·DE·IT...
-
Page 2: Declaration Of Conformity
Equipment Description ..D-TEK CO2 Leak Detector Applicable Directives ..73/23/EEC as amended by 93/68/EEC... - Page 3 Thank you for buying the INFICON D-TEK CO2 Leak Detector! With normal use, your D-TEK CO2 from INFICON will give you years of trouble-free service. To get the best performance from your D-TEK CO2, please read this manual carefully before you start using the instrument. If you have any questions or need additional assistance, please call +49 221 56788-660.
-
Page 4: Getting Started
Do not operate this instrument in the presence of gasoline, natural gas, propane, or in other combustive atmospheres. Using the D-TEK CO2 is simple. Press the power switch once to turn the detector ON. The green ON indicator lamp will illuminate, and the yellow indicator lamps will illuminate from left to right in a running fashion while the infrared cell warms up (approximately 60 seconds). -
Page 5: Finding Leaks
5. When the D-TEK CO2 signals a leak, pull the probe away from the leak for a moment, then bring it back to pinpoint the location. -
Page 6: Recharging The Power Stick
To recharge the power stick, use one of the instrument’s power cords. NOTE: The D-TEK CO2 does not need to be fully charged to operate. Additionally, the power stick does not need to be fully discharged before recharging. -
Page 7: Changing The Filter Cartridge
Slide a new filter cartridge into the cap. Twist the cap with the new filter cartridge onto the probe base until it is tight. NOTE: It is very important that you operate the D-TEK CO2 with a filter cartridge installed at all times. Failure to do so could damage the leak detector's... -
Page 8: Changing The Infrared Cell
Components may be hot. Turn off detector and disconnect power adapter cord before removing the infrared cell door. The D-TEK CO2’s infrared cell (IR cell) is located in the body of the detector. The IR cell is a complete assembly consisting of a metal tube, connectors and electronic components. -
Page 9: Removing/Replacing The Power Stick
Disengage the connector and slide the power stick out of the D-TEK CO2. To install a fresh power stick, slide the new stick into the D-TEK CO2 and push the miniature connector on the power stick into the mating half on the PCB board. -
Page 10: Replacement Parts And Accessories
Power Stick ..........712-700-G1 Replacement infrared cell for D-TEK CO2 ..... . 716-701-G1 Filter Cartridges, package of 5 . -
Page 11: Troubleshooting Guide
INFICON. 2b) Pump may have 2b) You should hear the pump failed. running after the D-TEK CO2 has completed its warm up sequence and is held up to your ear. VERIFY it is not a low battery condition (see #3). - Page 12 5) Pump is not 5a) Pump has failed. 5a) You should hear the pump working. running after the D-TEK CO2 has completed its warm up sequence and is held up to your ear. VERIFY it is not a low battery condition (see #3).
-
Page 13: Warranty And Liability-Limitation
MERCHANTABILITY or of FITNESS FOR A PARTICULAR PURPOSE or otherwise. All such other warranties are expressly disclaimed. INFICON shall have no liability in excess of the price paid to INFICON for the instrument plus return transportation charges prepaid. INFICON shall have no liability for any incidental or consequential damages. -
Page 14: Declaración De Conformidad
Declaración De Conformidad Se certifica que este equipo, diseñado y fabricado por INFICON® Inc., Two Technology Place, East Syracuse, NY 13057 EE.UU., cumple con los requisitos esenciales de seguridad de la Unión Europea y se coloca en el mercado en forma correspondiente. - Page 15 ¡Gracias por adquirir el Detector de fugas de dióxido de carbono D-TEK CO2 de INFICON! Si le da un uso normal, el D-TEK CO2 de INFICON le proporcionará años de servicio sin problemas. Para obtener el mayor rendimiento del D-TEK CO2, lea detenidamente este manual antes de comenzar a utilizarlo.
-
Page 16: Procedimientos Iniciales
Procedimientos iniciales El D-TEK CO2 viene con la celda de infrarrojos y la varilla de energía instaladas. Las baterías de hidruro de níquel/metal en la varilla de energía aún no tienen carga. Para cargarlas, conecte el cable del adaptador de alimentación de corriente alterna a la toma de corriente situada en la parte posterior del aparato y enchufe el adaptador en la toma eléctrica pertinente. - Page 17 NOTA: Para obtener una lectura correcta, es muy importante mover la punta de la sonda más allá del punto de la fuga. El D-TEK CO2 responde sólo a cambios en la concentración del refrigerante a partir del punto de la fuga.
- Page 18 O bien Conecte el adaptador del encendedor de cigarrillos al D-TEK CO2 y use la corriente de la batería de su vehículo. El indicador de carga de la batería (parte posterior izquierda) destella cuando la varilla de energía se está...
- Page 19 Enrosque la cubierta con el nuevo cartucho del filtro en la base de la sonda hasta que quede sujeta. NOTA: es muy importante que, siempre que trabaje con el D-TEK CO2, haya un cartucho de filtro instalado. De lo contrario, podrían resultar dañados los...
- Page 20 Si se desarma la celda, se destruirá. Esta celda de IR especializada funciona durante aproximadamente 800 horas. Cuando la celda de IR ha alcanzado el límite de su vida útil, el D-TEK CO2 hace que destellen todos los indicadores de fugas. Para reemplazar la celda de IR: 1.
- Page 21 Para instalar una nueva varilla de energía, deslice la varilla nueva dentro del D-TEK CO2 y empuje el conector miniatura sobre la varilla dentro de la mitad de acoplamiento del tablero de la PCB. Una vez que la varilla de energía haya quedado en su lugar, cierre el compartimiento de la batería alineando las dos...
-
Page 22: Especificaciones
Piezas y accesorios de recambio Las piezas y accesorios de recambio del D-TEK CO2 están disponibles en el mismo distribuidor donde adquirió el aparato. Estuche de almacenaje de plástico moldeado....716-702-G1 Audífonos . - Page 23 De no ser así, póngase en contacto con INFICON. 2b) Puede haber 2b) Cuando el D-TEK CO2 fallado la bomba. finaliza la secuencia de calentamiento y se le acerca al oído, debe escucharse la bomba funcionar.
- Page 24 (por ej., el operador puede rápidamente. usar una máscara). 5) La bomba 5a) Ha fallado 5a) Cuando el D-TEK CO2 no funciona. la bomba. finaliza la secuencia de calentamiento y se le acerca al oído, debe escucharse la bomba funcionar.
- Page 25 INFICON determine atribuible a defectos de material o mano de obra. La responsabilidad de INFICON se limita, a opción suya, a la reparación o el reemplazo del aparato o de la pieza deficiente.
-
Page 26: Déclaration De Conformité
été conçu. Description de l’équipement ..Détecteur de fuite D-TEK CO2 Directives applicables ..73/23/CEE, amendée par 93/68/CEE 89/336/CEE, amendée par 93/68/CEE... - Page 27 Merci d'avoir acheté le détecteur de fuite D-TEK CO2 d'INFICON ! En usage normal, votre D-TEK CO2 d'INFICON vous donnera des années de service sans incident. Pour obtenir les meilleures performances de votre D-TEK CO2, veuillez lire attentivement ce manuel avant de commencer à utiliser l'instrument. Si vous avez des questions ou besoin d'une assistance supplémentaire, veuillez appeler le...
-
Page 28: Mise En Route
Mise en route La cellule infrarouge et le pack de batteries sont installés dans le D-TEK CO2 en usine. Les batteries nickel/hydrure de métal contenues dans le pack de batteries ne sont pas encore chargées. Pour les charger, connectez le cordon du transformateur à... - Page 29 Un casque peut être utilisé avec le D-TEK CO2. Lorsque le casque est branché au détecteur, le signal sonore s’entend uniquement dans le casque. AVE RT IS SEME NT Utiliser uniquement le casque fourni par INFICON, nº de référence 032-0428. De graves lésions de l’ouïe peuvent se produire si un autre casque est utilisé.
- Page 30 Pour recharger le pack de batteries, utilisez l’un des cordons d’alimentation de l’instrument. NOTE: Le D-TEK CO2 n'a pas besoin d'être complètement chargé pour fonctionner. De plus, il n'est pas nécessaire que le pack de batteries soit complètement déchargé...
-
Page 31: Remplacement De La Cartouche Filtrante
à travers le filtre et affectera la sensibilité. P R É C A U T I O N Éteignez le D-TEK CO2 et tenez la sonde avec l'embout du filtre dirigé vers le bas lorsque vous retirez le capuchon du filtre. - Page 32 La cellule infrarouge (cellule IR) du D-TEK CO2 est située dans le corps du détecteur. La cellule IR est une unité complète comprenant un tube métallique, des connecteurs et des composants électroniques.
- Page 33 Retrait / remplacement du pack de batteries Le D-TEK CO2 utilise une batterie/un pack de batteries pré-assemblé. Retirez la porte du compartiment des batteries, au dos du D-TEK CO2, en appuyant sur les deux boutons de verrouillage de la poignée et en sortant tout droit la porte.
-
Page 34: Pièces De Rechange Et Accessoires
Pièces de rechange et accessoires Les pièces de rechange et accessoires pour votre D-TEK CO2 sont disponibles auprès du revendeur chez qui vous avez acheté l’instrument. Boîtier de rangement en plastique moulé ..... . 716-702-G1 Casque . -
Page 35: Guide De Dépannage
INFICON. 2b) Panne possible de 2b) Vous devriez entendre la la pompe. pompe fonctionner une fois que le D-TEK CO2 a atteint sa température de fonctionnement et que vous le tenez à votre oreille. VÉRIFIEZ qu'il ne s'agit pas d'une batterie déchargée (voir nº... - Page 36 5a) Panne de la 5a) Vous devriez entendre la fonctionne pas. pompe. pompe fonctionner une fois que le D-TEK CO2 a atteint sa température de fonctionnement et que vous le tenez à votre oreille. VERIFIEZ qu'il ne s'agit pas d'une batterie déchargée (voir nº...
- Page 37 INFICON garantit que votre détecteur de fuite de fluide frigorigène D-TEK CO2 sera exempt de défauts de matériaux ou de fabrication pendant deux ans à compter de la date d'achat. INFICON ne garantit pas les articles qui se détériorent lors d'une utilisation normale, notamment le pack de batteries, l'élément d'absorption à...
- Page 38 Anwendungen eingesetzt wird, für die es vorgesehen ist. Gerätebeschreibung... D-TEK CO2 Lecksucher Anwendbare Richtlinien ..73/23/EEC in der Fassung von 93/68/EEC...
- Page 39 Unter normalen Gebrauchsbedingungen sollte Ihnen der D-TEK CO2 von INFICON viele Jahre störungsfreie Dienste leisten. Für eine optimale Leistung des D-TEK CO2 empfehlen wir Ihnen, vor dem erstmaligen Gebrauch dieses Instruments die vorliegende Anleitung sorgfältig durchzulesen. Falls Sie irgendwelche Fragen haben oder Unterstützung benötigen, rufen Sie uns bitte unter +49 221 56788-660 an.
- Page 40 Propangas und in anderen entzündbaren Atmosphären nicht in Betrieb genommen werden. Die Bedienung des D-TEK CO2 ist ganz einfach. Zum Einschalten des Lecksuchers den Stromschalter einmal betätigen. Daraufhin leuchtet die grüne Einschaltanzeige auf. Die gelben Anzeigelampen leuchten der Reihe nach von links nach rechts auf, während sich die Infrarotzelle aufwärmt (was ca.
- Page 41 Wenn das Instrument eine Leckquelle feststellt, leuchten die gelben Anzeigelampen auf und es wird ein anderer hörbarer Ton ausgegeben. 5. Wenn der D-TEK CO2 ein Leck signalisiert, muss die Sonde kurz vom Leck zurückgezogen und dann dem Leck wieder angenähert werden, damit die Leckstelle präzise geortet wird.
- Page 42 7. Die Empfindlichkeitseinstellung nach dem Isolieren der Leckquelle wieder auf HOCH zurückstellen, um mit dem D-TEK CO2 weiterarbeiten zu können. 8. Nach erfolgter Überprüfung des Lecks das Instrument ausschalten. Wiederaufladen des Akku-Stabs Ein vollständig geladener Akku-Stab sollte einen länger als 6 ½ Stunden währenden Dauerbetrieb des Instruments ermöglichen.
- Page 43 Wechsel der Filterpatrone Im D-TEK CO2 kommt eine speziell konstruierte Filterpatrone zum Einsatz, die genau in eine Schutzkappe passt. Die Filterpatrone sollte immer dann ersetzt werden, wenn sie verschmutzt erscheint oder wenn in der Filterpatrone eingeschlossene Substanzen die Ansprechempfindlichkeit des D-TEK CO2 zu beeinträchtigen scheinen.
- Page 44 Abnehmen der Infrarot-Zellenklappe den Lecksucher ausschalten und das Netzadapterkabel abziehen. Die Infrarotzelle (IR-Zelle) des D-TEK CO2 befindet sich im Gehäuse des Lecksuchers. Es handelt sich dabei um eine komplette Baugruppe aus Metallrohr, Anschlüssen und elektronischen Komponenten. Die IR-Zelle darf nicht auseinandergebaut werden, da sie dadurch zerstört würde.
- Page 45 Entfernen/Ersetzen des Akku-Stabs Der D-TEK CO2 verwendet einen vormontierten Akku-Stab/Batterie. Die Klappe zum Batteriefach auf der Rückseite des D-TEK CO2 durch Drücken auf beide Freigabetasten am Griff entfernen. Die Klappe gerade herausziehen. Der Akku-Stab ist über einen elektrischen Miniaturanschluss mit der Leiterplatte verbunden.
-
Page 46: Technische Daten
Ersatz- und Zubehörteile Ersatz- und Zubehörteile für den D-TEK CO2 können vom gleichen Händler bezogen werden, von dem Sie das Instrument erworben haben. Spritzguss-Aufbewahrungsbehälter ......716-702-G1 Kopfhörer . - Page 47 Lampen blinken. (Eine einzelne blinkende grüne Lampe bei gleichzeitig ausgegebenem Audiosignal ist in Ordnung.) Wenn gelbe Lampen der Reihe nach in Querrichtung aufleuchten, 90 Sekunden abwarten, ob das Gerät einen Signalton auszugeben beginnt. Wenn nicht, INFICON kontaktieren.
- Page 48 2b) Pumpe ist 2b) Sie sollten nach CO2. möglicherweise Abschluss der ausgefallen. Aufwärmsequenz durch den D-TEK CO2 und wenn Sie das Gerät ans Ohr halten, die Pumpe laufen hören. SICHERSTELLEN, dass kein Batterie-schwach-Zustand vorliegt (siehe Nr. 3). Wenn nicht, INFICON kontaktieren.
- Page 49 5) Pumpe nicht in 5a) Pumpe ist 5a) Sie sollten nach Betrieb. ausgefallen. Abschluss der Aufwärmsequenz durch den D-TEK CO2 und wenn Sie das Gerät ans Ohr halten, die Pumpe laufen hören. SICHERSTELLEN, dass kein Batterie-schwach-Zustand vorliegt (siehe Nr. 3).
-
Page 50: Garantie Und Haftungsbeschränkung
Garantie und Haftungsbeschränkung INFICON garantiert, dass der D-TEK CO2-Lecksucher für die Dauer von zwei Jahren ab Kaufdatum frei von Material- und Ausführungsfehlern ist. INFICON übernimmt keine Garantie für Teile, die bei normaler Verwendung verschleißen, wie z. B. den Akku-Stab, das Infrarotabsorptionselement und Filter. Darüber hinaus übernimmt INFICON keine Garantie für Geräte, die unsachgemäß... -
Page 51: Dichiarazione Di Conformità
è destinata e per cui è stata costruita. Descrizione ....Cercafughe D-TEK CO2 Direttive pertinenti ... . 73/23/CEE, così come modificata da 93/68/CEE 89/336/CEE, così... - Page 52 Complimenti per l’acquisto del Cercafughe INFICON D-TEK CO2. Nelle normali condizioni di utilizzo, il D-TEK CO2 assicura anni di funzionamento senza problemi. Per ottenere le migliori prestazioni dal D-TEK CO2, leggere attentamente questo manuale prima dell'uso. Per eventuali domande o assistenza, chiamate il numero +49 221 56788-660;...
- Page 53 Introduzione Il D-TEK CO2 viene fornito completo di cella IR e gruppo batteria già installati; le batterie NiMH contenute all'interno di quest'ultimo non sono cariche al momento dell'acquisto. Per caricarle, collegare il cavo di alimentazione al trasformatore c.a. e all'ingresso di alimentazione che si trova sul retro dello strumento, quindi collegare il trasformatore ad una presa di rete.
- Page 54 NOTA: Per ottenere una lettura corretta è importante passare la sonda oltre il punto della possibile perdita. Il D-TEK CO2 infatti rileva le eventuali variazioni della concentrazione di refrigerante che fuoriesce dalla perdita; spostando lo strumento si permette ad esso di rilevare accuratamente queste variazioni.
- Page 55 è fissa. La ricarica completa richiede circa 10 ore. Sostituzione della cartuccia filtro Il D-TEK CO2 usa una speciale cartuccia filtro inserita all'interno di un elemento protettivo. La cartuccia va sostituita quando è sporca oppure se si ritiene che all'interno ci siano particelle o sostanze che influiscono sulla sensibilità...
- Page 56 Sostituzione della cella a infrarossi AT T E N ZI O NE I componenti potrebbero essere caldi; spegnere il cercafughe e scollegare il cavo del trasformatore prima di togliere lo sportello della cella a infrarossi. La cella a infrarossi (IR) è alloggiata all’interno del cercafughe ed è composta da un tubo metallico, connettori e componenti elettrici.
-
Page 57: Ricambi E Accessori
Ricambi e accessori Le parti di ricambio e gli accessori del D-TEK CO2 possono essere richiesti al rivenditore presso il quale è stato acquistato. Custodia stampata in plastica ....... 716-702-G1 Cuffie . -
Page 58: Caratteristiche Tecniche
Caratteristiche tecniche Utilizzo ........ambiente aperto / coperto Sensibilità... - Page 59 INFICON. 2b) Possibile guasto 2b) Al termine della della pompa. sequenza di riscaldamento, tenendo il D-TEK CO2 vicino all'orecchio dovrebbe sentirsi la pompa in funzione. CONTROLLARE che la batteria non sia scarica (vedi punto 3); se non è scarica, rivolgersi alla INFICON.
- Page 60 5) La pompa non 5a) Guasto della 5a) Al termine della sequenza funziona. pompa. di riscaldamento, tenendo il D-TEK CO2 vicino all'orecchio dovrebbe sentirsi la pompa in funzione. CONTROLLARE che la batteria non sia scarica (vedi punto 3); se ciò non accade, rivolgersi alla INFICON.
- Page 61 Garanzia e limitazione della responsabilità La INFICON garantisce il cercafughe D-TEK CO2 contro tutti i difetti di materiali e lavorazione per due anni a partire dalla data di acquisto. INFICON non garantisce le parti soggette a normale usura, ovvero il gruppo batteria, l’elemento di assorbimento dei raggi infrarossi e i filtri.
-
Page 62: Repair/Maintenance
Repair/Maintenance Date Maintenance Signature Remarks Repair Date Maintenance Signature Remarks Repair Date Maintenance Signature Remarks Repair Date Maintenance Signature Remarks Repair ... - Page 63 Repair/Maintenance Date Maintenance Signature Remarks Repair Date Maintenance Signature Remarks Repair Date Maintenance Signature Remarks Repair ...
- Page 64 Bonner Strasse 498 D-50968 Cologne, Germany Phone: +49 221 56788-660 Fax: +49 221 56788-9660 E-Mail: servicetools.europe@inficon.com www.inficonservicetools.com 074-421-P11A...
Need help?
Do you have a question about the D-TEK CO2 and is the answer not in the manual?
Questions and answers