
Related Manuals for Broil King P3


Summary of Contents for Broil King P3
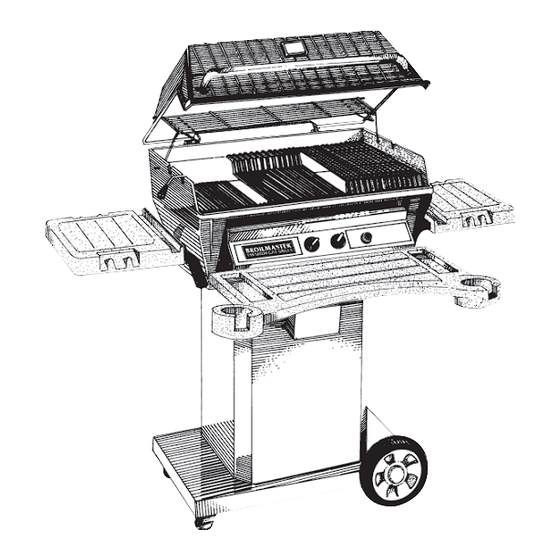
- Page 1 "P" G REMIUM RILL ’ WNER ANUAL ATURAL OR ROPANE PTIONAL CCESSORIES HOWN P4 M ODELS B100024-1-0502 P3, P4 Page 1...
-
Page 2: If You Smell Gas
IMMEDIATELY CALL YOUR GAS SUPPLIER OR FIRE DEPARTMENT 5. D O NOT TOUCH ELECTRICAL SWITCHES EAR LEATHER WORK GLOVES AND HANDLE PARTS CAREFULLY ONLY USE PROPANE CYLINDERS EQUIPPED WITH AN SE ONLY A REPUTABLE PROPANE DEALER WHEN EXCHANGING OR FILLING MPROPER VERFILL P3, P4... - Page 3 Every effort will be made to ensure that Broilmaster continues to be your choice as the premium grill Whether you are at the lake or in the privacy of your own...
-
Page 4: Table Of Contents
ABLE OF You have chosen the finest grill for your outdoor cooking pleasure. Please take time to read this entire manual before assembling your premium Broilmaster Parts Diagram ... 5 List ... 6 Grill Assembly ... 7-11 Propane Gas Grills ... 12-14 Gas Conversion ... -
Page 5: Parts Diagram
ARTS IAGRAM ® All repair part orders should be placed through your local Broilmaster dealer. To locate a dealer in your area, contact Broilmaster Customer Service at 800-851-3153 • .broilmaster.com. To ensure prompt and accurate service, please provide the following information when placing a repair part order: Model Number, Serial Number, Part Name, Part Number, and Quantity of parts needed. -
Page 6: List
B073967 B073967 B073963 B073963 B073963 B100033 B100033 B100033 B662325 B662325 B662325 B076332 B076332 B076332 B076522 B076522 B076522 B100117 B100117 B100117 B100135 B100135 B100135 B073978 B073978 B073978 B906180 B906180 B906180 B905048 B905048 B905048 B100137 B100137 B100137 B100125 B100125 B100125 P3, P4... -
Page 7: Grill Assembly
RILL SSEMBLY Before You Begin All Broilmaster grills require some assembly and installation. Follow all instructions unless noted to apply only to other specific models. If you purchased an accessory with your Broilmaster, follow the instructions provided with the accessory for assembly and installation. If... -
Page 8: Igniter Assembly
Attach one end of the ground wire (25) to the terminal on the rear of the electronic igniter. Attach the remaining end to the ground lug. IGURES Venturi Tubes IGURE O NOT CUT OR DAMAGE IGNITER WIRE IGURE P3, P4... -
Page 9: Radiation Shield
Install the burner stabilizing bracket (41) and fasten with the 10-24 x 3/4 phillips screw and 10-24 wing nut. IGURE INSTALL THIS SIDE UP IGURE P3, P4 Radiation Shield Place the radiation shield (20) in the grill bottom. F IGURE Installing the Burner Insert the burner assembly into the grill bottom with the venturi tubes facing the front of the grill. - Page 10 Fasten the stainless steel front handle (15) to the grill lid (13) with two #10-24 x 1" screws (39). IGURE Page 10 Lid Stop Attach the lid stop assembly to the grill bottom as shown. F IGURE IGURE IGURE IGURE P3, P4...
-
Page 11: Installing Racks
Master’ briquets. Periodically turn the briquets over while they are cool. Grid Lifter Assemble the grid lifter as shown. F When positioning or removing grids always use the grid lifter provided with your grill. P3, P4 IGURE IGURE IGURE IGURE Page 11... -
Page 12: Grill Location
6. provided with a collar to protect the cylinder valve. AUTION WHICH HAS A CAPACITY GREATER THAN TWENTY POUNDS WITH THIS GRILL AND SIDE BURNER ® Premium Gas Grill requires a O NOT USE A PROPANE GAS CYLINDER (20) P3, P4... -
Page 13: Connection Requirements
Flammable materials (gasoline, grill covers, etc.) must not be stored in the cylinder enclosure. Always store Propane cylinders in a secured upright position, out of the reach of children. P3, P4 RILLS Connection Requirements AUTION A GRILL DESIGNED FOR GAS IN A GRILL DESIGNED FOR... - Page 14 OFF the cylinder’s valve and the grill’s control valve. Remove the regulator by turning the plastic handwheel counterclockwise. Cylinder Retaining Bracket IGURE O NOT USE A WRENCH OR ANY OTHER TOOL SE OF A WRENCH OR OTHER TOOL WILL Clockwise P3, P4...
-
Page 15: Gas Conversion
IGURE IGURE 1/8" ORIFICE HOOD P3, P4 Remove the hose and regulator from the valve. Replace the components inside of your grill. Remove the knobs from the valve assembly and locate the adjustment screws on the inside of the valve stem. Using a small screw driver, turn the screws four (4) turns counterclockwise. -
Page 16: Natural Gas Grills
Broilmaster pressure regulators. Your gas grill operates at a manifold pressure of seven (7") inches water column. Connect cart mounted Natural gas grills to a pre-installed gas supply line using the twelve (12’) foot flexible hose and quick disconnect kit... -
Page 17: Air Shutter Adjustment
Refer to Figure 11. 4. Light the burner, wait five minutes and then carefully open the air shutter until the flame is blue and well defined. 5. Retighten the set screw. P3, P4 ROPANE & ATURAL Operating Instructions Using the Igniter... -
Page 18: Before Cooking
5. Turn OFF gas. The grill is now ready for use. Preheating Before cooking on a gas grill, allow the grill to preheat on HI for 5 minutes with the lid closed. This uses very little fuel and hot briquette cook quicker and provide better flavor. -
Page 19: Maintenance
Grease Tray Empty periodically. Replacement tray liners can be purchased at most supermarkets where disposable aluminum baking pans are displayed. P3, P4 Venturi Tubes The venturi tubes allow air and gas to mix prior to USE CARE WHEN burning, thus ensuring an efficient flame. Spiders or other small insects may build webs or nests inside the tubes obstructing air flow. -
Page 20: Troubleshooting
Realign/engage gas injector with the burner tube. Adjust air shutter. Turn or shield grill. Open air shutter. See Maintenance Section. Clean venturi tubes. See Maintenance Section. Clean by washing burner with mild detergent. Allow burner to operate on HI for 10-15 minutes. P3, P4... -
Page 21: Notes
OTES P3, P4 Page 21... -
Page 22: Warranty
529, Belleville, Illinois 62222. WHAT IS COVERED AND FOR HOW LONG. From the date this grill is first purchased for use, Broilmaster will make available, at our factory, a free replacement for any defective part covered by this warranty on the following basis: LIMITED LIFETIME WARRANTY •... -
Page 23: What Is Not Covered
HOW TO GET SERVICE Service under this warranty must be obtained by contacting your Broilmaster dealer. (See telephone directory or call 800-851-3153, Consumer Relations Department, Empire Comfort Systems, Inc.) Provide the dealer with Model number, Serial number, type of gas and purchase verification information. - Page 24 URABLE RILL NOWN ® BROILMASTER A Division of Empire Comfort Systems, Inc. 918 Freeburg Ave. Belleville, Illinois 62220 Phone: 1-800-851-3153 FAX: 1-800-443-8648 .broilmaster.com ISIT OUR WEB SITE AT WWW . B100024-1-0502 Page 24 P3, P4...
Need help?
Do you have a question about the P3 and is the answer not in the manual?
Questions and answers