Table of Contents
Advertisement
Available languages
Available languages
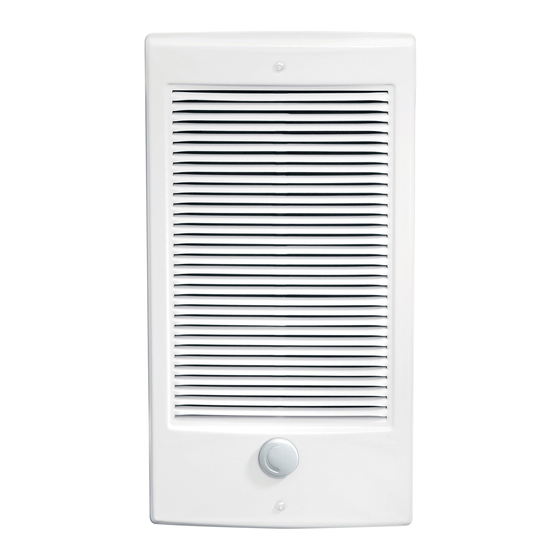
Fan Forced Wall Heater
RSH/RDH/TWH Series
ImpoRTanT InSTRucTIonS
When using electrical appliances, basic precautions should
always be followed to reduce the risk of fire, electric shock
and injury to person, including the following:
1.
Read all instructions before using this heater.
2.
A heater has hot and arcing or sparking parts inside. Do
not use it in areas where gasoline, paint or flammable
liquids are used or stored.
3.
This heater is hot when in use. To avoid burns, do not let
bare skin touch hot surfaces. If provided, use handles
when moving this heater. Keep combustible materials
such as: furniture, pillows, bedding, papers, clothes and
curtains away from heater.
4.
To prevent a possible fire, do not block air intakes or
exhaust in any manner. Do not use on soft surfaces like
a bed where openings may become blocked.
5.
Do not insert or allow foreign objects to enter any venti-
lation or exhaust opening as this may cause an electric
shock or fire, or damage the heater.
Save THeSe InSTRucTIonS
Installation Instructions
Congratulations on purchasing a small wall heater from
Dimplex North America. Your heater is manufactured using
the highest quality materials and workmanship and will
provide many years of trouble free service.
This heater is designed for permanent installation only.
Care should be taken to install according to the following
instructions. All required clearances should be maintained.
In addition all electrical wiring and connections should
comply with local electrical codes.
! noTe: It is extremely important to read all information
labels. Care must be taken to ensure that the heater is
rated the same voltage as the electrical supply wires.
Failure to do so could result in unsafe heater operation as
well as damage to the unit. If replacing an existing heater,
check the labels of the old heater to ensure the voltage of
the new heater is compatible.
All units should be controlled by means of a regulating
thermostat. Certain models only are provided with built in
thermostats. Check the Model Key Information section for
verification. Wall thermostats should comply with the voltage
and wattage of all heaters on the circuit. Built in thermostats
are not suitable for Register Grille Models.
All installations require the following components:
1) Recess Mount Box (Model 1011650100)
2) Heater Assembly (See nameplate Label)
3) Grille (Either Multi- Directional Style or Register Style)
An optional Surface Mount Box is available for installations
that are not recessed in wall cavity.
Figure 1
multi-Directional Grille orientation
Figure 2
Alternate Multi-Directional Grille Orientation
! noTe: Maintain a minimum clearance of 8" from adjacent
walls, floors and ceilings on all four sides of the grille
Step 1 – placement
All units are designed for placement in either interior or
exterior walls. Care should be taken to provide a minimum
of 8" clearance from floors, ceilings and adjacent walls.
Once installed, the airflow through the heater should not be
blocked in any way. Maintain 3' (91.4cm) clearance of objects
from the front of unit. Maintain a spacing of 3' (91.4cm)
between heaters in order to prevent re-circulation of heated
air. Insulation surrounding the back and sides of the recess
mount box will not affect performance. Ensure insulation is
rated for temperatures up to 185°F (85°C).
! noTe: Certain flooring and wall covering materials
(particularly those incorporating clear vinyl materials tend
to distort at temperatures in the vicinity of 140°F (60°C).
Material shall be checked prior to installation to determine
if discoloration will occur. Units are not approved for
placement in floors or ceilings. Do not install in any area
where combustible vapors, gases, dusts or liquids are
present. Fire or explosion may occur.
Step 2 – mounting The Recess Box
Determine the desired orientation of unit. Provide an
opening in wall 14 ¼" x 8 1/8" x 3 3/8" (36.2cm x 20.6cm
Recess Box
Wiring Access
Register Grille
Orientation
7207160100R07
Advertisement
Table of Contents

Related Manuals for Dimplex RSH Series


Summary of Contents for Dimplex RSH Series
- Page 1 Register Grille Congratulations on purchasing a small wall heater from Orientation Dimplex North America. Your heater is manufactured using the highest quality materials and workmanship and will provide many years of trouble free service. ! noTe: Maintain a minimum clearance of 8” from adjacent This heater is designed for permanent installation only.
- Page 2 240V rating when connected to 208 V. cat. no. volts Wattage connections RDH2010 or RDHR2010 2000W L1-A, L2-B & C 1000W L1-A, L2-B ONLY* RDH1507 or RDHR1507 1500W L1-A, L2-B & C 750W L1-A, L2-B ONLY* www.dimplex.com...
-
Page 3: Replacement Parts
High Limit cutout ....2300330100RP in writing to the Service Manager, Dimplex North America Ltd., 1367 Industrial Rd., Cambridge, Ontario N1R 7G8, Canada. -
Page 4: Instructions Importantes
Félicitations pour votre achat d’un petit radiateur mural de Dimplex Amérique du Nord Ltée. Le produit est conçu à l’aide de matériaux et de techniques de fabrication de qualité supérieure ! NoTA : Prévoir un espace minimal de 8 po entre les quatre assurant de nombreuses années d’utilisation sans défaillance. -
Page 5: Utilisation Et Entretien
240 V lorsque réglés à 208 V. Numéro de cat. volts watts connexions RDH2010 ou RDHR2010 2000W L1-A, L2-B & C 1000W L1-A, L2-B seulement* RDH1507 ou RDHR1507 1500W L1-A, L2-B & C 750W L1-A, L2-B seulement* www.dimplex.com... -
Page 6: Pièces De Rechange
Thermostat unipolaire ....TWHT1 soumise par écrit au directeur du service à la clientèle à : Dimplex Thermostat bipolaire ..... TWHT2 North America Limited, 1367 Industrial Road, Cambridge, Ontario, Montage en surface (amande) . - Page 7 ¡Enhorabuena! Usted ha comprado un pequeño calentador ! noTA: Mantenga una distancia mínima de 20 cm entre los de pared de Dimplex North America. Este producto ha sido cuatro lados de la rejilla y las paredes, el piso y el techo concebido con los materiales y la mano de obra de la más...
-
Page 8: Utilización Y Mantenimiento
240 V cuando están conectados a 208 V. no. cat. Voltios Vatios Conexiones RDH2010 o RDHR2010 2000W L1-A, L2-B & C 1000W L1-A, L2-B ONLY* RDH1507 o RDHR1507 1500W L1-A, L2-B & C 750W L1-A, L2-B ONLY* www.dimplex.com... -
Page 9: Piezas De Recambio
Termostato unipolar ..... . TWHT1 ser enviada por escrito a: Dimplex North America Limited, 1367 Termostato bipolar ..... . . TWHT2 Industrial Road, Cambridge Ontario, N1R 7G8, Canadá.
Need help?
Do you have a question about the RSH Series and is the answer not in the manual?
Questions and answers