Table of Contents
Advertisement
Quick Links
SERVICE MANUAL
BASIC
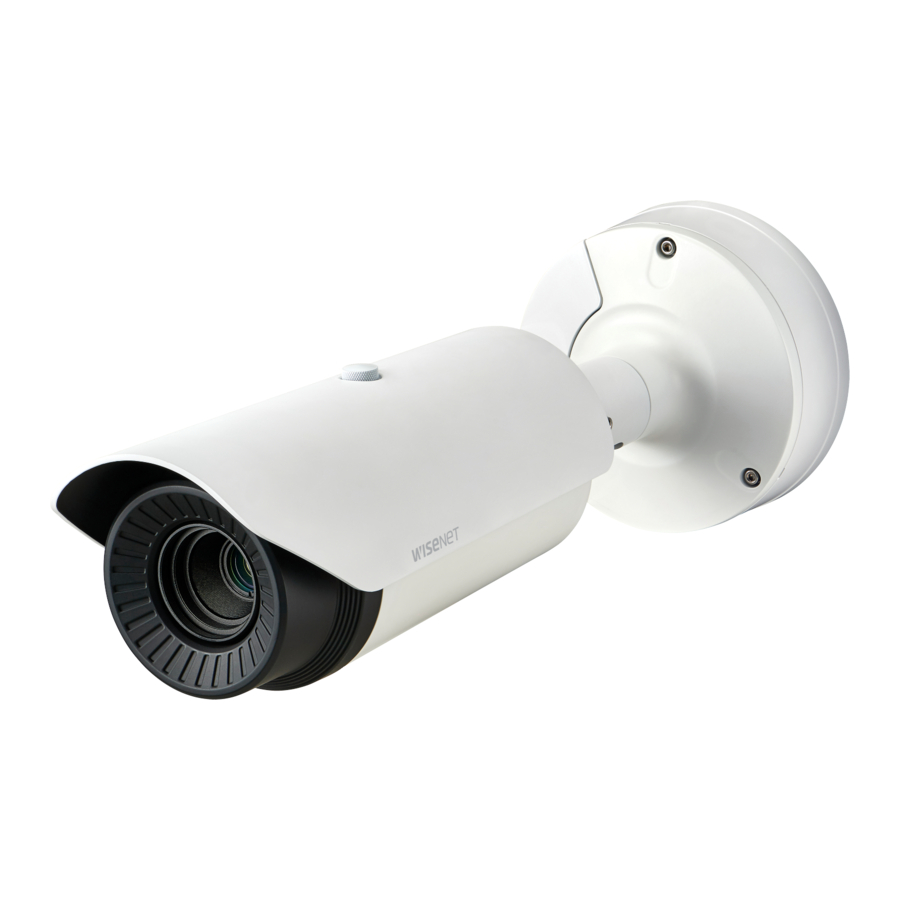
TNO-4030T/4040T/4041T/
TNO-4050T/4051T
FAMILY
TNO-4030TR/4040TR/4041TR
TNO-4030T/4040T/4050T/4030TR/4040TR
VR
Virtual Reality
If you click on the icon, you can see the product at 360 .
This Service Manual is a property of Hanwha Techwin.
Any unauthorized use of Manual can be punished under applicable
International and/or domestic law.
Thermal Network Camera
TNO-4041T/4051T/4041TR
VR
Virtual Reality
Advertisement
Table of Contents

Subscribe to Our Youtube Channel
Related Manuals for Hanwha Techwin TNO-4030T


Summary of Contents for Hanwha Techwin TNO-4030T
- Page 1 Virtual Reality Virtual Reality If you click on the icon, you can see the product at 360 . This Service Manual is a property of Hanwha Techwin. Any unauthorized use of Manual can be punished under applicable International and/or domestic law.
-
Page 2: Table Of Contents
1-2-1 General Servicing Precautions ............... 2 1-2-2 Insulation Checking Procedure .............. 3 1-3 ESD Precautions ..............3 2. Product Specification 2-1 Product Specification .............4 2-1-1 TNO-4030T/4040T/4041T/4050T/4051T ........4 2-1-2 TNO-4030TR/4040TR/4041TR ............7 2-1-3 Key Feature ..................10 2-2 Option Product Specification ..........11 2-2-1 TNO-4030T/4040T/4041T/4050T/4051T/ 4030TR/4040TR/4041TR ............11... - Page 3 5-3 TNO-4030TR/4040TR ............39 5-4 TNO-4041TR ...............42 6. Wiring Diagram & Block Diagrams 6-1 Wiring Diagram ..............44 6-1-1 TNO-4030T/4040T/4041T/4050T/4051T/ 4030TR/4040TR/4041TR ..............44 6-2 Block Diagrams ..............45 6-2-1 Main Block (TNO-4030T/4040T/4041T/4050T/4051T) ....45 6-2-2 Main Block (TNO-4030TR/4040TR/4041TR) ........ 46 6-2-3 Power Block ..................47...
-
Page 4: Precautions
1. Precautions 1-1 Safety Precautions 1) Before returning an instrument to the customer, always make a safety check of the entire instrument, including, but not limited to, the following items: (1) Be sure that no built-in protective devices are defective or have been defeated during servicing. (2) Protective shields are provided to protect both the technician and the customer. -
Page 5: Servicing Precautions
thermally hot parts), (3) the AC supply, (4) high voltage, and (5) antenna wiring. Always inspect in all areas for pinched, out-of-place, or frayed wiring, Do not change spacing between a component and the printed- circuit board. Check the AC power cord for damage. 5) Components, parts, and/or wiring that appear have overheated or that are otherwise damaged should be replaced with components, parts wiring that meet original specifications. -
Page 6: Insulation Checking Procedure
1-2-2 Insulation Checking Procedure Disconnect the attachment plug from the AC outlet and turn the power ON. Connect the insulation resistance meter (500V) to the blades of the attachment plug. The insulation resistance between each blade of the attach- ment plug and accessible conductive parts(see note) should be more than 1 Megohm. NOTE Accessible conductive parts include metal panels, input terminals, earphone jacks, etc. -
Page 7: Product Specification
2. Product Specification 2-1 Product Specification 2-1-1 TNO-4030T/4040T/4041T/4050T/4051T Description Fig TNO-4030T/ 4040T/4050T Virtual Reality TNO-4041T/4051T Virtual Reality Specification Details Items TNO-4030T TNO-4040T TNO-4050T TNO-4041T TNO-4051T Imaging Device Uncooled Micro bolometer Pixel size 17μm Effective Pixels 640x480 NETD <50mK Video CVBS : 1.0 Vp-p / 75Ω composite, 720x480(N), CVBS : 1.0 Vp-p / 75Ω... - Page 8 Details Items TNO-4030T TNO-4040T TNO-4050T TNO-4041T TNO-4051T Off / On - W/W : English/Numeric/Special Characters Camera Title - Common : Multi-line (Max 5), Color (Grey/Green/Red/Blue/Black/White), Transparency, Auto Scale by Resolution Digital Image Off / On(with Gyro) Stabilization Motion Detection Off/ On(8ea, 8point Polygonal zones), Handover...
- Page 9 Details Items TNO-4030T TNO-4040T TNO-4050T TNO-4041T TNO-4051T G.711 u-law /G.726 Selectable Audio Compression G.726 (ADPCM) 8KHz, G.711 8KHz Format G.726 : 16Kbps, 24Kbps, 32Kbps, 40Kbps AAC-LC : 48Kbps at 8/16/32/48KHz Audio Communication Bi-dierctional (2-Way) IPv4, IPv6 TCP/IP, UDP/IP, RTP(UDP), RTP(TCP), RTCP,RTSP, NTP, HTTP, HTTPS, SSL/TLS, DHCP,...
-
Page 10: Tno-4030Tr/4040Tr/4041Tr
2-1-2 TNO-4030TR/4040TR/4041TR Description Fig TNO-4030TR/ 4040TR Virtual Reality TNO-4041TR Virtual Reality Specification Details Items TNO-4030TR TNO-4040TR TNO-4041TR Imaging Device Uncooled Micro bolometer Pixel size 17μm Effective Pixels 640x480 NETD <50mK Video CVBS : 1.0 Vp-p / 75Ω composite, 720x480(N), CVBS : 1.0 Vp-p / 75Ω Video Out 720x576(P), for installation composite, 720x480(N),... - Page 11 Details Items TNO-4030TR TNO-4040TR TNO-4041TR Off / On - W/W : English/Numeric/Special Characters Camera Title - Common : Multi-line (Max 5), Color (Grey/Green/Red/Blue/Black/White), Transparency, Auto Scale by Resolution Digital Image Off / On(with Gyro) Stabilization Motion Detection Off/ On(8ea, 8point Polygonal zones), Handover Off / On (32ea, polygonal zones) Privacy Masking - Color : Grey/Green/Red/Blue/Black/White...
- Page 12 Details Items TNO-4030TR TNO-4040TR TNO-4041TR G.711 u-law /G.726 Selectable Audio Compression G.726 (ADPCM) 8KHz, G.711 8KHz Format G.726 : 16Kbps, 24Kbps, 32Kbps, 40Kbps AAC-LC : 48Kbps at 8/16/32/48KHz Audio Communication Bi-dierctional (2-Way) IPv4, IPv6 TCP/IP, UDP/IP, RTP(UDP), RTP(TCP), RTCP, RTSP, NTP, HTTP, HTTPS, SSL/TLS, Protocol DHCP, PPPoE, FTP, SMTP, ICMP, IGMP, SNMPv1/v2c/v3(MIB-2), ARP, DNS, DDNS, QoS, PIM-SM, UPnP, Bonjour, LLDP...
-
Page 13: Key Feature
The dustproof and waterproof design makes you feel at ease when installing the product outdoors or exposing it to rain. Temperature change detection (TNO-4030T/4040T/4050T/4041T/4051T) ● An event is generated when the temperature value of the camera input image is analyzed and is larger or smaller than the threshold value. -
Page 14: Option Product Specification
2-2 Option Product Specification 2-2-1 TNO-4030T/4040T/4041T/4050T/4051T/4030TR/4040TR/4041TR Description Fig Description Parts No. Q’ ty Availability Remark Cable for the testing EP02-000918A monitor Power Terminal Block EP21-001035 Audio/alarm Terminal TNO-4030T/4040T/4050T/ EP05-002394 Block 4030TR/4040TR Audio/alarm Terminal EP05-002395 TNO-4041T/4051T/4041TR Block Polarity EP02-002131A Power Cable... - Page 15 Description Fig Description Parts No. Q’ ty Availability Remark TNO-4030T/ FC28-002613B HANWHA 4040T/4050T/ FC28-002613A WISENET 4030TR/4040TR Sunshield FC28-002614B HANWHA TNO-4041T/ 4051T/4041TR FC28-002614A WISENET Sunshield Hold FC28-002617A TNO-4030T/4040T/4050T/ BASE WALL MOUNT FC05-001256B 4030TR/4040TR TNO-4030T/4040T/4050T/ Cable bush MC06-000071A 4030TR/4040TR Waterproof stopper PM02-004184A...
-
Page 16: Disassembly And Reassembly
3. Disassembly and Reassembly 3-1 TNO-4030T/4040T/4050T/4030TR/4040TR 3-1-1 Sun Shield Removal 1) Remove in the direction of the arrow Sun Sheld Knob 2) Remove in the direction of the arrow Sun Sheld SUN SHIELD KNOB Parts No. : FC28-002617A SUN SHIELD Parts No. -
Page 17: Ass' Y Front Cover Removal
3-1-2 Ass’ y Front Cover Removal 1) Remove 1 Screw 2) Remove in the direction of the arrow Ass’ y Front Cover 1 SCREW Parts No. : FC18-004515A ASS’ Y FRONT COVER Fig 3-2 Ass’ y Front Cover Removal Disassembly and Reassembly_... -
Page 18: Ass' Y Body Removal
Parts No. : EP02-004360A 3 SCREWS Parts No. : Z6001055201A CABLE Parts No. : EP02-004356A ASS’ Y BODY Parts No. : AM07-011443A : TNO-4030T AM07-011444A : TNO-4040T AM07-011445A : TNO-4050T AM07-012116A : TNO-4030TR AM07-012118A : TNO-4040TR Fig 3-3 Ass’ y Body Removal... -
Page 19: Case Bottom Removal
3-1-4 Case Bottom Removal 1) Remove 3 Screws 2) Remove in the direction of the arrow Case Bottom CASE BOTTOM 3 SCREWS Parts No. : FC18-003309A Fig 3-4 Case Bottom Removal Disassembly and Reassembly_... -
Page 20: Interface & Micro Sd Pba Removal
3-1-5 Interface & MICRO SD PBA Removal 1) Remove 2 Screws 2) Remove in the direction of the arrow Interface Cover 3) Remove in the direction of the arrow Interface PBA 4) Remove in the direction of the arrow Micro SD PBA INTERFACE PBA Parts No. -
Page 21: Lens Removal
3-1-6 Lens Removal 1) Remove in the direction of the arrow Interface Cover 2) Remove in the direction of the arrow Gasket Ring LENS GASKET RING GASKET RING Fig 3-6 Lens Removal Disassembly and Reassembly_... -
Page 22: Tno-4041T/4051T/4041Tr
3-2 TNO-4041T/4051T/4041TR 3-2-1 Sun Shield Removal 1) Remove in the direction of the arrow Sun Sheld Knob 2) Remove in the direction of the arrow Sun Sheld SUN SHIELD KNOB Parts No. : FC28-002617A SUN SHIELD Parts No. : FC28-002614B : HANWHA FC28-002614A : WISENET Fig 3-7 Sun Shield Removal Disassembly and Reassembly_... -
Page 23: Ass' Y Front Cover Removal
3-2-2 Ass’ y Front Cover Removal 1) Remove 1 Screw 2) Remove in the direction of the arrow Ass’ y Front Cover 1 SCREW Parts No. : FC18-004515A ASS’ Y FRONT COVER Fig 3-8 Ass’ y Front Cover Removal Disassembly and Reassembly_... -
Page 24: Ass' Y Body Removal
3-2-3 Ass’ y Body Removal 1) Remove 3 Screws 2) Remove in the direction of the arrow Ass’ y Body 3) Remove 2 Cables CABLE Parts No. : EP02-004358A 3 SCREWS Parts No. : Z6001055201A CABLE Parts No. : EP02-004357A ASS’... -
Page 25: Cover Rear Removal
3-2-4 Cover Rear Removal 1) Remove 3 Screws 2) Remove in the direction of the arrow Cover Rear COVER REAR Parts No. : FC15-005956A 3 SCREWS Parts No. : FC18-004000A Fig 3-10 Cover Rear Removal Disassembly and Reassembly_... -
Page 26: Interface Pba Removal
3-2-5 Interface PBA Removal 1) Remove 2 Screws 2) Remove in the direction of the arrow Interface Cover 3) Remove 1 Screw 4) Remove in the direction of the arrow Interface PBA 1 SCREW Parts No. : Z6001055201A INTERFACE PBA Parts No. -
Page 27: Lens Removal
3-2-6 Lens Removal 1) Remove in the direction of the arrow Interface Cover 2) Remove in the direction of the arrow Gasket Ring LENS GASKET RING GASKET RING Fig 3-12 Lens Removal Disassembly and Reassembly_... -
Page 28: Trouble Shooting
4. Trouble Shooting 4-1 Trouble Shooting 4-1-1 TNO-4030T/4040T/4041T/4050T/4051T/4030TR/4040TR/4041TR If power is not normal Check connection of LAN cable, and replace Is connection correct the LAN cable as needed. between SET and POE HUB, Check operation of POE HUB, and replace and LAN cables? with other port or hub as needed. - Page 29 If Image is not normal Is LED of I/F B’ d lighting? Check output of SMPS B’ d Check output of SMPS B’ d. Check power Is power normally being output of N/W B’ d. supplied to N/W B’ d? Check transmission operation of shutter close Is there any CGI.
-
Page 30: Firmware Upgrade
4-2 Firmware Upgrade 4-2-1 Upgrade 1. Click the Setup ( ) Button from the Monitoring page. Click TNO-4050T Fig 4-1 2. Click the System → Upgrade/Reboot menu from the menu on the left. TNO-4050T Video profile Video & Audio Video profile connection policy Network Keep connection when profile properties are changed Event... - Page 31 3. Click the Upgrade ( ) button from the Upgrade/Reboot Page. TNO-4050T Upgrade / Reboot Video & Audio Upgrade Network Sofware 1.00_180406 Event 1.00_180406 ISP version Analytics 2.5.4 SUNAPI version System UWA version 2.3.1_00000 Product information Click Upgrade / Reboot Sofware Upgrade Upgrade Factory default...
- Page 32 7. Once the firmware upgrade is completed (100%), the Close button becomes activated 8. Click the Close button to close the web browser window. TNO-4050T Upgrade / Reboot Confirm TNO-4030T Video & Audio Upgrade The browser is being closed. Please connect again. 브라우저창이 닫힙니다.재접속 하세요.
- Page 33 10. Connect the camera again and check if the version indicated at Setup → Upgrade/Reboot → S/W is same with the firmware image version. 11. Perform factory initialization when necessary. TNO-4050T Upgrade / Reboot Video & Audio Upgrade Network Sofware 1.00_180406 Event 1.00_180406...
-
Page 34: Entering Serial Number And Mac
4-3 Entering Serial Number and MAC 4-3-1 Input process of MAC & Serial when replacing the NETWORK PBA 1. In the Monitoring screen enter the command in the following format in the Address box. http://<IP Address>/stw-cgi/factory.cgi?mac=<xx:xx:xx:xx:xx:xx>&sn=<xxxxxxxxxxxxxxx> mac: MAC address, sn: Serial number ex) http://192.168.1.100/stw-cgi/factory.cgi?mac=00:11:22:33:44:55&sn=123456789012345 http://192.168.1.100/stw-cgi/factory.cgi?mac=00:11:22:33:44:55&sn=123456789012345 Fig 4-8... - Page 35 3. Move to Setup → System → Upgrade / Reboot page and click the Reset button to reboot the camera. Upgrade/Reboot Upgrade Video & Audio Network S/W Upgrade Upgrade Event Heatmap Factory default Except network parameter & Open SDK System Reset Product information Upgrade/Reboot...
-
Page 36: H/W Factory Reset
DHCP server in the network, you must run the IP Installer program to change the basic network settings such as IP address, Subnet mask, Gateway, etc., before you can connect to the network. Reset Reset Fig 4-12 TNO-4030T/4040T/4050T/4030TR/4040TR Fig 4-13 TNO-4041T/4051T/4041TR Trouble Shooting_... -
Page 37: Exploded View And Parts List
5. Exploded View and Parts List 5-1 TNO-4030T/4040T/4050T ....... 35 5-2 TNO-4041T/4051T .......... 37 5-3 TNO-4030TR/4040TR ........39 5-4 TNO-4041TR ........... 42 NOTE Hover your mouse to position number of the material parts of, appears to be whether or not to 3D run. -
Page 38: Tno-4030T/4040T/4050T
5-1 TNO-4030T/4040T/4050T 2& Exploded View and Parts List_... - Page 39 Loc. No Parts No. Description Specification Q’ ty Availability Remark FC15-005952A COVER-FRONT FOR 13 TO 35 ADC12 FC18-004516A O-RING-D1 88.57-D2 2.62 SILICON AM07-011443A ASSY,BODY-TNO-4030T TNO-4030T AM07-011444A ASSY,BODY-TNO-4040T TNO-4040T AM07-011445A ASSY,BODY-TNO-4050T TNO-4050T AM06-007366A ASSY,PCB-XNO-6085R POWER FC28-002617A KNOB-SHIELD SUN ADC12 FC28-002613B SHIELD-SUN...
-
Page 40: Tno-4041T/4051T
5-2 TNO-4041T/4051T Exploded View and Parts List_... - Page 41 Loc. No Parts No. Description Specification Q’ ty Availability Remark FC15-005952A COVER-FRONT FOR 13 TO 35 ADC12 FC18-004516A O-RING-D1 88.57-D2 2.62 SILICON AM07-011446A ASSY,BODY-TNO-4041T TNO-4041T AM07-011447A ASSY,BODY-TNO-4051T TNO-4051T AM06-007366A ASSY,PCB-XNO-6085R POWER FC28-002617A KNOB-SHIELD SUN ADC12 FC28-002614B SHIELD-SUN HANWHA FC28-002614A SHIELD-SUN WISENET FC28-002616A FOOT-SHIELD SUN...
-
Page 42: Tno-4030Tr/4040Tr
5-3 TNO-4030TR/4040TR (S.N.A.) 3& 2& Exploded View and Parts List_... - Page 43 Loc. No Parts No. Description Specification Q’ ty Availability Remark FC15-005952A COVER-FRONT FOR 13 TO 35 ADC12 FC18-004516A O-RING-D1 88.57-D2 2.62 SILICON EP14-001080 LENS SET-VGA_13MM_F1.0_SUNNY THERMAL TNO-4030TR EP14-001076 LENS SET-VGA_19MM_F1.0_SUNNY THERMAL TNO-4040TR FC18-004517A O-RING-D1 36.17-D2 2.62 SILICON FC28-002617A KNOB-SHIELD SUN ADC12 FC28-002613B SHIELD-SUN...
- Page 44 Loc. No Parts No. Description Specification Q’ ty Availability Remark FC15-005952A COVER-FRONT FOR 13 TO 35 ADC12 EP02-004360A MCX HARNESS-TNO-4040T 30P-30P,425MM EP02-004356A WIRE HARNESS-TNO-4040T 10P-10P,9P-9P,425 EP16-002672A FPCB,MAIN-TNO-4040T 2L,50PIN(0.5PITCH),E Z3809037101A CABLE-FLAT;3809-001383,30V,80C 64MM,40P Z6001055201A SCREW-MACHINE BH,+,M2,L5 FC18-004515A SCREW,SET-HEXA S2,0.7,4,-,M4,SUS Z6003007801A MACHINE SCREW FLAT HEAD,M3xL6 Ni Z6004041101A SET-SCREW_...
-
Page 45: Tno-4041Tr
5-4 TNO-4041TR (S.N.A.) 2& Exploded View and Parts List_... - Page 46 Loc. No Parts No. Description Specification Q’ ty Availability Remark FC15-005952A COVER-FRONT FOR 13 TO 35 ADC12 FC18-004516A O-RING-D1 88.57-D2 2.62 SILICON EP14-001076 LENS SET-VGA_19MM_F1.0_SUNNY THERMAL TNO-4041TR FC18-004517A O-RING-D1 36.17-D2 2.62 SILICON FC28-002617A KNOB-SHIELD SUN ADC12 FC28-002614B SHIELD-SUN HANWHA FC28-002613A SHIELD-SUN WISENET FC28-002616A...
-
Page 47: Wiring Diagram & Block Diagrams
6. Wiring Diagram & Block Diagrams 6-1 Wiring Diagram 6-1-1 TNO-4030T/4040T/4041T/4050T/4051T/4030TR/4040TR/4041TR PRE AMP PBA NUC PBA NETWORK PBA TNO-40X0T INTERFACE PBA TO DETECTOR TO DETECTOR TO NUC PBA TO NUC PBA TO NUC PBA TO NUC PBA TO NETWORK PBA... -
Page 48: Block Diagrams
6-2 Block Diagrams 6-2-1 Main Block (TNO-4030T/4040T/4041T/4050T/4051T) Video Data Control Vtemp(Detector) Signal Pre-AMP PCB SMPS PCB NUC PCB N/W PCB SPI (ISP1, CS1) Shutter Bias Voltage SMPS SPI (ISP1, CS2) Analog Data Clock Video Data 14bit SPI (ISP1, CS0) Vtemp. -
Page 49: Main Block (Tno-4030Tr/4040Tr/4041Tr)
6-2-2 Main Block (TNO-4030TR/4040TR/4041TR) Video Data Control Vtemp(Detector) Signal Pre-AMP PCB SMPS PCB NUC PCB N/W PCB SPI (ISP1, CS1) Shutter Bias Voltage SMPS SPI (ISP1, CS2) Analog Data Clock Video SPI (ISP1, CS0) Data 14bit Vtemp. (ISP/DSP) Sampling FPGA Clock Psync Vsync... -
Page 50: Power Block
6-2-3 Power Block Input specification: DC12V, AC24V, PoE XNO-6080 Output specification of power circuit: Vcc_+12V/0.85A (Designed as 12.95 W based on PoE input) Output specification of DDC circuit: Sequence: 1V -> 5V -> 1.5V -> 3.3V - DC 1V (1ch DDC): Although IC has specification of 6A, 3.2A class is applied to output inductor - DC 1.5V (Channel No. - Page 51 If you want to know additional information which is not included on this Service Manual, Please refer to the 4cust web site. http://www.4cust.net This Service Manual is a property of Hanwha Techwin. November 19. 2019 Any unauthorized use of Manual can be punished under applicable Written in Korea International and/or domestic law.
Need help?
Do you have a question about the TNO-4030T and is the answer not in the manual?
Questions and answers