
Subscribe to Our Youtube Channel
Related Manuals for iDPRT SP410


Summary of Contents for iDPRT SP410
- Page 1 SP410 User Manual Xiamen Hanin Electronic Technology Co., Ltd. ADD: 5F, 10#, Aide Airport Industrial Park, Huli District, Xiamen, China Web: www.idprt.com E-Mail info@idprt.com...
-
Page 2: Table Of Contents
CONTENT IMPORTANT SAFETY INSTRUCTIONS ....................4 CHAPTER 1 INTRODUCTION ......................7 1.1 Packing List ........................7 1.2 Appearance and Components ................... 7 CHAPTER 2 INSTALLATION & USAGE ....................8 2.1 Printer Connection ......................8 2.2 Fanfold Label Loading ......................9 2.3 Operation Panel ....................... - Page 3 SP410 User Manual ◼ Statement This manual content may be changed without permission and our company reserve the rights to make changes in technology, spare parts, hardware and software of the products. Please contract our company, if the user needs further information about the products. Without any written permission from our company, any section of this manual is prohibited to be copied or transferred in any form.
-
Page 4: Important Safety Instructions
SP410 User Manual IMPORTANT SAFETY INSTRUCTIONS Before using the printer, please read carefully the following safety consideration in case of bodily injury or equipment damage. 1.Safety warning The print head will become very hot during printing, please do not touch the printhead and peripheral parts during printing and printing just finished. - Page 5 SP410 User Manual • After the disappearance of the smoke, call your dealer to repair it. 2) Install the printer on the stable surface. • If the printer falls, it may be broken and you may hurt yourself. 3) Use the approved accessories only and do not try to disassemble, repair or remodel it by yourself.
- Page 6 SP410 User Manual 3.Other Precautions The copyright for this user manual and various other manuals is property of our company. Any copying or conversion into electronic form and saving of this material without the express written permission is strictly prohibited. Use of the information contained in this manual is not subject to any patent liability.
-
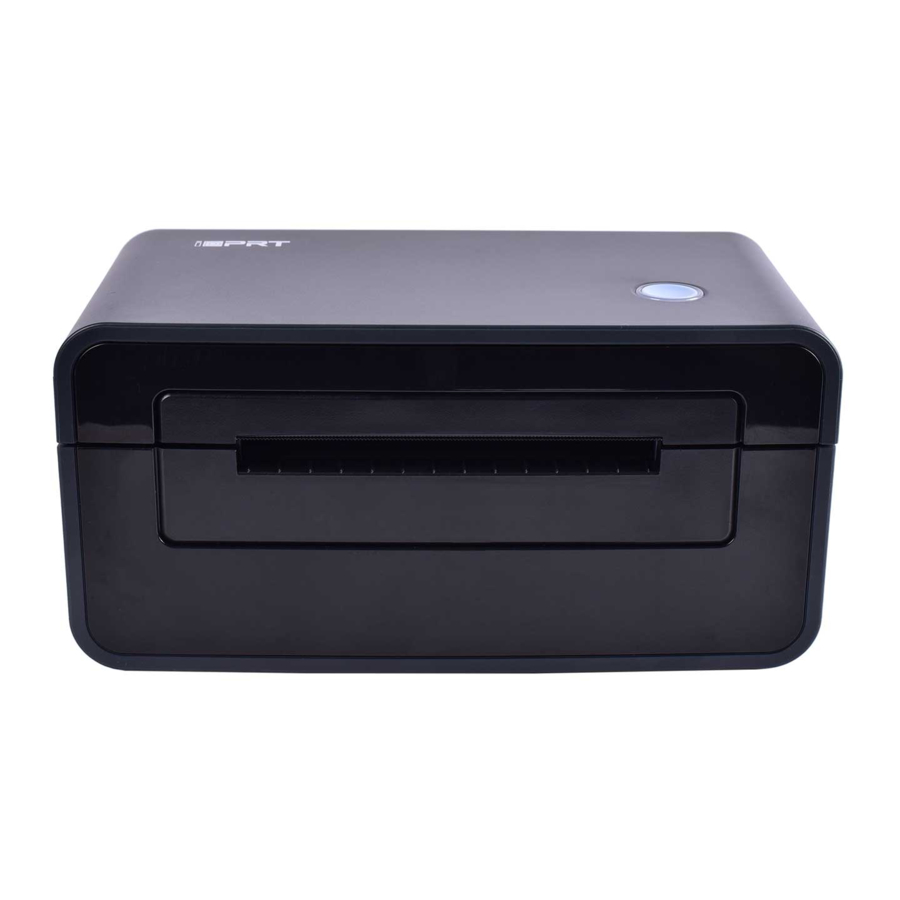
Page 7: Chapter 1 Introduction
SP410 User Manual CHAPTER 1 INTRODUCTION 1.1 Packing List Unpack the printer and keep the packing materials in case you need to ship the printer in the future. Any damages exist, please contact the local dealer. ■Standard Note : The packing materials are based on the order. -
Page 8: Chapter 2 Installation & Usage
SP410 User Manual CHAPTER 2 INSTALLATION & USAGE 2.1 Printer Connection 2.1.1 Power Connection 1. Make sure the printer’s power switch is in the off position. 2. Connect the power cord to printer. 3. Connect the other end of power cord to the outlet. -
Page 9: Fanfold Label Loading
SP410 User Manual 2.2 Fanfold Label Loading ■ Folding Paper Loading 1. Turn the power on, adjust the paper 2. Insert the paper into the entry slot. guide to fit the width of paper. 3. The paper will be sucked into the paper guide automatically. -
Page 10: Operation Panel
SP410 User Manual 2.3 Operation Panel 1.Feed Button: ◼ Turn on In the shutdown state, turn on the power switch behind the printer, then the indicator will be light on. ◼ Turn off When the power switch is turned off, the printer shuts down and the indicator light is off. In the power-on state, turn off the power switch behind the printer, then the indicator will be light off. -
Page 11: Chapter 3 Maintenance & Adjustment
SP410 User Manual CHAPTER 3 MAINTENANCE & ADJUSTMENT Adhesives and coatings of the media can transfer to the printer parts over time along the media path including the thermal print head and media sensor. This build-up can accumulate dust and debris. -
Page 12: Chapter 4 Label Printer Utility Instructions
SP410 User Manual CHAPTER 4 LABEL PRINTER UTILITY INSTRUCTIONS 4.1 Installation Preparation Download the utility application in www.idprt.com. 4.2 Usage Note: the following takes Windows 7 operating system for example, which may vary depending on the operating system on your computer. - Page 13 SP410 User Manual 3.Add/Modify/Delete Printer, Connect Test. ●Click “Modify Printer”. Choose the printer and port (e.g. USB), then click “OK”, showed in “Printer List”. ●Click “Delete Printer”. Click “OK” to delete the printer and click “Cancel” to cancel the command.
- Page 14 SP410 User Manual ●Click “Connect Test” to test whether the connection is successful or not. If connection succeeds, it shows as follows. If connection fails, it shows as follows. Note: 1) Please connect your printer to power firstly, choose one port (depend on the printer you bought) to connect to the PC.
- Page 15 SP410 User Manual 4.Function. ●Click “Printer Information”, showing printer information. (varies by different printers) ●Click “Print Test Text”. Type the text. Click “Print”, then printer starts to print the test text.
- Page 16 SP410 User Manual ●Click “Parameter Setting”. User can set up the density, paper mode and so on.
- Page 17 SP410 User Manual 1) Print density (choose range:0~15): 2) Heat Adjust...
- Page 18 SP410 User Manual 3) Paper Mode (Gap, Continuous, Black Mark): 4) Print Speed (choose range:2~6):...
- Page 19 SP410 User Manual 5) Codepage: 6) Click “Set” and back to the main menu. ●Click “Restore Factory Settings”. Click “OK” to restore factory settings and click “Cancel” to cancel the command. 5.Click “Quit”, and finish printer settings.
-
Page 20: Chapter 5 Windows Driver Instruction
SP410 User Manual CHAPTER 5 WINDOWS DRIVER INSTRUCTION 5.1 Installation Preparation Download Windows Driver application in www.idprt.com. 5.2 Installation Warning: There are some differences under different operating system. Please operate it according to the tips. Recommend to close security software before installation in case of preventing installation. - Page 21 SP410 User Manual 5.Select the default installation port name of printer driver, then click “Next”. 6.Click"Finish".
-
Page 22: Usage
SP410 User Manual 7.After installation, the icon will be found in “Start” → “Devices and Printers”. Note: If you have already installed the driver (No matter what kind of ports), it will generate a USB port automatically when connecting the printer to computer. - Page 23 SP410 User Manual 2.According to different needs, set the page.
- Page 24 SP410 User Manual ●Click “Paper Name”, then choose the paper type. ●Click “Manager” to add a new stock. ●Choose “Rotate” or “Effect”, it will be showed in the “Preview”.
- Page 25 SP410 User Manual ●Click “Advanced” to set “Save Paper”, “Density”, “Speed”, “Test”, “Media Handling”, “Media Type”. 1) Save Paper 2) Density...
- Page 26 SP410 User Manual 3) Speed 4) Test...
- Page 27 SP410 User Manual 5) Media Handling 6) Media type...
- Page 28 SP410 User Manual 3.Click “Watermark”, it recommends to use BMP format.
- Page 29 SP410 User Manual 4.Click “Halftone”.
- Page 30 SP410 User Manual 5.3.2 Printer Properties 1.Click “Start” → “Devices and Printers”. Right click the icon and choose “Printer properties”.
- Page 31 SP410 User Manual 2.Click “General” → “Print Test Page”, and printer will print labels with current settings.
- Page 32 SP410 User Manual 3.Click “Ports”, then choose the port needed. E.g. Configure the port to Serial Port. 1) Choose the Srial Port (COM1), click “Configur Port”.
- Page 33 SP410 User Manual 2) After opening the “Configure Port”, you can view the port data by printing the self-test page and and change the information on the "port setting"(as shown in the picture) to the same port data on the self-test page. After the modification, click "OK"...
- Page 34 SP410 User Manual 4.Click “Advanced” to set the available time for the printer.
-
Page 35: Removing
SP410 User Manual 5.4 Removing Note: Please turn off the printer or unplug the USB cable before removing the driver. 1.Double click Windows Driver. 2.Choose “Uninstall printer driver”, then click “Next”. - Page 36 SP410 User Manual 3.Choose the printer driver name needed to uninstall, then click “Next”. 4.Click"Yes".
-
Page 37: Chapter 6 Mac Driver Instruciton
Download the Mac Driver application in www.idprt.com. 6.2 Driver Installation for macOS Warning: Under different operating system, the screen has slight difference. Please operate it according to the tips. Take SP410 (macOS 10.15) as example. 1. Double click the Driver, click “Continue”. - Page 38 SP410 User Manual 2. Select a destination and click “Continue”.
- Page 39 SP410 User Manual 3. Choose “Installation Type” and click “Continue”-> “Install”.
- Page 40 SP410 User Manual 4. Type in the password of your computer. 5.The installation was successful.
- Page 41 SP410 User Manual 6. Turn on the printer and connect it to your computer (for example: via USB cable) 7. Click: Launchpad -> System Preferences -> Printers & Scanners. 8. Under “Printer & Scanner”, printer SP410 is available.
Need help?
Do you have a question about the SP410 and is the answer not in the manual?
Questions and answers