Table of Contents
Advertisement
Quick Links
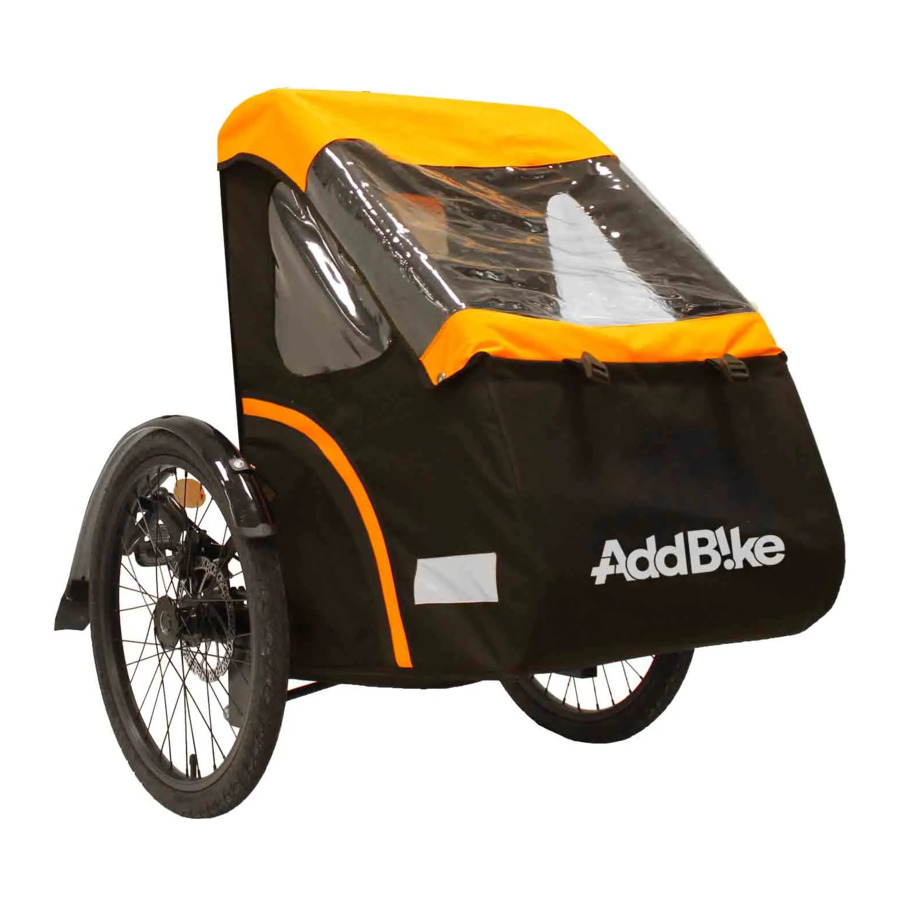
The AddBike
Your Bike
A reversible cargo bike
Child
Groceries
Loads
Non-contractual Photographs
User's and Installation Guide of the
Carry'Box Kid Module
November 2019
Compatible with the AddBike and the AddBike+
This document indicates the correct practices to be respected during use and
assembly / disassembly of the Carry'Box Kid Module. It is imperative to read this document
entirely in order to keep your bike, your AddBike and your Carry'Box Kid in good working
conditions for as long as possible.
Please keep this document.
Advertisement
Table of Contents

Related Manuals for AddBike CarryBox Kid


Summary of Contents for AddBike CarryBox Kid
- Page 1 This document indicates the correct practices to be respected during use and assembly / disassembly of the Carry’Box Kid Module. It is imperative to read this document entirely in order to keep your bike, your AddBike and your Carry’Box Kid in good working conditions for as long as possible.
- Page 2 Welcome to the big family of AddBikers!! There is no need to invest in expensive and large cargo bicycles. With the AddBike you can quickly and easily turn your own bike into a compact cargo bike.
-
Page 3: Table Of Contents
Components of the Carry’Box Kid ....................8 Installing the Carry’Box Kid module on the AddBike .............. 8 Step 1: Fixing the metal frame to the AddBike ................9 Step 2: Fix the hammock to the AddBike .................. 13 Step 3: Fixing the textile envelope on the AddBike .............. 16 Step 4 : Finish installing the hammock .................. -
Page 4: General Warning
AddBike dealer or contact AddBike directly at: support@addbike.fr. Please keep this manual for future reference. It is also important to take into account the directions for use of the AddBike and that of the bike receiving the AddBike. -
Page 5: Lexicon Of The Carry'box Kid Module
2. Lexicon of the Carry’Box Kid module Transparent Window Reflective tape Figure 1 – Textile envelope VERSION V4.1... - Page 6 Lower tubes Transerve bars Upper tubes Do not remove the foam covering the 7 tubes! The foams not only protect the tubes during transport but are also essential for mounting. Upper tubes Transerve Lower bars tubes Figure 2 – Metal frame VERSION V4.1...
- Page 7 Figure 3 – Hammock Figure 4 - Footrest VERSION V4.1...
-
Page 8: Components Of The Carry'box Kid
Improper installation can lead to accidents that could cause serious injury. Install the Carry’Box Kid module on your AddBike only when the latter is properly installed on your bike and after you make sure that your own bike is well maintained so as to ensure stability during installation. -
Page 9: Step 1: Fixing The Metal Frame To The Addbike
Remove screws, nuts and plastic caps from both sides of the compact seat plaque of the AddBike. Do the same with the screws, nuts and plastic caps from both sides of the upper compact plate of the backrest of the Addbike;... - Page 10 • Insert the bottom tubes into the holes of the base and line up the screw holes of both tubes; Figure 7 – Insertion of bottom tubes Put back the screws and nuts previously removed, but not the plastic caps (keep •...
- Page 11 Figure 9 – Insertion of the upper tubes Put back the previously removed screws and nuts from the AddBike’s backrest (but • not the plastic caps) and fix in this way the upper tubes to the AddBike’s backrest tubes; Figure 10 – Screws to be put back...
- Page 12 In the same way, fix the other two transverse bars to the structure. One of them between the two holes at the top of the upper tubes, and the other between the two holes down at the bottom tubes. Upper transverse Low transverse Figure 12 – Metal frame assembled on the AddBike VERSION V4.1...
-
Page 13: Step 2: Fix The Hammock To The Addbike
Step 2: Fix the hammock to the AddBike • Take the hammock and place it on the base of the AddBike according to the figure below; Figure 13 – Positioning the hammock Slip the top of the hammock on the backrest (below the upper transverse bar) and •... - Page 14 Pass the strap of the back of the hammock behind the backrest of the AddBike • (bottom) and fix it using the buckle (without tightening too much for now, to be able to adjust thereafter); Figure 15 – Positioning the back straps Fit the back strap securely between the AddBike backrest and the back plate.
- Page 15 Carry'Box Kid module. • Then, fix this strap on the seat of the AddBike using both the two slots provided for this purpose, and the adjustment buckle; Figure 18 – Fixing the crotch strap on the AddBike’s seat (bottom view of the hammock) VERSION V4.1...
-
Page 16: Step 3: Fixing The Textile Envelope On The Addbike
• lower transverse bar) and close it, clipping together the snap fasteners (below the AddBike). Pass the strip of the footrest in the slot of the AddBike’s seat and clip the snap • fastener Position the footrest textile around the transverse bar and secure using the Velcro •... - Page 17 Figure 20 – Placing the fabric cover on the medium transverse bar Pull the assigned fabric cover to the right of the module; • Figure 21 – Placing the fabric cover to the right of the module VERSION V4.1...
- Page 18 Be careful to keep the Velcro strap (circled in Figure 22 below) outside the fabric during the passage of fabric cover through both sides of the module. This strap is located on the fabric piece on each side, near the wheel.
- Page 19 Pull the assigned fabric cover to the left of the module; • Figure 23 - Positioning the fabric cover on the left of the module VERSION V4.1...
- Page 20 The fabric should perfectly match the shape of the metal frame at the front of the module. Put the top of the fabric cover around the upper tubes and use the Velcro strips to • fix them; Figure 24 - Placing fabric cover sections on the upper tubes VERSION V4.1...
-
Page 21: Step 4 : Finish Installing The Hammock
Slip the long straps from the top of the hammock (left aside on page 13) on both sides of the backrest, by pulling them from the rear of the Addbike’s backrest and making them pass between the backrest and the fabric on each side;... - Page 22 Bring them back to the front of the module and run them around the bottom tube, • above the low crossbar and under the protective foam of the bottom tube (so that it is completely secure and does not slip along the tubes); Figure 27 - Passage of the tensioning straps around the bottom tubes VERSION V4.1...
- Page 23 Attach these straps to the buckles in the hammock’s lower corners (loosen the strap • on the back of the hammock, if needed, for easier tightening) ; Figure 28 - Tension of the straps Check that the hammock is rightly fit (straps fastened at the rear, front, etc.) and test the tension of the different straps in order to find the best position for the hammock in the module.
-
Page 24: Step 5: Complete The Installation Of The Textile Envelope
Having checked that the hammock is rightly fit, slip the remaining piece of fabric • cover behind the backrest of the AddBike; Figure 29 - Positioning the back of the textile The fabric must fit between the backrest and the back plate. - Page 25 Make sure the two Velcro strips are well aligned at this point so as not to interfere with the movement of the Addbike’s back plate. To check, make a large movement from left to right with the handlebars of your bike.
- Page 26 (wind like this the Velcro strap around the axle); Figure 33 - Positioning the Velcro straps You can tilt your AddBike at one side or the other for easier access to this part of the axle. Risk of pinch during this step.
-
Page 27: Using The Carry'box Kid Module
The Carry’Box Kid can carry a child of about 2 to 7 years with a maximum size of 120 • cm and a maximum weight of 35kg. The person carrying a child on the AddBike and the Carry’Box Kid must be of adult • age and must previously get used to riding the AddBike. - Page 28 Points to supervise It is recommended to check your child's height and weight regularly. • Make sure you can control the ride on your Addbike before transporting your child • Apply the recommendations of the “AddBike User’s and Installation Guide”.
-
Page 29: Opening And Closing The Transparent Flap
Opening and closing the transparent flap • At the top of the module, secure the flap with the Velcro strap. Make sure the flap fits the curved shape of the top of the module; Figure 35 – Securing the flap at the top of the module At the bottom, attach the flap with the snaps on both sides of the module;... -
Page 30: Uninstalling The Carry 'Box Kid Module
Detach the Velcro from the upper crossbar; • • Detach the Velcro rear the AddBike, at the bottom and on the side; • Loosen and remove all accessible straps from the hammock (bottom rear, back top , and the long straps passing inside the module) ;... -
Page 31: Guarantee Charter
If a given part of the Carry’Box Kid does not function correctly, please contact the AddBike Company (support@addbike.fr) or your dealer. We will do our best to help you. In our website, www.add-bike.com, you will find a list of dealers who are trained for installation and maintenance of AddBike products. - Page 32 61 cours de la République 69100 VILLEURBANNE, FRANCE You may order additional user’s guides from AddBike. This user’s guide has been drafted with the utmost care. If you have any proposal to improve the clarity of this document we would appreciate you let us know...
Need help?
Do you have a question about the CarryBox Kid and is the answer not in the manual?
Questions and answers