
Related Manuals for Valley-Dynamo Black Hole


Summary of Contents for Valley-Dynamo Black Hole
- Page 3 6 – Warnings and notices 7 – Assembly instructions 13 – Overhead instructions 17 – Side Shield Installation 18 – Black Hole Programming 20 – Electronics Layout 23 – Selected Parts Listing 24 - Rules of Play 26 – Routine Maintenance...
-
Page 4: Warranty Length
Valley-Dynamo will request and you must provide the complete Model Number & Serial Number of the unit located inside the Black Hole’s CPU ACCESS Door, or other proof of purchase such as an invoice or receipt. - Page 5 Liquid spills are not a covered warranty failure. If warranty failure is suspected, for evaluation Valley-Dynamo will require return of the damaged playfield or at minimum at least 12 square feet (4’ x 3’) of the damaged section. No credit will be issued for a Playfield damaged by a liquid spill, or for incoming or outgoing freight for the replacement or returned playfield.
-
Page 6: Exclusion Of Damages
EXCLUSION OF DAMAGES Valley-Dynamo’s sole obligation and liability under this warranty is limited to the repair or replacement of a defective product at our option. Valley- Dynamo shall not, in any event, be liable for any incidental or consequential damages resulting from interruption of service, loss of business or revenue, or for liability in tort relating to this product or resulting from its use or possession. - Page 7 USE OF NON-DYNAMO PARTS OR CIRCUIT MODIFICATIONS MAY CAUSE SERIOUS INJURY OR EQUIPMENT DAMAGE! USE ONLY GENUINE DYNAMO AUTHORIZED PARTS. For safety and reliability, substitute parts and modifications are not recommended. Substitute parts or modifications may void FCC type acceptance. ...
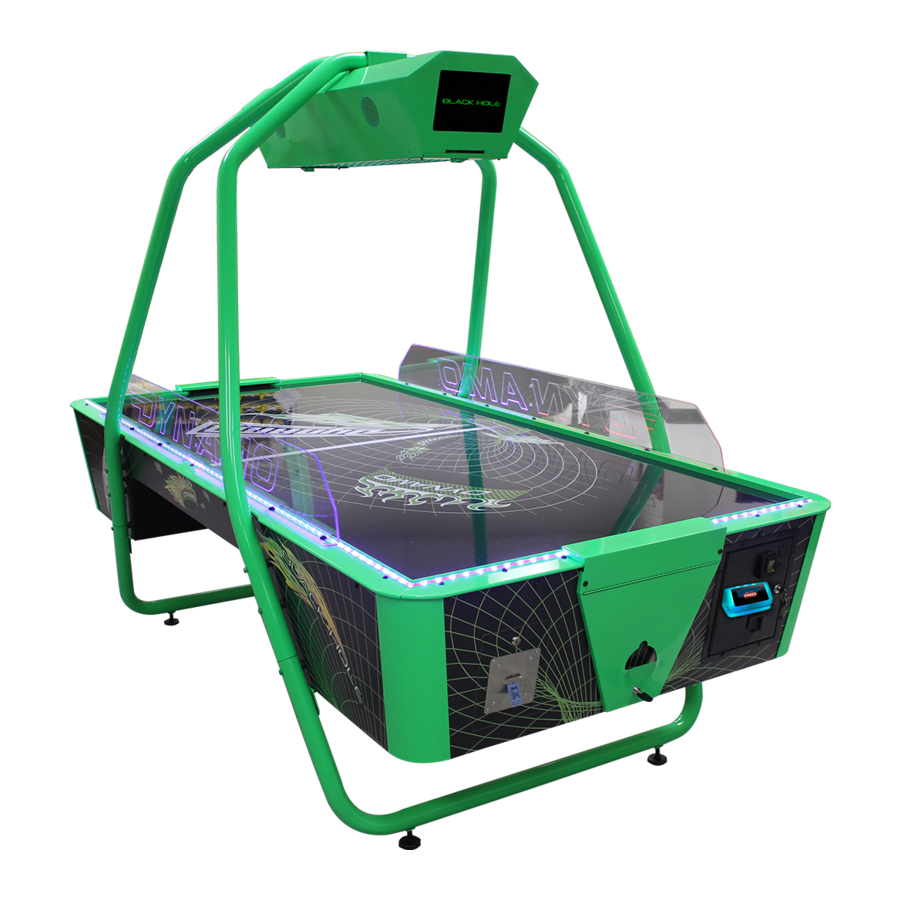
- Page 8 Congratulations on purchasing a Dynamo Hockey table - the finest professional grade hockey table on the market. BE SAFE: it is strongly recommended that you have at least two people for the safe setup of our hockey tables. The keys to open the coin and service doors are found with the instruction manual, taped to the playfield protective pad.
- Page 9 Parts Kits 1x CAMERA BRACKET WITH CAMERAS Game Play Pack 2 860400210 mallets 2 860400090 pucks 2 980400200 sand paper disks Wire Harnesses 1 730409010 main overhead tube harness 1 Overhead AC harness 1 Power Cord Overhead Diffusers ...
- Page 10 Removal of the Overhead Display Unit. The hockey table should now be carefully lifted onto its side (the end with the coin door will be to your left, the end with the service door to your right). Have two people tilt the table from the ends, do not lift from one side.
- Page 11 The Secondary Box contains four overhead tubes (two male, two female) and two U- shaped Legs. Slide the U-shaped legs under the central opening, opposing each other in this manner as shown in the photo below, with the leg leveler openings facing up. Note in the photo detail each leg has THREE mounting holes, and the side of the table has THREE corresponding holes.
- Page 12 Position the box top saved from unpacking the table on the floor, near the legs. Now, rotate the legs so the two other bolt holes from the photo line up with the corresponding holes in the table. The legs should be at roughly a 45-degree angle to the table, with the leg leveler openings should be parallel to the bottom of the table and flat to the floor.
- Page 13 At this point in the assembly process, use the center hole in the table and the leg. Pull the leg away from the table and slide one bushing between the leg and the table side wall. Take care when installing the bushing to keep from damaging the side decal.
- Page 14 Installing the Overhead Mounting Tubes. Keep the wire harnesses accessible as they will need to be fed into the overhead mounting tubes and plugged into the Overhead Display Unit. FIRST : route the Overhead Wire Harness through a FEMALE mounting tube. There is a cut-out at the top of the tube for the wiring, Slide the female tube onto the lower U-shaped leg.
- Page 15 Coin Door Service Door Blue/Home Red/Visitor No bolt NOTE ALIGNMENT OF OVERHEAD MOUNTING TUBES THIRD : Install Female and Male overhead mounting tubes on opposite sides of the table as used on the first two, use the diagram above as your guide. Now, all four mounting tubes should be installed on the table, with the wire harness accessible.
- Page 16 Directional Indicator marker. THAT END OF THE OVERHEAD SHOULD BE ORIENTED TOWARD THE COIN DOOR END OF YOUR BLACK HOLE TABLE. Feed the Overhead AC Harness and Overhead Wire Harness through the rectangular cut out. Then, secure the four nuts and washers attaching the overhead with the ½”...
- Page 17 Installing the Overhead Display Unit Camera Bracket On either side of the Camera Bracket are three mounting tables. Slide the three tabs on one side of the camera bracket into the groove located inside the Overhead Display Unit. Next, pull out on the Overhead Display Unit wall closest to you to slip the three tabs on the other side of the Camera Bracket (as in “the side now closest to you that is not already anchored in a groove”) into the groove.
- Page 18 Dynamo’s 3-piece Shield set will help to keep the puck on the table and discourage the placement of drinks on the table’s side rails. While it will create a safer environment, no shield has been invented that will keep every puck on every playfield every time. Exercise caution during play, keep hands and fingers clear of the playfield, and follow the instructions from Dynamo Caution Label, part # 850404030...
- Page 19 The Black Hole is shipped with a keyboard located behind the cash box. You may also use any USB keyboard. Open the CPU Access Door and plug the keyboard into an open USB slot of the mother board. Press F12 to enter programming mode.
- Page 20 Available Values Money: base: [0.05 - 1000000.00] increments of 0.05 currency: USD, AUD, GBP, JPY, CAD, HKD, CHF clicks: [1 - 100] increments of 1 card swipe: On/Off price (for card swipe): [0.00 - 1000000.00] increments of 0.05 ...
- Page 21 If it ever becomes necessary to troublshoot your Black Hole table’s electronics, these “maps” will be a valuable tool.
- Page 24 880400900 BLOWER MOTOR 110V 880400910 BLOWER MOTOR, 220V BLOWER MOTOR GASKET 980400400 800400990 GOAL-END, LOCK ENTRY, LASER GREEN, BLACK HOLE 030000140 J8045 KEY FOR GOAL ENDS 960402800 PUCK DROP HALF (2 PER END, 4 PER TABLE) 800401800 GOAL ENTRY SCORE OPTIC BOARD...
- Page 25 SCORING The first player to score 5 points wins the game. A point is scored when the puck enters and falls into the goal. After a point is scored, the player scored upon receives possession of the puck for the next serve.
- Page 26 GOAL TENDING If a player's hand, body or clothing touches the puck while the puck is moving in a direct path toward that player's goal, "goaltending" must be called. Goaltending constitutes a technical foul, which allows the opponent a free shot at the penalized player's unprotected goal.
- Page 27 Follow these suggestions to insure your table's maximum earning power and player appeal over the years to come. PUCKS AND MALLETS: Special pucks and mallets are made for Dynamo Hockey. The pucks and mallets you receive with your table are superior to any others available. For proper play, maximum player enjoyment and the best possible earnings, use high quality pucks and mallets.
- Page 28 Our pucks and mallets are available from a number of parts distributors as well as www.valleydynamoparts.com. Be sure to specify Dynamo pucks and mallets. We have added our logo to help identify them for you. SANDPAPER: Adhesive-backed 240-grit sandpaper (980400200) has been included with your table.
- Page 30 For additional assistance: Email anytime : techhelp@valley-dynamo.com During business hours (Central US Time) : call 972.595.5300 and follow the prompts for Tech support We hope your proudly American-built Dynamo Hockey table provides decades of...
- Page 31 Dynamo offers programmable pool tables with bill acceptors as well as standard push chute models, in three different sizes. All Dynamo products are proudly built in Richland Hills TX USA. Contact your distributor today, or check out the full Dynamo line as valley-dynamo.com.
Need help?
Do you have a question about the Black Hole and is the answer not in the manual?
Questions and answers
A puck sensor broke off from the board on one end of the table. Is there a way to fix it or replace it?
To fix or replace a broken puck sensor on a Valley-Dynamo Black Hole table, follow these steps:
1. Identify the Sensor: The puck sensor is likely part of the *Score Optic Board* (Part Number 880404200).
2. Turn Off Power: Disconnect the table from power to avoid electrical hazards.
3. Access the Sensor: Open the *Black Hole’s CPU Access Door* to locate the sensor and wiring.
4. Inspect for Damage: Check for loose connections, dirt, or physical damage.
5. Clean the Sensor: If the sensor is dirty, clean it with a dry cloth or compressed air.
6. Replace if Necessary: If the sensor is faulty, remove it and install a new *Score Optic Board*.
7. Reconnect and Test: Ensure all connections are secure, restore power, and test the table.
If further troubleshooting is needed, refer to the electronics layout in the manual or contact Valley-Dynamo’s tech support.
This answer is automatically generated