Philips S9000 Series Manual
Hide thumbs
Also See for S9000 Series:
- Manual (112 pages) ,
- Get started (12 pages) ,
- Important information manual (18 pages)
Table of Contents
Advertisement
Advertisement
Table of Contents

Related Manuals for Philips S9000 Series


Summary of Contents for Philips S9000 Series
- Page 1 S9000 series S9000...
- Page 5 English 6...
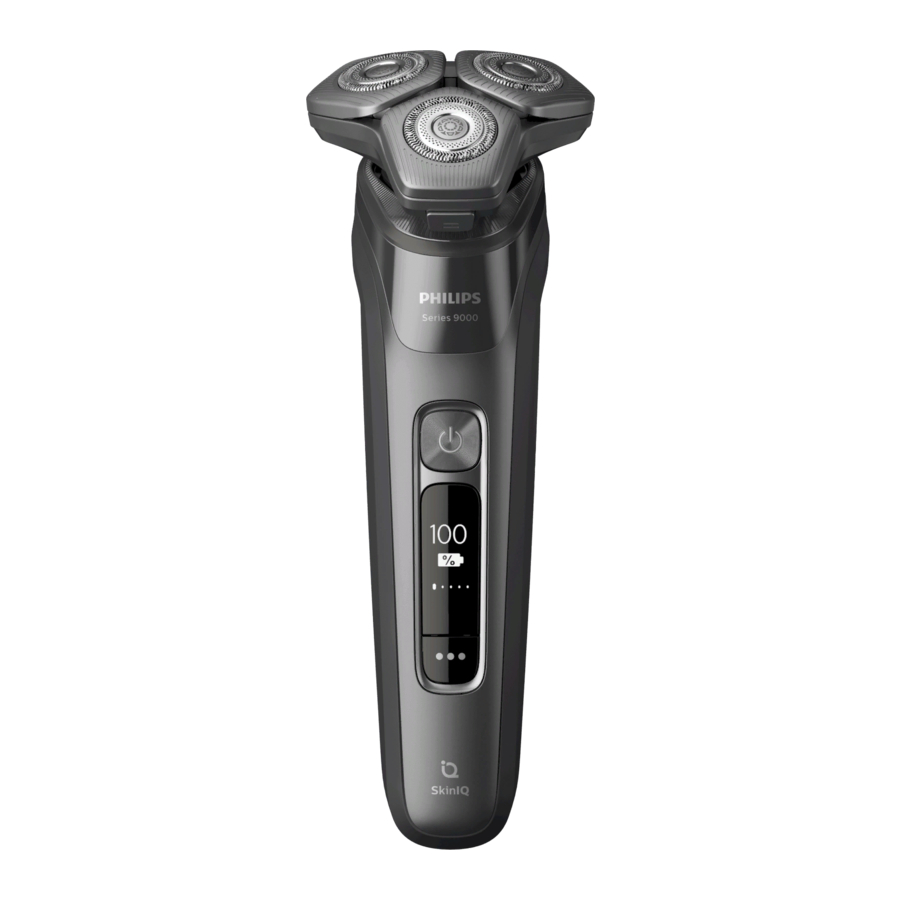
- Page 6 Further guidance _________________________________________________ Recycling__________________________________________________________ Trademarks_______________________________________________________ Introduction Congratulations on your purchase and welcome to Philips! To fully benefit from the support that Philips offers, register your product at www.philips.com/welcome or via the app. General description Pop-up trimmer 2 Trimmer release slide...
- Page 7 English 14 Quick Clean Pod 15 Cleaning brush 16 Length settings 17 Click-on beard styler attachment 18 Comb for beard styler attachment 19 Attachment holder 20 Click-on cleansing brush attachment Note: The accessories supplied may vary for different products. The box shows the accessories that have been supplied with your appliance.
- Page 8 Consult your phycisian for advice and keep the appliance at least 20 cm away. - Only use original Philips accessories or consumables. Only use detachable supply unit HQ8505. - Charge, use and store the product at a...
- Page 9 - The frequency band in which the Bluetooth on S9000 series appliances operates is 2.4 GHz. - The maximum radio frequency power radiated in the frequency band in which the S9000 series appliances operate is less than 20 dBm. - This equipment has been so constructed that the...
- Page 10 English - Hereby Philips declares that S9000 series appliances are in compliance with the essential requirements and other relevant provisions of Directive 2014/53/EU. The declaration of conformity may be consulted at www.philips.com/support. What do the icons on the display mean?
- Page 11 English When you switch on the shaver, a short animation with these icons shows which pressure feedback setting you activated (see 'When your shaver is switched on'). You can toggle through the pressure feedback settings by pressing the menu button. - Warnings and notifications Icon Meaning...
- Page 12 English The cleaning process has been interrupted (see 'Troubleshooting'). - Unplug for use Icon Meaning Unplug the shaver before you use it (see 'Unplug for use symbol '). What is my shaver telling me? When your shaver is switched on During your shave, you receive feedback on how much pressure you are applying via the light ring at the top of your shaver handle.
- Page 13 English 2 Press the menu button to toggle through the pressure feedback options. The table below shows what pressure feedback you receive with each option. Too little The right Too much pressure is amount of pressure is being applied pressure is being applied being applied Full pressure feedback...
- Page 14 English - Remaining battery charge This menu item shows the remaining battery charge. - Motion Control sensor This menu item shows the motion feedback from your last shave. - Travel lock From this menu item, you can lock and unlock your shaver by pressing and holding the menu button for 3 seconds.
- Page 15 English Post-shave feedback (this feature can be activated via the app) Once this feature is activated via the app, you can see the post-shave feedback on pressure and motion from your shave on the handle directly after you finish shaving and switch off your shaver. Pressure Guard sensor feedback When your shaving pressure can be improved, the Pressure Guard sensor icon displays with an...
- Page 16 English For safety reasons, the appliance can therefore only be used without cord. - Charge the appliance before you use it for the first time and when the remaining battery charge (see 'Main menu') indicates that the battery is almost empty.
- Page 17 English 2 Put the small plug in the charging stand and put the supply unit in the wall socket. 3 Place the appliance in the charging stand. Specific models only: The light ring on the bottom of the charging stand lights up and rotates quickly. - After approximately 5 minutes, the light ring rotates slower.
- Page 18 English Note: If you are shaving with gel or foam, rinse the shaving unit regularly during your shave to ensure that it continues to glide smoothly over your skin. 3 Use the narrow sides of the shaving unit to shave in hard-to-reach areas such as along your jawline and under your nose.
- Page 19 English period of 3-4 weeks to allow your skin to adapt to the new shaver. Cleaning reminder When you switch off the appliance, the cleaning reminder is displayed to remind you to clean the appliance (see 'How do I clean my appliance and the attachments?').
- Page 20 English Using the click-on attachments Note: The accessories supplied may vary for different products. The box shows the accessories that have been supplied with your product. Note: When the beard styler or cleansing brush is attached to the handle, the motion and pressure feedback is switched off automatically.
- Page 21 English 5 Move the appliance upwards while you exert gentle pressure. Make sure the front of the comb is in full contact with the skin. 6 Switch off the appliance and clean the attachment after use. Using the beard styler attachment without comb You can use the beard styler attachment without the comb to contour your beard, moustache, sideburns or neckline to a length of 0.5 mm.
- Page 22 - Put the protection cap (if supplied) on the shaver to protect it from dirt accumulation. - Alternatively, store the appliance on the charging stand (if supplied) or in the Philips Quick Clean Pod (if supplied). How do I clean my appliance and the attachments?
- Page 23 English Icon Behavior Meaning Becomes visible on the The Quick Clean Pod Cartridge Quick Clean Pod needs to be replaced (see 'How do I use the Quick Clean Pod?'). Preparing the Quick Clean Pod for use Twist and remove the top of the Quick Clean Pod. 2 Twist the lid off of the Quick Clean Pod Cartridge.
- Page 24 English 6 Put the top of the Quick Clean Pod back onto the base and turn it clockwise until you hear a click. Do not tilt the Quick Clean Pod to prevent leakage. Using the Quick Clean Pod Note: If you use the shaver with shaving foam, shaving gel or pre-shave products, thoroughly rinse the shaving heads before you use the Quick Clean Pod (see 'How do I clean my appliance and the...
- Page 25 Quick Clean Pod (see 'Preparing the Quick Clean Pod for use'). Scan the QR code to the left or visit www.philips.com/cleaning-cartridge to order replacement Quick Clean Pod Cartridges. Clean the appliance and the attachments after each use for optimal performance.
- Page 26 English While rinsing the shaving unit, water may drip out of the base of the shaver. This is a normal occurrence. Switch on the shaver. 2 Rinse the shaving unit under a warm tap. 3 Switch off the shaver. Press the release button to open the shaving unit.
- Page 27 English 2 Press the release button on the shaving unit and pull the shaving head holder off the shaving unit. 3 Rinse the hair chamber and shaving head holder under the tap. 4 Remove the shaving heads. For detailed instructions, see 'How do I replace the shaving heads?'.
- Page 28 English Make sure that the appliance is switched off and disconnected from the wall socket. 2 Push the trimmer release slide down to open the pop-up trimmer. 3 Switch on the appliance and rinse the pop-up trimmer with warm water. 4 After cleaning, switch off the appliance.
- Page 29 English Pull the comb off the beard styler attachment. Note: Grab the comb in the center to pull it off the beard styler attachment. Do not pull at the sides of the comb. 2 Rinse the cut hairs off the cutting unit with lukewarm water.
- Page 30 - Personalized advice Pair the shaver and smartphone The app is compatible with a wide range of iPhone and Android™ smartphones. More information is available at www.philips.com/MyShaver9000-app Download the app. 2 Make sure Bluetooth on your smartphone is switched on. S7920 3 Switch on the shaver to activate Bluetooth.
- Page 31 English 5 Once paired, the shaver and app connect automatically when the app is open and Bluetooth on your phone is switched on. Synchronize your shaves This shaver stores your shave data so you don't need to take your smartphone with you when you shave or want to check your shave data at a later stage.
- Page 32 For maximum shaving performance, we advise you to replace the shaving heads every two years. Replace damaged shaving heads immediately. Always replace the shaving heads with original Philips shaving heads (see 'Ordering accessories'). Replacing the shaving heads Switch off the shaver.
- Page 33 Ordering accessories To buy accessories or spare parts, visit www.philips.com/parts-and-accessories or go to your Philips dealer. You can also contact the Philips Consumer Care Center in your country (see the international warranty leaflet for contact details).
- Page 34 English The following accessories and spare parts are available: - SH91 Philips shaving heads - CC12 Cleaning cartridge 2-pack - CC13 Cleaning cartridge 3-pack - CC16 Cleaning cartridge 6-pack Note: The availability of the accessories may differ by country.
- Page 35 This chapter summarizes the most common problems you could encounter with the appliance. If you are unable to solve the problem with the information below, visit www.philips.com/support for a list of frequently asked questions or contact the Consumer Care Center in your country.
- Page 36 English Problem Possible cause Solution I want to use the You do not have to connect shaver without the your shaver to your smartphone app. before each shave. The shaver works fine without the app, although you will not experience the same benefits. To get personalized shaving tips, just make sure that you connect it at least once every...
- Page 37 Philips Quick Clean Pod Problem Possible cause Solution My shaver isn't clean You removed the Leave the shaver in the...
- Page 38 English My Philips Quick Clean You regularly use the Shake off excess water Pod is overflowing. Philips Quick Clean after rinsing the Pod after rinsing the shaving heads each shaver but not shaking time before putting the off excess water.
- Page 39 Android is a trademark of Google Inc. Google Play and the Google Play logo are trademarks of Google Inc. The Bluetooth® word mark and logos are registered trademarks owned by the Bluetooth SIG, Inc. and any use of such marks by Philips Personal Care is under license.
- Page 44 © 2021 Koninklijke Philips N.V. All rights reserved 3000.057.1984.1 (1/7/2021) >75 % recycled paper >75 % papier recyclé...
Need help?
Do you have a question about the S9000 Series and is the answer not in the manual?
Questions and answers