Table of Contents

Related Manuals for Roland VERSELAB MV-1


Summary of Contents for Roland VERSELAB MV-1
- Page 1 Owner’s Manual Before using the unit, ensure that its program is at the most recent version. For information on available upgrades for the program, see the Roland website (https://www.roland.com/). © 2021 Roland Corporation...
-
Page 2: Table Of Contents
Contents Panel Descriptions Loading/Saving Clips . . . . . . . . . . . . . . . . . . . . . . . . . . . . . . . . . . . . - Page 3 Contents Creating a Song by Arranging the Sections . . . . : Creating a Song . . . . . . . . . . . . . . . . . . . . . . . . . . . . . . . . . . . . . . . : Making Song-Related Settings .
-
Page 4: Panel Descriptions
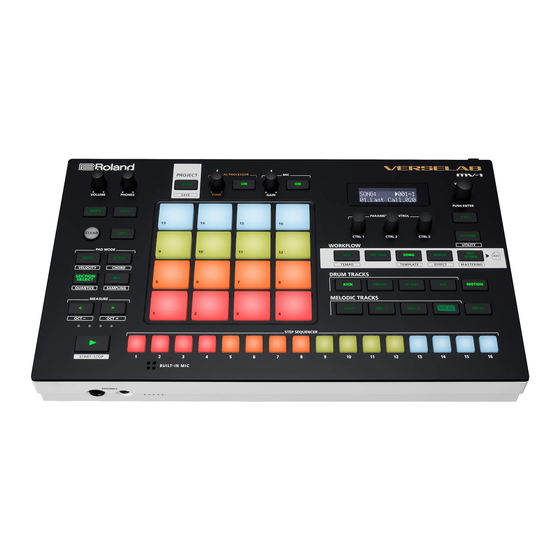
Panel Descriptions Top Panel Common Section (1) [VOLUME] knob [STYLE] button Switches the pads to Style mode. This lets you play phrases with Adjusts the volume of signal from the LINE OUT jacks. triplets, repeated notes and so on, as well as arpeggios. If you hold down the [SHIFT] button and press the [STYLE] button, the [PHONES] knob pads switch to Chord mode. - Page 5 Panel Descriptions Project Section Common Section (2) [LOAD] button Display Displays the project settings screen. Use this for the various operations Shows various information depending on the operation. and settings when creating or loading a project. Hold down the [SHIFT] button and press the [LOAD] button to save a [VALUE] dial project.
-
Page 6: Front Panel
Panel Descriptions Track Section [KICK] button [INST 2] button Selects the KICK track. Selects the INST 2 track. [SNARE] button [VOCAL] button Selects the VOCAL track. Selects the SNARE track. * The VOCAL track can only be selected when the workflow is in the “SONG” phase. -
Page 7: Rear Panel (Connecting Your Equipment)
Panel Descriptions Rear Panel (Connecting Your Equipment) * To prevent malfunction and equipment failure, always turn down the volume, and turn off all the units before making any connections. Cord hook AC adaptor DC IN jack MIC connector Connect the included AC adaptor to this jack. Connect your dynamic mic or condenser mic to this connector. -
Page 8: An Overview Of The Verselab
An Overview of the VERSELAB How the SONG is configured Project VOCAL track Take 1 Take 2 Take 2 Take 2 Take 3 Take 4 SONG KICK/SNARE/HI-HAT/KIT/BASS/INST 1/INST 2 tracks Section 1 Section 3 Section 2 Section 3 Section 4 Section 5 Mastering effects Vocal effects... -
Page 9: What Is A Project
An Overview of the VERSELAB What Is a Project? What Is a Clip? “project.” “clip” The data used for creating songs is managed as a Here’s how is a collection of data that is used by a track (except for the to create and save projects for each song. -
Page 10: About Workflows
An Overview of the VERSELAB About Workflows Steps for Creating a Song “workflow” refers to the flow of steps you use to create a song. Follow the operations below to create a new song. The workflow section on this unit has the following modes. Creating a New Project Creating a Project (p. -
Page 11: Listening To And Rearranging The Demo Songs
Listening to and Rearranging the Demo Songs This explains how to rearrange the demo songs (projects) on the SD card included with this unit and output them as a WAV file to the SD card. Flow of Operations Loading Clips Now, let’s load a preset clip from the SD card and edit its tone and Load the project and play back the song. - Page 12 Listening to and Rearranging the Demo Songs Press one of the pads [1]–[16] that are unlit (the unrecorded Changing the Structure of a Song vocal takes) to select where to record your vocal. “[REC] RecStandby” appears on the screen. Rearranging sections This shows you to rearrange the sections of the song.
-
Page 13: Reference
Reference... -
Page 14: Project Operations
Project Operations “project.” The data used for creating songs is managed as a Here’s how to create and save projects for each song. NOTE If you turn off the power without saving the data, any data you edited is lost. To keep your edited data, make sure to save the projects to an SD card. Loading a Project Saving a Project Load the project from the SD card and then edit the song. -
Page 15: Configuring The Project
Project Operations Configuring the Project Locking a Project Here’s how to configure the project’s settings, such as the reference Here’s how to protect a project so that it can’t be overwritten or pitch, pad illumination colors and more. deleted. Press the [LOAD] button. Press the [LOAD] button. - Page 16 Section Operations A project can use eight tracks. Out of these tracks, the seven tracks besides the VOCAL track are collectively known as a section. There are 16 sections, and you can line up sections to create a song (p. 35). Selecting a Section Copying a Section Here’s how to copy the performance data and tones from one section...
-
Page 17: Swapping Sections
Section Operations Swapping Sections Naming a Section Here’s how to swap (exchange) performance data and tones together You can name each section separately. between sections. Press the [SECTION] button to set the workflow to “Section.” Press the [COPY] button. Press the [SECTION SELECT] button to switch the pads to The menu screen appears. -
Page 18: Track Operations
Track Operations This unit includes eight tracks used for creating performance data, including the KICK, SNARE, HI-HAT, KIT, BASS, INST 1, INST 2 and VOCAL tracks. There are four types of tracks, and the type of data that a track can contain depends on its track type. Selecting Tracks Editing the Track Type There are four types of tracks: “tone, ”... -
Page 19: Clip Operations
Clip Operations “clip” is a collection of data that is used by a track (except for the VOCAL track). Clips contain data such as tones and phrases (performance data and motions; see p. 9). You can edit the clips by changing only the tones for each, as well as by copying them. Selecting a Clip Changing Tones/Samples Select the clips used for each track. - Page 20 Clip Operations Copying a Clip Swapping Clips Here’s how to copy the tone and phrase from one clip to another. This shows you how to swap contents between clips. * You can’t copy clips between tracks that have different track types. * You can’t swap clips with different track types.
-
Page 21: Loading/Saving Clips
Loading/Saving Clips You can load clips saved on an SD card, or import clips from a project. You can also save clips to the SD card. * You cannot load or save clips from/to the VOCAL track. Loading from the SD Card Saving to an SD Card * Only clips whose track type matches the destination track’s type can be loaded. -
Page 22: Changing The Tones
You can change all of the tones for all clips on the same track at once. * When loading an SDZ/SVZ file, save the file in the ROLAND/SOUND folder of Press the [EDIT] button in step 2, and then press the [KICK]–[INST 2] buttons. - Page 23 Changing the Tones Track type: Drum Kit This changes the drum kit and drum instruments. DRUM KIT Drum instrument Follow the steps in “Selecting a Clip” (p. 19) to select the Follow the steps in “Selecting a Clip” (p. 19) to select the clip with the tone you want to change.
-
Page 24: Editing A Tone
Changing the Tones Editing a Tone Editing the Multi-Effects Here’s how to adjust the volume or reverb send level, set the sample You can use multi-effects on tones and samples to process the sound. playback range and make other settings related to tones and samples. Press the [SEQ] button to set the workflow to “Sequencer.”... -
Page 25: Pad Operations
Pad Operations You can use the pads to play or create phrases (p. 26). You can also use the pads to select sections (p. 16). There are five operation modes for the pads: Note mode, Style mode, Velocity mode, Chord mode and Section Select mode. Switch between operation modes as needed. -
Page 26: Creating Phrases
Creating Phrases This shows you how to create phrases (performance data). There are two ways to create a phrase: inputting note by note (note data) using “step recording, ” or recording what you play in real time using “real-time recording. ” Step Recording Recording in Real Time (TR-REC) -
Page 27: Editing The Steps
Creating Phrases Editing the Steps Making Measure-Related Settings You can edit the length, velocity and other aspects of the notes you Use these settings to set the clip length, the length of a note in a single inputted for each step. step and so on. -
Page 28: Correcting The Timing Of Your Performance (Quantize)
Correcting the Timing of Your Performance (Quantize) On tracks whose track type (p. 18) is “tone” or “drum kit, ” you can use the quantize feature to correct the timing of your playing. You can apply quantization during both playback and recording. * You can’t quantize tracks whose track type is “looper”... -
Page 29: Recording Ctrl Knob Movement In Steps (Motions)
Recording CTRL Knob Movement in Steps (Motions) You can make changes to the sound by recording your operations of the [CTRL 1]–[CTRL 3] knobs as “motions.” * Motions can’t be recorded on the VOCAL track. * Motions can be recorded for each clip. Assigning Parameters to the CTRL Knobs Deleting a Motion You’ll need to assign the parameters you want to record to the... - Page 30 Recording CTRL Knob Movement in Steps (Motions) Creating a Linear Motion (Motion Designer) Use the Motion Designer to automatically create and record linear motions that change over time. This function is convenient for creating effects such as ducking (side chain). * Motions previously recorded are overwritten.
-
Page 31: Using Sampled Audio
Using Sampled Audio This shows you how to sample the sound from a built-in mic, an external mic, the audio input from the LINE IN jacks or clips playing back to create a sample (audio file). You can use the samples you create as tones or drum instruments. You can also export the samples to an SD card. Getting Ready to Sample Configuring the External Input Sampling Settings... -
Page 32: Sampling
Check the amount of memory used in “LooperUsage” on the MEMORY INFO Press the [VALUE] dial to export the sample to the SD screen (p. 44). EXPORT card in WAV format. — SAMPLE Exported samples are saved in the ROLAND/MV/ SAMPLE/EXPORT folder of the SD card. -
Page 33: Loop Playback Of Samples (Audio Looper)
“looper.” 5 Sample files that you want to load (in .wav format) must be placed in the ROLAND/MV/SAMPLE folder of the SD card. Getting Your Sample Ready Press the [SEQ] button to set the workflow to “Sequencer.”... -
Page 34: Making Settings That Apply During Playback
Loop Playback of Samples (Audio Looper) Making Settings that Apply During Editing the Multi-Effects Playback You can use multi-effects on samples to process the sound. This shows how to make settings that apply when playing back a Press the [SEQ] button to set the workflow to “Sequencer.” sample, such as volume and time stretch. -
Page 35: Creating A Song By Arranging The Sections
Creating a Song by Arranging the Sections This shows you how to create a “song” by arranging sections. With this feature, you can use the songs you create as backing tracks for recording vocals, to make a full song with vocals (p. 37). Creating a Song Making Song-Related Settings Here’s how to arrange the sections to match the structure of your... -
Page 36: Changing The Key Of Sections Arranged In Songs
Creating a Song by Arranging the Sections Changing the Key of Sections Arranged in Using Templates to Create a Song Songs (Song Templates) This unit features song templates, which form the structural patterns You can change the key of each section arranged in a song. of a song. -
Page 37: Recording The Vocals
(p. 39, 44). Delete the vocal takes that you don’t need (p. 39, 44). 5 Sample files to load (in WAV format) must be placed in the ROLAND/MV/ Press the [EDIT] button, and then press the MIC [ON] button. -
Page 38: Editing A Vocal Sequence
Recording the Vocals Editing a Vocal Sequence You can edit vocal sequences to adjust where the singing should start or to add repeating backing vocals. Adjusting the Vocal Start Timing Deleting a Vocal Sequence Press the [SONG] button to set the workflow to “SONG.” Press the [SONG] button to set the workflow to “SONG.”... -
Page 39: Editing The Vocal Takes
Recording the Vocals Editing the Vocal Takes You can adjust the volume and playback range of the vocal takes, or delete the vocal takes you don’t need. Making Settings that Apply During Playback Muting the Vocal Takes Here are the settings for the vocal take playback range, volume and You can mute vocal takes when a song plays back. -
Page 40: Using The Vocal Processor
Recording the Vocals Using the Vocal Processor The vocal processor features sonic effects that are particularly useful for vocals, including pitch shift and tonal character adjustment, adding harmonies and more. You can use the vocal processor to add effects to the playback sound of the vocal takes or the audio coming from the mics. The following effects are available. -
Page 41: Making Vocal Track Settings
Recording the Vocals Making Vocal Track Settings This shows you how to configure the mixer and effects for the VOCAL track. Adjusting the Volume and Pan Adjust the volume, stereo position (pan), equalizer settings and so on for the vocal takes overall. &“Making Track Settings”... -
Page 42: Finishing Up The Song As An Audio File (Mixdown)
MEMO 5 Audio files are saved in the “ROLAND/MV/MIXDOWN” folder on the SD card. Hold down the [SHIFT] button and press the [MIXDOWN] 5 Mixing a song down takes the same amount of time as playing it back. -
Page 43: Other Operations
Other Operations Assigning Parameters to the CTRL Formatting an SD Card Knobs NOTE When you format an SD card, all data on the SD card is erased. Back up your You can assign clip-related parameters to the [CTRL 1]–[CTRL 3] knobs data beforehand to your computer or other device. -
Page 44: Checking The Internal Memory Usage
Other Operations Checking the Internal Memory Usage Deleting Samples Loaded into a Project Audio data takes up memory on this unit. This data includes samples Here’s how to delete samples loaded into the tones, drum instruments that you load, samples that you record via sampling, samples you and the vocal takes. -
Page 45: Appendices
Appendices... -
Page 46: List Of Shortcut Keys
List of Shortcut Keys Switching Screens and Modes Action Operation To access the quantize edit screen press the [SECTION SELECT] button. To access the UTILITY screen press the [SYSTEM] button. To display the MASTERING menu screen press the [MIXDOWN] button. To display the mixer effects screen press the [MIXER] button. - Page 47 List of Shortcut Keys Pad Operations Action Operation To access the DRUM INST EDIT menu screen While the pads are in Note mode... hold down the [EDIT] button and press pads [1]–[16]. * Track type: Drum Kit only When the workflow is in the “Sequencer” phase Action Operation To access the clip settings screen...
-
Page 48: Main Specifications
SD card (installed in the product when shipped from the factory) SD card protector * This document explains the specifications of the product at the time that the document was issued. For the latest information, refer to the Roland website.
Need help?
Do you have a question about the VERSELAB MV-1 and is the answer not in the manual?
Questions and answers