Table of Contents
Advertisement
Quick Links
Advertisement
Table of Contents

Related Manuals for Bosch HNG8764.7


Summary of Contents for Bosch HNG8764.7
- Page 1 Oven HNG8764.7 User manual and installation instructions [en]...
-
Page 2: Table Of Contents
en Safety Table of contents 1 Safety Observe the following safety instructions. 1.1 General information USER MANUAL ¡ Read this instruction manual carefully. Safety .............. 2 ¡ Keep the instruction manual and the Preventing material damage ....... 6 product information safe for future refer- ence or for the next owner. -
Page 3: Safety
Safety en Hot steam may escape when you open the 1.4 Safe use appliance door. Steam may not be visible, de- Always place accessories in the cooking com- pending on the temperature. partment the right way round. ▶ Open the appliance door carefully. → "Accessories", Page 13 ▶... - Page 4 en Safety ▶ Never operate an appliance with a cracked ▶ Do not leave food unattended while it is or fractured surface. heating in containers made of plastic, pa- ▶ Never pull on the power cord to unplug the per or other combustible materials. appliance.
- Page 5 Safety en The accessible parts of the appliance become Cookware and containers made from metal or hot during operation. cookware with metal edging may lead to ▶ Never touch these hot parts. sparks being formed during simple mi- ▶ Keep children at a safe distance. crowave operation.
- Page 6 en Preventing material damage ▶ Keep children at a safe distance. Hot liquid may spill over the sides of the ac- If the door seal is damaged, a large amount cessory when it is removed from the cooking of heat is generated around the door. compartment.
-
Page 7: Preventing Material Damage
Preventing material damage en Never place cookware containing water on the Using accessories directly on top of one another ▶ cooking compartment floor. causes sparks. The prolonged presence of moisture in the cooking Do not combine the wire rack with the universal ▶... -
Page 8: Environmental Protection And Saving En- Ergy
en Environmental protection and saving energy 3 Environmental protection and saving energy 3.1 Disposing of packaging The packaging materials are environmentally compat- ible and can be recycled. Sort the individual components by type and dispose ▶ of them separately. 3.2 Saving energy If you follow these instructions, your appliance will use less power. -
Page 9: Familiarising Yourself With Your Appliance
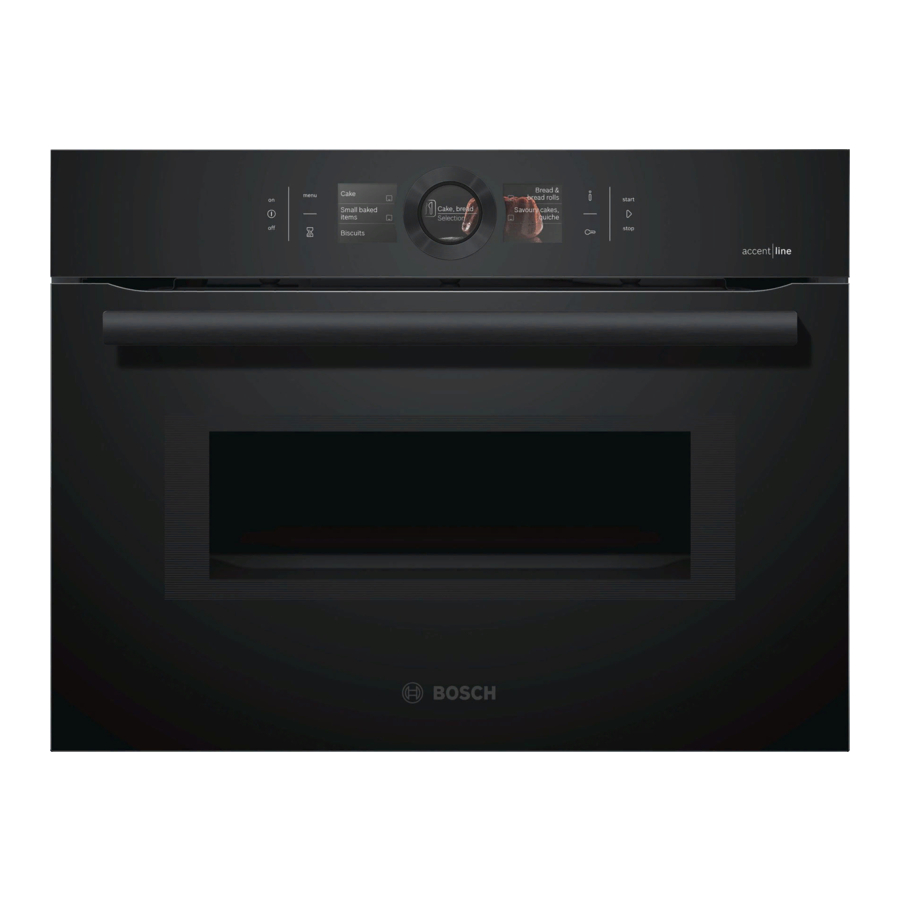
Familiarising yourself with your appliance en 4 Familiarising yourself with your appliance 4.1 Control panel Buttons The buttons on the left- and right-hand side of You can use the control panel to configure all functions the control panel have a pressure point. Press- of your appliance and to obtain information about the ing a button will execute its function. - Page 10 en Familiarising yourself with your appliance ¡ Heating line 4.4 Touch displays Once operation has started, the white line below the The touch displays act as both displays and controls. temperature turns red as the cooking compartment The touch displays are divided into several text fields. heats up.
- Page 11 Operating modes en Water tank ATTENTION! Do not cover the ventilation slot above the appliance You need the water tank for the types of steam heating. door. The appliance overheats. The water tank is behind the control panel. Ensure that the ventilation slots are unobstructed. → "Filling the water tank", Page 18 ▶...
- Page 12 en Operating modes Symbol Type of heating Temperature What it's used for and how it works range Possible additional options 4D hot air 30–275 °C Bake and roast on one or more levels. The fan distributes the heat from the ring-shaped heating element in the back wall evenly around the cooking compartment.
-
Page 13: Accessories
Accessories en 5.3 Microwave power settings This is where you can find an overview of the different microwave power settings and when to use them. The microwave power settings are levels and do not always correspond to the exact wattage that the appliance uses. Microwave power Maximum cooking setting in watts... - Page 14 Turn the accessories so that the notch is at the www.bosch-home.com rear and is facing downwards. Accessories vary from one appliance to another. When Insert the accessory between the two guide rods for purchasing accessories, always quote the exact a shelf position.
-
Page 15: Before Using For The First Time
Before using for the first time en 7 Before using for the first time Configure the settings for initial start-up. Clean the appliance and accessories. 7.1 Before using for the first time Malfunctions may occur when using filtered or deminer- Before using the appliance for the first time, ask your alised water. - Page 16 Press to start. Press to switch the appliance on. ▶ a The Bosch logo appears in the display. The types of 8.6 Setting the type of heating and heating then appear. temperature 8.2 Switching off the appliance Requirement: The operating mode "Types of heating"...
- Page 17 Rapid heating en 9 Rapid heating To save time, you can shorten the preheating time for Set a suitable type of heating and a temperature of set temperatures of 100 °C and higher. at least 100 °C. You can use rapid heating for the following types of Press "Rapid heating".
- Page 18 en Steam ¡ Food will spoil if you leave it in the cooking com- a The appliance starts to heat and the cooking time partment for too long. counts down. a When the time has elapsed, a signal sounds. The Requirements time shown in the display is zero.
- Page 19 Steam en Lift the water tank and remove it from the water tank Setting the type of steam heating recess . Note: Observe the instructions for the types of steam heating: ¡ → "Types of steam heating", Page 19 ¡ A cooking time must always be set for the types of steam heating.
-
Page 20: Steam
en Steam Press "Types of heating". 11.3 Steam assistance Press the type of heating that you want to use. When you cook with steam assistance, the appliance a The corresponding default temperature appears in introduces steam into the cooking compartment at vari- the display. -
Page 21: Microwave
Microwave en Drying the cooking compartment Dry the cooking compartment by hand or use the ▶ "Drying" function. Dry the cooking compartment after each steam opera- → "Drying", Page 35 tion. 12 Microwave You can use the microwave to cook, heat up, bake or Cookware and accessories with MicroCombi defrost food very quickly. - Page 22 en Microwave Use the control ring to change the cooking time. 12.2 Configuring the microwave settings ▶ a The change is applied immediately. Notes ¡ Note the correct way to handle the microwave: 12.3 MicroCombi – → "Safety", Page 2 – → "Preventing material damage", Page 6 To reduce the cooking time, you can use some types –...
- Page 23 Meat probe en To change the microwave power setting, press To change the type of heating, press on the type ‒ ‒ on the microwave and change the microwave of heating and change the type of heating. Then power setting. set the microwave power setting. Press to continue operation.
- Page 24 en Meat probe To change the cooking compartment temperature, 13.3 Setting the meat thermometer press "Temperature" and use the control ring to The meat probe measures the temperature inside the change the cooking compartment temperature. food between 30 °C and 99 °C. Changing the type of heating Requirements When you change the type of heating, the other set- ¡...
-
Page 25: Meat Probe
Assist en Lamb Core temperature Other Core temperature in °C in °C Leg of lamb, well done 70 - 80 Meat loaf, all kinds of meat 80 - 90 Saddle of lamb, medium rare 55 - 60 Heating food, reheating 65 - 75 Fish Core temperature in °C... - Page 26 en Assist ATTENTION! Category Foods Using silicone moulds or any film, covers or accessor- Bakes, Bake, savoury, fresh, cooked ingredi- ies that contain silicone could damage the baking soufflés ents sensor. Damage may occur even if the baking sensor Fresh lasagne is not active.
-
Page 27: Childproof Lock
Childproof lock en For some dishes, you can continue cooking if ne- Use the control ring to change the cooking time, if ‒ cessary. required. → "Adding extra cooking time", Page 27 Press to start. When the dish is ready, press to switch the ap- a The appliance starts to heat and the cooking time ‒... -
Page 28: Sabbath Mode
en Basic settings 17 Basic settings You can configure the appliance to meet your needs. Basic setting Selection Warning: Baking tray in Display 17.1 Overview of the basic settings microwave Do not display Night-time dimming Switched off Here you can find an overview of the basic settings Switched on and factory settings. - Page 29 Home Connect en 18 Home Connect This appliance is network-capable. Connecting your ap- 18.1 Setting up Home Connect pliance to a mobile device lets you control its functions Requirements via the Home Connect app, adjust its basic settings ¡ The appliance is connected to the power supply and and monitor its operating status.
- Page 30 18.7 Declaration of Conformity timisation, troubleshooting or security updates. To do this, you must be a registered Home Con- Robert Bosch Hausgeräte GmbH hereby declares that nect user, have installed the app on your mobile device the appliance with Home Connect functionality meets and be connected to the Home Connect server.
-
Page 31: Cleaning And Servicing
Cleaning and servicing en 19 Cleaning and servicing Do not use cleaning products with a high alcohol To keep your appliance working efficiently for a long ▶ content. time, it is important to clean and maintain it carefully. Do not use hard scouring pads or cleaning ▶... - Page 32 en Cleaning and servicing Cooking compartment Area Suitable cleaning agents Information Enamel surfaces ¡ Hot soapy water Soak any heavily soiled areas and use a brush or steel wool. ¡ Vinegar water Leave the appliance door open to dry the cooking compartment after cleaning it.
- Page 33 Cleaning function Pyrolytic self-cleaning en 20 Cleaning function Pyrolytic self-cleaning cess releases vapours, which can irritate mucous mem- With the "Pyrolytic self-cleaning" cleaning function, the branes. cooking compartment is cleaned virtually automatically. Keep the kitchen well ventilated while the cleaning Use the cleaning function to clean the cooking com- ▶...
-
Page 34: Cleaning Assistance
en Cleaning assistance Slide the pull-out rails in and out several times. Note: While the cleaning function is running, the frame While the cleaning function is running, the rails may on the inside of the appliance door becomes discol- become discoloured. This discolouration does not oured. -
Page 35: Drying
Drying en If descaling solution comes into contact with the control Press to start. panel or other delicate surfaces, it will damage them. a The descaling programme starts and the duration Remove descaling solution immediately with water. counts down. ▶ a Once the first part of the descaling programme has Mix the descaling solution: finished, an audible signal sounds. -
Page 36: Appliance Door
en Appliance door Clean the rail. Hook the rear retainers with the hook into the top hole and push them into the bottom hole . → "Cleaning products", Page 31 24.2 Fitting the retainers The retainers may fall out when you detach the rails. Note: The retainers at the front differ from those at the rear. - Page 37 Appliance door en 25.2 Removing the door panes WARNING ‒ Risk of serious harm to health! If the screws are undone, the safety of the appliance WARNING ‒ Risk of injury! can no longer be guaranteed. Microwave energy Scratched glass in the appliance door may develop may escape.
-
Page 38: Troubleshooting
en Troubleshooting Push the front pane to the appliance until the left- Screw both screws back in on the left and right of and right-hand hook is opposite the support . the appliance door. Put the door cover in position and push down on it until you hear it click into place. - Page 39 Troubleshooting en Fault Cause and troubleshooting Appliance does not There has been a power cut. heat up. Open and close the appliance door once after a power failure. ▶ a The appliance is checked and is ready to use. The time is not dis- Basic setting has been changed.
- Page 40 Setting values, e.g. temperature or cooking time, depend on the recipe, quantity and food. Next time, set lower or higher values. ▶ Tip: A lot of information about the food preparation and corresponding setting values can be found on our website www.bosch-home.com.
-
Page 41: Disposal
Disposal en 27 Disposal Find out here how to dispose of old appliances cor- This appliance is labelled in accord- rectly. ance with European Directive 2012/19/EU concerning used elec- trical and electronic appliances 27.1 Disposing of old appliance (waste electrical and electronic equip- Valuable raw materials can be reused by recycling. - Page 42 en How it works ¡ Add up to ½ litre of water to the universal pan, de- Baking on one level Shelf position pending on the size and type of food that you want Tall baked items and tins/dishes on to roast. the wire rack You can make a sauce from the juices that are col- Shallow baked items/baking trays...
- Page 43 How it works en ¡ The food transfers heat to the cookware. The cook- ¡ Spread the food out so that as much of it as pos- ware can become very hot. sible is in contact with the bottom of the cookware. ¡...
- Page 44 en How it works Food Accessory/ Shelf pos- Heating Temperat- Microwave Steam in- Cooking time cookware ition function ure in °C power set- tensity in mins → Page 11 ting in W Shortcrust tart with Universal pan 160–180 55–75 moist topping Yeast cake with moist Universal pan ...
- Page 45 How it works en Food Accessory/ Shelf pos- Heating Temperat- Microwave Steam in- Cooking time cookware ition function ure in °C power set- tensity in mins → Page 11 ting in W Quiche Tart dish or tin 190–210 30–40 Black tray Tarte flambée Universal pan 280 - 300 10 - 18...
- Page 46 en How it works Food Accessory/ Shelf pos- Heating Temperat- Microwave Steam in- Cooking time cookware ition function ure in °C power set- tensity in mins → Page 11 ting in W Fillet of beef, me- Covered cook- 240 - 260 90 30 - 40 dium, 1 kg ware...
- Page 47 How it works en Use the recommended settings when configuring Heat 1 litre of whole milk (3.5% fat) to 90 °C on the the appliance settings. hob and then leave it to cool down to 40 °C. The time may need to be adjusted, depending on It is sufficient to heat UHT milk to 40 °C.
- Page 48 en How it works Food Accessory/cook- Shelf pos- Searing Heating function Temperature Cooking ware ition time in → Page 11 in °C time in mins mins Fillet of pork, whole Uncovered cook- 4 - 6 45 - 70 ware Fillet of beef, 1 kg Uncovered cook- 4 - 6 90 - 120...
- Page 49 How it works en Food Accessory/ Shelf pos- Heating Temperat- Microwave Steam in- Cooking cookware ition function ure in °C power set- tensity time in → Page 11 ting in W mins Cakes, dry, 750 g Uncovered 10 - 15 cookware Meat, whole, e.g. Uncovered 1.
- Page 50 en How it works Recommended settings for reheating Food Accessory/ Shelf pos- Heating Temperat- Microwave Steam in- Cooking cookware ition function ure in °C power set- tensity time in → Page 11 ting in W mins Pizza, cooked Wire rack 170 - 180 5 - 15 Bread rolls, baguette, Wire rack...
- Page 51 How it works en Food Accessories/ Shelf posi- Heating Temperat- Steam intens- Cooking time cookware tion function ure in °C in mins → Page 11 Small cakes, 2 levels Universal pan 25–35 Baking tray Small cakes, 3 levels x 2 5+3+1 35–45 Baking tray Universal pan Hot water sponge cake Springform cake...
-
Page 52: Installation Instructions
en Installation instructions Recommended settings for cooking in combination with the microwave mode Food Accessory/cook- Shelf posi- Heating Temperat- Microwave Cooking time ware tion function ure in °C power setting in mins → Page 11 in W Potato gratin Uncovered cook- 170–190 25–30 ware Cakes... - Page 53 Installation instructions en 30.2 Appliance dimensions WARNING ‒ Danger: Magnetism! Permanent magnets are used in the control You will find the dimensions of the appliance here panel or in the controls. They may affect elec- tronic implants, e.g. pacemakers or insulin pumps. ▶ Wearers of electronic implants must stay at least 10 cm away from the control panel or controls during the installation.
- Page 54 en Installation instructions Hob type a raised in mm a flush in mm b in mm Induction hob Full-surface induction hob Gas hob Electric hob 30.5 Installation in a tall unit 30.6 Corner installation Observe the installation dimensions and the installation Observe the installation dimensions and the installation instructions when installing in a tall unit.
- Page 55 Installation instructions en isolating switch must be integrated into the perman- For handleless kitchens with vertical bar handle ent electrical installation in accordance with the in- strips: stallation regulations. Attach a suitable filling piece in order to cover ‒ any sharp edges and to guarantee a safe install- Electrically connecting an appliance without a ation.
- Page 56 Expert advice for your Bosch home appliances, help with problems or a repair from Bosch experts. Find out everything about the many ways Bosch can support you: www.bosch-home.com/service Contact data of all countries are listed in the attached service directory.
Need help?
Do you have a question about the HNG8764.7 and is the answer not in the manual?
Questions and answers