
Related Manuals for Capelec WORKSHOP CAP2600


Summary of Contents for Capelec WORKSHOP CAP2600
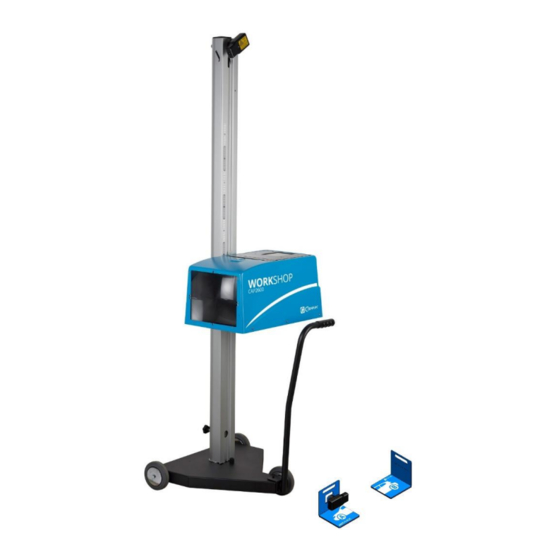
- Page 1 Rev A USER MANUAL CAP2600 WORKSHOP™ Expert | Universal headlight beam tester 1130, rue des Marels FR 34000 MONTPELLIER Phone: (33) 0 467 156 156 Fax: (33) 0 467 224 224 e-mail: contact@capelec.fr www.capelec.fr...
-
Page 3: Table Of Contents
Contents Introduction ..............................2 Section 1: COMMISSIONING .......................... 3 I. Area of use .............................. 3 II. Installation and commissioning ......................3 2.1 Assembly instructions ........................3 2.2 Configuration: first start up ......................5 2.3 Computer links ..........................5 2.4 Without a connection ........................9 2.5 Customising and entering the garage header ................ -
Page 4: Introduction
Keep it in a safe place to be able to consult it if necessary. Note: The information in this document is subject to change without notice. CAPELEC cannot be held liable for direct or indirect damage of any type, nor for losses or costs incurred through non compliant use. -
Page 5: Section 1: Commissioning
Section 1: COMMISSIONING I. Area of use Unlike other headlamp beam testers, the CAP2600 WORKSHOP™ does not need to define a work zone and qualify it. It features innovating and unique technology: the "ANYWHERE" ground compensation system. The CAP2600 WORKSHOP™ can therefore be used anywhere in your workshop. II. - Page 6 Cut the collar and keep the rubber stop. Caution: do not allow the metal cable to slip into the column Attach the metal cable onto the optical block Screw the upper stop to the top of the column Edit: 30/07/19 | Rev A | Page: 4...
-
Page 7: Configuration: First Start Up
2.3 Computer links The CAP2600 WORKSHOP™ can be used with or without a computer connection. If you want to connect your device, you can do so via the CAPELEC router or via your own WIFI network. Connection to the preconfigured CAPELEC router The CAP2600 WORKSHOP™... - Page 8 Start the CAP2600 WORKSHOP™ The WIFI icon (1) and the WEB interface address (2) appear on the home page Open a web browser and enter the displayed address Edit: 30/07/19 | Rev A | Page: 6...
- Page 9 Add this page to the favourites Bookmark this page Connection to a WIFI network The CAP2600 WORKSHOP™ can be connected to your WIFI network. It is used to access the WEB interface and generate the expert report. Start the CAP2600 WORKSHOP™ Go to "Config / Link"...
- Page 10 For networks with DHCP, keep the "IP AUTO" configuration, otherwise switch to static IP by unchecking "IP AUTO" and enter an IP address Restart the CAP2600 WORKSHOP™ The WIFI icon (1) and the WEB interface address (2) appear on the home page Open a web browser and enter the address Add this page to the favourites Edit: 30/07/19 | Rev A | Page: 8...
-
Page 11: Without A Connection
Bookmark this page 2.4 Without a connection The expert CAP2600 WORKSHOP™ headlamp beam tester can be used without a connection. The built- in thermal printer makes it possible to print simplified reports. Start the CAP2600 WORKSHOP™ Go to "Config / Link" and enter the password "2345" Select "Printer"... -
Page 12: Customising And Entering The Garage Header
2.5 Customising and entering the garage header From the headlamp beam tester Go to "Config / Company name" and enter your company name From the WEB interface Go to "Settings" and enter the company name in the header and add the logo Edit: 30/07/19 | Rev A | Page: 10... -
Page 13: Section 2: User Manual
Section 2: USER MANUAL I. Overview 1.1 Touch screen display Inclinometer function Battery charge level WEB interface address WIFI Signal USB memory Turn off the machine Quick restart For optimum use, the use of the stylus is recommended. Edit: 30/07/19 | Rev A | Page: 11... - Page 14 1.2 The main functions At start up, you have direct access to the 6 CAP2600 WORKSHOP™ functions: Start Used to draw up the dipped-beam headlamp report, to print a result ticket and to access the WEB interface expert report. Dipped beam It is used to accurately adjust the dipped-beam headlamps: dip angle, lateral angle and light intensity measurement.
- Page 15 1.3 Power supply The CAP2600 WORKSHOP™ runs on lithium-iron batteries. In continuous operation the autonomy is estimated at about ten hours. The charger supplied with the device has a charge indicator. CHARGERS The charger disconnection device is the adapter block. It must remain accessible. A charger different from the originally supplied charger must not be used under any circumstances.
-
Page 16: Positioning The Cap2600 Workshop
II. Positioning the CAP2600 Workshop™ 2.1 Vehicle preparation The following information is provided as a recommendation. Please refer to applicable regulations. For light vehicles: Preparation: Check the tyre pressure When the vehicle is fitted with a manual beam adjustment system (in the passenger compartment or on the headlight inserts), select the position intended by the manufacturer depending on the load When the vehicle is fitted with an adaptive lighting system (AFS), deactivate it by selecting "dipped... -
Page 17: Positioning In The Vehicle Length Axis
2.2 Positioning in the vehicle length axis - Position the CAP2600 WORKSHOP™ in front of the centre of the vehicle, so that the lens is located between 20 cm and 80 cm in front of each lamp. - Identify two fixed points on the vehicle, symmetrically placed in relationship to the central axis (for example: upper left and right corners of the windscreen, non-deformed bonnet angles,... -
Page 18: Positioning The Optical Block In Front Of The Headlamp
2.3 Positioning the optical block in front of the headlamp The positioning assistance optimises the optical block alignment in front of the lamp. It is activated automatically before each measurement. The indications displayed on the screen guide the user. When the optimum position is reached, "validated"... -
Page 19: Lamp Inspection
WARNINGS During this operation make sure that the CAP2600 WORKSHOP™ lens is not exposed to a parasite external light source (sunlight, spotlight, etc.) which could cause incorrect positioning. III. Lamp inspection 3.1 Inspection sequence In the start menu , the CAP2600 WORKSHOP™ will guide you through the entire headlamp inspection process. - Page 20 Note: You can also manually enter a registration plate directly on the CAP2600 WORKSHOP™ by clicking Step 2: Vehicle slope measurement using the ANYWHERE module Position the ANYWHERE modules as close as possible to the vehicle wheels on the left side as shown below.
- Page 21 Measured slope on the left side Note: For more accuracy, or if the vehicle area is very uneven, you can make an additional measurement on the right side of the vehicle. Repeat the same operation on the right side by turning the laser around. Click to activate the left/right double measurement.
- Page 22 Note: Between two vehicles, the device stores the ANYWHERE module ground slope. It is displayed in red with the "ATTENTION: the slope is not updated” message. If you wish to reuse the same slope without having to repeat a measurement using the ANYWHERE module, confirm by pressing Step 3: Choice of the headlamp height.
- Page 23 The column graduation makes it possible to estimate the headlight insert to an accuracy of +/- 5cm. h < 80 cm Select the height range and confirm by pressing Step 4: Checking dipped beam lamps To inspect the headlights (right and left), align the CAP2600 WORKSHOP™ in front of the headlight inserts. (See section II).
- Page 24 Validate the measurement Display the headlight image Screen rotation (adjustment mode) Back to positioning assistance Step 5: Inspection report The CAP2600 WORKSHOP™ displays a summary of the inspection. Display of recorded images Data sent to the WEB interface Result ticket printed on a thermal printer To print the report, You can print a result ticket on the built-in printer by clicking...
-
Page 25: Expert Report
3.2 Expert report Access to the expert report is via the WEB interface by going to the shortcut created on the browser (see Section 1 Commissioning, Computer Connections). It indicates the CAP2600 WORKSHOP™ home page address. The vehicles processed during the day are accessible in the "completed vehicles" column. Older vehicle results are grouped together in the "Archives"... - Page 26 The user technical report, It presents all the information on the lighting function as well as work advice in the "actions" column. The customer report This is a simplified and user-friendly presentation of the lighting inspection result. It is intended for the customer, the driver.
- Page 27 Representation of the lighting distance Adjustment quality Representation of light intensity and colour temperature Inspection and free comments Lighting distance and safety Distance too short Distance satisfactory Geometry and adjustment quality: Adjustment compliant Adjustment too low Adjustment too high with risk of dazzling Light intensity and safety Edit: 30/07/19 | Rev A | Page: 25...
- Page 28 Headlamp out of order Low intensity Medium intensity High intensity Abnormal right / left intensity difference Colour temperature and lamp quality Warm light White light Cold light Before / after expert report When you expertise the same vehicle a second time (following a repair for example), three versions of the BEFORE/ AFTER report can be printed - User: detailed and technical - Customer: simplified and didactic...
-
Page 29: Advice When Using The Expert Function
The BEFORE/AFTER report is used to compare the state of the lighting you have just completed with the last memorised report. 3.3 Advice when using the expert function We recommend carrying out a first dipped-beam headlamp inspection in order to present the "customer report"... -
Page 30: Configuration
Note: With the expert report, you can justify, document and save the services. IV. Configuration The configuration menu is used to configure the CAP2600 WORKSHOP™. Connection Used to configure data sending mode, computer connection and printing. The access is password protected 2345 Connection password: Company name... -
Page 31: Care And Maintenance Recommendations
Software version Appliance serial number CPU card serial number Approval number Battery level WIFI signal power Language sub-menu Used to choose the display language. Maintenance sub-menu Access is password protected. It is exclusively intended for maintenance by approved companies. V. Care and maintenance recommendations Lens maintenance: Avoid soiling it with splashes or by touching it Clean when necessary using soapy water or a window cleaning product and a clean cloth... - Page 32 VI. Technical specifications Specifications ▪ Weight: 25kg ▪ LxWxH: 590 x 670 x 1900 m ▪ Battery autonomy 10h continuous use ▪ Battery charging 4h with automatic stop Operating conditions ▪ Batteries: Rechargeable Lithium Iron batteries ▪ Charger power supply: 15.2V 2.3A ▪...
- Page 33 This symbol indicates that, in compliance with the WEEE directive (2002/96/EC) and with your national regulations, this product must not be disposed of with household waste. It must be deposited in a zone specific to this effect, for example an electric and electronic waste official collection centre (EEE), in order to be recycled, or at an approved product exchange point which is accessible when purchasing a new product of the same type as the product being disposed of.
Need help?
Do you have a question about the WORKSHOP CAP2600 and is the answer not in the manual?
Questions and answers