
Related Manuals for Lutz RM10


Summary of Contents for Lutz RM10
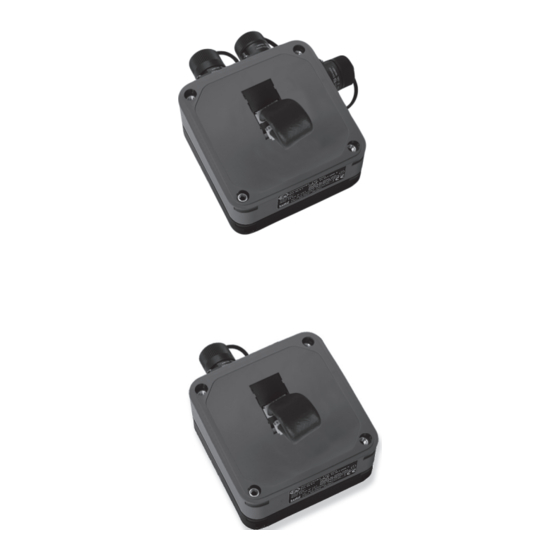
- Page 1 Translation of the original instructions RELAY MODULE / POWER SUPPLY UNIT Type RM10 RM30 NG10 Please read this manual before starting up. To be retained for future reference.
-
Page 3: Table Of Contents
..........................7 5. Modular Flow Meter System TS ....................8 6. Modular Flow Meter System HDO ....................9 B. Relay module RM10/RM30 and power supply unit NG10............... 10 1. Proper use ..........................10 1.1 Technical data ........................12 1.2 Application in explosion hazard areas ................12 1.2.1 Electrical data ...................... -
Page 4: General
A. General 1. Concerning this manual This manual • is part of this product • is valid for all mentioned series • describes the safe and proper use in all operating stages 1.1 Terms User: Single person or organisation who is using the products e.g. customer, user, assistant 1.2 Target groups Target group Task... -
Page 5: Warnings And Symbols
What to do Cross reference → Requirement Tab. 4: Symbols and meaning 1.5 Latest state Please find the latest state of this operating instruction under www.lutz-pumpen.de. 1.6 Copyright The content of this operating instruction and the images contained in them are subject to the copyright protection of Lutz Pumpen GmbH. -
Page 6: Safety
2. Safety The manufacturer will not be held responsible for any damages resulting from non-compliance of the overall documentation, in particular for damages in case of non-compliance of the operating instructions. 2.1 General safety information Observe following regulations before accomplishing all activities. Product safety The relay module is constructed in conformity with the state of the art and approved safety-related standards. -
Page 7: Scope Of Supply
Personnel qualifi cation • Ensure that personnel tasked with work on the relay module has read and understood these instructions and all associated applicable documents, particularly safety, maintenance and servicing information, before they start work. • Clarify responsibilities, competencies and monitoring of the personnel. • Ensure that all work is carried out by technical qualifi ed personnel only: - Assembly, servicing, maintenance work - Work on the electrics... -
Page 8: Modular Flow Meter System Ts
5. Modular Flow Meter System TS The flow meter operates according to the positive displacement principle. In a housing fitted with inlet and outlet is a measuring chamber through which the fluid is forced to flow on its way through the housing. In the measuring chamber, a nutating disc blocks the fluid`s clear path. As it flows through the measuring chamber, the fluid pushes the nutating disc to one side. It is the action of displacing the impediment which produces the wobble movement of the disc and circular motion of the nutating disc shaft. By means of a driver, a magnet with several poles is set into rotation, which is able to activate a magnetically switched contact through the lid of the housing. -
Page 9: Modular Flow Meter System Hdo
6. Modular Flow Meter System HDO The flow meters of series HDO are oval gear flow meters. This has proven to be a reliable and highly ac- curate method of measuring flow. Exceptional repeatability and high accuracy over a wide range of fluid viscosities and flow rates are features of the HDO series flow meter design. The low pressure drop and high pressure rating means the HDO series flow meter is suitable for both gravity and pump (in line) applications. For practically-orientated application, the flow meter system is made up of various modules: À Operating unit Electronic evaluating unit with touchscreen for operation of the flow meter. Á Protection cap Protects the modules basic flow meter, relay module or power supply unit when the operating unit is decentrally installed. Pulse converter Amplifies the signals from the basic flow meter. Is required if the signals need to be transmitted further than 5 m. -
Page 10: Relay Module Rm10/Rm30 And Power Supply Unit Ng10
Live mains connection! Electric shock can kill you. ► An operating unit or a protection cap must be mounted to the relay modules RM10, RM30 or to the power supply unit NG10 as protection against touching and contact with water. - Page 11 NOTICE The electromagnetic compatibility of the device is compatible with the emitted interference and interference immunity for residential and industrial areas. ► The system must not be operated in the immediate vicinity of strong electromagnetic fields (e.g. large motors, transformers) or interference sources that are connected to the mains (e.g. frequency converters).
-
Page 12: Technical Data
Danger of explosion! Combustion hazard. Blast wave: Flying parts can kill you. The relay modules RM10, RM30, the power supply unit NG10 and the connecting cables are not suitable for use in explosion hazard areas! If the relay module itself is not located in an explosion hazard area, power may be supplied and signals transmitted to the operating unit in zone 1. -
Page 13: Electrical Data
1.2.1 Electrical data RM10 120 V RM10 230 V RM30 NG10 120 V NG10 230 V Type Power supply: U = 100–120 V U = 220–230 V U = 230/400 V U = 100–120 V U = 220-230 V Connection... -
Page 14: Installation
2. Installation 2.1 Retrofitting the relay module/power supply unit NOTICE ►Use the supplied Allen key SW3 for the screws. ►Only tighten the screws hand-tight. Mounting steps: 1. Remove the caps and release the screws. 2. Carefully lift the operating unit. Pay attention to cable length! 3. -
Page 15: Connection For Automatic Mode
2.2 Connection for automatic mode A number of ready-configured cables are available for connecting up external units: À Power supply cable relay module RM10/power supply unit NG10, 5 m long (Order No. 0211-155) Á Connecting cable main valve, 5 m long (Order No. 0211-150) For actuation of a solenoid valve via the relay module RM10 or RM30. - Page 16 Fig. 7: Relay module R10: Connection of pump motor and solenoid valve Fig. 8: Relay module R10: Connection of pump motor, main valve and SLOW-valve...
- Page 17 Fig. 9: Relay module R30: Connection of pump motor (AC) and solenoid valve Fig. 10: Relay module R30: Connection of pump motor (3-phase current) and solenoid valve...
-
Page 18: Flow Meter With Separate Installation Of Relay Module/Power Supply Unit And Operating Unit
2.3 Flow meter with separate installation of relay module/power supply unit and operating unit DANGER Live mains connection! Electric shock can kill you. ►Before dismantling remove the plug. NOTICE ►Use the supplied Allen key SW3 for the screws. ►Only tighten the screws hand-tight. Mounting steps: 1. - Page 19 13. Insert screws suitable for the base (max. 5 mm thread diameter, not included in the scope of supply). 14. Mount the intermediate plate on a firm and level base. 15. Insert the lateral sealing covers including the flange nuts. Make sure that there are two different versions. 16. Carefully mount the relay module/power supply unit in the advised position and tighten up the screws.
-
Page 20: Flow Meter With Relay Module/Power Supply Unit And Separate Installation Of Operating Unit
2.4 Flow meter with relay module/power supply unit and separate installation of operating unit DANGER Live mains connection! Electric shock can kill you. ►Before dismantling remove the plug. NOTICE ►Use the supplied Allen key SW3 for the screws. ►Only tighten the screws hand-tight. Mounting steps: 1. - Page 21 9. Attach the operating unit onto the intermediate plate and mount the caps. 10. Connect the plug to the ribbon cable. 11. Replace the protection cap onto the relay module/ power supply unit and mount the caps. 12. Connect the operating unit and protection cap using the data line.
-
Page 22: Maintenance And Servicing
Blast wave: Flying parts can kill you. ►Only use the types of fuses listed below. As the blowing of a fuse generally precedes a fault, have the unit checked by an electrical specialist before changing a fuse. The units are adequately protected when 5 x 20 mm IEC 127 fine wire fuses are used: RM10 RM10 RM30 NG10 NG10... - Page 23 NOTICE ►Use the supplied Allen key SW3 for the screws. ►Only tighten the screws hand-tight. 1. Pull out the plug of the relay module/power supply unit. 2. Remove the caps and release the screws of the operating unit/protection cap. 3. Carefully lift the operating unit/protection cap. Pay attention to cable length! 4.
-
Page 24: Repairs
C. Repairs Repairs should only be made by the manufacturer or authorized Lutz-dealers. Only use original Lutz spare parts. D. Traceability Products manufactured by Lutz Pumpen for potentially explosive atmospheres are identified by an indi- vidual batch number which allows them to be traced. This number provides the year of construction and the design of the equipment. -
Page 25: Annex
110-230V / 50-60 Hz mp motor / SLOW-valve Not in use Main valve Earth conductor Not in use PE Earth conductor Fig. A4 - Relay module RM10 - connection of external electrical Fig. A3 - Relay module RM10 - mains connec- appliances tion... -
Page 26: Trouble Shooting
2. Trouble shooting 2.1 Fault report Operating mode Fault report Cause Remedy General Communication with • The connection • Check bus line another module not between the modules possible. is interrupted CHECK BUS! • Program error in the • Restart the system by pressing system "Reset"... - Page 27 Operating mode Fault report Cause Remedy Flow monitoring Flow rate too low • Pump damaged • Check pump • Line strainer blocked • Clean strainer • Hose line kinked • Check hose line • Solenoid valve • Check solenoid valve damaged Flow monitoring Flow rate too high...
-
Page 28: Other Faults
2.2 Other faults Operating mode Fault Cause Remedy General No liquid registered • Air in the piping • Prevent air pockets in system/dry running connecting lines, use a solid hose system • Pump is not operating • Check pump • Line strainer blocked • Clean strainer •... - Page 29 Operating mode Fault Cause Remedy General Liquid leaks from the • Seal defective • Replace seal housing of basic flow meter • Hairline cracks in • Check installation conditions housing and/or on for mechanical stresses and screw connection correct them due to mechanical influences •...
- Page 30 • Change battery operation • Battery contacts • Clean contacts corroded After insertion of • Basic flow meter is • Check basic flow meter the battery the Lutz missing company logo appears • Check connecting wires and longer than 1 minute plug connections No indication after • Batteries fitted •...
-
Page 35: Declaration Of Conformity
Translation of the original declaration of conformity We herewith declare under the sole responsibility that the following product complies with the EU Directives listed. Manufacturer: Lutz Pumpen GmbH Erlenstraße 5-7 D-97877 Wertheim Product: Relay module / Power supply unit Type:... - Page 36 Lutz Pumpen GmbH Erlenstraße 5-7 D-97877 Wertheim Tel.: (+49 93 42) 8 79 -0 (+49 93 42) 87 94 04 Email: info@lutz-pumpen.de www.lutz-pumpen.de Subject to technical changes. 04/2021 Best.-Nr. 0698-701 Printed in Germany...
Need help?
Do you have a question about the RM10 and is the answer not in the manual?
Questions and answers