Table of Contents
Advertisement
Advertisement
Table of Contents

Related Manuals for Bang & Olufsen BeoLab 5


Summary of Contents for Bang & Olufsen BeoLab 5
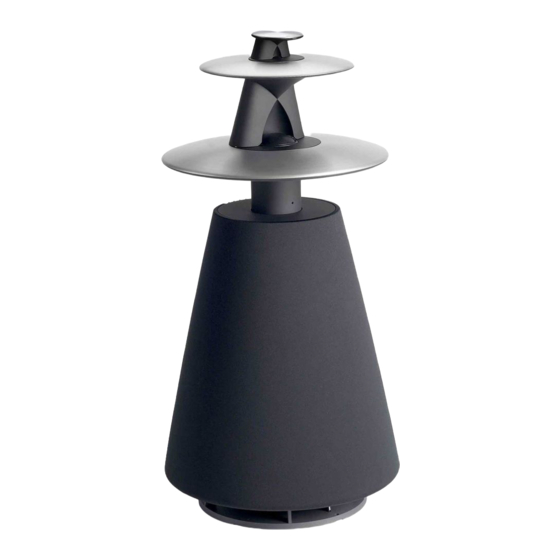
- Page 1 BeoLab 5 Guide...
- Page 2 CAUTION: To reduce the risk of electric shock, do not remove cover (or back). No User-serviceable parts inside. Refer servicing to qualified service personnel. WARNING: To prevent fire or electric shock, do not expose this appliance to rain or moisture. Do not expose this equipment to dripping or splashing and ensure that no objects filled with liquids, such as vases, are...
-
Page 3: Table Of Contents
Set up BeoLab 5, 6 Important information to consider before setting up BeoLab 5. Connect cables, 8 Find information about the sockets, and how to connect BeoLab 5 to your audio or video system. Adapt BeoLab 5 to your system, 11 Find out how to select an Option setting suitable to your particular setup, and how to change the LINE input level setting. -
Page 4: Daily Use
The calibration is explained in Adapt BeoLab 5 to your room (pp. 12–13). If the loudspeaker has been locked by the PIN code system, the indicator light shines intermittently red and green. -
Page 5: Set Up Beolab
For specific information about the Beo4 remote control, please refer to its enclosed Guide. Option 1 If BeoLab 5 is programmed to Option 1 To switch BeoLab 5 on/off… > Press RADIO to switch on. > Press • to switch off. - Page 6 – Do not touch the two speaker domes! Use the enclosed brush only when cleaning – please refer to Cleaning BeoLab 5 (p. 4) for further information. – The loudspeaker is designed for indoor use in dry, domestic environments only, and for use within a temperature range of 10–40º...
- Page 7 Cover for socket panel: To get access to the sockets and the RIGHT–LEFT switch, you will have to remove the cover. To do so, pull out the bottom edge of the cover, as illustrated above. Cable cover: Place the mains lead and the signal cables inside the enclosed cable cover, and then use the special tool to seal the cover.
-
Page 8: Connect Cables
(≤ 2 V RMS). If the LINE output level exceeds 2 V RMS, you must change the LINE input level on each loudspeaker – as explained in Adapt BeoLab 5 to your system (p. 11). ’Syncr. connection’ Socket for connection between two BeoLab 5 speakers in a setup. - Page 9 POWER LINK DIGITAL POWER LINK DIGITAL For connections in other Bang & Olufsen digital systems, please refer to the Guide enclosed with those systems. POWER LINK DIGITAL DIGITAL POWER LINK Connection to Bang & Olufsen systems The loudspeaker can be connected to all Bang &...
- Page 10 (SPDIF). When connecting to non-Bang & Olufsen systems, remember to change the ‘Option’ setting to either 1 or 4, as explained in ‘Adapt BeoLab 5 to your system’ (p. 11). >> Connect cables 'Sync.'...
-
Page 11: Adapt Beolab 5 To Your System
2 V RMS, you must set the loudspeakers to accommodate a higher input level (> 2 V RMS ≤ 4 V RMS). Adapt BeoLab 5 to your system Option 0 Option 0 (factory setup): Used if connected to a Bang & Olufsen audio (or video) system. -
Page 12: Adapt Beolab 5 To Your Room
With other speaker systems, you have to consider this when placing them. With BeoLab 5, the Adaptive Bass Control system – when calibrated – filters out this change in the bass level. During the calibration, the loudspeaker... - Page 13 To calibrate BeoLab 5 Perform the calibration for each loudspeaker in your setup separately. The calibration takes a couple of minutes for each loudspeaker. You cannot start the calibration if the loudspeaker has been locked by the PIN code system*.
-
Page 14: Use The Pin Code System
To activate the PIN code system You activate the PIN code system for each loudspeaker in your setup separately. While BeoLab 5 is in standby… > Press , and STOP in quick succession on the Beo4 remote control. - Page 15 However, you can only do so five times within a three-hour time period! While BeoLab 5 is in standby… > Press , and STOP in quick succession on the Beo4 remote control.
- Page 16 If the loudspeaker is locked by the PIN code system the indicator light slowly flashes red and green when you switch on. While BeoLab 5 is playing… > Key in your four-digit PIN code on the Beo4 remote control*. The loudspeaker confirms each digit with a ‘beep’.
-
Page 17: Indicator Lights And Sound Signals
In daily use, you will see that the indicator light shines either red (standby) or green (playing). In different situations, you may see other indications, such as a flashing red or green light, and combinations of these colours. When setting up the PIN code system, you will also hear sound signals from the loudspeaker. -
Page 18: Index
Maintenance Cleaning, 4 Option settings Adapt BeoLab 5 to your system, 11 Indicator lights and sound signals, 17 Use BeoLab 5 with a non-Bang & Olufsen system, 5 PIN code Daily use, 4 Indicator lights and sound signals, 17 PIN code system setup, 14–15 The PIN code in ‘daily use’, 16... - Page 19 For your information… Your needs as a user are given careful consideration during the design and development process of a Bang & Olufsen product and we strive to make our products easy and comfortable to operate. Therefore, we hope that you will take the time to tell us about your experiences with your Bang &...
Need help?
Do you have a question about the BeoLab 5 and is the answer not in the manual?
Questions and answers