
Related Manuals for WARRIOR 20SPS12


Summary of Contents for WARRIOR 20SPS12
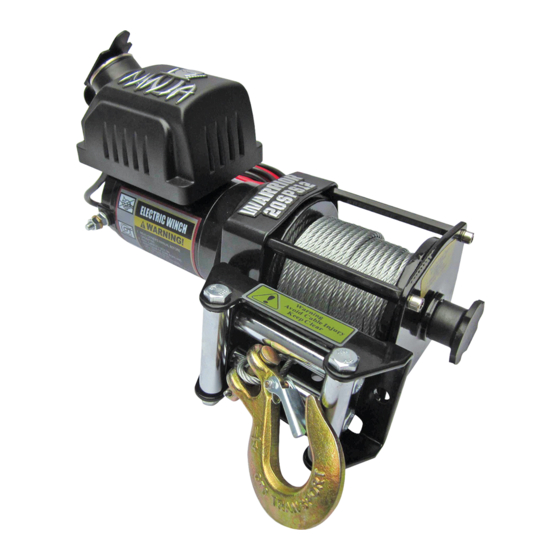
- Page 1 2000 ELECTRICAL WINCH 20SPS12, 20SPS24, 20SPA12, 20SPA24 Assembly & Operating Instructions...
-
Page 2: Table Of Contents
CONTENTS INTRODUCTION ..................1 GETTING TO KNOW YOUR WINCH ............2 SAFETY PRECAUTIONS .................3 GENERAL TIPS FOR SAFE OPERATION ..........5 WINCHING TECHNIQUES A-Z ..............6 WINCH ASSEMBLY AND MOUNTING ............8 MOUNTING DRAWING ................9 WINCH ACCESSORIES YOU WILL NEED ..........9 RIGGING TECHNIQUES ................ 1 0 WINCH WORKING DEMONSTRATION .......... -
Page 3: Introduction
INTRODUCTION Congratulations on your purchase of a high quality winch. We design and build winches to strict specifications and with proper use and maintenance should bring you years of satisfying service. WARNING - Read, study and follow all instructions before operating this device. -
Page 4: Getting To Know Your Winch
GETTING TO KNOW YOUR WINCH Your winch is a powerful piece of machinery. It is important that you understand the basics of its operation and specifications so that when you need to use it, you can use it with confidence and safety. Below is a list of the components of your winch and their use. -
Page 5: Safety Precautions
10. Solenoid: Power from the vehicle battery flows through the weather-sealed switch before being directed to the winch motor. 11. Remote Switch: The Power switch leads have a dual switch for powering in or powering out your winch drum. The Power switch leads allow you to stand clear of the wire rope when the winch is under load. - Page 6 WARNING – A minimum of five wraps of cable around the drum barrel is necessary for pulling and holding the rated load. WARNING – Keep yourself and others a safe distance to the side of the cable when it is under tension. WARNING –...
-
Page 7: General Tips For Safe Operation
WARNING – Use gloves to protect hands when handling the cable. Never let the cable slide through your hands. WARNING – Never connect the cable back to itself. Apply blocks to the wheels of the vehicle when on an incline. Duration of winching pulls should be kept as short as possible. -
Page 8: Winching Techniques A-Z
Inspect the wire rope and equipment before each use. A frayed or damaged rope must be replaced immediately. Use only the manufacturer’s replacement rope with the exact specifications. Inspect the winch installation and bolts to ensure that all bolts are tight before each operation. - Page 9 l. Inspect the wire rope. Make sure there are at least 5 wraps of wire rope around the winch drum. m. Drape a winch sail (recommended), blanket or jacket over the wire rope approximately 5 to 6 feet from the hook. Open the vehicle bonnet if possible for added protection.
-
Page 10: Winch Assembly And Mounting
WINCH ASSEMBLY AND MOUNTING 1. Your 2000lb winch is designed with a bolt pattern that is standard in this class of winch. Many winch mounting kits are available that utilize this bolt pattern for the popular ATV’s and mounting channels. If you will utilize the mounting channel you must ensure that it is mounted on a flat surface so that the three major sections (motor, drum and gear housing) are properly aligned. -
Page 11: Mounting Drawing
MOUNTING DRAWING The mounting drawing Red Battery + Black Battery - (5.9') Switch WINCH ACCESSORIES YOU WILL NEED NOT INCLUDED WITH YOUR WINCH Gloves – For handling the wire rope and hook strap. Anchor Strap/Chain – Tree saver anchor straps are made of high quality nylon with high tensile strengths from 5,000lbs to 10,000lbs. -
Page 12: Rigging Techniques
RIGGING TECHNIQUES Self-Recovery Locate a suitable anchor such as a strong tree trunk or boulder. Always use a sling as an anchor point. CAUTION Do not attach the clevis hook back onto the cable as this could cause damage to Fig 3.1 the cable. -
Page 13: Winch Working Demonstration
WINCH WORKING DEMONSTRATION 1. Disengage the clutch by turning the clutch to the “CLUTCH OUT” position. 2. Grab the cable (Part# K200015) and pull the cable to the desired length, then attach to item being pulled. CAUTION: Always leave at least five turns of cable on the drum; Review winch safety warnings and precautions on page 2、3 before continuing. -
Page 14: Maintenance
6. Safely rewind cable onto the drum (for the first five wraps be careful not to allow kinking). Cable must be wound onto the drum under a load of at least 10% rated line pull. WARNING - Only replace the wire rope with the identical replacement part recommended by the manufacturer. -
Page 15: Trouble Shooting
TROUBLE SHOOTING SYMPTOM POSSIBLE CAUSE SUGGESTED ACTION -Switch Assembly not -Insert Switch Assembly all the way into connected properly the connector. Motor does not -Loose battery cable -Tighten nuts on all cable connections. turn on connections -Defective Switch -Replace Switch Assembly. Assembly -Defective motor -Check for voltage at armature port with... -
Page 16: Winch Assembly Drawing
WINCH ASSEMBLY DRAWING... -
Page 17: Winch Parts List
WINCH PARTS LIST Part # Description Remark K200100-U Motor Assembly K200200 Gear-Box Assembly K200300 Planetary Gear Assembly K200400 Output Gear Ring Assembly K200001 Drum Holder Plate K200002 Locking Washerø5 K200003 Hexagon Socket Head Cap Screw M5 x 12 K200004 Bush(Ⅰ) K200500 Clutch Assembly K200005... -
Page 18: Specification
SPECIFICATION Rated line pull 2000 lbs (907 kgs) 12V:0.8hp / 0.6 kw Motor: permanent magnet 24V:0.9hp / 0.7 kw Gear reduction ratio 153:1 Cable (Dia.× L) Ø5/32"×49'(Ø4mm×15m) Drum size(Dia.× L) Ø1.24"×2.87" (Ø31.5mm×73 mm) Mounting bolt pattern 3.13" (79.5 mm) ;2-M8 ITEM 20SPS 20SPA Overall dimensions... -
Page 19: Warranty
WARRANTY Your winch has been manufactured and tested to the highest standards. Please ensure you read and understand the assembly and operating instructions before use. Failure to comply with these instructions or any improper use of the equipment will terminate the warranty. Please ensure you record the information below: Distributor Date of Purchase... - Page 20 Winch solutions (“seller” or winch solutions) warrants to the original retail buyer only (“Buyer”) that any mechanical component of a genuine WARRIOR WINCH (“product”) is free of defects in material and workmanship for the lifetime of the winch. The electrical components (including the motor, contactor, and switches) will be free of defects in material and workmanship for a period of (3) three years (36 Months) from the original purchase provable date of purchase.
- Page 21 Please ensure you record the information below: Distributor Date of Purchase Invoice No Serial No Please register your Winch at www.warriorwinch.co.uk , any product that is not registered will not be covered by the lifetime warranty. In the unlikely event you experience problems, contact the distributor with this information.
Need help?
Do you have a question about the 20SPS12 and is the answer not in the manual?
Questions and answers