
Related Manuals for Grundig GSND6384S


Summary of Contents for Grundig GSND6384S
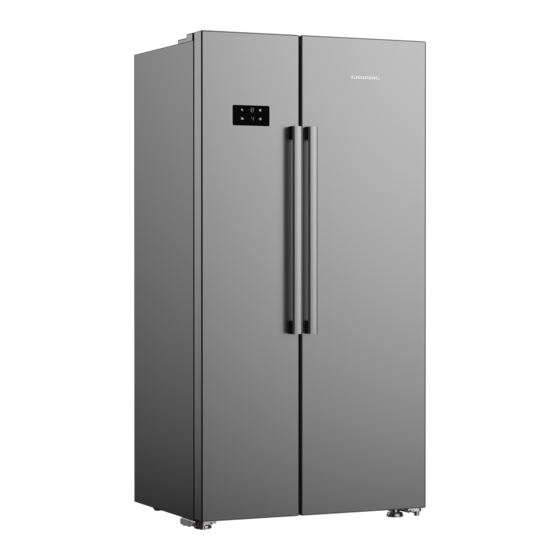
- Page 1 Buzdolabı Kullanma Kılavuzu Refrigerator User Manual GSND6384S TR/EN 58 5861 0000/AC TR-EN...
- Page 2 ulla bu ıla uzu o u u Ürünü tercih ettiğiniz için teşekkür ederiz. Yüksek kalite ve teknoloji ile üretilmiş olan ürününüzün size en iyi verimi sunmasını istiyoruz. Bunun için, bu kılavuzun tamamını ve verilen diğer belgeleri ürünü kullanmadan önce dikkatle okuyun. Kullanma kılavuzunda belirtilen tüm bilgi ve uyarıları...
-
Page 3: Table Of Contents
a la ı u ına ının u unun l u ulma ı ......23 Kullanım ama ı .....3 unun m zl nm avunma ız a lama v l a van v nl ....3 ........25 ......25 v nl ....4 .......25 K u l ......25 a ıma v nl... - Page 4 a la ı l a alan- na lama ma a a ma n n m a a ın an n nl m a ım ı ullanılan amla ın a la a v nl al ma la ı amla a alma a ı ma an u ulamala a mamız u al ma la a u ul-...
- Page 5 a la ı u la a a ın an a l unu lm m l al ına v a a ına ı ı ı ma- ın a l unun z - m ala malz m l n a ı ma ın la an uza u un a alanma v a l u a ı...
- Page 6 a la ı a ı n a ı ın an n n u ula a ı n u u u ma ın avalan ı ıla l n lma ı n n al ın a n n a ınma ı ı a ın a alı...
-
Page 7: A A A
a la ı n n ı ı a na ı l m al ın a a ala a v a a ınına u ulma ı a l una n m n uz nl n m a u un ı a la l z la n l v a ı... - Page 8 a la ı u uzan ıla ının v a uz la ının a ının a anı ı a lamala ının l nm u u- anı ı n n l mun a u ma azı uz v a m a al ma - z a alanmala- ı...
- Page 9 a la ı n n azla ula ın za a l u ma ın Ka ı a ıl ı ın a u umun a uz la ının nu u a alanmala v a a l una a a m unma ın unla n n al v alma ına n la l...
-
Page 10: M Z
a la ı m zl a ın ı ı ı al l ullanma ın od ll l ol a a- m zl nz n n al l la v azı z u ulama ı ullanma ın n n ullanı azın ı... - Page 11 a la ı ı ı a ıl a ı a anlı ı a a ın an a ımlanan ı ala ın K n n m l l n za a lı a a lı ma n m l n u un u ml v ullanıla l n l a a v...
-
Page 12: Buzdolabı Iz
Buzdolabı ız Süt ürünleri (soğuk saklama) bölmesi n u u u u u u a ı u u u a ı a la ı am a la umu alı u ına ı l u ma azn n u ulmu a lama u ına ı... -
Page 13: Ku Ulum N U
u ulu u ulu do u a ın ıla ı nl m z m n v nl al ma la ı l m n u un ı ı a na la ın an n n n n v ml alı a lm l ı... - Page 14 Kurulum a zla ı a ma a la ı a a la a ı v ala ı a zla la l n v ala ı ullanın a a a a la ını a a a a la ın Fixing nut Sabitleme somunu a zu a a avalan ı...
- Page 15 Kurulum Ka ıla ı la a a a lama l a ulunan a mununu Ka ının nuna a a lama mununu aa n n n nu a fixing bolt mununu ı ın Ka ıla ı a a la a a a lama adjusting nut l m v a ını...
- Page 16 Kurulum ba la ı ı ı a u a ı ı n n z n an uva la ı u ma u u u za ma a l la ı ula ı l na ılmı ı zl l ı a lı a a lan ı...
-
Page 17: Azı Lı
azı lı a a u u a lama v nl al ma la ı l m n u un ı ala ı a a am a uma v u ma a a u u a ıl a ı ullanıla a ı... -
Page 18: Azı Lı
azı lı n azla alı ma a lma ı u umun a am a la ı ın a u a a ınız u ma a la a a uva a ı ı la ını a a ma a a ı ı mı ıvı... -
Page 19: Alı I Il A I
alı ı ıl a ı o a ı du a la ıl a ı v nl al ma la ı l m n u un l m n ızlan ı ma ama ı la a a ın an a ılan ı... - Page 20 ulla ı ı v nl al ma la ı l m n u un an ll n n z n m an l n la ınızı ullanmanıza Ka l uz n u u u ı a lı a a ı ızlı...
- Page 21 ulla ı ı ablo uz ızlı n u ma l u ulama a a ılı ı la n n z a l uz a lan ı a ma a a az n u ma n u u ullanılı anız n u u u ma an n ızlı...
- Page 22 ulla ı ı o u za la ı ı ı od l o du u u B l ı a lı a ı n u u u n ı a lı a a ı Bu z ll o a ılı u a a ıl ı...
-
Page 23: Ull
ulla ı ı bz l ı o u a Bu z ll o Bu z ll o z ll z v m v l al n m a ı ı ulla ının a lan ı ı am a a a av ı... - Page 24 ulla ı ı u ı a ı ı ulla ıl a ı Bu z ll o ına an alınan l u un ılı lma ı n mal u ına ı uzun ullanılmamı a m z u u ına ının lunu a a ınızla umu a ullanı...
- Page 25 ulla ı ı una u ı ın a u u a na lı o u u azlı al ll u ına ı la Ka ı a ı l u ma azn ullanıma u un lma an ı a ın ıvı l u ma ın Ka ı...
-
Page 26: Uz A Lama A I
ulla ı ı Buz a buz a la a a la a abı Bu z ll o Bu z ll o uzma l u u a lama nuz a la ı nun a uzla ı- la ı nız azı ı uz alma n uzma ı... - Page 27 ulla ı ı ıdala ı do du ul a ı ı ala ın n u ulma an n n n m n lun ı a al a ı ı n u u u n u u u a la ı al m n um l n ı...
-
Page 28: Uzma
ulla ı ı n u ulma ı a la a ı a ı u umun a a n u ma ın lum uz ıdala ı n an a lı ını a la a ı la l l a zulma nu u l m n az a a lı... -
Page 29: Inla Ma Lam A I
Ba ı lu u m zl m nl l v nl al ma la ı l m n u un n n ı m zl n uz la ınızı n ml m z ullanınız m zl m m zl z lm l a a l m zl m zl n... - Page 30 Ba ı unu nl m amla ın a lama na lı u la m zl va ı u a lama l lu umunu a alı a la a n aza n lu an l a la ın zı a ı m zl nm a lanan ı...
- Page 31 a ı ma an n unu a ma z zaman n ı a ılı a ılma ın a a a a ın an u a ı ı u ma azın a lana l a alı a ın ı n l nm m malz m ulanımına a lı...
- Page 32 Sorun giderme n n a a n u u u ı a lı ı la l a a lanmı ı uzun alı ı n u u u ı a lı ını a a la ı a ı a lı ı la l ı...
- Page 33 Sorun giderme u u u ı a lı ı a a lanmı u ma l m n la l u u u n an ı a lı a a ının n u u u ullanılma a ı u n mal ı...
- Page 34 Sorun giderme a ının a anma ını n ll la l Ka ıla ı n ll n z m n amam n u mu la l a la ını a a la a a z a a a lam m n n a ı...
- Page 35 FERAGATNAME/UYARI azı a ızala a a ı a al ma la a l n a ılmala ı a ı la v nl unu a a ma an a a v nl lma an ullanıma n n a ullanı ıla a a ın an am K n m l m n a ınız...
- Page 36 Kanallarımız: * Web Adresimiz: www.grundig.com.tr * Çağrı Merkezimiz: 0850 210 0 888 * e-posta Adresimiz: (Sabit telefonlardan veya cep telefonlarından - musteri.hizmetleri@grundig.com alan kodu çevirmeden arayın*) * Sosyal Medya Hesaplarımız: * Diğer Numaramız https://www.instagram.com/grundigturkiye/ 0216 585 8 888 https://www.facebook.com/grundig.tr/ - Çağrı Merkezimiz haftanın 7 günü 24 saat hizmet https://www.youtube.com/user/TurkiyeGrundig...
- Page 37 Hizmet talebinin değerlendirilmesi Müșteri Bașvurusu Web sitesi Yetkili Servis musteri.hizmetleri Yetkili Satıcı Faks 0850 210 0 888 @grundig.com Çağrı merkezi 0216 423 23 53 Bașvuru kaydı Bașvuru Konusu Müșteri Adı, Soyadı Müșteri Telefonu Müșteri Adresi Hizmet talebinin alınması - Hizmet talebi analizi - Hizmet hakkında müșterinin bilgilendirilmesi...
- Page 38 Uygun Kullanım ve Garanti ile İlgili Dikkat Edilmesi Gereken Hususlar; Bu kılavuzu okumadan ürününüzü çalıştırmayınız. Așağıda belirtilen sorunların giderilmesi ücret karșılığında yapılır. Bu durumlar için garanti șartları uygulanmaz; 1 ) Kullanım hatalarından kaynaklanan hasar ve arızalar, 2) Malın tüketiciye tesliminden sonraki yükleme, boșaltma, tașıma vb. sırasında olușan hasar ve arızalar, 3) Malın kullanıldığı...
- Page 39 Markası: Arçelik A.Ș. Grundig Arçelik A.Ș. Karaağaç Caddesi No:2-6, Cinsi: Adresi: Buzdolabı 34445, Sütlüce / İSTANBUL Modeli: GSND6384S Telefonu: Bandrol ve Seri No: (0-216) 585 8 888 Faks: Garanti Süresi: (0-216) 423 23 53 3 YIL Azami Tamir Süresi: www.grundig.com.tr 20 İș...
- Page 40 Dear Customer, Please read this manual before using the product. Thank you for choosing this product. We would like you to achieve the optimal efficiency from this high quality product which has been manufactured with state of the art technology. To do this, carefully read this manual and any other documentation provided before using the product and keep it as a reference.
- Page 41 1 Safety Instructions Filling the water tank of the water A1.1 Purpose of usage ......3 fountain ..........23 A1.2 Safety of children, vulnerable 6.8 Cleaning the water tank .....24 persons and pets ........3 6.9 Dairy (cold storage) bin ....25 A1.3 Electrical safety ......4 6.10 Crisper ........25 A1.4 Handling Safety ......4 6.11 Ionizer ........25...
-
Page 42: Safety Instructions
Safety Instructions - In the units of hotels, motels or • This section includes the safety other resting facilities that are used instructions necessary to pre- by the customers, vent the risk of personal injury - In hostels, or similar environments, or material damage. -
Page 43: A1.3 Electrical Safety
Safety instructions • Keep the packaging materials • Do not tuck the power cord un- away from children. Risk of in- der the product or to the rear of jury and suffocation. the product. Do not put heavy items on the power cord. The • Before disposing of old products power cord should not be bent, that shall not be used any more:... -
Page 44: A1.5 Installation Safety
Safety instructions environment. Do not keep • Do not hold the product from its carpets, rugs or similar floor door while handling the product. covers under the product. This • Be careful not to damage the may cause risk of fire as a re- cooling system and the pipes sult of inadequate ventilation! while handling the product. -
Page 45: A1.6 Operational Safety
Safety instructions If you cannot prevent installation of • Place the power cord and hoses the product in the vicinity of a heat (if available) of the product so source, you shall use a suitable that they shall not cause a risk insulation plate and the minimum distance to the heat source shall be of tripping over. - Page 46 Safety instructions that may be frozen to the free- • Do not get on the product. Risk of zer compartment. Cans or bott- falling and injury! les may explode. Risk of injury • Do not cause damage to the and material damage! pipes of the cooling system using • Do not use or place materials sharp and piercing tools.
-
Page 47: A1.7 Maintenance And Cleaning Safety
Safety instructions this light with optical devices. The refrigerant type used in the Do not stare directly at UV LED product is specified in the the light for a long time. Ultraviolet type label. This gas is flammab- rays may cause eye strain. le. -
Page 48: A1.8Homewhiz
Safety instructions • Do not use sharp or abrasive 1.8HomeWhiz tools to clean the product. Do not use materials such as hou- (May not be applicable for all mo- sehold cleaning agents, deter- dels) gents, gas, gasoline, alcohol, • Follow the safety warnings even wax, etc. -
Page 49: Environmental Instructions
Environmental instructions 2.1 Compliance with the WEEE 2.3 Package information Directive and Disposing Packaging materials of the of the Waste Product: product are manufactured from recyclable materials in This product complies with EU WEEE accordance with our National Directive (2012/19/EU). This product Environment Regulations. -
Page 50: Your Refrigerator
Your Refrigerator Freezer compartment The dairy (cold storage) bin Cooler compartment Bottle shelf Cooler compartment door shelves Glass shelves Egg Holder Water dispenser filling tank Frozen food storing compartments Water dispenser reservoir Freezer compartment glass shelf Bottle shelf Icematic Adjustable stands Freezer compartment door shelves Crispers May not be available in all models... -
Page 51: Installation
Installation 4.1 The right place for installation WARNING: : If the door span is too narrow for the Read the “Safety product to pass, remove the Instructions” section first! door and turn the product sideways; if this does not work, contact the authorized Your product requires adequate air service. -
Page 52: Adjustment Of The Feet
Installation 4.3 Adjustment of the feet • To attach the wedges, remove the screws on the product and use the If the product is not in balanced screws provided with the wedges. position, adjust the front adjustable stands by rotating right or left. Fixing nut • Attach 2 plastic wedges on the ventilation cover as shown in the... - Page 53 Installation In order to adjust the doors vertically, •Loosen the fixing nut at the bottom •Screw adjusting nut (CW/CCW) according to the position of the door •Tighten the fixing nut for the final position In order to adjust the doors horizontally, • Loosen the fixing screw at the bottom • Loosen the fixing bolt on the top • Screw the adjusting bolt (CW/ CCW) on the side according to the position of the door...
-
Page 54: Electrical Connection
Installation 4.4 Electrical connection WARNING: Do not use extension or multi sockets in power connection. WARNING: Damaged power cable must be replaced by Authorized Service. • Our firm will not assume responsibility for any damages due to usage without earthing and power connection in compliance with national regulations. -
Page 55: Preparation
Preparation • Make sure the foods are not Read the “Safety Instructions” section first! in contact with the cooler compartment temperature 5.1 What to do for energy saving sensor described below. Connecting the product to electronic energy-saving systems is harmful, as it may damage the product. -
Page 56: First Operation
Preparation impoving air distribution and It is normal for the front edges of the refrigerator energy efficiency. to be warm. These areas are designed to warm up in order to prevent condensation. For some models, indicator panel turns off automatically 1 minutes after the door closes. -
Page 57: Operating The Product
Operating the Product 6.1 Pausing the program Read the “Safety Instructions” section first! • Do not use any mechanical tools or any other tools than the recommendations of the manufacturer to speed up the thawing operation. • Do not use parts of your refrigerator such as the door or drawers as a support or a step. -
Page 58: Operation Of The Product
Operation of the Product Read the “Safety Instructions” section first! 6.2 Indicator panel Indicator panels may vary depending on the model of your product. Audial and visual functions of the indicator panel will assist in using the refrigerator. Wireless Key Cooling Compartment OFF Quick Freezing Key (Vacation) Function Key... - Page 59 Using the product 1. Wireless Key 2. Quick Freezing Key This key is used to make a wireless When the quick freeze key is pressed, the connection with your product via LED on the key is illuminated and the quick HomeWhiz mobile app.
-
Page 60: Deodoriser Module
Using the product return to normal. The energy-saving 6.3Deodoriser Module function is a function activated ex- (OdourFresh +) factory and cannot be cancelled. *May not be available in all models 5. Freezing Compartment Temperature The deodoriser module quickly Setting Key eliminates the bad smells in your Temperature setting is made for cooler refrigerator before they permeate... -
Page 61: Humidity Controlled Crisper (Fullfresh+)
Using the product 6.4Humidity controlled 6.5 Blue light/ Vitamin crisper (FullFresh+) Care Technology *May not be available in all models *May not be available in all models Thanks to the humidity controlled crisper, vegetables and fruits may For the blue light, be stored for a longer period at an environment with ideal humidity Fruits and vegetables stored in the... -
Page 62: Using The Water Fountain
Using the product 6.6 Using the water fountain 2. Release the arm after filling your glass with water as you desire. *May not be available in all models The first few glasses of water taken from the fountain will normally be warm. -
Page 63: Cleaning The Water Tank
Using the product 6.8 Cleaning the water tank Remove the water filling reservoir inside the door shelf. Detach by holding both sides of the door shelf. Hold both sides of the water tank and remove at 45° angle. Remove and clean the water tank lid. Do not fill the water tank with fruit juice, fizzy beverages, alcoholic... -
Page 64: Dairy (Cold Storage) Bin
Using the product 6.13 Icematic and ice storage box 6.9 Dairy (cold storage) bin *May not be available in all models *May not be available in all models Fill the icematic with water and put in “The dairy (cold storage) bin ” place. -
Page 65: Freezing Fresh Food
Using the product 6.14 Freezing fresh food • Make sure the food items are packed before putting in the • To preserve food quality, the freezer. Use freezer holders, food items placed in the freezer tinfoil and damp-proof paper, compartment must be frozen plastic bag or similar packaging as quickly as possible, use the materials instead of traditional... -
Page 66: Recommendations For Storing Frozen Foods
Using the product Freezer Cooler Compartment Compartment Descriptions Setting Setting This is the default, recommended -18°C 4°C setting. These settings are recommended -20,-22 or -24°C 4°C for ambient temperatures exceeding 30°C. Press Rapid Freeze function 24 hours before placing the food, Rapid Freeze 4°C the product will reset to previous... -
Page 67: Placing The Food
Using the product 6.17 Placing the food Freezer Various frozen goods compartment including meat, fish, ice shelves cream, vegetables etc. Food items inside Cooler pots, capped plate and compartment capped cases, eggs (in shelves capped case) Cooler Small and packed food compartment or beverages door shelves... -
Page 68: Maintenance And Cleaning
Maintenance and cleaning • On the products without a No- WARNING: Read the “Safety Frost feature, water droplets Instructions” section first! and icing up to a thickness of a finger may occur on the rear wall WARNING: Unplug the of the freezer compartment. Do refrigerator before cleaning not clean, and never apply oils or... -
Page 69: Maintenance And Cleaning
Maintenance and cleaning There is a coating on the surface of 7.3 Preventing Odours the glasses. This coating minimizes The product is manufactured free of any formation of stains and provides odorous materials. However, keeping easy cleaning of the stains and dirts the food in inappropriate sections and that have been formed. -
Page 70: Troubleshooting
Troubleshooting • The door is opened too frequently Check this list before contacting the service. Doing so will save you time and money. >>> Take care not to open the This list includes frequent complaints that product's door too frequently. are not related to faulty workmanship or • The environment is too humid. - Page 71 Troubleshooting The refrigerator's operating noise is • The new product may be larger increasing while in use. than the previous one. Larger products will run for longer • The product's operating periods. performance may vary depending • The room temperature may on the ambient temperature be high.
- Page 72 Troubleshooting The freezer temperature is very • The cooler compartment low, but the cooler temperature is temperature is set to a very high adequate. degree. >>> Temperature setting of the cooler compartment has • The freezer compartment an effect on the temperature in temperature is set to a very the freezer compartment.
- Page 73 Troubleshooting • The product is not cleaned • The product's operating principles regularly. >>> Clean the interior involve liquid and gas flows. regularly using sponge, warm >>> This is normal and not a water and carbonated water. malfunction. • Certain holders and packaging There is sound of wind blowing materials may cause odour.
- Page 74 Troubleshooting • Fan may continue to operate when the the freezer door is open. WARNING: If the problem persists after following the instructions in this section, contact your vendor or an Authorized Service. Do not try to repair the product. Refrigerator / User Guide 35 / 35EN...
- Page 75 For your own safety, please unplug product prior to carrying out any repair. Grundig may not be held responsible for safety issues that may arise because of repairs or attempts not carried out in accordance with instructions specified at user manuals or located at https://www.grundig.com.tr/destek/ and performed on...
- Page 76 Notes ......................................................................................................................................................................................................................................................................................................................................................................................................................................................................................................................................................................................................................................................................................................................................................................................................................................................................................................................................................................................................................................................................................................................................................................................................................................................................................................
- Page 77 Notes ......................................................................................................................................................................................................................................................................................................................................................................................................................................................................................................................................................................................................................................................................................................................................................................................................................................................................................................................................................................................................................................................................................................................................................................................................................................................................................................
Need help?
Do you have a question about the GSND6384S and is the answer not in the manual?
Questions and answers