Table of Contents
Advertisement
Quick Links
Advertisement
Table of Contents

Subscribe to Our Youtube Channel
Related Manuals for Grundig GSN 30710 DW


Summary of Contents for Grundig GSN 30710 DW
- Page 1 Tall Larder Fridge User Manual GSN 30710 DW EN / 58 4566 0000/AA...
- Page 2 Please read these instructions first before using your appliance Thank you for choosing a Grundig appliance. Please take some time to read this user manual before using your appliance, to ensure you know how to safely operate the controls and functions.
-
Page 3: Table Of Contents
Contents 1. Safety and environment 5. Operating the product instructions Indicator panel ....14 1.1. General safety .....4 Using the water dispenser 16 1.1.1 HC warning ......6 Filling the water 1.1.2 For models with water dispenser's tank ......16 dispenser ........6 5.4 Cleaning the water tank ...17 1.2. -
Page 4: Safety And Environment
1. Safety and environment instructions – farm houses and by clients This section provides the safety in hotels, motels and other instructions necessary to residential type environments; prevent the risk of injury and – bed and breakfast type material damage. Failure to environments;... - Page 5 • If the product will not be • If the product has LED used for a while, unplug the type lighting, contact the product and remove any food authorised service for inside. replacing or in case of any problem. • Do not use the product when • Do not touch frozen food with the compartment with circuit cards located on the upper...
-
Page 6: Hc Warning
will cause the product to fall the help of a professional down and cause damage to plumber. the parts. • If there is risk of water • Take care not to trap the hammer effect in your power cable. installation, always use a water hammer prevention equipment in your installation. -
Page 7: Child Safety
1.5. Compliance with following the product purchasing date. RoHS Directive • This product complies with EU 1.3. Child safety WEEE Directive (2011/65/EU). It does not contain harmful and • Keep packaging materials prohibited materials specified in out of children’s reach. the Directive. -
Page 8: Your Refrigerator
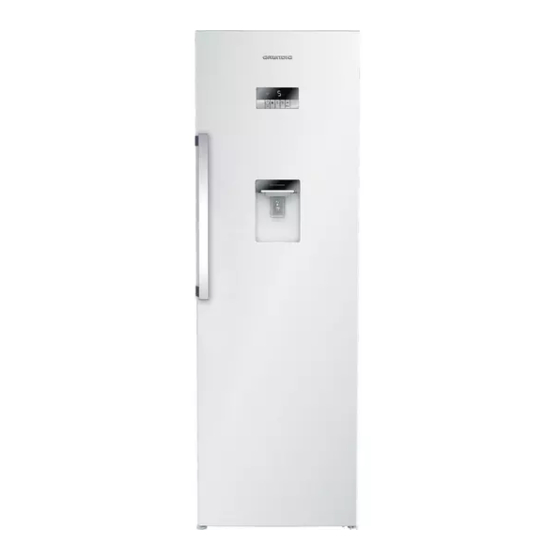
2. Your Refrigerator Adjustable front feet Indicator panel Salad drawer Butter & Cheese sections Chiller and glass cover Water dispenser filling tank Movable shelves Egg section Wine rack Water dispenser reservoir Adjustable door racks Bottle shelves * May not be available in all models Figures in this user manual are schematic and may not match the product exactly. -
Page 9: Installation
3. Installation Make sure that the power cable is not pinched or Refer to the nearest Authorised crushed while pushing Service Agent for installation of the product into its place the product. To make the product after installation or ready for use, make sure that cleaning procedures. -
Page 10: Installing The Plastic Wedges
3.2 Installing the If the current value of the fuse or breaker in the house does plastic wedges not comply with the value in the Plastic wedges are used to create rating plate, have a qualified the distance for the air circulation electrician install a suitable between the product and the rear fuse. -
Page 11: Illumination Lamp
3.4 Illumination lamp To change the Bulb/LED used for illumination of your refrigerator, call your AuthorisedService. The lamp(s) used in this appliance is not suitable for household room illumination. The intended purpose of this lamp is to assist the user to place foodstuffs in the refrigerator/freezer in a safe and comfortable way.The lamps used in this appliance have to withstand... -
Page 12: Preparation
4. Preparation loaded. There is no risk in using a shelf or drawer suitable for the shapes and sizes of the 4.1 Things to be done foods to be frozen. for energy saving • Thawing frozen food in fridge compartment will both provide Connecting the product energy saving and preserve the to electric energy saving... - Page 13 • Run the refrigerator without putting any food for 6 hours and do not open its door unnecessarily. Front edges of the refrigerator may feel warm. This is normal. These areas are designed to be warm to avoid condensation. You will hear a noise when the compressor starts up.
-
Page 14: Operating The Product
5. Operating the product 5.1 Indicator panel 1. On/Off Function: Cool function will be cancelled This function allows you to make automatically 2 hours later if you the Fridge turn off when pressed do not cancel it manually. for 3 seconds.The fridge could 4. - Page 15 12.1.Energy Saving Indicator : Vacation button, vacation function is activated and the vacation (optional) indicator light will illuminate. This icon (“-“) lights up when the When this function is activated, Energy Saving Function is selected. the fridge compartment 12.2.Energy Saving Indicator : temperature is kept at 15°C in (optional) order to prevent bad odours from...
-
Page 16: Using The Water Dispenser
5.2 Using the water dispenser 5.3 Filling the water dispenser's tank * May not be available in all models Water tank filling reservoir is loca- It is normal for the first ted inside the door rack. few glasses of water ta- ken from the dispenser to 1. -
Page 17: Cleaning The Water Tank
Capacity of the water tank is 3 litres; do not overfill. 5.4 Cleaning the water tank Remove the water filling reservoir inside the door rack. Remove the door rack by holding from both sides. Grab the water tank from both sides and remove it with an angle of 45°C. -
Page 18: Drip Tray
5.5 Drip tray Water that dripped while using the water dispenser accumulates in the spillage tray. Remove the plastic filter as shown in the figure. With a clean and dry cloth, remove the water that has accumulated. -
Page 19: Using Interior Compartments
5.6 Using interior 5.8 Placing the food compartments Body shelves: Distance between Egg tray the shelves can be adjusted when Food in pans, Fridge necessary. covered plates compartment Crisper: Vegetables and fruits can and closed shelves be stored in this compartment for containers long periods without decaying. -
Page 20: Changing The Door Opening Direction
5.10 Changing the door opening direction Door opening direction of your refrigerator The manufacturer recommends that the reversing of the door opening is only carried out by Authorised Service agents and will be at the customers expense. Damage caused by unauthorised persons whilst attempting to reverse the doors is not covered under the warranty. -
Page 21: Maintenance And Cleaning
6. Maintenance and cleaning • Cleaning your fridge at regular in- Check regularly that the door tervals will extend the service life gaskets are clean. If not, clean of the product. them. • To remove door and body shelves, remove all of its WARNING: contents. -
Page 22: Protecting The Plastic Surfaces
6.2 Protecting the plas- tic surfaces Do not put liquid oils or oil-cooked meals in your refrigerator in un- sealed containers as they dama- ge the plastic surfaces of the refri- gerator. If oil is spilled or smeared onto the plastic surfaces, clean and rinse the relevant part of the surfa- ce at once with warm water. -
Page 23: Troubleshooting
cooling system is not balanced, 7. Troubleshooting which triggers the compressor Check this list before contacting thermic safeguard. The product the service. Doing so will save you will restart after approximately 6 time and money. This list includes minutes. If the product does not frequent complaints that are not restart after this period, contact related to faulty workmanship... - Page 24 The food items kept in cooler food item is placed inside. This compartment drawers are frozen. is normal. • • Large quantities of hot food may The cooler compartment have been recently placed into temperature is set to a very the product.
- Page 25 • • Any items placed on the product The foods were placed in may cause noise. >>> Remove unsealed holders. >>> Keep the any items placed on the product. foods in sealed holders. Micro- organisms may spread out of The product is making noise of unsealed food items and cause liquid flowing, spraying etc.
- Page 26 Repairs to the product required as a result of faulty materials, defective components or manufacturing defects. • Functional replacement parts to repair a product. • The costs of a Grundig Approved Engineer to carry out the repair. What is not covered? • Transit and delivery damage. •...
- Page 27 -Installation or use of a product where such installation or use fails to meet the requirements contained in this guarantee or the User Instructions Booklet. • Repairs to a product operated at any time on commercial or non- residential household premises (unless we have previously agreed to the installation environment).
- Page 28 Optional extras, where available (i.e. extendable feet) are suppli- ed on a chargeable basis only. Does Grundig offer replacements? This is a repair-only guarantee. On occasion, the Manufacturer may at its sole discretion, replace your product with a new product instead of carrying out a repair.
- Page 29 02415578. GRUNDIG UK AND IRELAND ECO INVERTER MOTOR GUARANTEE TERMS AND CONDITIONS This 10 year guarantee relates to Grundig products that feature the Eco Inverter Motor. The Eco Inverter Motor guarantee terms and conditions are in addition to our Standard guarantee terms and conditions detailed in the previous section.
- Page 30 90 days of the original purchase date) guaran- tee period. To activate your guarantee, you MUST register your appliance wit- hin 90 days of the original purchase date, by visiting Grundig. co.uk/register. Customers will receive a unique reference code as proof of gua- rantee validation by email or post, which must be quoted at the time of a claim being made.
- Page 31 Please take a few moments to complete the details below, as you will need this information when you call us, or to use our online services. When you call us you may be required to input your serial number into your telephone keypad. For help please visit grundig.co.uk/support/ model-finder •...
- Page 32 Send us a secure message through our online contact us form. Please visit our website, click Contact Us and choose a product support topic from the list of options. Complete the required details and click send message. Product registrations For UK and Republic of Ireland product registrations please visit grundig. co.uk/register.
Need help?
Do you have a question about the GSN 30710 DW and is the answer not in the manual?
Questions and answers