Table of Contents
Advertisement
Quick Links
Spread Pattern
Header
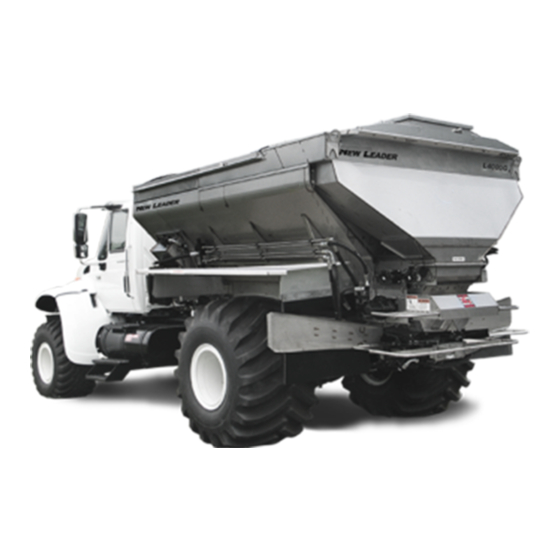
Use great caution while working around the spreader. Contact with spinners and other
WARNING
moving parts is very dangerous. Do not adjust while machinery is moving, wear eye
protection and avoid discharge from spinners. Do not ride on moving spreader.
A Catch Test is required prior to each season, before using a new product, or if a significant visible
change has occurred with a product.
Catch Test
The CFR number, or cubic feet per revolution number, is a calibration number entered into the controller
to determine rate output from the spreader's conveyor. A catch test is performed to verify accurate rate
output per the controller.
NOTE: An optional calibration chute (P/N 312688) is available to simplify the catch test process. The
calibration chute fits all New Leader spreader models with 30" wide conveyor bottoms. Contact your
local New Leader dealer for details.
WARNING
1. Disable the spinners by unplugging the PWM valve(s).
2. Move the spinner assembly to the 4" (102mm) position.
3. Remove the Material Divider back plate, and Vane Assembly (if applicable). Install calibration chute if
available.
4. Position an end loader or other suitable device beneath the spinners to catch material.
5. Load material into all applicable bins.
6. Prime the conveyor as specified per the controller.
• If using a calibration chute, run the conveyor just until material reaches the end. Remove any
excess material that falls into the catching device.
• If not using a calibration chute, run the conveyor until the spinner discs are full of material.
Remove any excess product from the catching device. Do not remove material from spinner discs.
7. Measure the depth of material on the end of the conveyor to verify the constant number feedgate
height information entered into the controller. Adjust feedgate height or recalibrate feedgate as
necessary.
8. Verify that all other product settings entered into the controller are correct.
9. Select the correct bin in the controller for the first bin to be tested. Enter the anticipated weight of
product to be dispensed from the conveyor.
10. Start the engine and engage hydraulics. Allow to run for several minutes to bring hydraulic oil up to
operating temperature. Bring engine up to operating RPM.
11. Following the setup wizard on the controller, run the catch test. The conveyor will start dispensing
material, and automatically shut off when the estimated amount of product is dispensed.
12. If not using a calibration chute, leave the material on the spinner discs. Weigh the amount of
product that the conveyor actually dispensed into the catching device, and note the result.
13. Enter the actual weight of material dispensed into the controller. The controller will then
automatically perform the calibration.
14. Repeat Steps 5 - 12 for all other applicable bins, if an insert bin is installed.
15. Once satisfactory results have been achieved for all applicable bins, turn the engine off, replace the
back plate on the Material Divider, return the spinner assembly to its original position setting, and
plug the PWM valve(s) back in.
NOTE: For more information on controller operations and setup, contact your local dealer.
313967-I
To prevent injury, disable the spinners by unplugging the PWM valve before beginning
the catch test procedure.
- 2 -
SPREAD PATTERN
www.NewLeader.com
(800) 363-1771
Advertisement
Table of Contents

Related Manuals for New Leader L4000G4


Summary of Contents for New Leader L4000G4
- Page 1 NOTE: An optional calibration chute (P/N 312688) is available to simplify the catch test process. The calibration chute fits all New Leader spreader models with 30” wide conveyor bottoms. Contact your local New Leader dealer for details.
-
Page 2: Spread Pattern Test Kit
SPREAD PATTERN Spread Pattern Header Use great caution while working around the spreader. Contact with spinners and WARNING other moving parts is very dangerous. Do not adjust while machinery is moving, wear eye protection and avoid discharge from spinners. Do not ride on moving spreader. Spinner assembly and material divider have NOT been adjusted at the factory. -
Page 3: Spreader Preparation
SPREAD PATTERN Spread Pattern Header Spinners Spinner discs and fins must be kept clean and polished. Even a small build-up on a spinner NOTICE! fin can significantly affect the spread pattern. Rusty, rough, bent or worn fins will produce poor spread patterns. In general, critical spinner speed will fall somewhere between 600 and 900 RPM. - Page 4 SPREAD PATTERN Header Spread Pattern NOTE: This chart is to be used as a reference only to begin testing. SIMPLE START SETTINGS Material Density Ground Rate (lbs) Feedgate Spinner Spinner Speed (in) Frame (mph) Setting Lime 1000-5000 .5" 2000-8000 .5" Urea Corn Blend 3.5"...
-
Page 5: Test Procedure
Using the data sheets supplied with the kit, document all spreader information and adjustments as necessary. See Figure 1. 1330 76th Ave SW SPREAD PATTERN DATA SHEET Cedar Rapids, IA 52404-7052 New Leader Manufacturing (319) 363-8281 L4000G4 Rev. Spreader Model:... - Page 6 SPREAD PATTERN Header Spread Pattern Four-Wheeled Vehicles 60’ 60’ For four-wheeled application vehicles, position the spreader at the beginning of the course so that the vehicle will straddle the center collection tray. See Figure 100’ 75’ 20’ (3m) Engage spinners before navigating the course. As the 10’...
-
Page 7: Test Results
SPREAD PATTERN Spread Pattern Header Test Results After navigating the course, shut the spreader down and park in a secure location. Using the funnel, transfer the contents of each collection tray into its corresponding test tube beginning at one end of the trays and working towards the opposite end. If spreading a blend of materials, inspect all tubes to determine if the blend is consistent across the entire swath width. - Page 8 SPREAD PATTERN Header Spread Pattern Troubleshooting NOTE: It is highly recommended that ONLY ONE ADJUSTMENT be made between test samples taken. If more than one adjustment is made, it will be difficult to determine which adjustment was responsible for the change in pattern shape. Problem Pattern Recommended Adjustments...
-
Page 9: Determining Driving Centers
SPREAD PATTERN Spread Pattern Header Determining Driving Centers Once an acceptable pattern is obtained, as shown in Figure 5, driving centers can be determined. To determine optimum driving centers (effective swath width), determine the average amount of material in the center of the pattern. Figure 8 shows an example data sheet recorded from the profile shown in Figure 9. -
Page 10: Verifying Driving Centers
SPREAD PATTERN Spread Pattern Header Verifying Driving Centers Once optimum driving centers (effective swath width) have been established, conduct a final “S” pass over the trays to verify. Refer to Figure 10. 1. With both the spinners and conveyor turned off, drive the spreader through the center of the course, establishing an “AB”...
Need help?
Do you have a question about the L4000G4 and is the answer not in the manual?
Questions and answers