
Subscribe to Our Youtube Channel
Related Manuals for Candy Grand O Evo EVOC 5810NB


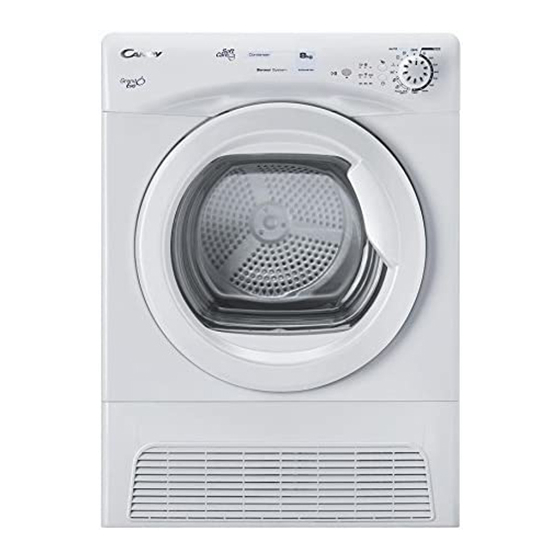
Summary of Contents for Candy Grand O Evo EVOC 5810NB
- Page 1 INSTRUCTION BOOK EVOC 5810NB Condenser Tumble Dryer English Français Slovensko...
-
Page 2: Table Of Contents
INDEX Introduction Delivery Information Unpacking the Product Safety Reminders Installation The Laundry Environmental Issues Gias Service Installation Electrical Requirements Adjusting the Feet Ventilation Drain Hose Kit: Fitting Instructions Preparing the Load Clothes Preparation Do Not Tumble Dry Energy Saving Sorting the Load Drying Guide Controls and Indicators Selecting the Programme... -
Page 3: Introduction
INTRODUCTION Please read and follow these instructions carefully and operate the machine accordingly. This booklet provides important guidelines for safe use, installation, maintenance and some useful advice for best results when using your machine. Keep all documentation in a safe place for future reference or for any future owners. Delivery Information UNPACKING THE PRODUCT Remove the machine from... -
Page 4: Installation
SAFETY REMINDERS Installation Environmental Issues ● Check that the product has no visible signs of ● All packaging materials used are damage before use. If damaged do not use and environmentally-friendly and recyclable. please call GIAS Service. Please help dispose of the packaging via environmentally-friendly means. -
Page 5: Installation
INSTALLATION Electrical Requirements VENTILATION Adequate ventilation must be provided in the room where the tumble dryer is located to Tumble dryers are supplied to operate at a prevent gases from appliances burning other voltage of 220-240V, 50 Hz single phase. Check fuels, including open fires, being drawn into the that the supply circuit is rated to at least 10A room during operation of the tumble dryer. -
Page 6: Drain Hose Kit: Fitting Instructions
DRAIN HOSE : FITTING INSTRUCTIONS To avoid emptying the water container after each drying cycle, the water can be 5 . P l a c e t h e t a p discharged directly to a waste water drain pipe supplied by the kit to (the same drainage system as household close the remaing... -
Page 7: Preparing The Load
PREPARING THE LOAD Before using the tumble dryer for the first time: Maximum Drying Weight ● Cottons Max. 8 kg ● Please read this instruction book thoroughly. ● Synthetics Max. 4 kg ● Remove all items packed inside drum. ● Wipe the inside of the drum and door with a Do not overload the drum, large items when damp cloth to remove any dust which may wet can exceed the maximum admissible clothes... -
Page 8: Controls And Indicators
To change the heat setting the programme must be reset Low Heat – Indicator light ON The Candy Sensor Dry machine gives many High Heat – Indicator light OFF options for drying the laundry to suit all circumstances. -
Page 9: Selecting The Programme
SELECTING THE PROGRAMME DESCRIPTION PROGRAMME Perfect home Select the degree of dryness that you require. This ranges from Extra Dry for bath towels and bathrobes, through for items that will be put away without ironing, to the programme that leaves the laundry Cupboard Dry suitable for ironing. -
Page 10: Door And Filter
DOOR and FILTER Opening the Door WATER CONTAINER The water removed from the laundry during the drying cycle is collected in a container inside the Pull on handle to open door of the dryer. When the container is full the the door. -
Page 11: Condenser
CONDENSER Important: Always switch off and remove the OPERATION plug from the electricity supply before cleaning the condenser. 1. Open the door and load the drum with To maintain the efficiency of the dryer regularly laundry. Ensure that garments do not hinder check that the condenser is clean. -
Page 12: Delay Start Function
OPERATION Delay Start Function The Delay Start Function allows the user to delay the start of the drying cycle by 3, 6 or 9 hours. When the function is first selected the display will show a delay of 3 hours, subsequent presses of the button will increase the delay to 6 or 9 hours. -
Page 13: Troubleshooting
TROUBLESHOOTING What Might be the Cause of... The dryer is noisy… Defects you can remedy yourself ● Switch off the dryer and contact GIAS Service Before calling GIAS Service for technical for advice. advice please run through the following checklist. A charge will be made if the machine is found to be working or has been installed Indicator is on…... - Page 14 INDEX Introduction Informations Sur La Livraison Déballage Du Produit Rappels De Sécurité Utilisation Installation Le Linge Protection De L'environnement Service Gias Installation Besoins Électriques Ajustement Des Pieds Ventilation Préparation De La Charge Préparation Des Vêtements Tri De La Charge Ne Séchez Pas En Machine Économies D’énergie Guide De Séchage Commandes Et Indicateurs...
-
Page 15: Introduction
INTRODUCTION Veuillez lire et suivre ces instructions avec soin et utiliser la machine en conséquence. Ce livret contient des instructions importantes sur la sécurité d'utilisation, l'installation et l'entretien de la machine, ainsi que des conseils utiles pour obtenir les meilleurs résultats possibles lors de son utilisation. -
Page 16: Installation
RAPPELS DE SÉCURITÉ Installation Protection De L'environnement ● Vérifiez que la machine ne présente aucun ● Tous les matériaux de conditionnement signe visible de détérioration avant de l’utiliser. utilisés sont écologiques et recyclables. En cas de détérioration, assurez-vous de ne Veuillez les éliminer de manière écologique. -
Page 17: Installation
INSTALLATION VENTILATION Besoins Électriques La pièce où se trouve le sèche-linge doit avoir Les sèche-linges sont prévues pour une une ventilation adéquate de manière à ce que tension monophasée de 220-240 V, 50 Hz. les gaz des appareils qui brûlent d’autres Vérifiez que la tension nominale du circuit combustibles, y compris les cheminées, ne d'alimentation est réglée sur 10 A minimum. - Page 18 KIT TUYAU D'ÉVACUATION : INSTRUCTIONS DE MONTAGE Afin d'éviter d'avoir à vider le réservoir d'eau après chaque cycle de séchage, l'eau qui est normalement recueillie dans ce même réservoir pendant le cycle le séchage peut être 4. Fixez le tuyau noir évacuée directement par un tuyau du kit (en utilisant le d'évacuation d'eau sales (le même système...
-
Page 19: Préparation De La Charge
PRÉPARATION DE LA CHARGE Avant d’utiliser le sèche-linge pour la première Poids De Séchage Maximum fois : ● Coton 8 kg maxi ● Veuillez lire ce manuel d’instruction en détail. ● Synthétiques 4 kg maxi ● Retirez tous les articles qui se trouvent à l’intérieur du tambour. -
Page 20: Commandes Et Indicateurs
– appuyez pour réduire la température pour les articles délicats ; l'indicateur situé au-dessus du La machine Candy Sensor Dry propose bouton s'allume. Pour modifier le réglage de la température, le programme doit être diverses options de séchage du linge programme. - Page 21 SÉLECTION DU PROGRAMME DESCRIPTION PROGRAMME Sélectionnez le degré de séchage souhaité. Celui-ci s'étend de pour le linge de bain et les peignoirs, à pour les articles qui seront rangés sans être repassés, et comprend également le Prêt à Ranger programme séchant le linge qui sera repassé. Prêt à...
-
Page 22: Porte Et Filtre
PORTE et FILTRE Ouverture De La Porte RÉSERVOIR D’EAU L'eau éliminée lors du cycle de séchage est Tirez sur la poignée collectée dans un bac à condensation situé à pour ouvrir la porte. l'interieur de la porte du sèche-linge. P o u r r e m e t t r e l e Lorsque le bac est plein , le voyant lumineux s è... -
Page 23: Condenseur
CONDENSEUR Important : Coupez toujours le courant et FONCTIONNEMENT débranchez la prise avant de nettoyer le 1.Ouvrir la porte et charger le linge dans le condenseur. tambour.Vérifier qu'aucun vêtement n'entrave Pour maintenir l’efficacité du sèche-linge, vérifiez régulièrement la propreté du la fermeture de la porte. -
Page 24: Départ Différé
FONCTIONNEMENT Départ Différé La fonction de temporisation permet à l'utilisateur de différer le démarrage du cycle de séchage dans 3, 6 ou 9 heures. Lorsque cette fonction est sélectionnée pour la première fois, l'afficheur indique un démarrage différé de 3 heures ; en appuyant successivement dessus, le démarrage sera différé de 6 ou de 9 heures. -
Page 25: Dépistage De Pannes
DÉPISTAGE DE PANNES Qu'est-ce qui peut être à l'origine de... Le sèche-linge est bruyant… Défauts que vous pouvez rectifier vous- même ● Arrêtez le sèche-linge et contactez le service Avant d’appeler le service GIAS pour obtenir des GIAS pour obtenir des conseils. conseils, veuillez suivre la liste des vérifications L'indicateur est allumé…... - Page 26 INDEX Uvod Podatki o Dobavi Odstranjevanje Embalaže Opombe za Varnost Uporaba Namestitev Perilo Varovanje Okolja Pooblaščeni Servis Namestitev Zahteve za Električno Napeljavo Nastavitev Nivelirnih Nog Pretok Zraka Priprava na Polnjenje Stroja Priprava Oblačil Sortiranje Perila V Sušilnem Stroju Ne Sušiti Varčevanje z Energijo Navodila za Sušenje Tipke za Upravljanje In Signalne Lučke...
-
Page 27: Uvod
UVOD Prosimo vas, da ta navodila pozorno preberete in stroj uporabljate v skladu z njimi. Ta knjižica vsebuje pomembna navodila za varno uporabo, namestitev in vzdrževanje vašega stroja ter tudi uporabne napotke za doseganje najboljših rezultatov. Vso dokumentacijo, ki ste jo dobili s strojem, skrbno shranite, saj jo boste morda še potrebovali ali pa jo boste Predali drugemu lastniku. -
Page 28: Namestitev
OPOMBE ZA VARNOST Namestitev Varovanje Okolja ● Preden stroj uporabite, se prepričajte, da ni ● Vsi materiali, iz katerih je izdelana embalaža, vidno poškodovan. Če je poškodovan, ga ne so okolju prijazni in jih je mogoče reciklirati. uporabljajte, temveč pokličite pooblaščeni Prosimo, odvrzite embalažo na okolju prijazen servis. -
Page 29: Namestitev
NAMESTITEV Zahteve za Električno Napeljavo PRETOK ZRAKA V prostoru, kjer stoji sušilni stroj, je treba zagotoviti zadostno zračenje, zato da stroj med Sušilni stroji delujejo na enofazni izmenični tok delovanjem v prostor ne bi potegnil plinov, ki jih s 50 Hz in napetostjo 220-240 V. Prepričajte se, pri izgorevanju izločajo nekatere naprave, na da je nazivna zmogljivost priključka vsaj 10A. - Page 30 ODTOČNA CEV: NAVODILA ZA PRIKLJUČITEV Če ne želite po vsakem programu sušenja prazniti posode za vodo, lahko napeljete vodo neposredno v odtočno cev (enak system kot pri pomivalnih koritih). Odtok mora biti ob 5 . S čepom, ki je bil sušilnem stroju.
-
Page 31: Priprava Na Polnjenje Stroja
PRIPRAVA NA POLNJENJE STROJA Preden prvič uporabite sušilni stroj: Maksimalna Teža za Sušenje ● Bombaž največ 8 kg ● Skrbno preberite navodila za uporabo; ● Sintetika največ 4 kg ● Odstranite vse dele, ki so v bobnu; ● Z vlažno krpo obrišite notranjost bobna in vrat, Bobna ne smete preveč... -
Page 32: Tipke Za Upravljanje In Signalne Lučke
TIPKE ZA UPRAVLJANJE IN SIGNALNE LUČKE Indikator za Indikator za Tipka za filter vodo Akril-sint Tipka Prikaz avto Gump za Tipka za Start/Pavza Programa Programe Zamik Stikalna Plošča In Kontrolne Lučke Stikalo za izbiranje programov - omogoča izbiranje ustreznega programa. Tipka za zamik vklopa -omogoča, da nastavite časovni zamik vklopa sušenja. -
Page 33: Izbira Programa
IZBIRA PROGRAMA OPIS PROGRAM Perfect home Izberite, kako suho perilo želite. Na voljo so vam možnosti od Zelo suho Izjemno suho za npr. brisače, Za v omaro za oblačila, ki jih boste shranili brez likanja, ter program, po katerem je perilo ravno Za v omaro prav suho za likanje. -
Page 34: Vrata In Filter
VRATA IN FILTER Odpiranje Vrat POSODA ZA VODO Voda, ki se med sušenjem izloči iz perila, se zbira v posodi v vratih sušilnega stroja. Ko se Za odpiranje vrat posoda napolni, se osvetli indikator potegnite ročico. stikalni plošči. Takrat MORATE izprazniti Za ponovni zagon posodo za vodo. -
Page 35: Da Odstranite Posodo
KONDENZATOR Pomembno: Pred čiščenjem kondenzatorja UPORABA SUŠILNEGA STROJA vedno izklopite stroj in izvlecite kabel iz vtičnice. 1.Odprite vrata in potisnite perilo v boben. Prepričajte se, da ne ovira zapiranje vrat. Da ohranite učinkovitost sušilnega stroja, redno preverjajte, Ali je kondenzator očiščen. 2.Nežno zaprite vrata –... -
Page 36: Obratovanje
Obratovanje Časovni Zamik Vklopa Funkcija časovnega zamika vklopa uporabniku omogoča, da za 3, 6 ali 9 ur zamakne začetek izvajanja programa. Ob prvem pritisku na tipko za zamik vklopa bo izbran zamik 3 ur, ob naslednjem pa 6 in nato 9 ur. Ob. -
Page 37: Čiščenje Sušilnega Stroja
ODPRAVLJANJE NAPAK Kaj je Lahko Vzrok, da ... POMOČ STRANKAM Napake, ki jih lahko odpravite sami Če vaš sušilni stroj še vedno ne dela niti potem, Preden pokličete pooblaščeni servis za nasvet, ko ste preverili vse točke na tem seznamu, vas vas prosimo, da pregledate ta seznam. - Page 38 40008018...
Need help?
Do you have a question about the Grand O Evo EVOC 5810NB and is the answer not in the manual?
Questions and answers