Table of Contents
Advertisement
Available languages
Available languages
Advertisement
Chapters
Table of Contents

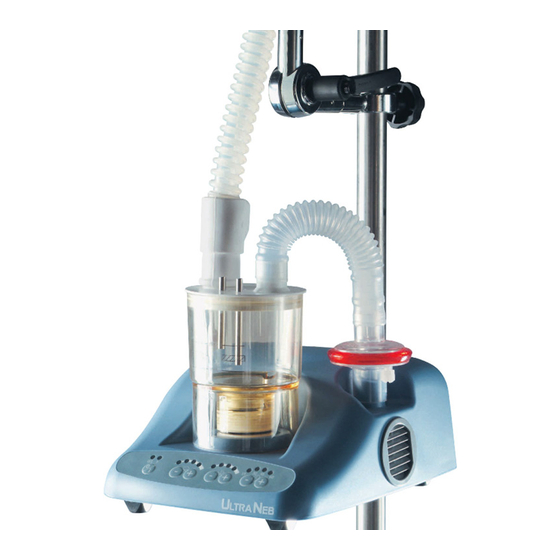
Related Manuals for DeVilbiss UltraNeb


Summary of Contents for DeVilbiss UltraNeb
- Page 1 Prüfanweisung Service Manual Manuel d’entretien...
-
Page 2: Messpunkte
Bild 1 / Fig. 1 / Fig. 1 2.6 Messpunkte / Measuring points / Points de mesures Bild 2 / Fig. 2 / Fig. 2... -
Page 3: Table Of Contents
Heizbuchse tauschen 1.9.1 Demontage Heizbuchse 1.9.2 Montage Heizbuchse Transformator tauschen 1.10 1.10.1 Demontage Transformator 1.10.2 Montage Transformator Steuerplatine tauschen 1.11 Inbetriebnahme Versorgungsspannungen messen Leistungsstufe einmessen Einstellung Trockenlaufschutz Prüfung Trockenlaufschutz Prüfung Elektrische Sicherheit IEC 601-1 Messpunkte Inbetriebnahme-Protokoll USV UltraNeb Fehlersuche Fehlersuchtabelle... -
Page 4: Montageanleitung
1. Montageanleitung 1.1 Benötigte Werkzeuge 1.5 Leiterplatte tauschen • Kreuzschlitzschraubendreher PH1, PH2 1.5.1 Demontage Leiterplatte • Schlitzschraubendreher Größe 2,5 mm • Deckel demontieren (siehe Punkt 1.2) • Steckschlüssel 5,5 mm • Steckanschluss lösen ( J3 ) • Lötstation • M3 Muttern entfernen •... -
Page 5: Leistungsstufe Tauschen
1.6 Leistungsstufe tauschen 1.7 Lüfter tauschen 1.6.1 Demontage der Leistungsstufe 1.7.1 Demontage des Gerätelüfters • Deckel demontieren (siehe Punkt 1.2) • Deckel demontieren (siehe Punkt 1.2) • Steckanschluss J3 lösen • Schrauben des Gerätelüfterhalters lösen • Senkkopfschrauben am Geräteboden lösen. •... -
Page 6: Entstörfilter Tauschen
1.8 Entstörfilter tauschen 1.9 Heizbuchse tauschen 1.8.1 Demontage Entstörfilter 1.9.1 Demontage Heizbuchse • Deckel demontieren. (siehe Punkt 1.2) • Deckel demontieren. (siehe Punkt 1.2) • Schrauben des Entstörfilters an der Geräteunterseite lösen. • Anschluss J1 von der Platine entlöten. • Steckanschlüsse lösen. •... -
Page 7: Transformator Tauschen
1.10 Transformator tauschen 1.11 Steuerplatine tauschen 1.10.1 Demontage Transformator • Flachbandkabel zwischen Steuerplatine und Hauptplatine an • Deckel demontieren. (siehe Punkt 1.2) Anschlüssen J1 der Steuerplatine und J7 der Hauptplatine • Leiterplatte demontieren (Punkt 1.5.1) vorsichtig trennen. Die Steckverbinder dafür 2-3 mm leicht •... -
Page 8: Inbetriebnahme
2. Inbetriebnahme Prüfplatine einstecken und Gerät einschalten. 2.3 Einstellung Trockenlaufschutz 2.3.1 Taster Nebel auf Maximal (Rechtsanschlag) stellen 2.1 Versorgungsspannungen messen. Spannung an Messpunkt MP 1 ( Masse) und MP 4 messen, mit Trimmer R23 Spannung auf ca. 3,0 V - 0,5 V einstellen. Wert in Masse für Messungen 2.1.1 bis 2.1.5 ist MP 1. -
Page 9: Inbetriebnahmeprotokoll Usv Ultraneb
2.7 Inbetriebnahmeprotokoll USV UltraNeb Datum: Geräte Nr.: Platine Nr.: Hinweis! Spannungstoleranzen: Je nach Netzspannung oder Umgebungsbedingungen können die angegebenen Toleranzen über schrit- ten werden. Dies beeinträchtigt jedoch nicht die Funktion des Gerätes. Die angegebenen Spannungswerte dienen als Richtwerte um bei einer Fehlfunktion ein defektes Bauteil schneller analysieren zu können. Bei unerklärlichen hohen Abweichungen setzten Sie sich bitte mit dem Hersteller in Verbindung. -
Page 10: Fehlersuche
3. Fehlersuche 3.1 Fehlersuchtabelle Punkt Störung Abhilfe grün gelb Nach dem Einschalten kein Nebel in der Aus Aus Aus Netzzuführung, Netzschalter Netzsicherung auf der Verneblerkammer Rückseite überprüfen (T800L250) wie 3.1 Aus Aus Aus Gerät öffnen, Sicherung F2 (T250L250) überprüfen wie 3.1 Verneblerkammer oder Quarzmodul wechseln. - Page 11 1.10.1 Removing transformer 1.10.2 Fitting transformer Change control board 1.11 Start-up instructions Measuring supply voltages Calibrating the power supply Setting dry-running protection Testing dry-running protection Testing electrical safety IEC 6011 Measuring points Test protocoll for UltraNeb UPS Trouble shooting Trouble shooting table...
-
Page 12: Assembly Instructions
1. Assembly instructions 1.1 Tools required 1.5 Changing PC board • Phillips screwdriver PH1, PH2 1.5.1 Removing PC board • 2.5 mm slotted screwdriver • Remove cover (see point 1.2) • 5.5 mm socket wrench • Loosen plug connection (J3) •... -
Page 13: Changing Power Supply
1.6 Changing power supply 1.7 Changing fan 1.6.1 Removing power supply 1.7.1 Removing device fan • Remove cover (see point 1.2) • Remove cover (see point 1.2) • Loosen plug connection J3 • Loosen screws on the device fan holder •... -
Page 14: Changing Noise Filter
1.8 Changing noise filter 1.9 Changing heating socket 1.8.1 Removing noise filter • Remove cover. (see point 1.2) 1.9.1 Removing heating socket • Loosen the noise filter screws underneath the device. • Remove cover. (see point 1.2) • Loosen plug connections. •... -
Page 15: Changing Transformer
1.10 Changing transformer 1.11 Change control board • Carefully separate ribbon cable between the control board 1.10.1 Removing transformer and the main board at connections J1 of the control board • Remove cover. (see point 1.2) and J7 of the main board. •... -
Page 16: Start-Up Instructions
2. Start-up instructions Insert test board and switch on device. 2.3 Setting dry-running protection 2.3.1 Set the vapour push button to the maximum setting 2.1 Measuring supply voltages (turning right till it stops) Measure voltage at measuring points MP 1 (earth) and MP 4, Earth for measurements for 2.1.1 to 2.1.5 is MP 1. -
Page 17: Test Protocoll For Ultraneb Ups
2.7 Test protocoll for UltraNeb UPS Date: Device no.: Board no.: Note ! Voltage tolerance: Depending on the mains voltage or environmental conditions the stated tolerances may be exceeded. This does not however affect the functioning of the device. The specified voltage values serve as a guideline in order to be able to quickly analyse defective parts in the case of an operating failure. -
Page 18: Trouble Shooting
3. Trouble shooting 3.1 Trouble shooting table Symptoms LED indications Action Green Yellow No mist produced Check Power leads, Main switch and fuse on the rear (T800L250) No mist produced Open device and check fuse F2 (T250L250) No mist produced / fuse F2 checked Change chamber or transducer, then turn on device again No mist produced / chamber or transducer... - Page 19 Réglage de la protection pour la marche à sec Test de la protection pour la marche à sec Test de sécurité électrique IEC 6011 Points de réglage Mise en route du protocole du système d’alimentation sans coupure UltraNeb Localisation de disfonctionnement Table de localisation de disfonctionnement...
- Page 20 1. Instructions de montage 1.1 Outils nécessaires 1.5 Remplacement de la carte de CI • Tournevis cruciforme (Phillips) PH1, PH2 1.5.1 Démontage de la carte de circuit imprimé • Tournevis pour écrous à fente de 2,5 millimètres • Enlevez le couvercle (voir le point 1.2) •...
- Page 21 1.6 Remplacement du bloc d’alimentation 1.7 Remplacement du ventilateur 1.6.1 Démontage du bloc d’alimentation 1.7.1 Démontage du dispositif de ventilation • Enlevez le couvercle (voir le point 1.2) • Enlevez le couvercle (voir le point 1.2) • Détachez le raccordement de prise J3 •...
- Page 22 1.8 Remplacement du filtre à bruit 1.9 Remplacement du manchon de chauffage 1.8.1 Démontage du filtre à bruit 1.9.1 Démontage du manchon de chauffage. • Enlevez le couvercle (voir le point 1.2) • Enlevez le couvercle (voir le point 1.2) •...
- Page 23 1.10 Remplacement du transformateur 1.11 Remplacement du tableau de commande 1.10.1 Démontage du transformateur • Séparez délicatement le câble-ruban entre le tableau de • Enlevez le couvercle (voir le point 1.2) commande et le panneau principal aux raccordements J1 du •...
- Page 24 2. Instructions de mise en marche Insérez le panneau test et allumez le dispositif. 2.3 Protection pour la marche à sec 2.3.1 Placez le bouton poussoir pour la vapeur au maximum 2.1 Réglage des tensions d’alimentation (en tournant à droite jusqu’à ce qu’il s’arrête) Réglez la tension aux points de mesure MP 1 (la terre) et MP 4, La terre pour les réglages de 2.1.1 à...
- Page 25 2.7 Protocole initial du système d’alimentation sans coupure de l’UltraNeb Date: Dispositif numéro: Panneau numéro: Remarque ! Tolérances de tension : en fonction de la tension secteur ou des conditions ambiantes, les tolérances indiquées peuvent être dépassées. Cela ne perturbe pas le fonctionnement de l’appareil. Les valeurs de tension données le sont à titre indicatif. Elles sont utilisées pour permettre la détection plus rapide d’une défaillance d’un composant lorsque l’appareil ne fonctionne pas correctement.
- Page 26 3. Dépannage 3.1 Table de dépannage Symptômes Indicateur à DEL Action Rouge Verte Jaune Pas de génération de vapeur Eteinte Eteinte Eteinte Contrôler les fils d’alimentation, commu - tateur principal et le fusible à l’arrière (T800L250) Pas de génération de vapeur Eteinte Eteinte Eteinte Ouvrir le dispositif et contrôler le fusible F2 (T250L250)
- Page 28 DeVilbiss Healthcare GmbH DeVilbiss Healthcare Ltd. DeVilbiss Healthcare S.A.S. Kamenzer Straße 3 Unit 3, Bloomfield Park, Bloomfield Road 13 - 17 Rue Joseph Priestley 68309 Mannheim Tipton, West Midlands DY4 9AP 37100 Tours Deutschland United Kingdom France Tel. + 49 (0) 6 21 / 1 78 98 - 0 Phone + 44 (0) 121 521 3140 Tél.: + 33 (0) 2 47 42 99 42...
Need help?
Do you have a question about the UltraNeb and is the answer not in the manual?
Questions and answers