Table of Contents
Advertisement
Quick Links
Advertisement
Table of Contents

Related Manuals for Gaggenau CI 292 601


Summary of Contents for Gaggenau CI 292 601
- Page 1 Use and care manual CI 292 601 Cooktop...
-
Page 3: Table Of Contents
en-us Table of Contents Us e a n d c a r e ma n ua l 9 Safety Definitions Booster function for saucepans Activating IMPORTANT SAFETY INSTRUCTIONS Deactivating Fire Safety Booster function for frying pans Cooking Safety Burn Prevention Recommendations for use Child Safety Activating... -
Page 4: Safety Definitions
This indicates that damage to the appliance or property may occur as a result of non-compliance with this advisory. Additional information on products, accessories, replacement parts and services can be found at Note: This alerts you to important information and/or www.gaggenau.com and in the online shop tips. www.gaggenau.com/zz/store... -
Page 5: Important Safety Instructions
9 IMPORTANT SAFETY INSTRUCTIONS READ AND SAVE THESE INSTRUCTIONS IMPORTANT SAFETY INSTRUCTIONS WARNING WARNING R E A D A N D S A V E T H E S E I N S T R U C T I O N S When properly cared for, your new TO REDUCE THE RISK OF A appliance has been designed to be... -
Page 6: Cooking Safety
9 IMPORTANT SAFETY INSTRUCTIONS READ AND SAVE THESE INSTRUCTIONS Cooking Safety WARNING TO REDUCE THE RISK OF INJURY WARNING TO PERSONS IN THE EVENT OF A Use this appliance only for its GREASE FIRE, OBSERVE THE intended use as described in this FOLLOWING: manual. -
Page 7: Burn Prevention
9 IMPORTANT SAFETY INSTRUCTIONS READ AND SAVE THESE INSTRUCTIONS burner where the cookware with CAUTION temperature sensor is located. If the temperature sensing system is Never use the appliance if liquids or not working properly, boilovers may foods have spilled around the control result causing burns and injury. -
Page 8: Child Safety
9 IMPORTANT SAFETY INSTRUCTIONS READ AND SAVE THESE INSTRUCTIONS Always turn hood ON when cooking at If the display does not work when a high heat or when flambéing food (i.e. cooking area is heating up, disconnect Crêpes Suzette, Cherries Jubilee, the circuit breaker or fuse in the electrical Peppercorn Beef Flambé). -
Page 9: Cleaning Safety
9 IMPORTANT SAFETY INSTRUCTIONS READ AND SAVE THESE INSTRUCTIONS Cleaning Safety WARNING Do not clean the appliance while it is still RISK of injury! hot. Some cleaners produce noxious When cooking with a double-boiler, fumes when applied to a hot surface. Wet the cooktop and cooking vessel may clothes and sponges can cause burns crack due to overheating. -
Page 10: Electromagnetic Interference
9 IMPORTANT SAFETY INSTRUCTIONS READ AND SAVE THESE INSTRUCTIONS you have any questions, contact the Electromagnetic interference manufacturer. WARNING Do not store or use corrosive chemicals, vapors, flammables or nonfood products This induction cooktop generates on or near this appliance. It is specifically and uses ISM frequency energy that designed for use when heating or heats cookware by using an... -
Page 11: Cooling Fan
9 IMPORTANT SAFETY INSTRUCTIONS READ AND SAVE THESE INSTRUCTIONS Proposition 65 Warning: WARNING This product may contain a chemical Hazard due to magnetism! known to the State of California, which The wireless temperature sensor is can cause cancer or reproductive harm. magnetic. -
Page 12: Causes Of Damage
en-us Causes of damage Causes of damage N OTICE C a u s e s o f d a m a g e Rough pot and pan bases scratch the cooktop. ▯ Never leave cookware cooking empty. This can cause ▯... -
Page 13: Protecting The Environment
en-us Causes of damage Protecting the Environment Cooking with Induction Energy-saving Advice Advantages of induction cooking Induction cooking is very different from traditional Place a lid on cookware. Cooking with an uncovered ▯ cooking methods, as heat builds up directly in the item of pan will result in a considerable increase in energy cookware. - Page 14 en-us Causes of damage Some induction cookware does not have a fully No pan or improper size ferromagnetic base: If no pan is placed on the selected element, or if it is made of unsuitable material or is not the correct size, the If the base of the cookware is only partially ▯...
-
Page 15: Getting To Know Your Appliance
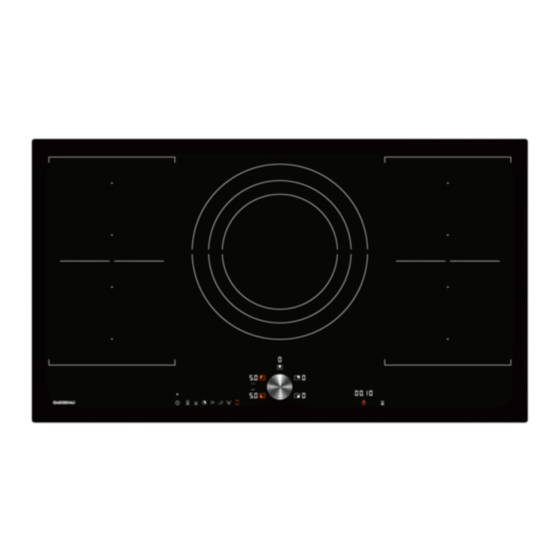
en-us Getting to know your appliance Getting to know your appliance G e t t i n g t o k n o w y o u r a p p l i a n c e P age 2 contains a list of models and dimensions. Note: Depending on the appliance model, individual details and colors may differ. -
Page 16: Elements
en-us Getting to know your appliance Elements Cooking zones Û / $ Single cooking zone Use cookware that is a suitable size. ò Three-ring cooking zone This ring switches on automatically when you use cookware with a base that covers the outer zone (ð or ò). See the section entitled ~ "Flex function"... -
Page 17: Twistpad With Twist Knob
en-us Twistpad with Twist Knob Twistpad with Twist Knob Operating the appliance T w i s t p a d w i t h T w i s t K n o b O p e r a t i n g t h e a p p l i a n c e T he twistpad is the area in which you can use the twist T his chapter explains how to set a cooking position. -
Page 18: Setting An Element
en-us Operating the appliance Setting an element Switching off the element Select the element and turn the twist knob until ‹ Set the required element using the twist knob. appears. The element switches itself off and the residual Heat setting 1 = lowest setting. heat indicator lights up. -
Page 19: Settings Table
en-us Operating the appliance Settings table The following table provides some examples. Cooking CAUTION times may vary depending on the type of food, its weight and quality. Deviations are therefore possible. During cooking, stews or liquids, such as soups, sauces or drinks can heat up very quickly and overflow or spatter. -
Page 20: Flex Function
en-us Flex function As a single cooking zone Flex function Using the entire cooking zone by connecting both individual zones. F l e x f u n c t i o n Y ou can use the flexible cooking zone as an individual Linking the two elements element or as two independent elements, as required. -
Page 21: Transfer Function
en-us Transfer function Notes Transfer function Move the cookware to a cooking zone that is not ▯ switched on, that you have not yet preset or on which T r a n s f e r f u n c t i o n no other cookware has been placed previously. -
Page 22: Timer Functions
en-us Timer functions Frying sensor technology for frying pans/cooking Timer functions sensor If you set a cooking time for a cooking zone with activated frying sensor technology or activated cooking T i m e r f u n c t i o n s Y our cooktop has three timer functions: sensor, the cooking time begins to count down Cooking timer... -
Page 23: Booster Function For Saucepans
en-us Booster function for saucepans Timer plus Booster function for saucepans If you press and hold the Š symbol for a few seconds before the audible signal ceases, the stopwatch is activated. B o o s t e r f u n c t i o n f o r s a u c e p a n s T his function allows large volumes of water to be heated up even more quickly than with power setting Š. -
Page 24: Booster Function For Frying Pans
en-us Booster function for frying pans Activating Booster function for frying pans Select the element. Touch the © symbol. The › indicator lights up. B o o s t e r f u n c t i o n f o r f r y i n g p a n s T his function enables you to heat cookware faster than when using heat setting Š. -
Page 25: Keep-Warm Function
en-us Keep-warm function Keep-warm function Cooking assistance functions Ü K e e p - w a r m f u n c t i o n C o o k i n g a s s i s t a n c e f u n c t i o n s T his function is suitable for melting chocolate or butter T he cooking assistance functions are guaranteed to and for keeping food warm. -
Page 26: Suitable Cookware
en-us Cooking assistance functions Cooking processes Temperature levels Cookware Availability Activating °F (°C) ¨ 212 (100) All cooking zones Cooking ¨ 240 (115) All cooking zones Cooking in a pressure cooker ¨ 320 (160) All cooking zones Deep-fat frying at a low temperature ¨... -
Page 27: Sensors And Special Accessories
en-us Cooking assistance functions Sensors and special accessories Functions and heat settings The sensors measure the temperature of the cookware Frying sensor technology for frying pans continuously. This regulates the cooking power very If you are frying food, use this function to maintain the precisely in order to retain the correct temperature and suitable frying pan temperature. - Page 28 en-us Cooking assistance functions Setting procedure Switch off the frying sensor technology for frying pans Select the cooking zone and touch the Ú symbol or use Select the appropriate temperature setting from the the twist knob to set the ‹ temperature level. A signal table.
- Page 29 en-us Cooking assistance functions Tips for cooking with the cooking sensor Setting the boiling point Keeping warm/heating up: Portioned frozen products, The point at which water starts to boil depends on the ▯ e.g. spinach. Place the frozen product in the height of your home above sea level.
- Page 30 en-us Cooking assistance functions Programming You can call up the cooking sensor functions using the wireless cooking sensor. Proceed as follows: The cooktop must be on. Place the cookware and press the ¨ symbol on the ▯ Attach the wireless cooking sensor to the cookware; wireless temperature sensor.
-
Page 31: Table
en-us Cooking assistance functions Table Cooking assistance functions: The following table provides a selection of dishes and is Ú Frying sensor technology for frying pans sorted according to foods. Temperature and cooking time ¨ Cooking sensor depend on the quantity, condition and quality of the foods. - Page 32 en-us Cooking assistance functions Fish Cooking as- Temperature Total cooking time from sistance level °F (°C) the audible signal (mins) functions Frying with a little oil Ú Fish fillet, plain 10 - 20 Ú Fish fillet, breaded 10 - 20 Ú Scampi 4 - 8 Ú...
- Page 33 en-us Cooking assistance functions Vegetables and legumes Cooking assis- Temperature Total cooking time from tance functions level °F (°C) the audible signal (mins) Frying with a little oil Ú Garlic 2 - 10 Ú Onions, sautéed 2 - 10 Ú Onion rings 5 - 10 Ú...
- Page 34 en-us Cooking assistance functions Potatoes Cooking Temperature Total cooking time from assistance level °F (°C) the audible signal (mins) functions Frying with a little oil Ú Fried potatoes (made from unpeeled boiled potatoes) 6 - 12 Ú French fries (made from raw potatoes) 15 - 25 Ú...
- Page 35 en-us Cooking assistance functions Soups Cooking Temperature Total cooking time from assistance level °F (°C) the audible signal (mins) functions Cooking in a pressure cooker ¨ Home-made broths in a pressure cooker 250 (115) 20 - 30 Stir frequently. Add the food at the start. Sauces Cooking assistance Temperature...
- Page 36 en-us Cooking assistance functions Frozen products Cooking assis- Temperature Total cooking time from tance functions level °F (°C) the audible signal (mins) Frying with a little oil Ú Escalope 15 - 20 Ú Cordon bleu 10 - 30 Ú Poultry breast 10 - 30 Ú...
-
Page 37: Teppan Yaki For The Flex Zone
en-us Cooking assistance functions Teppan Yaki for the Flex Zone The Teppan Yaki accessories are ideal for the flexible consistency, color and succulence of the food when cooking zone and are optimal cookware for using the searing and browning. frying sensor technology. The following table shows a selection of dishes and is «Teppan Yaki arranged by food type. - Page 38 en-us Cooking assistance functions Cookware Temperature Total frying time after the level signal tone sounds (min) « Fried potatoes 6 - 12 (made from unpeeled boiled potatoes) « Potato pancakes 2.5 - 3.5 « Glazed potatoes 10 - 15 Egg dishes « Fried eggs in butter 2 - 6 «...
-
Page 39: Wireless Cooking Sensor
en-us Wireless cooking sensor The adhesive requires 1 hour to fully cure. Do not use or Wireless cooking sensor clean the pot during this time. ‚ Notes W i r e l e s s c o o k i n g s e n s o r B efore you use the cooking sensor functions for the first Do not leave the pot with the silicone patch to soak in ▯... -
Page 40: Cleaning
en-us Wireless cooking sensor Detection successful: The wireless temperature sensor Silicone patch is detected within a few seconds. Three short beeps Clean and dry before attaching to the wireless cooking sound and the ¨ symbol changes from orange to sensor. Suitable for dishwashers. white. -
Page 41: Declaration Of Conformity
Declaration of Conformity Do not use metal objects to remove the battery. Do not touch the battery terminals. Gaggenau Hausgeräte GmbH hereby declares that the appliance with wireless cooking sensor function meets the basic requirements and other relevant provisions of the Directive 2014/53/EU. -
Page 42: Childproof Lock
en-us Childproof lock Childproof lock Display cleaning protection A ctivating and deactivating the C h i l d p r o o f l o c k D i s p l a y c l e a n i n g p r o t e c t i o n I f you wipe over the control panel while the cooktop is switched on, settings may be changed. -
Page 43: Basic Settings
en-us Basic settings Basic settings B a s i c s e t t i n g s T he appliance has various basic settings. These basic settings can be altered to suit your individual requirements. Display screen Function Signal tones ™‚... -
Page 44: To Access The Basic Settings
en-us Basic settings Home Connect ™Š ~ "Home Connect Settings" on page 47 *Factory setting **The cooktop’s maximum power output is shown on the rating label. -------- To access the basic settings: Leaving the basic settings Turn off the cooktop with the main switch. The cooktop must be switched off. -
Page 45: Home Connect
en-us Home Connect Start the app and create your Home Connect login Home Connect details. The app will guide you through the registration process. Make a note of your e-mail address and password. H o m e C o n n e c t T his appliance is Wi-Fi enabled and settings can be sent Automatic Registration in the Home Network to the appliance via a mobile device. - Page 46 en-us Home Connect Start the app on your mobile device and follow the Switch to the general settings menu of your mobile instructions for automatic network registration. device and call up the Wi-Fi settings. When the ‹¯ value stops flashing on the cooing zone display and the ‹””...
-
Page 47: Home Connect Settings
en-us Home Connect Home Connect Settings Notes The •’ƒ setting is only displayed if the appliance is ▯ You can adjust Home Connect to suit your requirements connected to the home network. at any time. The •’„ setting is only displayed if the appliance has ▯... - Page 48 en-us Home Connect When the ‹¯ value stops flashing on the cooing zone Connecting to the network display and the ‹”” value lights up again, the Open the basic setting ™Š. C o n n e c t i n g t o t h e n e t w o r k registration process is complete.
-
Page 49: Software Update
en-us Home Connect Software update The current software and hardware version of your ▯ appliance. Using the software update function, your cooktop's Status of any previous resetting to factory settings. ▯ software can be updated (e.g. for the purpose of optimization, troubleshooting or security updates). -
Page 50: Connecting An Extractor Hood
en-us Connecting an extractor hood Connecting appliances via your home network Connecting an extractor hood If the appliances are connected to each other via your home network, both the hood controls and Home Connect can be used to operate the cooktop. C o n n e c t i n g a n e x t r a c t o r h o o d Y ou can connect this appliance to a matching hood and then control the functions of the hood via your cooktop. -
Page 51: Resetting The Connection
en-us Connecting an extractor hood symbols for the hood controls on the cooktop are Controlling the hood via the cooktop displayed on the cooktop control panel. In the basic settings of your cooktop, you can adjust the Connecting via your home network behavior of your extractor hood depending on the switch- on/off of the cooktop or individual cooking zones. -
Page 52: Hood Control Settings
en-us Connecting an extractor hood Note: The ™‘, ™›, ™™ and ™š settings are only Hood control settings displayed if the appliance is connected to an extractor Y ou can adjust the cooktop-based hood controls to suit H o o d c o n t r o l s e t t i n g s hood. -
Page 53: Clean
en-us Clean Apply a small amount of the glass ceramic cooktop Clean cleaner. When dry, buff surface with a clean paper towel or cloth. D aily Cleaning C l e a n Cleaning guidelines Note: Recommended cleaners indicate a type of cleaner and do not constitute an endorsement of a specific When using a cleaner, use only a small amount;... -
Page 54: Twist Knob
en-us Frequently-asked questions and answers (FAQ) Type of Soil Possible Solution Greasy spatters Use a soapy sponge or cloth to remove grease; rinse thor- oughly and dry. Apply glass ceramic cooktop cleaner. Metal marks: Iridescent stain Pans with aluminum, copper or stainless steel bases may leave marks. - Page 55 en-us Frequently-asked questions and answers (FAQ) Noises Low whistling noise: Occurs when the cookware is empty. This noise disappears when water or food is added to the cookware. Crackling: Occurs when using cookware made from different layers of material or when using cookware of different sizes and different materials at the same time.
-
Page 56: Faults - What To Do
en-us Faults – what to do? Faults – what to do? CAUTION Repairs should only be done by an authorized servicer. F a u l t s – w h a t t o d o ? G enerally, faults are easy to remedy. Please read the Improper repair of your appliance may result in risk notes in the table before calling Customer Service. -
Page 57: Cookware Test
en-us Faults – what to do? Display Possible cause Solution “‰ƒ‹„ The temperature sensor has overheated When you are not using the temperature sensor, and all the cooking zones have been remove this from the cookware and store it far away switched off. -
Page 58: Customer Service
en-us Customer Service After 10 seconds, the result for the quality and speed of Customer Service the cooking process will appear on the element display. C u s t o m e r S e r v i c e I f your appliance needs repairs, our Customer Service is there for you.
Need help?
Do you have a question about the CI 292 601 and is the answer not in the manual?
Questions and answers