
Related Manuals for Melissa & Doug 5509


Summary of Contents for Melissa & Doug 5509
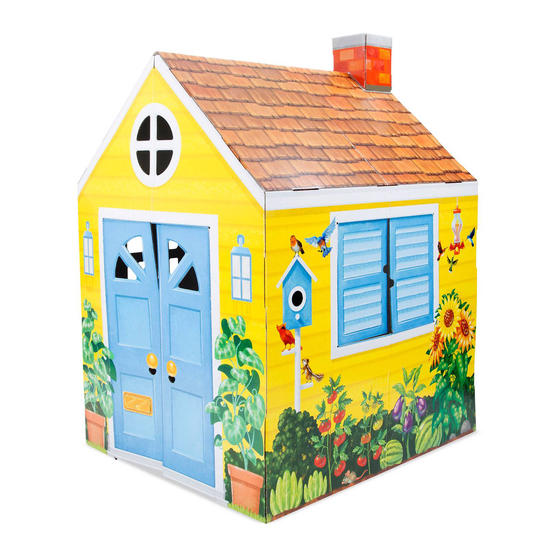
- Page 1 Country Cottage Indoor Playhouse ASSEMBLY INSTRUCTIONS Together in 8 Steps! Have a question or need help? Give us a call! 1-800-284-3948 Ages 3+ Item # 5509 MADE IN CHINA...
- Page 2 THANK YOU! Thank you for choosing the Melissa & Doug Country Cottage Indoor Playhouse! It’s a terrific way to help nurture a child’s creativity and imagination, and to inspire independent play and storytelling for years to come. NOW IT’S TIME TO PUT IT TOGETHER! Don’t worry, assembling your new indoor playhouse is simple, and we’re here to help.
- Page 3 PARTS - Be Smart—Sort Your Parts Before you begin assembly, make sure you have all the parts listed below. front panel (door) left side panel (tree) back panel (chimney) right side panel (shuttered window) left roof panel (tree) right roof panel (plain) inside stabilizer chimney chimney...
- Page 4 Fold and Crease All Edges, Tabs & Flaps • Before you begin assembly, lay panels flat and place artwork face down. Be sure all slots are clear of cardboard. • Fold/crease along the scores on the edges of the panels and on tabs, flaps, windows, doors, and mail slot.
- Page 5 STEP 1 - Every Journey Begins with the First Step Attach the left side panel (part B) to the front panel (part A). IMPORTANT: Don’t forget to fold/crease along the scores on the front doors and mail slot before attaching front panel. Assembled View STEP 2 - Get Back...
- Page 6 STEP 3 - Right You Are Attach the right side panel (part D) to the cottage assembly. IMPORTANT: If you are tight on floor space, you can carefully fold the front panel on top of the side panel. Be sure the tabs don’t disconnect.
- Page 7 STEP 4 - A Joint Effort • First, stand the cottage upright and lock both corner joints, located on the lower inside rear wall. • Second, push the remaining open corner of the cottage closed and attach the right side panel (D) to the front panel (A).
- Page 8 STEP 5 - Raise the Roof Attach the right side roof panel (part F) to the left side roof panel (part E). Assembled View STEP 6 - Put a Lid on It Line up tabs to slots and attach the roof IMPORTANT: Be sure chimney holes are at assembly to the cottage.
- Page 9 STEP 7 - Brace Yourself Carefully flip the cottage onto its rear panel and attach the inside stabilizer (part G) under the door. Make sure shiny side is facing up inside cottage. Assembled View...
- Page 10 STEP 8 - Top It Off Assemble the chimney panels (parts H, I, J, and K). Attach the chimney to the roof of the cottage. Melissa & Doug Customer Care: 1-800-284-3948 Assembled View...
- Page 11 YOU DID IT! Now the real fun begins—it’s time to let imaginations turn this house into a home! Check out the Imagination Launch Guide included with the playhouse for a message from Melissa and Doug, Countless Ways to Play, and much more.
Need help?
Do you have a question about the 5509 and is the answer not in the manual?
Questions and answers