
Related Manuals for BabySense V24US


Summary of Contents for BabySense V24US
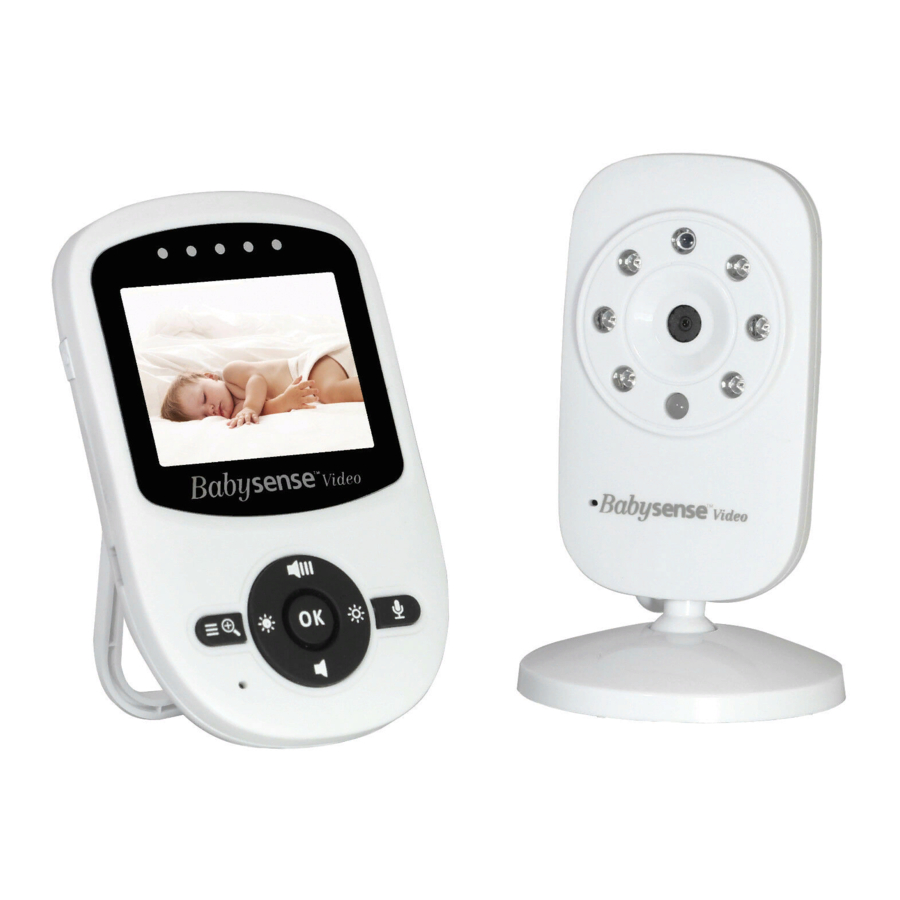
- Page 1 Video Baby Monitor USER GUIDE Model: V24US www.babysensellc.com Toll Free Number - (833) 568-2229 Email - service hisense.co.il...
-
Page 2: Warnings And Safety Instructions
• Risk of suffocation: Keep all packaging materials and protective foils out of reach of children. • Babysense video monitor is high quality electronic device which must be handled with care: Do not handle roughly, drop or throw. - Page 3 2. Pack Contents • Parent Unit x 1; • Baby Unit x 1; (x 2 in model V24US_2 - Monitor with two cameras) • AC Power Adapter x 2; (x 3 in model V24US_2 - Monitor with two cameras) • Li-ion Battery (built-in in Parent Unit) x 1; •...
-
Page 4: Getting Started
• Plug the AC adapter into the wall outlet. • Press and hold the power key on the top left side of the Parent Unit; • Once the Parent Unit is turned on, the power LED will light up and “Babysense Video” image will display on the LCD. -
Page 5: Operating The Monitor
• Place the baby monitor in a place where the air can circulate freely and avoid blocking ventilation and speaker openings. • Aim the camera(s) to best optimize the viewing area: Select a location for the camera that provides a clear view of the area you want to monitor, which is free from dust, and is not in line-of-sight to a strong light source or direct sunlight. - Page 6 5.4 Deleting the Baby Unit (Camera) • Press the MENU/Exit key (12) and the menu screen will be displayed on the Parent Unit. • Press the LEFT key (10) or RIGHT key (8) until the camera icon is highlighted in red then press UP key (5) or DOWN key (9) to select the desired camera to delete.
- Page 7 5.8 Volume adjustment • Press the UP (5) key to increase the volume. • Press the DOWN (9) key to decrease the volume. 5.9 Brightness adjustment • Press the LEFT (10) key to decrease the brightness. • Press the RIGHT (8) key to increase the brightness. 5.10 Temperature Setting The temperature reading from the temperature sensor (22) at the back of the Baby Unit will be displayed on the top of the screen.
-
Page 8: Maintenance
5.13 Infrared Night Vision (Automatic) • The infrared night vision function allows the camera to pick up images of your baby or the monitored area in dark or low light conditions. • In this mode, only black and white colors will be displayed on the Parent Unit screen. •... -
Page 9: Troubleshooting
9. Troubleshooting Problem Possible cause(s) No reception on the Parent Unit • The power adapters may not be properly connected. • Ensure that the Baby and Parent Units are ON. • Make sure the Baby Unit and Parent Unit are not far away from each other. •... -
Page 10: Technical Data
10. Technical Data Frequency 2.4GHz FHSS Up to 960 feet (open space) Operating Range Power Adapter Input: 100-240VAC 50 / 60Hz, 200mA Max; Output: 5V, 600mA; 2.4” TFT LCD LCD Screen Rechargeable battery (built-in in Model: YB 503450 3.7V, 950 mAh, 3.515Wh Parent Unit) Operating time with battery fully charged Approx. - Page 11 All cardboard and paper packaging materials should be recycled in accordance with your local council waste regulations. Thank you for choosing Babysense Video monitor from Hisense Ltd. 14. FCC STATEMENTS: This device complies with part 15 of the FCC Rules. Operation is subject to the following two conditions: (1)This device may not cause harmful interference.
- Page 12 Video Baby Monitor V.INT.UG. .ENV US. .
Need help?
Do you have a question about the V24US and is the answer not in the manual?
Questions and answers