Table of Contents
Advertisement
Quick Links
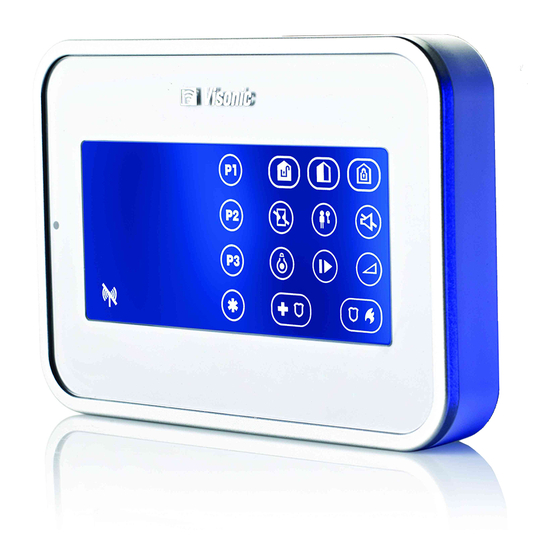
KP-160 PG2
Keyprox
Table of Contents
1. INTRODUCTION ............................................................................................................. 2
2. INSTALLATION ............................................................................................................... 3
2.1 Inserting Battery..................................................................................................... 3
2.2 Closing Battery Compartment Cover ..................................................................... 3
Portable Installation ..................................................................................................... 3
Wall-mounted Installation ............................................................................................ 4
2.3 Wall Mounting Options .......................................................................................... 4
2.4 Enrolling the KP-160 PG2...................................................................................... 6
2.5 Configuring the KP-160 PG2 Parameters .............................................................. 6
2.6 Enrolling Proximity Tags ........................................................................................ 8
3. USING THE KEYPROX ................................................................................................... 9
3.1 Arming and Disarming the System ........................................................................ 9
3.2 Initiating Alarms ................................................................................................... 10
3.3 System Status and Indications ............................................................................ 10
3.4 Bypassing Zones ................................................................................................. 12
3.5 Controlling Home Automation Devices ................................................................ 13
3.6 Other Functions ................................................................................................... 13
APPENDIX: SPECIFICATIONS ........................................................................................ 14
D-303169 KP-160 PG2 Installation Instructions
User's Guide
1
Advertisement
Table of Contents

Related Manuals for Visonic Keyprox


Summary of Contents for Visonic Keyprox
-
Page 1: Table Of Contents
2.4 Enrolling the KP-160 PG2..................6 2.5 Configuring the KP-160 PG2 Parameters .............. 6 2.6 Enrolling Proximity Tags ..................8 3. USING THE KEYPROX ....................9 3.1 Arming and Disarming the System ................ 9 3.2 Initiating Alarms ....................10 ... -
Page 2: Kp-160
1. INTRODUCTION KP-160 PG2 is a 2-way wireless PowerG control station for the PowerMaster family control panels. The KP-160 PG2 enables most common everyday user functions: Arm and Disarm the alarm system. Initiate Emergency, Fire and Panic alarms. ... -
Page 3: Installation
2. INSTALLATION 2.1 Inserting Battery CAUTION! Risk of explosion if battery is replaced by an incorrect type. Dispose of used battery according to manufacturer's instructions. Figure 1 – Battery Insertion Insert two 1.5V batteries in each slot while ensuring battery polarity. 2.2 Closing Battery Compartment Cover Portable Installation Figure 2 - Battery Cover Mounting (part a) -
Page 4: Wall-Mounted Installation
Wall-mounted Installation Figure 3 - Battery Cover Mounting (part b) A. Tamper B. DC Power Connection 2.3 Wall Mounting Options The KP-160 PG2 unit mounting options are illustrated in the following drawings. Wall Mounting Figure 4a – Wall Mounting 1. Drill 3 mounting holes 2. - Page 5 Wall Mounting with External Electrical Connector Figure 4b – Wall Mounting with External Electrical Connector 1. Secure bracket with 2 screws as shown in the two drawings above. 2. Attach the unit to the bracket. 3. Secure the unit with the screw D-303169 KP-160 PG2 Installation Instructions...
-
Page 6: Enrolling The Kp-160
Define the active tamper. TAMPERS Option settings Disabled (default); All Tampers and Battery Cover. Define whether or not the control panel will monitor supervision SUPERVISION messages sent by the keyprox (see Note). Option settings ON (default) or OFF. D-303169 KP-160 PG2 Installation Instructions... - Page 7 Note: Every 5 minutes the keyprox performs a communication test session with the control panel (i.e. "Supervision signal) to check the integrity and quality of the Radio link. If the keyprox does not report a supervision signal at least once within a predefined time, a “MISSING”...
-
Page 8: Enrolling Proximity Tags
Option settings: NOT Connected (default) and Connected to AC. 2.6 Enrolling Proximity Tags You can enroll proximity tags in the PowerMaster panel either via the KP-160 PG2 keyprox, as described below, or through the PowerMaster control panel, as described in the corresponding section of the control panel's User or Installer Guide. -
Page 9: Using The Keyprox
3. USING THE KEYPROX 3.1 Arming and Disarming the System Step Basic Arming User Actions Keyboard & Panel Response Select a The selected key Any combination of blinks. PARTITION (if Partition is enabled) Arm AWAY The selected key and the... -
Page 10: Initiating Alarms
( 2 sec.) 3.3 System Status and Indications When executing a command, the keyprox's LED ("30" in the "Icon and Key Indications" Figure) blinks red once to indicate transmission of the command to the control panel. If the operation is successfully completed, the green LED lights momentarily and a "happy tune"... - Page 11 Icon/Key Indications Arming Indication ENTRY DELAY The "Present Prox Tag" icon and DISARM key blink simultaneously If Partition is enabled, the arming indication of the first partition is displayed concurrently with the corresponding first partition key LED then the second partition indication is displayed concurrently with the second partition key LED and then the third partition indication is similarly displayed.
-
Page 12: Bypassing Zones
to be reviewed and cleared. AC failure. Communication failure: KP-160 PG2 is out of range of the control panel or did not get an acknowledge signal of a command from the control panel. Indicates that the KP-160 PG2 device's battery is low and must be replaced (refer to section 2.1). -
Page 13: Controlling Home Automation Devices
Installer Guide (“OUTPUTS” menu) and User Guide (“SCHEDULER” menu). Output Function Actions Response X-10 or PGM The keyprox's LED blinks [PGM P0 to P9] or device ON red once to indicate transmission of the [X-10 01 to 99]... -
Page 14: Appendix: Specifications
APPENDIX: SPECIFICATIONS Europe and rest of world: 433-434, 868-869 Frequency Band (MHz) USA: 912-919 Communication Protocol PowerG Battery type Four 1.5V AA Alkaline batteries 4 years (for typical use). Battery Life Expectancy 5-12VDC Power source (optional) Blue/white or black/white Back light Operating Temperature 0C to 55C (32F to 131F) 150x100x20mm (5-7/8 x 3-7/8 x 13/16 in) - Page 15 WARRANTY THE MANUFACTURER SHALL IN NO EVENT BE Visonic Limited (the “Manufacturer") warrants this LIABLE SPECIAL, INDIRECT, product only (the "Product") to the original purchaser INCIDENTAL, CONSEQUENTIAL OR PUNITIVE only (the “Purchaser”) against defective DAMAGES LOSS, DAMAGE, workmanship and materials under normal use of the...
- Page 16 W.E.E.E. Product Recycling Declaration For information regarding the recycling of this product you must contact the company from which you orignially purchased it. If you are discarding this product and not returning it for repair then you must ensure that it is returned as identified by your supplier.
Need help?
Do you have a question about the Keyprox and is the answer not in the manual?
Questions and answers