Table of Contents
Advertisement
Quick Links
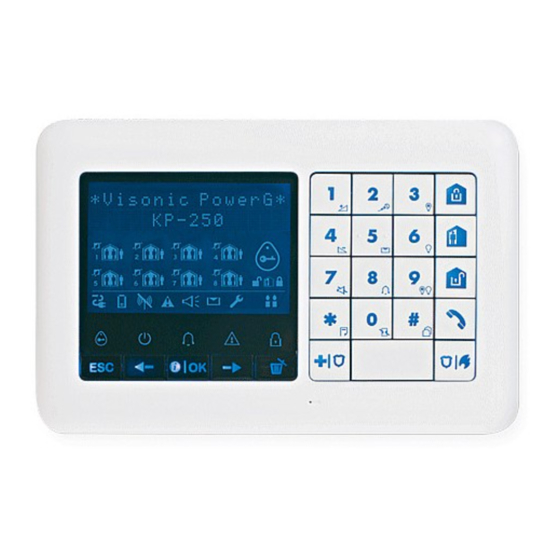
KP-250 PG2
Advanced Two-Way Keypad
Table of Contents
1. Introduction ................................................................................................................................................................. 3
2. Additional System Features ........................................................................................................................................ 3
Partitioning .............................................................................................................................................................. 3
Screen Saver .......................................................................................................................................................... 3
Proximity Tags ........................................................................................................................................................ 3
Users and Codes .................................................................................................................................................... 3
Speech & Sound Cont. Push-buttons ..................................................................................................................... 3
Voice ON/OFF ........................................................................................................................................................ 4
Recording a Message ............................................................................................................................................. 4
Message Playback .................................................................................................................................................. 5
3. Arming and Disarming the System ............................................................................................................................. 6
Basic Arming and Disarming................................................................................................................................... 6
Special Arming & Disarming Options ...................................................................................................................... 7
Initiating Alarms .................................................................................................................................................... 10
4. System Status and Indications ................................................................................................................................. 13
LCD Display and General Audible Indicators ........................................................................................................ 13
Arming Indications ................................................................................................................................................ 13
General Indications ............................................................................................................................................... 14
Alarm Indication Siren ........................................................................................................................................... 15
5. Reviewing Troubles and Alarm Memory ................................................................................................................... 16
Alarm & Tamper Memory Indication ..................................................................................................................... 16
Clearing the Memory Indication ............................................................................................................................ 16
Troubles ................................................................................................................................................................ 16
GSM/GPRS Status Indications ............................................................................................................................. 17
Trouble Indications ............................................................................................................................................... 18
6. System Configuration ............................................................................................................................................... 19
A.1 Entering the User Settings Menu & Selecting a Setting Option ...................................................................... 19
A.2 Returning to the Previous Step or Exiting the USER SETTINGS Menu ......................................................... 21
A.3 Buttons used for Navigation & Setting ............................................................................................................ 22
B.1 Setting the Zone Bypass Scheme .................................................................................................................. 22
B.2 Reviewing the Zone Bypass Scheme ............................................................................................................. 24
B.3 Recalling the Zone Bypass Scheme ............................................................................................................... 24
B.4 Programming User Codes .............................................................................................................................. 25
B.5 Programming the Duress Code ...................................................................................................................... 27
B.6 Add / Delete Proximity Tags ........................................................................................................................... 28
B.7 Add / Delete Keyfob Transmitters ................................................................................................................... 30
B.8 Setting the Time & Time Format ..................................................................................................................... 33
B.9 Setting the Date & Date Format ..................................................................................................................... 35
B.10 Enabling / Disabling Auto-Arming ................................................................................................................. 36
B.11 Setting the Auto-Arming Time ...................................................................................................................... 36
B.12 Programming Private Phone and SMS Reporting ........................................................................................ 37
B.13 Enabling / Disabling the Squawk Option ...................................................................................................... 42
D-304269 KP-250 PG2 User's Guide
User's Guide
1
Advertisement
Table of Contents

Related Manuals for Visonic KP-250 PG2


Summary of Contents for Visonic KP-250 PG2
-
Page 1: Table Of Contents
B.10 Enabling / Disabling Auto-Arming ......................... 36 B.11 Setting the Auto-Arming Time ........................36 B.12 Programming Private Phone and SMS Reporting ..................37 B.13 Enabling / Disabling the Squawk Option ...................... 42 D-304269 KP-250 PG2 User’s Guide... - Page 2 B3. The Show Function ............................58 B4. Siren ................................58 B5. Partition Status display ........................... 58 B6. Common Areas ............................... 58 APPENDIX C: Glossary ..............................60 APPENDIX D: Compliance with Standards ........................63 D-304269 KP-250 PG2 User’s Guide...
-
Page 3: Introduction
The sound and speech-related functions offered by the PowerMaster alarm system can be controlled by the KP-250 PG2 keypad, as detailed in the following list. In option 2, the KP-250 PG2 keypad will not operate (respond) if the KP-250 PG2 is assigned to two or more partitions. D-304269 KP-250 PG2 User’s Guide... -
Page 4: Voice On/Off
Note: The system will maintain the “MUTE OFF” state until subsequent selection of “MUTE ON’. Recording a Message You can record a verbal message on the PowerMaster control panel, by the KP-250 PG2, for other users of the alarm system. Face the panel, press on the KP-250 PG2 keypad and keep it pressed. -
Page 5: Message Playback
Message playback is performed by the control panel. To listen to a message left by another user of the system: Click on the KP-250 PG2 keypad and listen. PLAY will be displayed and the message will be played back over the PowerMaster loudspeaker or external voice box. When the playback ends, the display will revert to the normal status- displaying mode. -
Page 6: Arming And Disarming The System
To review the open zones click on the KP-250 PG2 keypad. The details and location of the first open zone detector (usually an open door or window sensor) will be displayed. To fix the open zone, locate the sensor and secure it (close the door or window) –... -
Page 7: Special Arming & Disarming Options
Move to interior zone (ARM HOME) AWAY/HOME ARM indicator on both the KP-250 PG2 keypad and PowerMaster panel lights steadily during the armed state. Disarming and Stopping Alarm Enter the protected premises via a delayed zone. Upon detecting your entrance, the system will start sounding the entry delay beeps alerting you to disarm the system before the entry delay ends. - Page 8 (Exit delay) Move to interior zone HH:MM HOME ARM indicator flashes on both the KP-250 PG2 keypad and PowerMaster panel during the armed state. Arming AWAY or HOME ‘Instant’ Pressing during the exit delay will arm the system in the "Instant' mode, i.e. without an entry delay. Therefore, any detection in any zone will trigger an immediate alarm.
- Page 9 (to mute the buzzer) AWAY Vacate the premises ARM indicator on both the KP-250 PG2 keypad and PowerMaster panel lights during the armed state. Remember: Forced arming compromises security!! Forced arming “HOME” is performed in a similar manner, as follows:...
-
Page 10: Initiating Alarms
(Exit delay) AWAY Note: Latchkey must be enabled by your installer. ARM indicator on both the KP-250 PG2 keypad and PowerMaster panel lights during the armed state. Initiating Alarms Following are various methods that may be used for initiating alarms. - Page 11 Disable / enable the chime zones by alternate clicking of the key, as shown below: PRESS RESULTING DISPLAY CHIME ON CHIME OFF HH:MM READY CHIME indicator lights steadily on the KP-250 PG2 keypad, when “chime on” is selected. D-304269 KP-250 PG2 User’s Guide...
- Page 12 The following diagrams show how to increase or decrease the loudness by clicking the <1> or<4> key on the KP-250 PG2 keypad (assuming that the volume was at minimum/maximum to begin with). PRESS RESULTING DISPLAY PRESS RESULTING DISPLAY VOLUME+ VOLUME (max) VOLUME+ VOLUME VOLUME+ VOLUME VOLUME VOLUME+ (max) D-304269 KP-250 PG2 User’s Guide...
-
Page 13: System Status And Indications
Note: The icons and numbers shown on the above keypad drawing are for illustrative purposes only. When executing a command, the KP-250 PG2 keypad's LED blinks red once to indicate transmission of the command to the control panel. If the operation is successfully completed, the green LED lights momentarily and a "happy tune"... -
Page 14: General Indications
Keypad Chime ON / OFF status PGM control System Trouble Event log / enroll button Escape Instant Previous Partition selection Info. / OK Dialer to call telephone numbers (for Next future use) AC failure Discard / abort D-304269 KP-250 PG2 User’s Guide... -
Page 15: Alarm Indication Siren
ON - ON - ON - ON - pause - ON - ON - ON - ON - pause..Test* –– (both external siren and internal sounder) ON for 2 seconds (once) * Not included in all models D-304269 KP-250 PG2 User’s Guide... -
Page 16: Reviewing Troubles And Alarm Memory
Alarm & Tamper Memory Indication The KP-250 PG2 retains in its memory alarm and “tamper” events that occurred during the last arming period. Note: Alarm events are memorized only after the “abort period”. This means that if you disarm the system immediately - before the abort period expires - there will be no memory indication A. -
Page 17: Gsm/Gprs Status Indications
GSM/GPRS Status Indications After all trouble messages have been reviewed and if a SIM card is installed in the panel, the KP-250 PG2 displays the GSM signal strength indication, as follows: "GSM RSSI STRONG" / "GSM RSSI GOOD" / "GSM RSSI POOR". -
Page 18: Trouble Indications
RSSI LOW There is no power to the siren SIREN AC FAILURE The sensor has an open tamper TAMPER FAILURE The sensor reports trouble TROUBLE Detector alarms when is Soak Test mode SOAK TEST FAIL D-304269 KP-250 PG2 User’s Guide... -
Page 19: System Configuration
This chapter explains the user programming features of your PowerMaster system using the KP-250 PG2 keypad. To access the User Settings menus, a KP-250 PG2 keypad must first be enrolled in the system. For instructions on how to enroll the KP-250 PG2 Keypad, refer to the KP-250 PG2 Installer’s Guide, section 11.4. - Page 20 Use to set the calendar date to show the correct date and date format. For further details and programming procedure see section B.9. Use to enable or disable the Automatic Daily Arming option at predefined times (see AUTO-ARM Auto-Arm Time setting). For further details and programming procedure see section disable B.10. D-304269 KP-250 PG2 User’s Guide...
-
Page 21: Returning To The Previous Step Or Exiting The User Settings Menu
[<OK> TO EXIT], or preferably, press once which brings you immediately to the exit screen [<OK> TO EXIT]. <OK> TO EXIT When the display reads [<OK> TO EXIT], press D-304269 KP-250 PG2 User’s Guide... -
Page 22: Buttons Used For Navigation & Setting
B.3. Fire zones cannot be bypassed. Carefully read the section titled "Additional Information" according to the indicated references etc – see table at end of section B.3. REMEMBER – ZONE BYPASSING COMPROMISES SECURITY! D-304269 KP-250 PG2 User’s Guide... - Page 23 The display now reads [<OFF> TO CLEAR]. To clear the bypassed zone, press the button. A "Happy Tune" ☺ sounds and the updated zone status is now displayed, i.e. Z04:READY ] or [ Z04: READY Z04: NOT READY D-304269 KP-250 PG2 User’s Guide...
-
Page 24: Reviewing The Zone Bypass Scheme
This menu is displayed only if "BYPASS" was previously enabled by the installer. The STATUS to the right of the zone number indicates whether the zone is READY, NOT-READY or BYPASSED. This display will appear only if PARTITIONING was previously enabled. D-304269 KP-250 PG2 User’s Guide... -
Page 25: Programming User Codes
(PowerMaster-10 G2) / 32 (PowerMaster-30 G2 / PowerMaster-33 G2) multi-function portable keyfob transmitters that will allow you and the other users to easily arm, disarm and control the system without accessing the KP-250 PG2 or panel, including from outside the premises (see section B.7 Add / Delete Keyfob Transmitters). The Duress Code enables you to disarm the system using a special code that sends a silent alarm to the monitoring station. - Page 26 3, 4 for example, “1234”, using the numerical keypad. When done, press User 06: 1234 ☺ ☺ A "Happy Tune" sounds. The display confirms the saved code. 5, 6 Return to step 3 D-304269 KP-250 PG2 User’s Guide...
-
Page 27: Programming The Duress Code
Here you program the duress code. Carefully read the section titled "Additional Information" according to the indicated references etc – see table at end of this section. Refers to when PARTITIONING is enabled. D-304269 KP-250 PG2 User’s Guide... -
Page 28: Add / Delete Proximity Tags
The display will read [ADD NEW TAG]. ADD NEW To begin the process of enrolling a new proximity tag press Present the proximity tag to the KP-250 PG2 within the timeout period. ENROLL NOW or ENTR ID:xxx-xxxx If enrollment was successfully completed, a "Happy Tune" ☺ sounds and the... - Page 29 [T05:Tag (prox)]. When the tag you wish to delete appears on the display, press The display now reads [<DEL> to delete]. <DEL> to delete Refers to when PARTITIONING is enabled. D-304269 KP-250 PG2 User’s Guide...
-
Page 30: Add / Delete Keyfob Transmitters
Partition Option (For information about Partition option - see APPENDIX B). If the Partition option is enabled in the KP-250 PG2, each of the 8 (PowerMaster-10 G2) / 32 (PowerMaster-30 G2 / PowerMaster-33 G2) keyfobs can be authorized by the Master User to arm and disarm any combination, or all 3 partitions, irrespective of the authorization of its corresponding user code. - Page 31 ] if the keyfob was DEVICE ENROLLED ID accepted Return to step 2 ☺ enrolled manually by entering the ID number, a "Happy Tune" sounds and the display will then change to [ F01:Keyfob D-304269 KP-250 PG2 User’s Guide...
- Page 32 When the keyfob you wish to delete appears on the display, press ID No. 300-5799 The display now reads [<DEL> to Delete]. <DEL> to Delete To delete the keyfob press the button. Refers to when PARTITIONING is enabled. D-304269 KP-250 PG2 User’s Guide...
-
Page 33: Setting The Time & Time Format
You can now enroll another keyfob. You can also select another option in the User Settings menu (see section A.1 and section A.2), or quit programming (see section A.3). If the keyfob was previously enrolled in the system, the KP-250 PG2 display indicates this together with the keyfob's ID number, for example, "... - Page 34 The time saved is displayed without the cursor, for example, " " followed by the selected time format. 08:55 A You can now select another option in the User Settings menu (see section A.1 and section A.2), or quit programming (see section A.3). D-304269 KP-250 PG2 User’s Guide...
-
Page 35: Setting The Date & Date Format
You can now select another option in the User Settings menu (see section A.1 and section A.2), or quit programming (see section A.3). This setting can be performed only after completing steps 1 – 3 of section B.9A. D-304269 KP-250 PG2 User’s Guide... -
Page 36: Enabling / Disabling Auto-Arming
When you are satisfied with the setting, press to confirm. A "Happy Tune" ☺ sounds. The display confirms the saved time, then returns to AUTO-ARM TIME 5, 6 the User Settings menu, step 1. 08:30 ☺ Return to step 1 D-304269 KP-250 PG2 User’s Guide... -
Page 37: Programming Private Phone And Sms Reporting
VOICE REPORT The display will read [VOICE REPORT]. To enter this option press REPORTED EVENTS When the display reads [REPORTED EVENTS] press disable report Refers to system that is connected to the Voice Box D-304269 KP-250 PG2 User’s Guide... - Page 38 3 alarms The display shows the currently selected option. REDIAL ATTEMPTS 3 alarms Click the button until the display reads the desired number of redial attempts, for example, "4 attempts". REDIAL ATTEMPTS 4 alarms D-304269 KP-250 PG2 User’s Guide...
- Page 39 Click the button until the display reads the desired acknowledge method, for example, "by all ack". TEL.ACKNOWLEDGE by all ack Refers to system that is connected to the Voice Box D-304269 KP-250 PG2 User’s Guide...
- Page 40 6, 7 phone number, for example, “5080168593”, using the numerical keypad. When done, press to confirm. ☺ SMS tel#2 8, 12 A "Happy Tune" sounds and the display confirms the SMS phone number. 5080168593 D-304269 KP-250 PG2 User’s Guide...
- Page 41 You can select between: " "; " "; " "; " ". 1 attempt 2 attempts 3 attempts 4 attempts You can select between: " " – enables 2-way voice communication with private telephones. enable D-304269 KP-250 PG2 User’s Guide...
-
Page 42: Enabling / Disabling The Squawk Option
You can now enable (ON) or disable (OFF) the Squawk option using the button. symbol now appears next to the new selected option. You can now select another option in the User Settings menu (see section A.1 and section A.2), or quit programming (see section A.3). D-304269 KP-250 PG2 User’s Guide... -
Page 43: Programming The Scheduler
When the "operation No." to schedule appears on the display, press D. To Set the ON (Start) Time Start time HH:MM The "start time" screen is shown on the display. : To set the start time of the selected operation, press the button. D-304269 KP-250 PG2 User’s Guide... - Page 44 For detailed explanation of how to set the time - refer to Section B.8B. To end this session and return to the previous "operation" menu, press the button. To select other menu options or to quit programming, follow the instructions in sections A.2 and A.3. D-304269 KP-250 PG2 User’s Guide...
-
Page 45: Enabling / Disabling Voice Option
Enter the [USER SETTINGS] menu, select the [VOICE OPTION] option and press VOICE OPTION enable The display shows the currently selected setting. VOICE OPTION enable Refers to system that is connected to the Voice Box D-304269 KP-250 PG2 User’s Guide... -
Page 46: Adjusting The Volume Of The Control Panel Or External Box
KP-250 PG2 keypad. B.16 Adjusting the Volume of the Control Panel or External Box The KP-250 PG2 allows you to adjust the volume of the PowerMaster control panel or an external voice box. Here you can increase or decrease the loudness. -
Page 47: Serial Number
PANEL ID 100005 Displays the GSM image transfer software version. PYTHON VERSION FFFFFFFFF Displays the control panel default version. EE CAT & SN J-702271 K18.022 Displays the KP-250 PG2 keypad software version. KP250 SW VER 01.00.09 D-304269 KP-250 PG2 User’s Guide... -
Page 48: Advanced Features
7. Advanced Features Displays the KP-250 PG2 keypad catalog number. KP250 cat.number 70245100 Displays the software upgrade communicator version RSU VERSION 7S702415 K01.034 Displays the software upgrade boot/programmer version BOOT VERSION 7S702412 K01.022 Return to step 2 Additional Information (section B.17) For detailed instructions on how to select the Setting Options –... -
Page 49: Automatic On/Off Control
BY TIMER OFF BY SENSOR ON (If this is the default) BY SENSOR OFF If not satisfied - Press BY SENSOR OFF If satisfied - BY SENSOR OFF HH:MM READY D-304269 KP-250 PG2 User’s Guide... -
Page 50: Periodic Test By User Code
Siren Test: Each siren of the system is automatically activated for 3 seconds (outdoor sirens with low volume). In addition, the system tests the siren of enrolled smoke sensors. Temperature Sensor Test: When Temperature Sensors are enrolled in the system, the KP-250 PG2 displays the temperature of each zone in Celsius or Fahrenheit. - Page 51 TEMPERATURE TEST The display now reads [TEMPERATURE TEST]. To display the temperature of zones on the KP-250 PG2, press The KP-250 PG2 reads the temperature of each zone. The display alternates Z01 +19.5C Z01:Temp. Sensor between the temperature, the sensor number and the sensor location.
- Page 52 If the INSTALLER CODE is used to enter the Periodic Test instead of the USER CODE, the devices LED will also provide the link quality indication – refer to Chapter 4 of the KP-250 PG2 Installer’s Guide, Periodic Test by Installer Code.
-
Page 53: Periodic Test Per Partition
DEVICE TESTS END After a device has been activated, the control panel reads [Zxx IS ACTIVATED] and the "N" indicator drops one count. After all devices have been tested, the control panel reads [DEVICE TESTS END]. D-304269 KP-250 PG2 User’s Guide... - Page 54 Periodic test per partition will be interrupted (the panel returns to selected partition display) upon occurrence of one of the following: 1) Disarm event by keyfob, keypad or pendant assigned to a selected partition; 2) PANIC, FIRE or EMERGENCY event. D-304269 KP-250 PG2 User’s Guide...
-
Page 55: Maintenance
PRESENT TAG OR ENTER CODE: When the KP-250 PG2 display reads [PRESENT TAG OR ENTER CODE: CODE enter the current master user code or present your tag. The "Happy Tune" will sound and the display will read [KP-250 LIST OF KP-250 EVENTS]. -
Page 56: Exiting The Event Log
Exiting the Event Log Click the button from anywhere within the event log. The display will read [KP-250 <OK> TO EXIT]. KP-250 <OK> to Exit Click the button. HH:MM READY The system reverts to the normal operating mode. D-304269 KP-250 PG2 User’s Guide... -
Page 57: Appendix A: Specifications
APPENDIX B: Partitioning The KP-250 PG2 includes an optional partition feature. Partitioning is available only if your installer has enabled the feature. Once partitioning is enabled Partitioning menus are added to the system which can be viewed on the LCD display. -
Page 58: B3. The Show Function
APPENDIX B: Partitioning Arming/Disarming a Single Partition To arm/disarm a single partition, press the button on the KP-250 PG2 and then press the Partition number: 1; 2; or 3. Then, press the button. B3. The Show Function The show function is enabled during single/all partition(s) status and displays information that is relevant to the selected or all partitions. - Page 59 Acts as a Delay type when at least one of the assigned partitions is armed HOME. Will be ignored when at least one of the assigned partitions is disarmed. Always armed. Emergency; Fire; Flood; Gas; Temperature; 24-hour silent; 24-hour audible; Non-alarm D-304269 KP-250 PG2 User’s Guide...
-
Page 60: Appendix C: Glossary
Disturbed Zone: A zone in a state of alarm (this may be caused by an open window or door or by motion in the field of view of a motion detector). A disturbed zone is considered “not secured”. D-304269 KP-250 PG2 User’s Guide... - Page 61 Status: AC fail, low battery, trouble, system state etc. User Codes: The KP-250 PG2 is designed to obey your commands, provided that they are preceded by a valid security access code. Unauthorized people do not know this code, so any attempt on their part to disarm or defeat the system is bound to fail.
- Page 62 Instant and delay zones are “on watch” only when the control panel is armed, and other (24- hour) zones are “on watch” regardless of whether the system is armed or not. D-304269 KP-250 PG2 User’s Guide...
-
Page 63: Appendix D: Compliance With Standards
– Connect the device to an outlet on a circuit different from the one which supplies power to the receiver. – Consult the dealer or an experienced radio/TV technician. Changes or modifications not expressly approved by Visonic Ltd. could void the user's authority to operate the equipment. W.E.E.E. Product Recycling Declaration For information regarding the recycling of this product you must contact the company from which you orignially purchased it. - Page 64 WARRANTY Visonic Limited (the “Manufacturer") warrants this product only (the However, if the Manufacturer is held liable, whether directly or "Product") to the original purchaser only (the “Purchaser”) against indirectly, for any loss or damage arising under this limited warranty,...
Need help?
Do you have a question about the KP-250 PG2 and is the answer not in the manual?
Questions and answers