
Related Manuals for Extreme Networks Extreme Management Center NMS-A-25


Summary of Contents for Extreme Networks Extreme Management Center NMS-A-25
- Page 1 Extreme Management ® Center NMS-A-25 Installation Guide 12/2019 9036578-00 Subject to Change Without Notice...
- Page 2 For additional information on Extreme Networks trademarks, please see: www.extremenetworks.com/company/legal/trademarks/ Contact If you require assistance, contact Extreme Networks using one of the following methods. Global Technical Assistance Center (GTAC) for Immediate Support Phone: 1-800-998-2408 (toll-free in U.S. and Canada) or 1-603-952-5000. For the Extreme Networks support phone number in your country, visit: www.extremenetworks.com/support/contact...
- Page 3 — A forum for Extreme customers to connect with one another, get questions answered, share ideas and feedback, and get problems solved. This community is monitored by Extreme Networks employees, but is not intended to replace specific guidance from GTAC.
-
Page 4: Table Of Contents
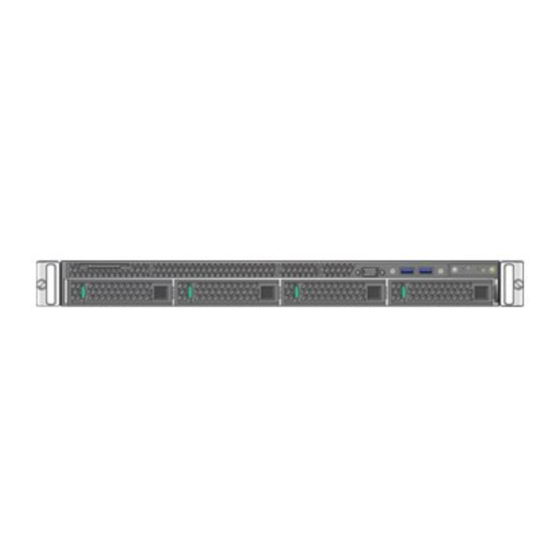
Table of Contents Table of Contents About This Guide Engine Overview and Setup Kit Contents Specifications Front Panel Features Hard Drive LED Indicator Patterns Back Panel Features Power Supply Status Indicator Patterns Removing and Installing the Front Bezel Removing the Front Bezel Installing the Front Bezel Installing the Engine into a Rack Torque Values... - Page 5 Changing Engine Settings Changing Basic Network Configuration Changing SNMP Configuration Changing Date and Time Settings Upgrading Extreme Management Center Engine Software Reinstalling Engine Software Product Regulatory and Compliance Information Federal Communications Commission (FCC) Notice Industry Canada, Class A CE Notice VCCI Notice BSMI EMC Statement —...
-
Page 6: About This Guide
About This Guide This document describes the installation and initial configuration of the Extreme Management Center NMS-A-25 hardware engine. This document is intended for experienced network administrators who are responsible for implementing and maintaining communications networks. 6 of 34... -
Page 7: Engine Overview And Setup
Kit Contents The NMS-A-25 engine ships with the following components: Extreme Networks URL card Front bezel label A rack mounting kit Two rack handles and appropriate screws AC power cord bracket and cable clamp kit One USB flash drive Specifications The physical specifications for the engine are listed in the following tables. - Page 8 Specifications Memory module capacities 4 GB DIMMs Minimum RAM (included) 32 GB (eight 4 GB DIMMs) Maximum RAM 48 GB (twenty-four 2 GB RDIMMs) Drives Hard drives One 480 GB SSD hard drive Connectors Back Four RJ-45 Serial 9-pin, DTE, 16550-compatible Three 4-pin, USB 2.0-compliant Video 15-pin VGA...
-
Page 9: Front Panel Features
Front Panel Features Parameter Limits Vibration, unpackaged 5 Hz to 500 Hz, 2.20 g RMS random Shock, operating Half sine, 2 g-force peak, 11 milliseconds Shock, unpackaged Trapezoidal, 25 g, velocity change 136 inches/second (40 lb to < 80 lb) Shock, packaged Non-palletized free fall in height 24 inches (40 lb to <... -
Page 10: Hard Drive Led Indicator Patterns
Back Panel Features Front Control Panel System ID button w/integrated LED System status LED NMI button (recessed, tool required for Power button w/integrated use) Mgmt port activity LED Hard drive activity LED Not used Not used System cold reset button Not used Hard Drive LED Indicator Patterns The hard drive has two LED indicators visible from the front of the system: one is... -
Page 11: Power Supply Status Indicator Patterns
Back Panel Features NMS-A-25 Back Panel Power supply module #1 Serial port Power supply module #2 USB 2.0 ports eth0 Mgmt port, out of band eth1 I/O Module Bay Video connector Riser cards, not used The following table describes the LEDs for the RJ45 management port. RJ45 Port LEDs (Management Port) LED Type LED Pattern... -
Page 12: Removing And Installing The Front Bezel
Removing and Installing the Front Bezel Power Supply Status LED Indicator Patterns LED Pattern Power Supply Condition Green Output on and OK No AC power to all power supplies 1 Hz blinking green AC present / Only 12VSB on (PS off) or PS in cold redundant state Amber AC power cord unplugged or AC power lost. -
Page 13: Installing The Engine Into A Rack
Installing the Engine into a Rack 1. Lock the right end of the front bezel to the rack handle. 2. Rotate the front bezel clockwise till the left end clicks into place. 3. Lock the bezel, if needed. Installing the Engine into a Rack A rack mounting kit and installation guide are included with the NMS-A-25 engine. -
Page 14: Torque Values
Installing the Engine into a Rack Torque Values The following table describes the recommended torque values to use when installing the engine using standard threaded fastener machine screws and bolts. Recommended Torque Values by Screw Size Screw Size Torque in Pounds Bit Size English Metric... -
Page 15: Configuration
Pre-Configuration Tasks Configuration Once you have installed the engine into a rack, you need to connect a monitor and a USB keyboard, connect the power cord and network cable, and power it After the engine boots and the engine installation is complete, you must go through the initial configuration process described in this chapter. - Page 16 1. Login as root with no password, and press Enter. The following screen appears: ========================================================== ====== Extreme Networks - Extreme Management Center Suite Engine Welcome to the Extreme Management Center Engine Setup ======================================================== ======= Please enter the information as it is requested to continue with the configuration.
- Page 17 Configuring the Engine Note: You must set a new root password. This new root password is used by the initial user when logging in to the Extreme Management Center applications. 3. Press Enter to set a new root password. Enter the new password as prompted. Enter new UNIX password: Retype new UNIX password: Password updated successfully.
- Page 18 Configuring the Engine ========================================================== ====== Enter the hostname for the engine (Required): Enter the IP address for <hostname> [192.168.1.10]: Enter the IP netmask [255.255.255.0]: Enter the gateway address [192.168.1.1]: Enter the IP address of the name server (Optional): Enter the domain name for <hostname> (Optional): Do you want to use NIS (y/n) [n]? y Enter the IP address of the NIS server: Enter the NIS domain name (Required):...
- Page 19 Configuring the Engine ========================================================== ====== SNMP Configuration ========================================================== ====== The following information will be used to configure SNMP management of this device. The SNMP information entered here must be used to contact this device with remote management applications such as Extreme Management Center Console. ========================================================== ====== Please enter the SNMP user name [snmpuser]:...
- Page 20 Configuring the Engine 10. In the NTP Servers validate selection screen, enter 0 to accept the current settings and proceed to the Set Time Zone screen in step 13. ========================================================== ====== NTP Servers ========================================================== ====== These are the currently specified NTP servers. Enter 0 or any key other than a valid selection to complete NTP configuration and continue.
- Page 21 Configuring the Engine ss - 2 digit seconds ============================================================== Please enter the month [10]: Please enter the day of the month [28]: Please enter the year [2013]: Please enter the hour of day [09]: Please enter the minutes [34]: Please enter the seconds [08]: 1.
- Page 22 The Extreme Management Center engine software is automatically installed. This could take a few minutes. When the installation is complete, you’ll see the following screen: ============================================================== Extreme Networks - Extreme Management Center Suite Engine - Setup Complete ============================================================== 22 of 34...
-
Page 23: Launching Extreme Management Center Applications
Launching Extreme Management Center Applications Setup of the Extreme Management Center Engine is now complete. The engine is now operational and ready to accept remote connections. Details of the installation are located in the /var/log/install directory. ============================================================== Launching Extreme Management Center Applications Now that you have configured the Extreme Management Center engine, you are ready to access the Extreme Management Center Launch Page and run the... -
Page 24: Restoring A Database From A Windows Server To The Engine
Restoring a Database from a Windows Server to the Engine Restoring a Database from a Windows Server to the Engine This section describes several Extreme Management Center configuration changes that are required if you are moving your Extreme Management Center installation from a Windows platform system to the engine. -
Page 25: Changing Inventory Manager
Changing Inventory Manager Changing Inventory Manager If you are using Inventory Manager, you must change the Data Storage Directory path to point to the new location on the engine. The Data Storage Directory is where all Inventory Manager data is stored, including capacity planning reports, configuration templates, archived configurations, and property files. -
Page 26: Changing Date And Time Settings
Upgrading Extreme Management Center Engine Software This starts the SNMP configuration script and allows you to make the required changes. Changing Date and Time Settings To enable or disable NTP for engine date and time, or to manually set the date and time on the engine, enter the following command at the engine CLI: /usr/postinstall/dateconfig This starts the date and time configuration script and allows you to change the... - Page 27 Upgrading Extreme Management Center Engine Software The upgrade automatically begins. The Extreme Management Center Server is restarted automatically when the upgrade is complete. Because your Extreme Management Center engine settings were migrated, you are not required to perform any configuration on the engine following the upgrade.
-
Page 28: Reinstalling Engine Software
Upgrading Extreme Management Center Engine Software Reinstalling Engine Software Use the procedure in this chapter to reinstall the engine software, in the event a software reinstall becomes necessary. Be aware this procedure reformats the hard drive and reinstalls all the engine software, the operating system, and all related Linux packages. - Page 29 Upgrading Extreme Management Center Engine Software 1. Press the power button, and then press F6 to go to the Boot Menu. 2. Select the USB drive on the menu. 3. The engine starts booting from the USB flash drive. 4. When the boot is complete, the Engine Installation screen appears and the installation begins.
-
Page 30: Product Regulatory And Compliance Information
Federal Communications Commission (FCC) Notice Product Regulatory and Compliance Information For complete regulatory compliance and safety information, refer to the document Intel® Server Products Product Safety and Regulatory Compliance, available at the following links: http://download.intel.com/support/motherboards/server/sb/g23122003_ safetyregulatory.pdf https://www.extremenetworks.com/support/documentation/ Federal Communications Commission (FCC) Notice This product has been tested and found to comply with the limits for a class A digital device, pursuant to Part 15 of the FCC rules. -
Page 31: Industry Canada, Class A
Industry Canada, Class A Industry Canada, Class A This Class A digital apparatus complies with Canadian ICES‐ 003. This digital apparatus does not exceed the Class A limits for radio noise emissions from digital apparatus set out in the interference‐ causing equipment standard entitled “Digital Apparatus,”... -
Page 32: Hazardous Substances
Hazardous Substances measures. Hazardous Substances This product complies with the requirements of Directive 2011/65/EU of the European Parliament and of the Council of 8 June 2011 on the restriction of the use of certain hazardous substances in electrical and electronic equipment. European Waste Electrical and Electronic Equipment (WEEE) Notice In accordance with Directive 2012/19/EU of the European Parliament on waste... - Page 33 European Waste Electrical and Electronic Equipment (WEEE) Notice For information about the available collection system, please contact Extreme Customer Support at +353 61 705500 (Ireland). 33 of 34...
-
Page 34: Declaration Of Conformity
Declaration of Conformity Declaration of Conformity 2004/108/EC Application of Council Directive(s): 2006/95/EC 2011/65/EU Manufacturer’s Name: Extreme Networks, Inc. 145 Rio Robles Manufacturer’s Address: San Jose, CA 95134 European Representative Name: Extreme Networks Limited Nexus House, Newbury Business Park European Representative Address:...
Need help?
Do you have a question about the Extreme Management Center NMS-A-25 and is the answer not in the manual?
Questions and answers