
Related Manuals for Daikin VRV IV W+ Series


Summary of Contents for Daikin VRV IV W+ Series
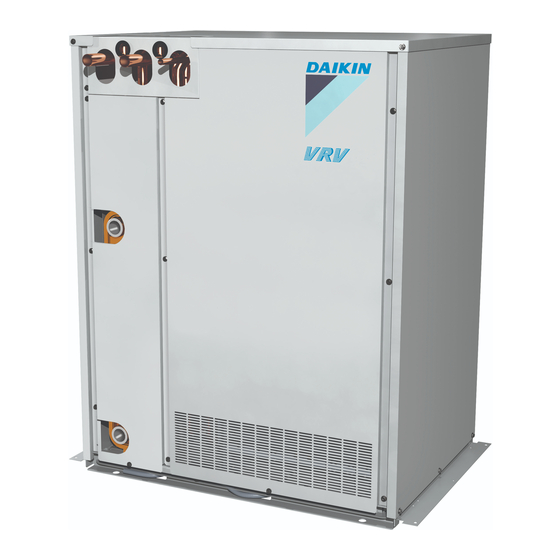
- Page 1 Installation and operation manual VRV IV water-cooled system air conditioner RWEYQ8T9Y1B RWEYQ10T9Y1B Installation and operation manual RWEYQ12T9Y1B English VRV IV water-cooled system air conditioner RWEYQ14T9Y1B...
- Page 2 2P399209-2B...
- Page 3 2P399209-2B...
- Page 4 Table of contents 8.2.15 Symptom: The display shows "88"....... 13 Table of contents 8.2.16 Symptom: The compressor in the outdoor unit does not stop after a short heating operation ....... 13 8.2.17 Symptom: The inside of an outdoor unit is warm even when the unit has stopped ........
-
Page 5: Table Of Contents
To route and fix the transmission wiring........29 Daikin website (publicly accessible). 15.4 To connect the transmission wiring ........... 29 ▪ The full set of latest technical data is available on the Daikin 15.5 To finish the transmission wiring ..........30 Business Portal (authentication required). - Page 6 3 User safety instructions WARNING WARNING Any gas or oil remaining inside the stop valve may blow off ALWAYS use multicore cable for power supply cables. the spun piping. CAUTION If these instructions are NOT followed correctly it may ▪ When connecting the power supply: connect the earth result in property damage or personal injury, which may be cable first,...
- Page 7 3 User safety instructions ▪ Units are marked with the following symbol: CAUTION To avoid oxygen deficiency, ventilate the room sufficiently if equipment with burner is used together with the This means that electrical and electronic products may NOT be system.
- Page 8 4 About the system WARNING NOTICE For future modifications or expansions of your system: ▪ Do NOT modify, disassemble, A full overview of allowable combinations (for future remove, reinstall or repair the unit system extensions) is available in technical engineering yourself as incorrect dismantling or data and should be consulted.
- Page 9 5 User interface High temperature (HT) Hydrobox unit Special operation ranges are valid in case of using Hydrobox units or EKEXV kit AHU. They can be found in the installation/operation manual of the Air handling unit (AHU) dedicated unit. Latest information can be found in the technical User interface engineering data.
- Page 10 6 Operation Cooling operation Using the dry program Heating operation 6.3.1 About the dry program Fan only operation ▪ The function of this program is to decrease the humidity in your 2 Press the ON/OFF button on the user interface. room with minimal temperature decrease (minimal room cooling).
- Page 11 7 Maintenance and service NOTICE CAUTION Do not turn off power immediately after the unit stops, but Do NOT insert fingers, rods or other objects into the air wait for at least 5 minutes. inlet or outlet. Do NOT remove the fan guard. When the fan is rotating at high speed, it will cause injury.
- Page 12 8 Troubleshooting When asking your dealer for an intervention, always state: Malfunction Measure ▪ The complete model name of the unit. The system operates ▪ Check if air inlet or outlet of outdoor or but cooling or heating indoor unit is not blocked by obstacles. ▪...
- Page 13 8 Troubleshooting ▪ When the cool/heat changeover remote control switch is installed ▪ A continuous low "shah" sound is heard when the system is in cooling operation or at a stop. When the drain pump (optional and the display shows (change-over under centralized accessories) is in operation, this noise is heard.
- Page 14 About 22.2 ▪ Front connection Øa 28.6 is part of Daikin's wider commitment to reduce our Øb environmental footprint. With we want to create a circular economy for refrigerants. One of the actions to achieve this, is the reuse of reclaimed refrigerant in VRV units produced and sold in ▪...
- Page 15 12 About the units and options Unit Refrigerant piping VRV DX indoor unit Low temperature (LT) Hydrobox unit Branch selector box (BP*) (required to connect Residential Air (RA) or Sky Air (SA) direct expansion (DX) indoor units) Residential Air (RA) direct expansion (DX) indoor units (12.3 N·m) User interface Wireless user interface...
- Page 16 13 Unit installation Boiler Unit installation 4× 13.1 Preparing the installation site 13.1.1 Installation site requirements of the outdoor unit Mind the spacing guidelines. See the "Technical data" chapter. CAUTION Appliance not accessible to the general public, install it in a 13.3 Mounting the outdoor unit secured area, protected from easy access.
- Page 17 14 Piping installation In case of heat recovery system Pipe Ø Temper grade of piping material ≥19.1 mm 1/2H (half hard) ▪ All piping lengths and distances have been taken into consideration (see About the piping length in the installer reference guide). ▪...
- Page 18 14 Piping installation In case of heat pump system F: Piping between refrigerant branch kit and branch selector box (BP box) Indoor unit capacity Piping outer diameter size (mm) index Gas pipe Liquid pipe Heat pump system in case of single outdoor unit <150 15.9 Pipe size for direct connection on branch selector box (BP*) must be...
- Page 19 14 Piping installation If the pipe size above the refnet header is Ø34.9 mm or NOTICE more, KHRQ22M75H is required. There are restrictions on the refrigerant pipe connection INFORMATION order between outdoor units during installation in case of a multiple outdoor unit system. Install according to following Maximum 8 branches can be connected to a header.
- Page 20 14 Piping installation Air purge (field supply) ▪ Carry out complete cooling/thermal insulation of the water piping Water outlet and the outdoor unit drain piping. If insulation has not been carried Water inlet out, the unit may sustain damage during severe winters due to Shut-off valve (field supply) freezing, in addition to thermal loss.
- Page 21 14 Piping installation Size the valve (b) or pump (c) in accordance with the maximum To set a different minimum flow rate for the system, change field required flow rate A, calculated by the installer of the hydronic setting [2-25] to the applicable value. See "16.1 ...
- Page 22 14 Piping installation ▪ Install the joints horizontally, so that the caution label (a) attached ▪ Make sure to keep the appropriate stop valves open during to the joint comes to the top. operation. In case of heat pump system, the gas suction stop valve remains in the closed position.
- Page 23 14 Piping installation Only for heat recovery system. NOTICE Do not connect the vacuum pump to the suction gas stop valve if the unit is intended to run as a heat pump system. This will increase the risk of unit failure. To handle the service port 3 Recover gas and oil from the spun piping by using a recovery unit.
- Page 24 14 Piping installation 14.4 Checking the refrigerant piping NOTICE Make sure that all (field supplied) field piping valves are OPEN (not outdoor unit stop valves!) before you start leak 14.4.1 About checking the refrigerant piping test and vacuuming. Refrigerant piping works are Finish piping work.
- Page 25 14 Piping installation 14.4.6 To insulate the refrigerant piping NOTICE The connections to the indoor units and all indoor units After finishing the leak test and vacuum drying, the piping must be should also be leak and vacuum tested. Keep any possible insulated.
- Page 26 14 Piping installation Parameter C. When using more than one multi BS unit, add the sum NOTICE of the individual BS unit charge factors. Before starting charging procedures, check Model 7‑segment display indication of the outdoor unit A1P PCB 2" [ 4 33]). is as normal (see "16.1.4 ...
- Page 27 14 Piping installation High pressure/low pressure gas line stop valve NOTICE Valve A Valve B ▪ The refrigerant charging port is connected to the piping Valve C inside the unit. The unit's internal piping is already Valve D factory charged with refrigerant, so be careful when connecting the charge hose.
-
Page 28: To Insulate The Water Piping
15 Electrical installation NOTICE Electrical installation Applicable legislation on fluorinated greenhouse gases requires that the refrigerant charge of the unit is indicated DANGER: RISK OF ELECTROCUTION both in weight and CO equivalent. WARNING Formula to calculate the quantity in CO equivalent tonnes: GWP value of the refrigerant ×... -
Page 29: Field Wiring: Overview
15 Electrical installation Example Combining the RWEYQ30T9 by using the RWEYQ8T9, 15.3 To route and fix the transmission RWEYQ10T9, and RWEYQ12T9. wiring ▪ Minimum circuit ampacity RWEYQ8T9=15.5 A Transmission wiring can be routed through the front side only. Fix it to the upper mounting hole. ▪... -
Page 30: To Finish The Transmission Wiring
15 Electrical installation In case of heat recovery system TO IN/D UNIT TO OUT/D UNIT TO MULTI UNIT F2 Q1Q2 F1 F2 F1 F2 F1 F2 F1 F2 TO IN/D TO OUT/D TO IN/D TO OUT/D UNIT UNIT UNIT UNIT F1 F2 F1 F2 F1 F2... -
Page 31: To Connect The Optional Wiring
15 Electrical installation 15.8 To connect the optional wiring For the optional wiring use insulated wires of a rated voltage of 1 2 3 4 5 6 7 8 9 10 250 V or higher and a minimal cross section of 1.25 mm² for single core wires and 0.75 mm²... -
Page 32: Configuration
16 Configuration 2" [ 4 33] 3 Measure the insulation resistance again. ▪ "16.1.6 To use mode settings" [ 4 33] ▪ "16.1.7 Mode 1: Monitoring settings" [ 4 34] ▪ "16.1.8 Mode 2: Field Configuration 16.1.2 Field setting components INFORMATION Location of the 7‑segment displays, buttons and DIP switches: It is important that all information in this chapter is read sequentially by the installer and that the system is configured as applicable. -
Page 33: To Access Mode 1 Or 2
16 Configuration 16.1.4 To access mode 1 or 2 What To quit and return to the Press BS1. Initialisation: default situation initial status NOTICE 16.1.6 To use mode 2 Be sure to turn ON the power 6 hours before operation in order to have power running to the crankcase heater and The master unit should be used to input field settings in to protect the compressor. -
Page 34: Mode 2: Field Settings
16 Configuration [1‑17] [1‑18] [1‑19] [2‑24] Water pump control Shows: Water pump/valve control is OFF or 1 pump/ valve per system ▪ [1‑17]: The latest malfunction code. Each unit has a pump/valve (pump is OFF ▪ [1‑18]: The 2nd last malfunction code. when slave unit does not operate) ▪... -
Page 35: To Connect The Pc Configurator To The Outdoor Unit
[ 4 28]. Be sure that neither a fuse nor a commissioning instructions in this chapter, a general protection device has been bypassed. commissioning checklist is also available on the Daikin Business Portal (authentication required). Internal wiring The general commissioning checklist is complementary to... -
Page 36: About The Test Run
18 Troubleshooting 3 Turn ON the power to the outdoor unit and the connected Additional refrigerant charge indoor units. The amount of refrigerant to be added to the unit shall be written on the included "Added refrigerant" plate and NOTICE attached to the rear side of the front cover. -
Page 37: Technical Data
▪ A subset of the latest technical data is available on the regional Daikin website (publicly accessible). SENPH ▪ The full set of latest technical data is available on the Daikin Business Portal (authentication required). 19.1 Service space: Outdoor unit... -
Page 38: Disposal
20 Disposal Compressor Double tube heat exchanger Liquid receiver Thermistor Disposal NOTICE Do NOT try to dismantle the system yourself: dismantling of the system, treatment of the refrigerant, oil and other parts MUST comply with applicable legislation. Units MUST be treated at a specialised treatment facility for reuse, recycling and recovery. - Page 40 4P452190-1 D 0000000. 4P452190-1D 2020.10 Verantwortung für Energie und Umwelt...
Need help?
Do you have a question about the VRV IV W+ Series and is the answer not in the manual?
Questions and answers