
Related Manuals for Daikin RXYSCQ6TMV1B


Summary of Contents for Daikin RXYSCQ6TMV1B
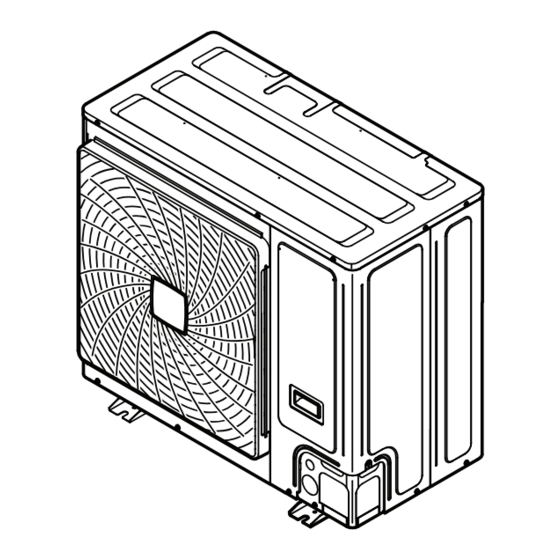
- Page 1 Installer and user reference guide VRV IV-S system air conditioner RXYSCQ4TMV1B Installer and user reference guide RXYSCQ5TMV1B English VRV IV-S system air conditioner RXYSCQ6TMV1B...
-
Page 2: Table Of Contents
Table of contents 6.4.1 About connecting the refrigerant piping ....... 16 Table of contents 6.4.2 Precautions when connecting the refrigerant piping ..17 6.4.3 Guidelines when connecting the refrigerant piping ..17 6.4.4 Pipe bending guidelines..........17 6.4.5 To flare the pipe end ............ 17 1 General safety precautions 6.4.6 To braze the pipe end .......... -
Page 3: General Safety Precautions
1 General safety precautions 11 Troubleshooting 20.2.7 Symptom: The user interface display reads "U4" or "U5" and stops, but then restarts after a few minutes.. 50 11.1 Overview: Troubleshooting............37 20.2.8 Symptom: Noise of air conditioners (Indoor unit)..50 11.2 Precautions when troubleshooting .......... -
Page 4: For The User
(on top of the above and persons with reduced physical, sensory or mental instructions described in the Daikin documentation). capabilities or lack of experience and knowledge if they have been given supervision or instruction concerning use of the appliance in CAUTION a safe way and understand the hazards involved. -
Page 5: Installation Site
1 General safety precautions 1.3.2 Installation site NOTICE After all the piping has been connected, make sure there is ▪ Provide sufficient space around the unit for servicing and air no gas leak. Use nitrogen to perform a gas leak detection. circulation. -
Page 6: Water
2 About the documentation WARNING CAUTION The ambient temperature inside the unit can get much When connecting the power supply, the earth connection higher than that of the room, e.g. 70°C. In case of a brine must be made before the current-carrying connections are leak, hot parts inside the unit can create a hazardous established. -
Page 7: For The Installer
Technical engineering data ▪ A subset of the latest technical data is available on the regional Daikin website (publicly accessible). ▪ The full set of latest technical data is available on the Daikin Business Portal (authentication required). For the installer... -
Page 8: To Remove The Accessories From The Outdoor Unit
4 About the units and options Model identification Example: R X Y SC Q 4 TM V1 B [*] Code Explanation Outdoor air cooled Heat pump (no continuous heating) Single module Compact S series Refrigerant R410A Capacity class VRV IV series 3.2.3 To remove the accessories from the Power supply... -
Page 9: Possible Combinations Of Indoor Units
5 Preparation The VRV IV-S heat pump system can be combined with several Preparation types of indoor units and is intended for R410A use only. For an overview which units are available you can consult the Overview: Preparation product catalogue for VRV IV-S. An overview is given indicating the allowed combinations of indoor This chapter describes what you have to do and know before going units and outdoor units. -
Page 10: Additional Installation Site Requirements Of The Outdoor Unit In Cold Climates
5 Preparation ▪ In places with weak reception, keep distances of 3 m or more to ▪ deterioration of the operational capacity; avoid electromagnetic disturbance of other equipment and use ▪ frequent frost acceleration in heating operation; conduit tubes for power and transmission lines. ▪... -
Page 11: Securing Safety Against Refrigerant Leaks
–5°C for 5 days or longer, with relative humidity refrigerant with which each separate system is charged. levels exceeding 95%, we recommend to apply a Daikin range specifically designed for such application and/or to 2 Calculate the volume of the room (m ) where the indoor unit is contact your dealer for further advice. -
Page 12: Preparing Refrigerant Piping
5 Preparation Formula F/G≤H INFORMATION Total volume of refrigerant in the refrigerant ▪ Combination of VRV DX and RA DX indoor units is not system allowed. Size (m ) of smallest room in which there is ▪ Combination of RA DX and AHU indoor units is not an indoor unit installed allowed. -
Page 13: To Select Refrigerant Branch Kits
5 Preparation E: Piping between BP unit and RA DX indoor unit Outdoor unit Piping outer diameter size (mm) capacity type (HP) Gas pipe Liquid pipe Indoor unit capacity Piping outer diameter size (mm) Standard Size-up index Gas pipe Liquid pipe 15.9 19.1 15~42... - Page 14 5 Preparation Requirement Limit VRV DX RA DX Maximum length first branch kit-indoor unit 40 m 40 m ▪ Example 1.1, unit 8: b+c+d+e+f+g+p≤Limit ▪ Example 1.2, unit 6: b+h≤Limit ▪ Example 1.2, unit 8: i+k≤Limit ▪ Example 1.3, unit 8: i≤Limit ▪ Example 2, unit 18: b+m≤Limit Maximum length outdoor-BP 30 m ▪...
-
Page 15: Preparing Electrical Wiring
6 Installation Preparing electrical wiring Opening the units 5.4.1 About electrical compliance 6.2.1 About opening the units Equipment complying with EN/IEC 61000‑3‑12 (European/ At certain times, you have to open the unit. Example: International Technical Standard setting the limits for harmonic ▪... -
Page 16: To Install The Outdoor Unit
6 Installation NOTICE If drain holes of the outdoor unit are covered by a mounting base or by floor surface, raise the unit to provide a free space of more than 150 mm under the outdoor unit. 4× M12 Drain holes (dimensions in mm) (mm) Make sure not to cover the drain holes. -
Page 17: Precautions When Connecting The Refrigerant Piping
6 Installation 6.4.2 Precautions when connecting the refrigerant piping INFORMATION Also read the precautions and requirements in the following chapters: ▪ General safety precautions Torque wrench Spanner ▪ Preparation Piping union Flare nut DANGER: RISK OF BURNING Piping size Tightening Flare Flare shape (mm) -
Page 18: To Braze The Pipe End
6 Installation The pipe end MUST be evenly flared in a perfect circle. Make sure the flare nut is fitted. 6.4.6 To braze the pipe end NOTICE Precautions when connecting field piping. Add brazing material as shown in the figure. ≤Ø25.4 Service port Stop valve cover... -
Page 19: To Connect The Refrigerant Piping To The Outdoor Unit
6 Installation ▪ After handling the stop valve, tighten the stop valve cover NOTICE securely, and check for refrigerant leaks. For the tightening Precautions when making knockout holes: torque, refer to the table below. ▪ Avoid damaging the casing and underlying piping. ▪... -
Page 20: Checking The Refrigerant Piping
6 Installation Leak test and vacuum drying ▪ Mount the refnet header so that it branches horizontally. Checking the refrigerant piping involves: ▪ Checking for any leakages in the refrigerant piping. ▪ Performing vacuum drying to remove all moisture, air or nitrogen in the refrigerant piping. -
Page 21: To Perform A Leak Test
6 Installation NOTICE To insulate the refrigerant piping The connections to the indoor units and all indoor units After finishing the leak test and vacuum drying, the piping must be should also be leak and vacuum tested. Keep any possible insulated. -
Page 22: To Determine The Additional Refrigerant Amount
6 Installation NOTICE Indoor units Total CR CR per type VRV DX RA DX If the power of some units is turned off, the charging procedure cannot be finished properly. RA DX 80~130% — 80~130% Total CR = Total indoor unit capacity connection ratio NOTICE CR per type = Allowable capacity connection ratio per indoor unit type... -
Page 23: Error Codes When Charging Refrigerant
6 Installation Charging refrigerant (in manual additional refrigerant charge NOTICE mode) After adding the refrigerant, do not forget to close the lid of The remaining additional refrigerant charge can be charged by the refrigerant charging port. The tightening torque for the operating the outdoor unit by means of the manual additional lid is 11.5 to 13.9 N•m. -
Page 24: Precautions When Connecting The Electrical Wiring
6 Installation Field power supply (with earth leakage protector) Main switch Earth connection Outdoor unit Indoor unit User interface Power supply wiring (sheathed cable) (230 V) Transmission wiring (sheathed cable) (16 V) Outdoor unit Power supply 1~ 50 Hz Indoor unit Earth wiring Central user interface (etc...) Main line Power supply wiring and transmission wiring... -
Page 25: Guidelines When Knocking Out Knockout Holes
6 Installation WARNING Wire type Installation method Single-core wire ▪ After finishing the electrical work, confirm that each electrical component and terminal inside the electrical AA´ A´ components box is connected securely. ▪ Make sure all covers are closed before starting up the unit. -
Page 26: Finishing The Outdoor Unit Installation
6 Installation Routing through the frame TO IN/D TO OUT/D a Power supply cable b Transmission wiring cable F1 F2 F1 F2 F1 F2 Connecting to the When cables are routed from the unit, a frame protection sleeve for the conduits (PG insertions) can be inserted at the knockout hole. -
Page 27: To Close The Outdoor Unit
7 Configuration Insulator Mode 1 and 2 Transmission wiring (F1/F2) Mode Description Finishing tape Mode 1 Mode 1 can be used to monitor the current 6.9.2 To close the outdoor unit situation of the outdoor unit. Some field setting (monitoring contents can be monitored as well. settings) NOTICE Mode 2... -
Page 28: To Access Mode 1 Or 2
7 Configuration Description Action Button/display H1P H2P H3P H4P H5P H6P H7P Make sure the LEDs are Mode 2 showing the default situation. (H1P OFF) (H1P ON) Setting 8 Check the status of LED H6P. H6P OFF: Unit is currently (in mode 2) (H2P~H7P = binary 8) not operating under low noise... -
Page 29: Mode 1 (And Default Situation): Monitoring Settings
7 Configuration Action Button/display Value / Description BS1 [1×] Quit mode 2. Shows the status of power consumption limitation operation. Unit is currently not operating under power consumption limitations. 7.2.7 Mode 1 (and default situation): Monitoring settings Unit is currently operating under power consumption In mode 1 (and in default situation) you can read out some limitation. - Page 30 7 Configuration Setting Value Description (= binary) [2‑8] 6°C Auto target temperature during cooling operation. (default) 8°C 9°C 10°C 11°C [2‑9] Auto target temperature during heating operation. (default) 46°C 43°C [2‑12] Deactivated. Enable the low noise function and/or power consumption limitation (default) via external control adaptor (DTA104A61/62).
- Page 31 7 Configuration Setting Value Description (= binary) [2‑26] 20h00 22h00 Low noise operation start time. (default) This setting is used in conjunction with setting [2‑22]. 24h00 [2‑27] 6h00 7h00 Low noise operation stop time. 8h00 This setting is used in conjunction with setting [2‑22]. (default) [2‑30] Power consumption limitation level (step 1) via the external control...
-
Page 32: To Connect The Pc Configurator To The Outdoor Unit
7 Configuration 7.2.9 To connect the PC configurator to the To activate this in… Change… outdoor unit Cooling operation [2‑8]=3 (default) Heating operation [2‑9]=1 (default) Hi-sensible/economic (cooling/heating) The refrigerant temperature is set higher/lower (cooling/heating) compared to basic operation. The focus under high sensible mode is comfort feeling for the customer. -
Page 33: Example: Automatic Mode During Cooling
7 Configuration Quick 7.3.3 Example: Automatic mode during cooling Overshoot (during heating operation) or undershoot (during cooling operation) is allowed compared to the requested refrigerant temperature, in order to achieve the required room temperature very 100% fast. The overshoot is allowed from the start up moment. ▪... -
Page 34: Example: Automatic Mode During Heating
8 Commissioning 7.3.4 Example: Automatic mode during heating Commissioning Overview: Commissioning 100% After installation and once the field settings are defined, the installer is obliged to verify correct operation. Therefore a test run MUST be performed according to the procedures described below. This chapter describes what you have to do and know to commission the system after it is configured. -
Page 35: Checklist During Commissioning
8 Commissioning Field wiring Checklist during commissioning Be sure that the field wiring has been carried out To perform a test run. according to the instructions described in the chapter "6.8 Connecting the electrical wiring" on page according to the wiring diagrams and according to the 8.4.1 About the test run applicable legislation. -
Page 36: Correcting After Abnormal Completion Of The Test Run
9 Hand-over to the user 4 Check the test operation results on the outdoor unit 7‑LEDs ▪ Preventing electrical hazards when maintaining and servicing the display. system Completion Description ▪ The refrigerant recovery operation Normal completion 10.2 Maintenance safety precautions Abnormal completion DANGER: RISK OF ELECTROCUTION... -
Page 37: About Service Mode Operation
11 Troubleshooting 10.4 About service mode operation 11.2 Precautions when troubleshooting Refrigerant recovery operation/vacuuming operation is possible by WARNING applying setting [2‑21]. Refer to "7.2 Making field settings" on ▪ When carrying out an inspection on the switch box of page 27 for details how to set mode 2. - Page 38 12 Disposal Main code Cause Solution Electronic expansion valve malfunction Check connection on PCB or actuator. (Y1E) - A1P (X21A) (Y3E) - A1P (X22A) ▪ The stop valve of an outdoor unit is left closed. ▪ Open the stop valve on both the gas and liquid side. ▪...
- Page 39 13 Technical data Technical data A subset of the latest technical data is available on the regional Daikin website (publicly accessible). The full set of latest technical data is available on the Daikin Business Portal (authentication required). 13.1 Overview: Technical data This chapter contains information about: •...
- Page 40 13 Technical data Multiple rows of units ( b (mm) ≥250 ≤½H b≥250 ≥250 ½H <H ≤H b≥300 ≥100 ≥250 >H ≥250 ≥2000 ≥3000 ≥200 ≥250 ≥1000 ≥250 ≥1500 Stacked units (max. 2 levels) ( ≥250 ≥250 ≥500 ≥500 ≥300 ≥1000 ≥250 ≥250...
- Page 41 13 Technical data 13.3 Piping diagram: Outdoor unit S1NPH S1PH S1NPL Stop valve (gas) Stop valve (liquid) Filter (3×) Subcool heat exchanger Heat sink PCB Pressure regulating valve Heat exchanger Service port (high pressure) Muffler Check valve Compressor accumulator Capillary tube Service port (refrigerant charge) Accumulator Compressor...
- Page 42 13 Technical data K10R Magnetic relay 13.4 Wiring diagram: Outdoor unit L1R~L3R Reactor The wiring diagram is delivered with the unit, located at the inside of Motor (compressor) the service cover. Motor (fan) Notes for RXYSCQ4~6: Switching power supply This wiring diagram applies only to the outdoor unit. R1, R2 Resistor Symbols (see below).
- Page 43 14 About the system For the user About the system User interface The indoor unit part of VRV IV-S heat pump system can be used for CAUTION heating/cooling applications. The type of indoor unit which can be ▪ NEVER touch the internal parts of the controller. used depends on the outdoor units series.
- Page 44 17 Operation The indoor unit will stop fan operation, the refrigerant cycle will Operation reverse and energy from inside the building will be used to defrost the outdoor unit coil. 17.1 Operation range The indoor unit will indicate defrost operation on the display Hot start Use the system in the following temperature and humidity ranges for safe and effective operation.
- Page 45 17 Operation NOTICE 17.5 Setting the master user interface Do not turn off power immediately after the unit stops, but wait for at least 5 minutes. 17.5.1 About setting the master user interface 17.4 Adjusting the air flow direction Refer to the operation manual of the user interface. 17.4.1 About the air flow flap Double flow+multi-flow units...
- Page 46 18 Energy saving and optimum operation Detailed information is given for the installer in the installation 17.5.4 About control systems manual. He can help you to realize the best balance between energy This system provides two other control systems beside individual consumption and comfort.
- Page 47 19 Maintenance and service CAUTION: Pay attention to the fan! WARNING It is dangerous to inspect the unit while the fan is running. The refrigerant in the system is safe and normally does not leak. If the refrigerant leaks in the room, contact with a fire Be sure to turn off the main switch before executing any of a burner, a heater or a cooker may result in a harmful maintenance task.
- Page 48 20 Troubleshooting Component Inspection Maintenance cycle NOTICE cycle (replacements and/or ▪ The table indicates main components. Refer to your repairs) maintenance and inspection contract for more details. Electric motor 1 year 20,000 hours ▪ The table indicates recommended intervals 25,000 hours replacement cycles.
- Page 49 20 Troubleshooting Malfunction Measure Main code Contents The system operates ▪ Check if air inlet or outlet of outdoor or Discharge temperature malfunction (outdoor) but cooling or heating indoor unit is not blocked by obstacles. Abnormal suction temperature (outdoor) is insufficient. Remove any obstacles and make sure Refrigerant overcharge detection the air can flow freely.
- Page 50 20 Troubleshooting is turned ON again in case it was turned OFF just before. The 20.2.8 Symptom: Noise of air conditioners same starting delay occurs after the operation mode selector (Indoor unit) button was used. ▪ A "zeen" sound is heard immediately after the power supply is ▪...
- Page 51 23.1 Information requirements for Eco Field supply Design Equipment NOT made by Daikin that can be combined with product according instructions Follow the steps below to consult the Energy Label – Lot 21 data of accompanying documentation.
- Page 52 4P404224-1C 2019.07...
Need help?
Do you have a question about the RXYSCQ6TMV1B and is the answer not in the manual?
Questions and answers