Daikin RWEYQ8T9Y1B Installer And User Manual
Vrv iv water-cooled system air conditioner
Hide thumbs
Also See for RWEYQ8T9Y1B:
- Installation and operation manual (36 pages) ,
- Installer and user reference manual (144 pages) ,
- Installation and operation manual (40 pages)

Related Manuals for Daikin RWEYQ8T9Y1B


Summary of Contents for Daikin RWEYQ8T9Y1B
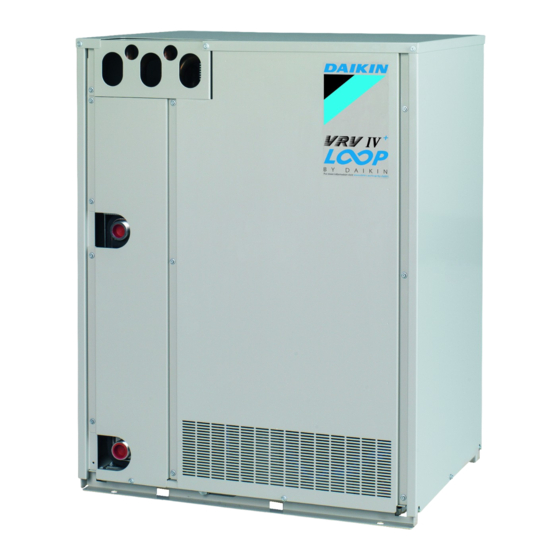
- Page 1 Installer and user reference guide VRV IV water-cooled system air conditioner RWEYQ8T9Y1B RWEYQ10T9Y1B Installer and user reference guide RWEYQ12T9Y1B English VRV IV water-cooled system air conditioner RWEYQ14T9Y1B...
-
Page 2: Table Of Contents
Table of contents Connecting the refrigerant piping ..........23 Table of contents 6.4.1 Precautions when connecting refrigerant piping ..23 6.4.2 About connecting the refrigerant piping ....... 23 6.4.3 To route the refrigerant piping........23 6.4.4 To connect the refrigerant piping to the outdoor unit ... 23 1 General safety precautions 6.4.5 To connect the multi connection piping kit .... -
Page 3: General Safety Precautions
1 General safety precautions About service mode operation........... 43 19.2.4 Symptom: The fan strength does not correspond to the setting ..............53 9.4.1 To use vacuum mode ..........43 19.2.5 Symptom: The fan direction does not correspond to 9.4.2 To recover refrigerant ..........43 the setting .............. -
Page 4: For The User
Make sure installation, testing and applied materials comply with applicable legislation (on top of the For the user instructions described in the Daikin documentation). CAUTION ▪ If you are not sure how to operate the unit, contact your installer. Wear adequate personal protective equipment (protective ▪... -
Page 5: Installation Site
1 General safety precautions 1.3.2 Installation site WARNING Always recover the refrigerant. Do NOT release them ▪ Provide sufficient space around the unit for servicing and air directly into the environment. Use a vacuum pump to circulation. evacuate the installation. ▪... -
Page 6: Water
1 General safety precautions WARNING WARNING Take sufficient precautions in case of brine leakage. If ▪ ONLY use copper wires. brine leaks, ventilate the area immediately and contact ▪ Make sure the field wiring complies with the applicable your local dealer. legislation. -
Page 7: About The Documentation
▪ Format: Paper (in the box of the outdoor unit) Daikin website (publicly accessible). ▪ Outdoor unit installation and operation manual: ▪ The full set of latest technical data is available on the Daikin extranet (authentication required). ▪ Installation and operation instructions ▪... -
Page 8: To Remove The Accessories From The Outdoor Unit
3 About the box Accessory pipes: Diameters 4× Accessory pipes Øa Øb Øc Ød (mm) Liquid pipe 12.7 12.7 12.7 ▪ Front connection Øa 12.7 Øb ▪ Top connection To remove the accessories from Øc Ød the outdoor unit Gas pipe 25.4 25.4 25.4... -
Page 9: About The Units And Options
4 About the units and options About the outdoor unit This installation manual concerns the VRV IV water-cooled system air conditioner. The unit is full inverter driven, and can be used for cooling, heat pump and heat recovery applications. (12.3 N·m) Model line up: Model Description... -
Page 10: Combining Units And Options
4 About the units and options Heat recovery system Water system Unit Connection to refrigerant system Water piping Dry cooler Brine loop Closed cooling tower Boiler Combining units and options 4.5.1 About combining units and options NOTICE To be sure your system setup (unit+indoor unit(s)) will work, you have to consult the latest technical engineering data for VRV IV water-cooled. -
Page 11: Possible Options For The Outdoor Unit
5 Preparation RWEYQ18 = RWEYQ8 + 10 Description Model name RWEYQ20 = RWEYQ10 + 10 With optional fixing box for the KJB111A switch RWEYQ22 = RWEYQ10 + 12 RWEYQ24 = RWEYQ12 + 12 INFORMATION RWEYQ26 = RWEYQ12 + 14 The cool/heat selector can only be used when the RWEYQ28 = RWEYQ14 + 14 refrigerant system is configured as heat pump system. -
Page 12: Securing Safety Against Refrigerant Leaks
5 Preparation ▪ In places where a mineral oil mist, spray or vapour may be 5.2.2 Securing safety against refrigerant leaks present in the atmosphere. Plastic parts may deteriorate and fall off or cause water leakage. About safety against refrigerant leaks NOTICE The installer and system specialist shall secure safety against leakage according to local regulations or standards. -
Page 13: Preparing Refrigerant Piping
5 Preparation ▪ Temper grade: use piping with temper grade in function of the When there are no smaller room divisions: pipe diameter as listed in table below. Pipe Ø Temper grade of piping material ≤15.9 mm O (annealed) ≥19.1 mm 1/2H (half hard) ▪... - Page 14 5 Preparation In case of heat recovery mode In case of heat pump mode Indoor unit capacity Piping outer diameter size (mm) index Gas pipe Liquid pipe <150 15.9 150≤x<200 19.1 200≤x<290 22.2 290≤x<420 28.6 12.7 420≤x<640 15.9 640≤x<920 34.9 19.1 ≥920 41.3...
-
Page 15: To Select Refrigerant Branch Kits
5 Preparation ▪ Concerning refnet headers, choose from the following table in Size up accordance with the total capacity of all the indoor units connected HP class Liquid piping outer diameter size (mm) below the refnet header. 18~22 15.9 → 19.1 Indoor unit capacity 2 pipes 3 pipes... -
Page 16: Single Outdoor Units And Standard Multi-Outdoor-Unit Combinations
5 Preparation Term Definition Distance 5.3.5 Single outdoor units and standard multi- outdoor-unit combinations Height difference between 50/40 m outdoor and indoor units In case of heat pump mode Height difference between 15 m indoor units 30 m Connection with VRV DX indoor units and air handling units Height difference between 5 m outdoor units... - Page 17 5 Preparation This connection is only allowed on a single outdoor unit Connection with VRV DX indoor units and Hydrobox units installation. Pipe Maximum length (actual/equivalent) Longest pipe from the outdoor unit or the 100 m/120 m last multi-outdoor piping branch (1+2, 1+3+4, 1+3+5+6, 1+3+5+7) Longest pipe after the first branch (3+4, 40 m/—...
-
Page 18: Multiple Outdoor Units: Possible Layouts
5 Preparation Connection with only VRV DX indoor units Pipe Maximum length (actual/equivalent) Longest pipe from the outdoor unit or the 165 m/190 m last multi-outdoor piping branch (1+2, 1+3, 1+5) Longest pipe after the first branch (2, 3, 5) 40 m/— In case of a multi-outdoor setup: longest 10 m/13 m pipe from the outdoor unit to the last multi- outdoor piping branch (4) -
Page 19: Preparing Water Piping
5 Preparation To indoor unit Piping between outdoor units NOTICE ≥200 mm There are restrictions on the refrigerant pipe connection order between outdoor units during installation in case of a multiple outdoor unit system. Install according to following Then restrictions. The capacities of outdoor units A, B and C ≤2 m must fulfill the following restriction conditions: A≥B≥C. -
Page 20: Handling The Brazed Plate Heat Exchanger
5 Preparation ▪ Connecting piping – Tools. Only use appropriate tooling to ▪ Drainage – Lateral length. Lateral length of drainage should be handle brass, which is a soft material. If NOT, pipes will get as short as possible (≤400 mm) and installed in a downward damaged. -
Page 21: Preparing Electrical Wiring
5 Preparation INFORMATION Some third party valves/pumps have a maximum flow rate defined by the hardware of the system, but a different maximum flow rate can be set to correspond with the maximum input voltage (10 V DC) The installer should ask information to the valve/pump supplier before making the selection. -
Page 22: Safety Device Requirements
6 Installation 5.5.2 Safety device requirements Opening the units The power supply must be protected with the required safety 6.2.1 To open the outdoor unit devices, i.e. a main switch, a slow blow fuse on each phase and an earth leakage protector in accordance with the applicable legislation. DANGER: RISK OF ELECTROCUTION For single models Selection and sizing of the wiring should be done in accordance with... -
Page 23: Connecting The Refrigerant Piping
6 Installation NOTICE 6.4.2 About connecting the refrigerant piping When the installation height of the unit needs to be Before connecting the refrigerant piping, make sure the outdoor and increased, do not use stands to only support the corners. indoor units are mounted. ▪... -
Page 24: To Connect The Multi Connection Piping Kit
6 Installation NOTICE Precautions when connecting field piping. Add brazing material as shown in the figure. ≤Ø25.4 >Ø25.4 NOTICE ▪ Be sure to use the supplied accessory pipes when carrying out piping work in the field. ▪ Be sure that the field installed piping does not touch Horizontal surface other pipes, the bottom panel or side panel. -
Page 25: Using The Stop Valve And Service Port
6 Installation Nitrogen To close the stop valve ▪ Do NOT use anti-oxidants when brazing pipe joints. 1 Remove the stop valve cover. Residue can clog pipes and break equipment. 2 Insert a hexagon wrench into the stop valve and turn the stop ▪... -
Page 26: Checking The Refrigerant Piping
6 Installation WARNING Never remove the pinched piping by brazing. Service port and service port cover Any gas or oil remaining inside the stop valve may blow off Stop valve the pinched piping. Field piping connection Stop valve cover 6 Make sure that no particles remain in the pipe. Blow out any 2 Connect the vacuuming/recovery unit through a manifold to the particles with compressed air. -
Page 27: Checking Refrigerant Piping: General Guidelines
6 Installation ▪ Performing vacuum drying to remove all moisture, air or nitrogen Valve State of valve in the refrigerant piping. Valve C Open If there is a possibility of moisture being present in the refrigerant Valve D Open piping (for example, water may have entered the piping), first carry Liquid line stop valve Close out the vacuum drying procedure below until all moisture has been... -
Page 28: To Insulate The Refrigerant Piping
6 Installation 2 Check that, with the vacuum pump turned off, the target Charging refrigerant vacuum is maintained for at least 1 hour. 3 Should you fail to reach the target vacuum within 2 hours or 6.7.1 Precautions when charging refrigerant maintain the vacuum for 1 hour, the system may contain too much moisture. -
Page 29: To Charge Refrigerant
6 Installation NOTICE 6.7.4 To charge refrigerant The refrigerant charge of the system must be less than Follow the steps as described below. 100 kg. This means that in case the calculated total Pre-charging refrigerant refrigerant charge is equal to or more than 95 kg you must divide your multiple... -
Page 30: Checks After Charging Refrigerant
6 Installation INFORMATION INFORMATION If the total additional refrigerant amount was reached in The manual refrigerant charge operation will automatically step 4 (by pre-charging only), record the amount of stop within 30 minutes. If charging is not completed after refrigerant that was added on the additional refrigerant 30 minutes, perform the additional refrigerant charging charge label provided with the unit and attach it on the operation again. -
Page 31: Connecting The Water Piping
6 Installation Connecting the water piping Connecting the electrical wiring 6.8.1 About connecting the water piping 6.9.1 Precautions when connecting electrical wiring Before connecting the water piping DANGER: RISK OF ELECTROCUTION Make sure the outdoor and indoor units are mounted. Typical workflow WARNING Connecting the water piping typically consists of the following... -
Page 32: Field Wiring: Overview
6 Installation NOTICE NOTICE Do NOT install a phase advancing capacitor, because this ▪ Be sure to keep the power line and transmission line unit is equipped with an inverter. A phase advancing apart from each other. Transmission wiring and power capacitor will reduce performance and may cause supply wiring may cross, but may not run parallel. -
Page 33: To Route And Fix The Transmission Wiring
6 Installation In case of heat pump mode Tightening torque for the transmission wiring terminal screws: Screw size Tightening torque (N•m) M3.5 (A1P) 0.8~0.96 In case of heat recovery mode TO IN/D UNIT TO OUT/D UNIT TO MULTI UNIT F2 Q1Q2 F1 F2 F1 F2 F1 F2 F1 F2 TO IN/D... -
Page 34: To Route And Fix The Power Supply
6 Installation Screw size Tightening torque (N•m) M8 (power terminal block) 5.5~7.3 M8 (ground) NOTICE Liquid pipe Recommendations when connecting the earth wire: Gas pipe Finishing tape Wire it so that it comes through the cut out section of the High pressure/low pressure gas pipe cup washer. -
Page 35: Configuration
7 Configuration Multifunction outputs The control line of the valve/pump should be connected to the X2M connector in the electrical switchbox. To connect the valve/pump to To monitor the outdoor unit operation or trigger field supplied the outdoor unit, also provide a separate 12 V DC power supply equipment connected to the outdoor unit, this RWEYQ*T9, series is (with an output power of at least 50 mW) to the X2M connector. -
Page 36: Field Setting Components
7 Configuration ▪ "7.2.2 Field setting components" on page 36 ▪ "7.2.3 To access the field setting components" on page 36 PC configurator For VRV IV heat recovery system it is alternatively possible to make several commissioning field settings through a personal computer interface (for this, option EKPCCAB is required). The installer can prepare the configuration (off-site) on PC and afterwards upload the configuration to the system. -
Page 37: To Use Mode 1
7 Configuration Access Action What Mode 1 Push BS1 one time. Changing and accessing Once mode 2 is selected (push BS1 for the setting in mode 2 more than 5 seconds), you can select 7‑segment display indication changes to: the wanted setting. It is done by pushing BS2. -
Page 38: Mode 2: Field Settings
7 Configuration When the latest malfunction codes were reset by accident on an [1‑0] Description indoor unit user interface, they can be checked again through this No indication Undefined situation. monitoring settings. Outdoor unit is master unit. For the content or reason behind the malfunction code see Outdoor unit is slave 1 unit. - Page 39 7 Configuration [2‑20] Description [2‑30] Power consumption limitation (approximately) Activated. To stop the manual additional refrigerant charge operation (when the required additional [2‑31] refrigerant amount is charged), push BS3. If Power consumption limitation level (step 2) via the external control this function was not aborted by pushing BS3, adaptor (DTA104A61/62).
-
Page 40: To Connect The Pc Configurator To The Outdoor Unit
8 Commissioning If the unit internal temperature is higher than the zero energy Commissioning typically consists of the following stages: dissipation setting temperature, the zero energy dissipation control Checking the "Checklist before commissioning". will start and cool down the unit. Performing a test run. -
Page 41: About Test Run
8 Commissioning Earth wiring Water circuit Be sure that the earth wires have been connected Make sure that the water circuit is filled. properly and that the earth terminals are tightened. Water flow Insulation test of the main power circuit Make sure that the calculated water flow rate can be Using a megatester for 500 ... -
Page 42: Correcting After Abnormal Completion Of The Test Run
9 Maintenance and service Step Description Overview: Maintenance and Pipe length check service Refrigerant amount check This chapter contains information about: Pump down operation ▪ Preventing electrical hazards when maintaining and servicing the Unit stop system Note: During the test operation, it is not possible to stop the unit ▪... -
Page 43: About Service Mode Operation
To recover refrigerant Daikin website (publicly accessible). This should be done by a refrigerant reclaimer. Follow the same ▪ The full set of latest technical data is available on the Daikin procedure as for vacuuming method. extranet (authentication required). DANGER: RISK OF EXPLOSION 12.1... -
Page 44: Technical Data
12 Technical data ≥500 ≥500 ≥20 ≥20 ≥20 ≥20 ≥20 ≥20 ≥900 ≥900 (mm) ≥300 (mm) Front side INFORMATION Further specifications can be found in the technical engineering data. Installer and user reference guide RWEYQ8~14T9V1B + RWEYQ8~14T9Y1B VRV IV water-cooled system air conditioner 4P452191-1 –... -
Page 45: Piping Diagram: Outdoor Unit
12 Technical data 12.3 Piping diagram: Outdoor unit SENPH SENPL 4D108945A Charge port Oil separator Stop valve (with service port ∅7.9 mm flare Accumulator connection) Cooling water inlet Compressor Cooling water outlet Charge port / Service port Double tube heat exchanger Filter Liquid receiver Check valve... -
Page 46: Wiring Diagram: Outdoor Unit
13 About the system F1S (A2P) Surge arrestor 12.4 Wiring diagram: Outdoor unit F1U (A4P) Fuse (T, 3.15 A, 250 V) The wiring diagram is delivered with the unit, located at the inside of F401U (A2P) Fuse (T, 6.3 A, 250 V) the service cover. F402U (A2P) Fuse (T, 6.3 A, 250 V) Notes to go through before starting the unit... -
Page 47: System Layout
14 User interface Water system 13.1 System layout Heat recovery system Unit Connection to refrigerant system Water piping Dry cooler Brine loop Closed cooling tower Boiler User interface CAUTION Never touch the internal parts of the controller. Do not remove the front panel. Some parts inside are dangerous to touch and appliance problems may happen. -
Page 48: Operation Range
16 Operation ▪ Fan only operation (air to air). In case of Then ▪ Heating and cooling (air to water). RWEYQ8~14 single The indoor unit will stop fan operation, the models refrigerant cycle will reverse and energy ▪ Domestic hot water operation from inside the building will be used to Dedicated functions exist depending on the type of indoor unit, refer defrost the outdoor unit coil. -
Page 49: Using The Dry Program
16 Operation Cooling operation Heating operation Fan only operation 16.3.3 To use the dry program (WITH cool/heat changeover remote control switch) To start 1 Select cooling operation mode with the cool/heat changeover remote control switch. 2 Press the operation mode selector button on the user interface several times and select (program dry operation). -
Page 50: Setting The Master User Interface
17 Energy saving and optimum operation ▪ Ventilate often. Extended use requires special attention to NOTICE ventilation. ▪ The movable limit of the flap is changeable. Contact ▪ Keep doors and windows closed. If the doors and windows remain your dealer for details. (only for double-flow, multi-flow, open, air will flow out of your room causing a decrease in the corner, ceiling-suspended and wall-mounted). -
Page 51: Available Comfort Settings
18 Maintenance and service provided in the installation/operation manuals of dedicated indoor 17.2 Available comfort settings units. Make sure to install cleaned air filters back in the same position. For each of above modes a comfort level can be selected. The comfort level is related to the timing and the effort (energy ▪... -
Page 52: Recommended Maintenance And Inspection
19 Troubleshooting 18.4.2 Recommended maintenance and NOTICE inspection ▪ The table indicates main components. Refer to your maintenance and inspection contract for more details. Since dust collects when using the unit for several years, ▪ The table indicates recommended intervals performance of the unit will deteriorate to some extent. -
Page 53: Error Codes: Overview
19 Troubleshooting WARNING 19.2 Symptoms that are NOT system Stop operation and shut off the power if anything malfunctions unusual occurs (burning smells etc.). The following symptoms are NOT system malfunctions: Leaving the unit running under such circumstances may cause breakage, electric shock or fire. Contact your dealer. 19.2.1 Symptom: The system does not operate The system must be repaired by a qualified service person:... -
Page 54: Symptom: White Mist Comes Out Of A Unit (Indoor Unit, Outdoor Unit)
20 Relocation ▪ Immediately after the cooling operation stops and if the room 19.2.15 Symptom: The display shows "88" temperature and humidity are low. This is because warm This is the case immediately after the main power supply switch is refrigerant gas flows back into the indoor unit and generates turned on and means that the user interface is in normal condition. - Page 55 Optional equipment Equipment made or approved by Daikin that can be combined with the product according to the instructions in the accompanying documentation. Field supply Equipment not made by Daikin that can be combined with product according instructions accompanying documentation.
- Page 56 4P452191-1 0000000K 4P452191-1 2017.04...
Need help?
Do you have a question about the RWEYQ8T9Y1B and is the answer not in the manual?
Questions and answers