Advertisement
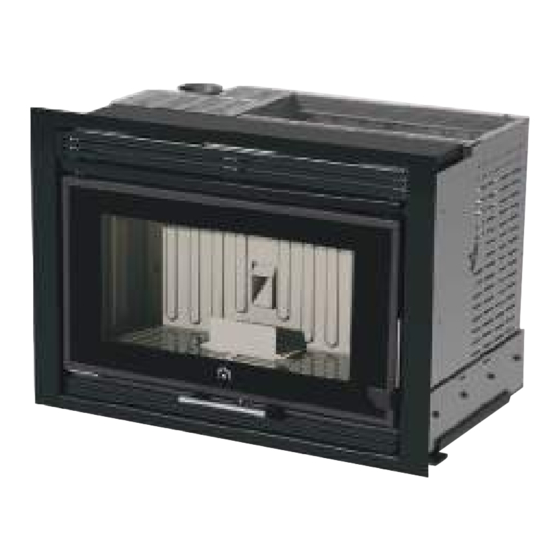
PELLKAMIN 8 - 10
Inserto a pellet - Wood pellet insert
Insert à pellet - Insertable de pellet
Pellets-Einsatz - Pellet-inbouwhaard
Indsats til pillebrændeovne - Inserível a pellet
I
Installazione, uso e manutenzione
UK
Installation, use and maintenance
F
Installation, usage et maintenance
E
Instalación, uso y mantenimiento
D
Installations-, Betriebs- und Wartungsanleitung
NL
Installatie, gebruik en onderhoud
DK
Installation, brug og vedligeholdelse
P
Instalação, uso e manutenção
GR
Εγκατάσταση, χρήση και συντήρηση
Κασέτα pellet
- 1
-
pag.
2
pag. 31
pag. 60
pag. 89
pag. 118
pag. 147
pag. 176
pag. 205
σελ. 234
Advertisement

Subscribe to Our Youtube Channel
Related Manuals for EdilKamin PELLKAMIN 8


Summary of Contents for EdilKamin PELLKAMIN 8
- Page 1 PELLKAMIN 8 - 10 Inserto a pellet - Wood pellet insert Insert à pellet - Insertable de pellet Pellets-Einsatz - Pellet-inbouwhaard Indsats til pillebrændeovne - Inserível a pellet Κασέτα pellet Installazione, uso e manutenzione pag. Installation, use and maintenance pag. 31 Installation, usage et maintenance pag.
-
Page 2: Table Of Contents
WOOD PELLET FIREPLACE, trademark EDILKAMIN, called PELLKAMIN Year of manufacture: Ref. Data nameplate Declaration of performance (DoP - PELLKAMIN 8: EK 130 - PELLKAMIN 10: EK 124): Ref. data tag plate In addition, it is hereby declared that: the wood pellet fireplace PELLKAMIN is in compliance with the... - Page 3 - Commissioning/ testing Commissioning and testing must be performed by an authorized Edilkamin Technical Assistance Centre. Failure to do so will void the warranty. Commissioning, as specified in standard UNI 10683 consists in a series inspections to be performed with the insert installed in order to ascertain the correct operation of the system and its compliance to applicable regulations.
-
Page 4: Safety Information
• Make sure the insert is installed and ignited the first time maintenance or by repeatedly pressing the ignition button wi- by Edilkamin-qualified CAT personnel (technical assistan- thout having emptied the crucible. ce centre) in accordance with the instructions provided here •... -
Page 5: General Information
GENERAL INFORMATION PRINCIPLE OF OPERATION PELLKAMIN is an insert that uses pellets as fuel. Combustion is electronically managed. The combustion chamber is made with steel perimeter structure covered, at the back, with a cast-iron panel and closed, at the front, with a ceramic glass door (use the thermal glove pro- vided when opening). - Page 6 GENERAL INFORMATION • ELECTRONIC EQUIPMENT LEONARDO is a combustion safety and control system which allows optimal performan- ce in all conditions thanks to two sensors measuring the pressure level in the combustion chamber and smoke temperature. The detection of and subsequent optimisation of these two parameters is continuous in order to correct operation anomalies in real time.
- Page 7 GENERAL INFORMATION FRONT PELLKAMIN 8 FRONT PELLKAMIN 10 presa aria esterna Ø 40 mm BACK uscita fumi Ø 80 mm Combustion air presa aria esterna Ø 40 mm Ø 40 mm presa aria esterna Ø 40 mm SYSTEM SIDE Smoke outlet uscita fumi Ø...
- Page 8 Vac. Power variations greater than 10% can cause problems for the product. The above data are indicative and are those resulting during certification on the part of the notified body. EDILKAMIN s.p.a. reserves the right to change the products at its discretion without notice. SAFETY DEVICES •...
- Page 9 The power line must have a suitable cross-section for the insert’s power. An inadequate earthing system can cause anomalies for which Edilkamin cannot be held liable. Power variations greater than 10% can cause problems for the product.
-
Page 10: Installation
INSTALLATION SMOKE OUTLET The insert must have its own smoke outlet (the smoke can- not be discharged into a smoke flue used by other devices). Smoke discharge takes place from the mouth on the cover, measuring 8 cm in diameter. The smoke outlet must be connected to outside by means of suitable steel pipes EN 1856 certified. - Page 11 INSTALLATION The insert is supplied with a base plate (A) complete with smoke duct (B) and primary air duct (C). The insert can be removed for loading pellets (OPERATION TO BE PERFORMED WITH THE INSERT TURNED OFF) and for any maintenance or cleaning by an Authorised Technical Assistance Centre.
- Page 12 INSTALLATION EXTRACTION OF THE INSERT To extract the insert, proceed as follows: CAUTION: BEFORE PROCEEDING, MAKE SURE THAT THE IN- SERT IS FIXED TO THE BASE fig. 5 • Open the door and lift the slide lock (F – Fig. 5). •...
- Page 13 INSTALLATION INSTALLATION OF THE PELLET LOADER KIT (Optional) N.B.: THE PELLET LOADER KIT ALLOWS PELLETS TO BE LOADED IN THE HOPPER FROM THE FRONT WITHOUT HAVING TO TURN OFF THE INSERT. The insert is already prepared for the installation of the pellet loader on the mantel.
- Page 14 INSTALLATION Note: • The loading mouth can be installed on the front, on the right side of the mantel. • Shortening the pellet loading tube (supplied with a length of 80 cm), depending on the position of the hearth, is man- datory so that it stays taut, in order to facilitate the pellets dropping into the hopper.
- Page 15 INSTALLATION DIAGRAM FOR MAKING THE FIXING SLOT OF THE INLET WITH PELLET LOADING DOOR (approximate measurements) RIGHT FRONT SIDE - 43...
- Page 16 INSTALLATION INSTALLATION OF THE PELLET FRONT LOADING DRAWER KIT (optional) N.B.: THE INSTALLATION OF THE PELLET FRONT LOADING DRAWER ALLOWS PELLETS TO BE LOAD- ED IN THE HOPPER FROM THE FRONT WITHOUT HAVING TO TURN OFF THE INSERT. The insert is already prepared for the installation of the pellet front loading drawer complete with vent surround frame.
- Page 17 INSTALLATION • Mount the vent surround frame (R – Fig. 19-20) supplied with the pellet loading drawer, in place of the one previously fig. 19 removed. fig. 20 • Refit the slotted-in upper grille (N – Fig. 21), the lower grille (O –...
- Page 18 40) Edilkamin will therefore not be held liable for any charges deriving from both demolition and reconstruction works, In addition to the above, always consider the indications even where consequent to replacement of any faulty insert given by paragraphs 4.4 and 4.7 of standard UNI 10683...
- Page 19 INSTALLATION OPTIONAL BASE Place the bottom of the base (1 - Fig. 25) in the selected posi- tion. Provide a power outlet on the back of the insert, so that it is accessible once installation is complete. Secure the lower part of the base to the floor with 8-mm diam- eter steel anchors in order to prevent it from tipping over.
-
Page 20: Instructions For Use
INSTRUCTIONS FOR USE Commissioning must be done by a Technical Service Centre authorised by Edilkamin (CAT) prior to ignition and testing according to the UNI 10683/2012 standard. This standard indicates the control operations to be carried out, aimed at ascertaining correct system function. - Page 21 INSTRUCTIONS FOR USE REMOTE CONTROL This controls all the functions. Key to buttons and display: : to turn off and on (to go from remote control on stand-by to remote control on) +/- : to increase/decrease the various regulations : to select Automatic function : to select Manual function and access the control and programming menus - icon flashing: remote control searching for network - icon fixed: remote control with connection enabled...
- Page 22 INSTRUCTIONS FOR USE Filling the cochlea. OPERATIONS THAT CAN ONLY BE CARRIED OUT BY The first time you use the product, or should the tank be com- REMOTE CONTROL pletely emptied of pellets, to fill the coclea press both keys “+” Clock regulation Press and hold the key “M”...
- Page 23 1 to point 5. ted and loading therefore needs correcting. Should this correction not suffice, contact the Edilkamin-autho- SIMPLIFIED LIGHTING BUTTON If the radio remote control device does not work, you can carry rised Dealer, to establish the new operating axis.
-
Page 24: Maintenance
MAINTENANCE Before performing any maintenance, disconnect the ap- pliance from the mains. Regular maintenance is required for the insert to function correctly. Any problems resulting from lack of maintenance will im- mediately void the warranty. DAILY MAINTENANCE Operations must be performed when the stove is off, cold and unplugged from the power supply •... - Page 25 MAINTENANCE SEASONAL MAINTENANCE (implemented by the DEALER) Consists of: • Clean the stove internally and externally • Clean the discharge pipes inside the slotted-in upper grille thor- oughly (6 – Fig. C) (Take care not to overtighten the bolt securing the top grille and deform it;...
-
Page 26: Possible Troubleshooting
POSSIBLE TROUBLESHOOTING In the event of problems the PELLKAMIN stops automatically and runs the shutdown process and the display shows text regarding the motivation of the shutdown (see the various alarms below). Never pull the plug during shutdown on account of malfunction. Should it block, to restart the insert you will need to allow the turn-off procedure to take place (600 seconds with audible signal), and then press the button Do not turn the stove on again before checking the cause of the malfunction and CLEANING/ EMPTYING the crucible. - Page 27 POSSIBLE TROUBLESHOOTING 9) Problem: Remote control not working Actions: • Move closer to the insert • check the battery and if necessary, replace it. • Synchronisation with automatic search on activation: when you put the batteries into the radio control a radio channel search phase will start up automatically, and it will subsequently connect to the product de- tected.
- Page 28 CHECK LIST To be integrated with a complete reading of the technical specifications Positioning and installing First ignition performed by authorised CAT who released the guarantee certificate • • Air vent in the room • Only the insert outlet passes through the smoke channel/chimney flue •...
-
Page 29: Notes
DATE AND STAMP ANY SERVICING ..................................................................................................................................................DATE AND STAMP SEASONAL MAINTENANCE ..................................................................................................................................................DATE AND STAMP DEALER ...................................... DATE AND STAMP CAT....................................... For further clarification or requirements, visit our website www.edilkamin.com NOTES: - 57... - Page 32 w w w . e d i l k a m i n . c o m cod. 941198-GB 12.17/H - 254...
Need help?
Do you have a question about the PELLKAMIN 8 and is the answer not in the manual?
Questions and answers