
Subscribe to Our Youtube Channel
Related Manuals for Odorox Slimline


Summary of Contents for Odorox Slimline
- Page 1 Owners Manual Distributed By Bio-Shine dba. OdoroxAir Slimline™ Hydroxyl Unit 190 Summerhill Road | Spotswood NJ 08884 | (732) 25 251-9506 ext. 211 odoroxair@bio-shine.com | www.OdoroxAir.com...
-
Page 2: Table Of Contents
TABLE OF CONTENTS Table of Contents SAFETY INFORMATION ................................. 1 PACKAGE CONTENTS ................................... 5 SYSTEM PLACEMENT ..................................6 WALL-MOUNT INSTRUCTIONS ..............................7 OPERATING GUIDELINES ................................13 OPERATING INSTRUCTIONS ..............................14 CARE INSTRUCTIONS ..................................15 OPTIC REPLACEMENT INSTRUCTIONS ..........................16 FILTER CLEANING & REPLACEMENT ..........................17 SPECIFICATIONS, REPLACEMENT PARTS AND LIMITED WARRANTY .............. -
Page 3: Safety Information
• Use generator only for intended use as described in this manual. Any other use not recommended by the manufacturer may cause fire, electric shock, or injury to persons. The use of attachments not recommended may cause hazards. • INDOOR USE ONLY! Odorox Slimline ®... - Page 4 SAFETY INFORMATION Safety Information • NEVER block the air openings, grills/outlets or place on a soft surface such as a bed or sofa, as this could cause the unit to tip over, blocking the Air Intake Opening/Grill. • Keep unit away from heated surfaces and open flames. •...
- Page 5 (finished wood, plastic or concrete) cracks or in hard-to-reach areas where beads may can be cleaned following this guidance. Porous be hidden or trapped. Check a wide area beyond surfaces or fabric-covered items (upholstery, the spill. Odorox Slimline ®...
- Page 6 SAFETY INFORMATION • Use the eyedropper to collect mercury beads airing, items that are washable can then be and place them in the plastic bag. Hold the laundered. eyedropper at an angle to draw the mercury into • Dispose of contaminated items properly! the tip.
-
Page 7: Package Contents
PACKAGE CONTENTS Package Contents 1) Odorox® Slimline Hydroxyl 2) Two base brackets Generator w/Control Panel 3) Four 8-32 x 3/4 inch Phillips 4) One 0.05 inch hex key (Star) machine screws 5) One Owner’s Manual Odorox Slimline ®... -
Page 8: System Placement
INSTALLATION INSTRUCTIONS System Placement There are two options available when considering system placement: OPTION ONE: PORTABLE FLOOR STAND The Slimline may be used as a portable, free-standing unit, with the use of the enclosed base brackets (see Figure 1) OPTION TWO: WALL-MOUNT The Slimline may be installed to a wall (see “Wall-Mount Installation Instructions”... -
Page 9: Wall-Mount Instructions
STEP 2: DO NOT locate Hydroxyl Generator behind a door, furniture, drapes, etc., Where the air flow to the unit would be restricted. STEP 3: DO NOT connect Hydroxyl Generator to dimmer switch or speed control. STEP 4: Please read specification label on product for further information and requirements. Odorox Slimline ®... - Page 10 WALL-MOUNT INSTALLATION Wall-Mount Installation PLAN THE INSTALLATION STEP 1: Carefully unpack Slimline and remove from plastic. STEP 2: Remove four screws on side of unit, then tilt and pull cover. STEP 3: Disconnect speed control/cover from main unit by means of the ‘quick connect’ and set aside on a clean surface.
- Page 11 • Gently ‘wiggle’ connector while pulling from lamp base. • Gently pull lamp from three lamp supports. • DO NOT put any pressure on side of lamp with no support. • Temporarily store lamp in a safe, clean location. Odorox Slimline ®...
- Page 12 STEP 8: Determine the desired installation location. This location must conform to the Warnings and Caution instructions discussed earlier. This Slimline unit must be anchored securely to a wall or ceiling. The mounting screw locations are designed for standard wood/metal framing with studs on 16 inch centers. Using the back panel as a template, mark the screw locations onto the mounting surface so that unit can be screwed directly to the main studs.
- Page 13 Note: Lamp connector is keyed. If unable to connect lamp connector with lamp base, rotate lamp connector 180 degrees and try again. • Ensure lamp connector and lamp base are firmly pressed together. Odorox Slimline ®...
- Page 14 Gently lower the bottom of the cover until all four screw holes line up. Secure cover with four screws removed in Step 2. Maintain pressure on cover while installing four screws to avoid cross- threading. STEP 18: Turn on electrical service. STEP 19: Turn on Slimline Hydroxyl Generator and set for desired airflow. Owner’s Manual...
-
Page 15: Operating Guidelines
OPERATING GUIDELINES Operating Guidelines The Slimline™ unit is designed for smaller spaces where a portable or wall-mounted unit is sought. It is ideal for offices and schools, senior living, conference and waiting rooms, and other commercial applications that are seeking to sanitize and deodorize indoor spaces. -
Page 16: Operating Instructions
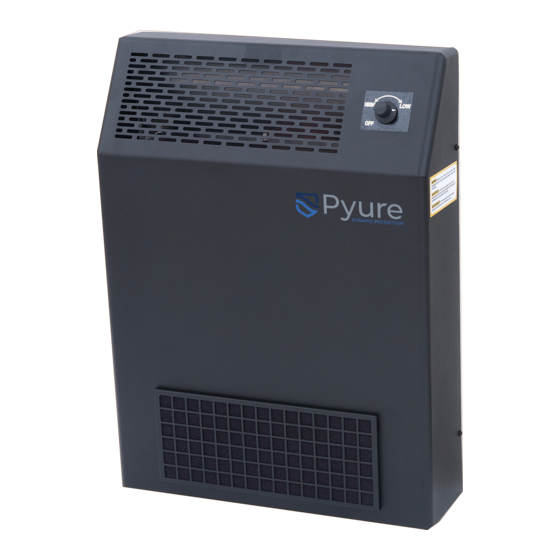
OPERATING INSTRUCTIONS Operating Instructions POWER ON The main power for the Slimline can be switched on by turning the rotary switch clockwise. POWER OFF The main power for the Slimline can be switched off by turning the rotary switch counter clockwise to the “Off”... -
Page 17: Care Instructions
SYSTEM CASE CLEANING Exterior The exterior of the Slimline can be cleaned with mild dishwashing detergent and a clean damp cloth. DO NOT use any all-purpose cleaners with harsh detergents or abrasives, as these may damage the decals and the exterior finish. -
Page 18: Optic Replacement Instructions
Instructions Warning: DISCONNECT the unit from the electrical power source before performing any maintenance or cleaning on the Slimline™ Unit. Caution: Optics contain Mercury. Read and follow the Safety Information on pages 2 and 3 of this manual when handling the optics in the Slimline™... -
Page 19: Filter Cleaning & Replacement
REPLACEMENT Warning: DISCONNECT the unit from the electrical power source before performing any maintenance or cleaning on the Slimline™ Unit. STEP 1: Turn Main Power switch to the “Off” position STEP 2: Unplug power cord from the electrical receptacle, or turn off electrical breaker if unit is hard-wired... -
Page 20: Specifications, Replacement Parts And Limited Warranty
For a list of authorized dealers in your area, please visit www.pyureco.com Limited Warranty The Pyure Company warrants that this Slimline (excluding spare parts and consumables) shall be free from defects in workmanship or materials for a period of two (2) years from the date of purchase. - Page 21 PLEASE KEEP THIS PART FOR YOUR RECORDS Serial #: Model #: Date of Purchase: Vendor Name: The PYURE Company 2055 High Ridge Road Boynton Beach, FL 33426 (561) 735-3701 www.pyureco.com Complete below and reverse side. Tear along perforation and mail to The PYURE Company within 60 days of purchase. You may also visit www.pyureco.com and register your warranty on-line.
- Page 22 The PYURE Company (“PYURE”) warrants that the product set forth below will be free from defects in materials and workmanship for the period of two (2) years from the date of original purchase under the following terms and conditions: To obtain service under this warranty, send or deliver this product within the warranty period together with the warranty certificate to any PYURE regional office or PYURE authorized warranty service center.
-
Page 23: Limited Use End-User License Agreement
Company retains all title, copyrights, and other intellectual property rights in the Licensed PYURE Software and any copies thereof. You may use a copy of the Licensed PYURE Software with any Odorox® product for which you have accepted the terms of this EULA. - Page 24 LIMITED USE END-USER LICENSE AGREEMENT OR ANY DAMAGES WHATSOEVER (INCLUDING, WITHOUT LIMITATION, DAMAGES FOR LOSS OF BUSINESS PROFITS, BUSINESS INTERRUPTION, LOSS OF BUSINESS INFORMATION, LOSS OF SAVINGS, OR ANY OTHER PECUNIARY LOSS) ARISING OUT OF THE USE OF OR INABILITY TO USE THE LICENSED PYURE SOFTWARE PRODUCT, OR FOR PROVISION OF OR FAILURE TO PROVIDE SUPPORT SERVICES, EVEN IF THE PYURE COMPANY HAS BEEN ADVISED OF THE POSSIBILITY OF SUCH DAMAGES.
- Page 25 Need Support? Contact our support team 190 Summerhill Road | Spotswood NJ 08884 | (732) 25 251-9506 ext. 211 odoroxair@bio-shine.com | www.OdoroxAir.com...
Need help?
Do you have a question about the Slimline and is the answer not in the manual?
Questions and answers