
Related Manuals for Reely GeNii Mini RtF


Summary of Contents for Reely GeNii Mini RtF
- Page 1 Operating Instructions GPS Drone GeNii Mini RtF Item No. 2280967 Item No. 2282654 Super Combo WARNING Read the safety instructions before using the product!
-
Page 2: Table Of Contents
Table of contents Intended use ................................4 Know the aircraft ..............................5 2.1 Components ..............................5 2.2 Flight Status Indicator Lights .........................6 Know the remote controller ..........................7 3.1 Components ..............................7 3.2 Indicator lights ..............................8 3.3 Using the mobile support ..........................9 4. Before flying ...............................10 4.1 Charging the aircraft battery ........................10 4.2 Installing (and removing) the flight battery ....................10 4.3 Getting the remote controller ready ...................... - Page 3 6.8 Flying – Using flight modes ..........................27 6.9 Flying – When safety features take over .....................29 6.10 Flying – Using waypoints ...........................30 6.11 Taking photos and recording video ......................31 7. Maintenance ..............................34 7.1 Pairing aircraft and remote controller ......................34 7.2 Calibrating the compass ..........................34 8. Technical data ..............................36 8.1 General ................................36 8.2 Drone ................................36 8.3 Remote control ............................36 8.4 Flight battery ..............................37 8.5 Balance charger (for drone battery charging) ....................37 8.6 App ................................37 Disposal ................................37 9.1 Product ................................37 9.2 (Rechargeable) batteries ..........................37...
-
Page 4: Intended Use
1. Intended use The product is a ready to fly remote controlled quadcopter with camera. It is suitable for persons aged 16 years or older. The product can be controlled with the remote controller or with the mobile app. Use the mobile app to display real time flight data. It can be used indoors and outdoors under moderate wind conditions. Contact with moisture must be avoided under all circumstances. For safety and approval purposes, you must not rebuild and/or modify this product. If you use the product for purposes other than those described above, the product may be damaged. In addition, improper use can result in short circuits, fires, electric shocks or other hazards. All company names and product names are trademarks of their respective owners. All rights reserved. Google Play and the Google Play logo are trademarks of Google LLC. App Store is a service mark of Apple Inc. -
Page 5: Know The Aircraft
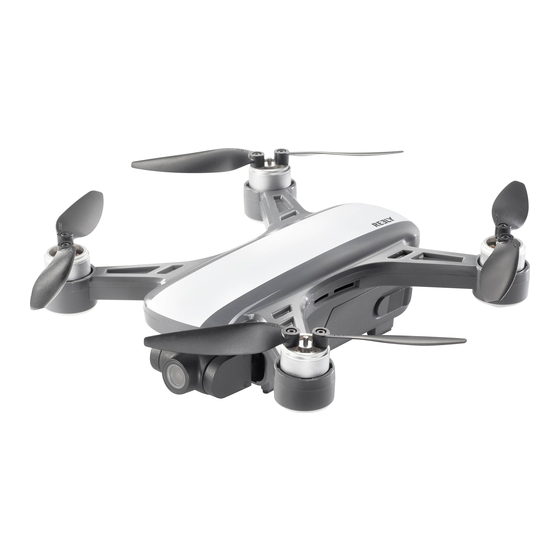
2. Know the aircraft 2.1 Components 1 Propeller 2 Gimbal Camera 3 Flight Status Indicator Light 4 Optical Positioning Status Indicator Light 5 Motor 6 Power button 7 Memory Card Slot 8 Micro USB Interface (for manufacturer only) 9 Aircraft Battery... -
Page 6: Flight Status Indicator Lights
2.2 Flight Status Indicator Lights Rear indicator lights (Quadcopter) Status indication Solid blue light on start-up Self-inspection • Remote controller and aircraft are paired Solid green light • GPS is located • Remote controller and aircraft is paired Flashing green light • GPS is not located Blue and red light flashing alternately Horizontal calibration process Red and green light flashing alternately Vertical calibration process Flashing blue light... -
Page 7: Know The Remote Controller
3. Know the remote controller 3.1 Components a Antenna f Left Joystick k Mobile Phone Bracket b Flight Mode Switch g Right Joystick USB Charge Port c One Key Return h Power m Gimbal Adjustment d Mode Indicator One Key Take Off/Land e Status Indicator Picture/Video... -
Page 8: Indicator Lights
3.2 Indicator lights 3.2.1 Charging Indicator light Status indication Blinking green Charging Solid green Charging completed 3.2.2 In operation Indicator light Sound Status indication Solid green light Working normally. Low battery warning. Slowly flashing red light B-B-B... Immediately charge the battery. Battery level critically low. Quickly flashing red light B-B-B... Remote controller turns off when the sound stops. Solid red light Serious error Double-flashing green BB-BB-... -
Page 9: Using The Mobile Support
3.3 Using the mobile support Step 1 Step 2 Install the mobile phone support in the slot of the back Pull the support up. of the remote controller. Step 3 Step 4 Put the mobile device on the mobile support. Adjust support and mobile phone to the right angle. -
Page 10: Before Flying
4. Before flying 4.1 Charging the aircraft battery WARNING • Make sure you have read and understood the safety instructions related to batteries. • Charge batteries in a well-ventilated environment and keep away from heat sources. • Do not charge batteries next to flammable or on the surface of electro-conductive objects. • Monitor batteries while they are charging. 1. Connect the USB charging cable to the flight battery charger. 2. Connect the end of the charging cable to a USB power supply. CAUTION! Do not charge on a computer USB port. 3. Insert the aircraft battery into the charger as shown below. Indications Blinking green light (Insert a battery) Blinking red light (Charging) Solid green light (Battery fully charged) 4.2 Installing (and removing) the flight battery Installing Removing Push the battery into the battery compartment until it... -
Page 11: Getting The Remote Controller Ready
4.3 Getting the remote controller ready If you intend to control the aircraft with the mobile app, you do not need to ready the remote controller. 4.3.1 Checking the battery level On the remote controller, press the <power> button for 2 seconds to turn it on. Observe the indicator light: Green solid: battery level is sufficient. Green blinking: battery level is low. Charge the battery. See 4.3.2 Charging the battery. 4.3.2 Charging the battery Warning: Disconnect the charging cable before using the remote controller. Indicator Light USB charging cable Household power socket USB adapter Indications Blinking green light (Charging) Solid green light (Battery fully charged) 4.4 Installing an SD card for media storage Picture and videos are saved to the SD card for storage. -
Page 12: Flying With The Remote Controller
5. Flying with the Remote controller 5.1 Introduction • You can take off and land manually or by using the one-key program. • You can select between different flight modes. • You can use the Return-To-Home function to let the aircraft return to the starting position automatically. • Use the mobile app to monitor the real-time image and video footage and the flight status of the aircraft. 5.2 Understanding the controls Mode 2 Left Joystick Ascend Right Joystick Forward Descend Backward Left Rotation Right Rotation Left Right Mode 1 Right Joystick Ascend Left Joystick... -
Page 13: Flying - Getting Ready For Take-Off
5.2.1 Switching modes (Mode 1/Mode2) 1. Initiate mode switching: - For Mode 2: Move the left joystick to the lowest position and hold down the <One Key Takeoff/Landing> button at the same time. - For Mode 1: Toggle the right joystick to the lowest position and hold down the <Photo/Video> button at the same time. 2. While holding down the button from step 1, turn on the remote controller by pressing the <Power> button until you hear a beep sound. 3. Release the joystick. The mode is changed. 5.3 Flying – Getting ready for take-off Requirements • The flight battery and the remote controller battery are fully charged. • You understand what the controls do. 5.3.1 Powering on and initializing the aircraft WARNING Always power on the remote controller before you turn on the aircraft to prevent accidents. -
Page 14: Flying - Taking Off
5.3.2 Linking mobile app and remote controller Requirements • Your mobile device can connect to 5 GHz Wi-Fi networks. • You have installed the mobile app GeNii Mini (scan QR code to the right or download it from the respective app store). • (Recommended) You have installed the mobile support on the remote con- troller. Link mobile device and remote controller: 1. Turn on Wi-Fi on your mobile device. 2. Select the Controller-xxxxxx (serial number) network to link your mobile device. Open the app and select Start Flying to enter the operation interface. Note: It can take a while for the Start button to show. -
Page 15: Flying - Landing
5.4.1 Taking off via the one-key program 1. Hold down the <One Key Takeoff/Land> button for 2 to 3 seconds. When the remote controller beeps steadily, the aircraft will automatically take off and raise to an altitude of 1.2 meters and hover. 2. Control the aircraft with the joysticks. 5.4.2 Taking off manually 1. Start the motors by fully pushing the left and right joysticks outward into their bottom corners and holding them there for at least 3 seconds. 2. Use the throttle joystick to take off. 3. Control the aircraft with the joysticks. 5.5 Flying – Landing NOTICE Prevent product damage: • Choose an open and flat space as your landing site. • Be aware of obstacles and ensure the aircraft is hovering over the landing site before landing. CAUTION After landing, stay away from the aircraft until the propellers have stopped rotating to avoid injury. -
Page 16: Flying - Switching Off
5.6 Flying – Switching off WARNING Always turn off the aircraft before you turn off the remote controller to prevent accidents. After the aircraft has landed and the propellers have stopped rotating do the following: 1. On the aircraft, hold down the <Power> button until the lights go out. 2. On the remote controller, hold down the <Power> button until you hear a beep and the lights go out. 3. Remove the battery from the aircraft and let it cool down. DANGER! Keep the battery out of the reach of children. 5.7 Flying – Using Return-To-Home 5.7.1 Introduction Return-To-Home is a flight assistance feature: it returns the aircraft to base automatically. This is useful in case you lose control or sight of the aircraft. How it works after activation: • if the aircraft flies below 30 meters, the aircraft will automatically ascend to 30 meters before returning home. • if the aircraft flies above 30 meters, the aircraft will return home at the current altitude. 5.7.2 Activating Activate and use the Return-To-Home function as follows: 1. In Position Flight Mode, press the <One Key Return> button to activate Return-To-Home. - A continous buzzer sounds. -
Page 17: Flying - Using Flight Modes
Remember • Use the Position Flight Mode in combination with Return-To-Home. • For Return-To-Home to work, the aircraft must be able to record the GPS coordinates before take off, and be receiving a good quality GPS signal. • Keep your flying path free of obstacles to avoid accidents. Fly the aircraft in open flat terrain (no tall buildings within a 50 meter radius and flat terrain within a 10 meter radius). 5.8 Flying – Using flight modes 5.8.1 Position flight mode This mode is suitable for beginner pilots. It uses GPS to achieve accurate hovering, intelligent following and other assistance features. Remember • This mode supports Return-To-Home as long as the GPS coordinates are recorded before you take off. Activating Indicator lights Notes • It is the default mode after powering Left indicator light on the control- •... -
Page 18: Flying - When Safety Features Take Over
5.9 Flying – When safety features take over Built-in safety features protect the product and the pilot and automatically take over control when certain conditions are met. 5.9.1 When the aircraft battery runs out Condition Indication Action Battery is running out. • Status indicator light of the aircraft • Return-to-home is activated and turns slowly blinking red. cannot be disabled. • Alert on mobile app. Battery level is critically low. -
Page 19: Taking Photos And Recording Video
5.10 Taking photos and recording video NOTICE Prevent product damage: • Ensure the camera can rotate freely. • Exposure to high temperatures can damage the camera and even cause injury. 5.10.1 Aerial photography tips • Ensure a smooth flight. • Shoot on sunny and breezy days. • Take photos or videos when the drone is in Position Flight Mode. 5.10.2 Adjusting the camera angle For best results, tilt the camera upward or downward when taking photos or videos. On the remote controller, scroll the wheel to control the pitch angle. See below image. Scroll the button upward to tilt the camera upward. Scroll the button downward to tilt the camera downward. - Page 20 5.10.5 Using gestures to take pictures or record video 1. Bring the aircraft into hover position. 2. Enable in the mobile app. Gesture Recognition Remember • Face the drone camera. • Fly the drone in well-lit environment. • Ensure a strong WiFi signal. • Use gestures when you stay around 2 meters away from the drone camera. Victory gesture (picture) 1. Keep 2 meters from the drone and face the camera. 2. Raise one of your hands in front of you and make a V shape.
-
Page 21: Flying With The Mobile App
6. Flying with the Mobile app 6.1 Introduction • You can take off and land manually or by using the one-key program. • You can select between different flight modes. • You can use the Return-To-Home function to let the aircraft return to the starting position automatically. 6.2 Understanding the controls Mode 2 Left Joystick Ascend Right Joystick Forward Descend Backward Left Rotation Right Rotation Left Right Mode 1 Right Joystick Ascend Left Joystick Forward Descend... -
Page 22: Flying - Getting Ready For Take-Off
6.2.1 Switching modes (mode 1 / mode 2) The default setting is Mode 2. Enter General Settings in the mobile app to switch the control mode: • Left hand: Mode 2 (default) • Right hand: Mode 1 6.2.2 Controlling by gravitation With gravitational control enabled in the app you can control the aircraft by tilting your mobile device. Requirements • Your mobile device must support/has G-sensors. • The aircraft is initialized and the mobile device linked. Go through section 6.3 Flying – Getting ready for take-off before you enable gravitational control. 1. In the mobile app, select to turn on gravitational control. 2. - Page 23 1. Put the aircraft on a flat surface. 2. Power on the aircraft: - Push the <Power> button once (1x), then hold down the <Power> button for 2 seconds (Fig. B). - The initializing tune plays. 3. Wait for the self-check to complete. - The procedure takes about 30 seconds. - When the indicator lights turn from flashing or solid blue to flashing or solid green the procedure is completed (Fig C). 6.3.2 Linking mobile app and aircraft Requirements • Your mobile device can connect to 5 GHz Wi-Fi networks. • You have installed the mobile app GeNii Mini (scan QR code to the right or download it from the respective app store). Link mobile device and aircraft: 1.
-
Page 24: Flying - Taking Off
6.4 Flying – Taking off Remember • When you turn on the aircraft the Position Flight Mode is activated by default. • It is highly recommended you only take off after the indicator light on the aircraft turns solid green (strong GPS signal). • Choose a wide and open flight environment. Tall buildings and metal materials may interfere with the com- pass and GPS equipment on the aircraft. • If you are a beginner you can enable Beginner mode in the mobile app, which only permits take-off when the GPS signal is sufficient. 6.4.1 Taking off via the one-key program 1. In the mobile app, tap on 2. Confirm the pop-up message to initiate automated take-off. Stay away from the aircraft during take-off. 3. Control the aircraft with the joysticks. 6.4.2 Taking off manually 1. -
Page 25: Flying - Landing
6.5 Flying – Landing NOTICE Prevent product damage: • Choose an open and flat space as your landing site. • Be aware of obstacles and ensure the aircraft is hovering over the landing site before landing. CAUTION After landing, stay away from the aircraft until the propellers have stopped rotating to avoid injury. 6.5.1 Landing via the one-key program 1. In the mobile app, tap on 2. Confirm the pop-up message to initiate landing. Stay away from the aircraft during landing. 6.5.2 Landing manually Use the throttle joystick to land . After the aircraft has landed, move the throttle to the lowest position and wait for the motors to turn off. -
Page 26: Flying - Using Return-To-Home
6.7 Flying – Using Return-To-Home 6.7.1 Introduction Return-To-Home is a flight assistance feature: it returns the aircraft to base automatically. How it works after activation: • if the aircraft flies below 30 meters, the aircraft will automatically ascend to 30 meters before returning home. • if the aircraft flies above 30 meters, the aircraft will return home at the current altitude. Remember • Use the Position Flight Mode in combination with Return-To-Home. • For Return-To-Home to work, the aircraft must be able to record the GPS coordinates before take-off, and be receiving a good quality GPS signal. • Keep your flying path free of obstacles to avoid accidents. Fly the aircraft in open flat terrain (no tall buildings within a 50 meter radius and flat terrain within a 10 meter radius). 6.7.2 Activating RTH button Confirmation box Forward/Backward Activate and use the Return-To-Home function as follows: 1. In Position Flight Mode, tab on to activate Return-To-Home. 2. Confirm the pop-up message to initiate returning home. - The aircraft does not react to joystick input as long as returning to home is in progress. - If you want to cancel the function, tap on 3. -
Page 27: Flying - Using Flight Modes
6.8 Flying – Using flight modes 6.8.1 Selecting a flight mode 6.8.2 Position flight mode This mode is suitable for beginner pilots. It uses GPS to achieve accurate hovering, intelligent following and other assistance features. Remember • This mode supports Return-To-Home as long as the GPS coordinates are recorded before you take off. Activating Indicator lights Notes • It is the default mode after powering On aircraft: • Wait until the GPS turns on on the aircraft. before flying. •... - Page 28 6.8.3 Altitude flight mode Altitude Flight Mode is for experienced pilots. In this mode, you can fly the aircraft with or without GPS signal (flying with GPS is the recommended option). If GPS is turned off, you will fly the aircraft manually. Activating Notes Select the mode from the mode dropdown menu. Certain environmental factors, such as airflow, might affect the flight, resulting in drifting or hovering failure. 6.8.4 Point of Interest flight mode In point of interest mode, the aircraft will circle around a definite subject. You can control the aircraft position and the orbiting radius as follows: 1. Select the Position flight mode and take off. 2. In the mobile app, select ORBIT from the flights mode menu. The aircraft will start orbiting (Fig. C) about the set location. 3. Use the joystick(s) to: - Increase and decrease the orbiting radius (Fig. B, the image shows Mode 2 configuration). - Control the aircraft position (Fig.
-
Page 29: Flying - When Safety Features Take Over
6.8.5 Follow me flight mode The aircraft will automatically follow your mobile device. CAUTION Prevent injury In this mode the aircraft circles around you. It is necessary to maintain a good GPS signal at all times. Observe the diagram below and follow the steps: 1. Ensure the GPS signal indicator shows all signal bars 2. Take off and then select TRACK from the flights mode menu. 3. Select the desired altitude (5 – 50 m). select the desired height (5 – 50 m) Aircraft maintains a 5 m horizontal distance to the mobile device. 6.9 Flying – When safety features take over Built-in safety features protect the product and the pilot and automatically take over control when certain conditions are met. -
Page 30: Flying - Using Waypoints
6.10 Flying – Using waypoints Through waypoints you tell the aircraft where to go in sequence. CAUTION Prevent injury Always choose open and spacious outdoor fields, away from crowds. Pay attention to the flight environment and flight altitude. Waypoint flight Route planning flight Flight altitude Start Set course point 1. Take off and bring the aircraft into a safe hover position. 2. In the mobile app, tap on the map in the left bottom corner to bring up the waypoints. 3. Tap on (Waypoint Flying) or (Flight Planning) to start the configuration: - Read the important notifications. - Add waypoints to the map (within a 100 m radius) and set the altitude on the right side of the screen. 4. Tap on to start the sequence. The aircraft sequentially flies to each set point. - Tap on to exit the sequence. The aircraft will hover at its current location. 5. When the aircraft reaches the final waypoint it will hover at that point. You can now decide what you want to do next. -
Page 31: Taking Photos And Recording Video
6.11 Taking photos and recording video NOTICE Prevent product damage: • Ensure the camera can rotate freely. • Exposure to high temperatures can damage the camera and even cause injury. 6.11.1 Aerial photography tips • Ensure a smooth flight. • Shoot on sunny and breezy days. • Take photos or videos when the drone is in Position Flight Mode. 6.11.2 Adjusting the camera angle For best results, tilt the camera upward or downward when taking photos or videos. In the mobile app, slide the scroll bar on the right side to control the pitch angle. See below image. Slide up to tilt the camera upward. Slide down to tilt the camera downward. - Page 32 6.11.4 Using gestures to take pictures or record video 1. Bring the aircraft into hover position. 2. Enable in the mobile app. Gesture Recognition Remember • Face the drone camera. • Fly the drone in well-lit environment. • Ensure a strong WiFi signal. • Use gestures when you stay around 2 meters away from the drone camera. Victory gesture (picture) 1. Keep 2 meters from the drone and face the camera. 2. Raise one of your hands in front of you and make a V shape.
- Page 33 6.11.5 MV filming Tap on MV to enter the MV filming mode. Joystick On/ Off Album Turn off MV Mode Filter Image Rotation Photo Video Recorded Time Recording Progress Bar Music Time Image Rotation 1. Tap on to turn on image rotation. 2. Use two fingers to rotate or zoom the image.
-
Page 34: Maintenance
7. Maintenance 7.1 Pairing aircraft and remote controller When you replace your remote controller, it is necessary to pair it with the aircraft before you can use it as follows: 1. Switch on the aircraft and the remote controller. 2. Go to the network settings on your mobile device and view available WiFi networks. Take down the serial number of the remote controller: - Controller-xxxxxx (hexadecimal) 3. Connect your mobile device to the Drone-xxxxxx (hexadecimal) network. 4. In the mobile app, tap on ● ● ● to open the menu. 5. Go to then tap on Pair. A dialogue box will pop up. Pair RC 6. - Page 35 7.2.2 Calibrating The calibration procedure comprises two steps: (1) horizontal and (2) vertical calibration. Requirements • Your mobile device is connected to the Drone-xxxxxx (serial number) or Controller-xxxxxx (serial num- ber) network. • Your environment is free from magnetic interference. 1. In your mobile app, tap on ● ● ● to open the menu. Tap on COMPASS CALIBRATION to start calibrating. - The indicator lights on the aircraft alternately flash red and blue. 3. Follow the in-app instructions to complete the calibration procedure. The app will remind you which step to perform.
-
Page 36: Technical Data
8. Technical data 8.1 General Transmission frequency range ......5180 – 5240 MHz, 5745 – 5825 MHz Transmission power..........<14 dBm Transmission distance ........ R emote controller: max. 300 m (line of sight) Wi-Fi: max. 100 m 8.2 Drone Dimension ............148 x 145 x 60 mm (L x W x H) Main rotor diameter ..........120 mm Function ............ F ollow me function, Waypoint function, Track mode, One key return, Lost control return, Low battery return, Optical flow system Ascent speed ............max. 2 m/s in sport mode Max. Descent speed .........max. 1.5 m/s Top speed ............18 km/h in sport mode (without wind) Altitude above sea level ........max. 4000 m Front camera sensor ........1 / 3.2” CMOS ; Image format 4096 x 3072 (12 MP) Video resolution ..........1920 x 1080 (front camera), 1280 x 720 (optical flow camera) Image resolution .......... 4 096 x 3072 (12 MP) (front camera), 1280 x 720 (optical flow camera) -
Page 37: Flight Battery
8.4 Flight battery Type ..............Li-ion 3S, 11.4 V, 1000 mAh Rated energy ............11.4 Wh Charging time ...........90 min Weight ..............82 g 8.5 Balance charger (for drone battery charging) Input voltage/current .........5 V/DC, 2 A Output voltage ..........4.35 V/DC, 0.7 A x 3 8.6 App Name ..............GeNii Mini Operating system .......... A ndroid: supports 5G Wi-Fi; Version 6.0 or above iOS: Version 9.0 or above 9. Disposal 9.1 Product Electronic devices are recyclable waste and must not be disposed of in the household waste. At the end of its service life, dispose of the product in accordance with applicable regulatory guidelines. Remove any inserted (rechargeable) batteries and dispose of them separately from the product. -
Page 38: Declaration Of Conformity (Doc)
10. Declaration of Conformity (DOC) Conrad Electronic SE, Klaus-Conrad-Straße 1, D-92240 Hirschau, hereby declares that the UAS “GeNii Super Combo” / “GeNii Mini” is of class C0 and in compliance with Directive 2014/53/EU and EU regulations 2019/945 and 2020/1058. Click on the following link to read the full text of the EU Declaration of Conformity: www.conrad.com/downloads Enter the product’s order number in the search field; you can then download the EU Declaration of Conformity in the available languages. 11. Appendix – About optical flow positioning 11.1 Introduction Placed on the bottom of the aircraft, the optical flow positioning system senses the movements of the aircraft with the assistance of the camera, and calculates the current altitude, helping to precisely locate the aircraft’s position. When the aircraft is ready to take off, the optical flow positioning function cannot be activated due to the low altitude with the aircraft’s front indicator light blinking slowly. After the aircraft has taken off and the conditions are satisfied, the optical flow positioning function will automatically turn on and locate the aircraft’s position as to enable hovering with the aircraft’s indicator light turning solid red. Attention: In mid-flight, the optical flow positioning function cannot be activated if the aircraft’s front indicator light turns slow blinking red. Please pay proper attention for a safe flight. The optical flow positioning system is significantly affected by the intensity of the light and the surface texture of the physical object. If the optical flow positioning system fails to work, its function of horizontal centered absolute position- ing will be ineffective. In this situation, please manually control the aircraft and pay proper attention whist flying the aircraft in the following scenarios. 11.2 Usage Scenarios •... - Page 39 - The system may fail to locate position when the aircraft flies fast at a low altitude (0.5 meter below). - The surfaces in pure colors (such as pure black, pure white, pure red, pure green). - Highly reflective surfaces. - Water bodies or the transparent surfaces. - The surfaces of moving objects (such as the crowds, and bushes or brushwood with strong wind blowing). - The environment where the light changes rapidly. - Badly-lit (light intensity less than 300 lux) or brightly-lit (light intensity more than 10,000 lux) surfaces of the objects. - Poorly-textured surfaces. - The surfaces that have been featured with highly-repeated textures (such as same-colored checker bricks). - Tiny barriers. - Control the aircraft to fly at an appropriate speed of about 5m/s at the altitude of 1 meter.
- Page 40 This is a publication by Conrad Electronic SE, Klaus-Conrad-Str. 1, D-92240 Hirschau (www.conrad.com). All rights including translation reserved. Reproduction by any method, e.g. photocopy, microfilming, or the capture in elec- tronic data processing systems require the prior written approval by the editor. Reprinting, also in part, is prohibited. This publication represent the technical status at the time of printing.
Need help?
Do you have a question about the GeNii Mini RtF and is the answer not in the manual?
Questions and answers