Table of Contents
Advertisement
Quick Links
Advertisement
Table of Contents

Related Manuals for Leibinger RAPID Series


Summary of Contents for Leibinger RAPID Series
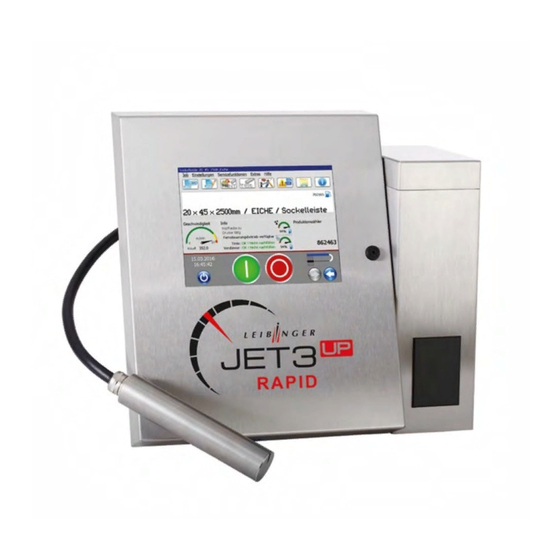
- Page 1 Technical information The new LEIBINGER RAPID printer series Version 1.4...
-
Page 3: Table Of Contents
Table of content Table of content Introduction ......................4 Technical data ......................5 Overview ......................5 Font - Font height – Font width – Stroke distance – Speed ........6 Features and applications ................... 7 Overview about features and applications .............. 7 Printing speed and the quality of printouts ............. -
Page 4: Introduction
It is highly recommended thoroughly checking the manuals and the accessories catalogue for the differences between the JET3up and the JET3 RAPID series. The following list gives an overview about the parts that are different for the RAPID series in comparison to the JET3up: Controller board... -
Page 5: Technical Data
Technical data 2 Technical data There are three types of the RAPID available: • RAPID Universal • RAPID Highspeed • RAPID Wire 2.1 Overview RAPID Highspeed RAPID Universal Type RAPID Wire 1000 m/min 800 m/min Up to 30% faster than Maximum the JET3up printing... -
Page 6: Font - Font Height - Font Width - Stroke Distance - Speed
Technical data 2.2 Font - Font height – Font width – Stroke distance – Speed RAPID Wire Font Height [mm] Recommended Recommended stroke Speed [m/min] character width [mm] distance [mm] drop frequency 115 kHz 128 kHz 1,5 – 2,0 2,0 - 4,0 0,30 –... -
Page 7: Features And Applications
Features and applications 3 Features and applications The three types of printers of the RAPID series provide different features and they are designed for different kinds of applications. 3.1 Overview about features and applications RAPID Highspeed RAPID Universal Type RAPID Wire •... -
Page 8: Printing Speed And The Quality Of Printouts
3.2 Printing speed and the quality of printouts Each printer type of the RAPID series could be used for production speeds up to 1000 m/min. However, the quality of the printouts would not be acceptable using the wrong printer for a certain speed. - Page 9 Features and applications Rapid Highspeed The RAPID Highspeed comes with the same print head technology as the RAPID Wire but with a different head cover. The headcover of the RAPID Highspeed is designed for high-speed applications that: • require a larger distance between print head and head cover •...
- Page 10 Features and applications RAPID Universal The RAPID Universal comes with the same print head as the JET3up. The main difference to the JET3up is the higher oscillator frequency of the RAPID Universal. With an oscillator, frequency of up to 128 kHz the RAPID Universal allows a 30% faster operating speed than the JET3up with a 96 kHz oscillator frequency.
-
Page 11: Print Samples
Features and applications 3.3 Print samples The following print samples are all created with 70-101 black ink on the different types of RAPID printers, at different speeds and with different printing parameters. 3.3.1 Print samples RAPID Wire Not available 3.3.2 Print samples: RAPID Highspeed in comparison with RAPID Universal The print sample show that with a 7x5 font the RAPID Highspeed has quality advantages compared with the RAPID Universal at speed higher than 200 m/min... -
Page 12: Print Samples: Rapid Universal In Comparison With Jet3Up - 2D Codes
Features and applications 3.3.3 Print samples: RAPID Universal in comparison with JET3up – 2D codes The print samples show that the RAPID Universal provides the same print quality as the JET3up but at a 30% higher production speed. The print outs of the RAPID Universal are a shade lighter than the print outs of the JET3up. -
Page 13: Print Sample: Rapid Wire And Rapid Highspeed Cabel Printouts
Features and applications 3.3.5 Print sample: RAPID Wire and Rapid Highspeed cable printouts The following example show the print out quality of the RAPID Wire and Rapid Highspeed printers at 800 m/min and 1000 m/min printing speed. Printout RAPID Wire / 1000 m/min / 3x7 tower font/ full printout Printout RAPID Wire / 1000 m/min / 3x7 tower font / details Printout RAPID Highspeed / 800 m/min / 5x5 font/ full printout Printout RAPID Highspeed / 800 m/min / 5x5 font / details... -
Page 14: Available Inks
Available inks 4 Available inks For technical reason it is not possible to use the full range of LEIBINGER inks for high-speed printing. Using an ink that is not approved for high-speed printing may result in printouts of dissatisfying quality! -
Page 15: Rapid Wire And Highspeed: The Print Head Ventilation
RAPID Wire and Highspeed: The print head ventilation 5 RAPID Wire and Highspeed: The print head ventilation The RAPID Wire and the Rapid Highspeed printers are equipped with a print head ventilation. The print head ventilation ensures longer cleaning intervals and reduces the risk of condensation within the print head. -
Page 16: Technical Details
RAPID Wire and Highspeed: The print head ventilation 5.2 Technical details The RAPID Wire and the Rapid Highspeed printers are equipped with a connector for compressed air. The connector is located on the back panel of the hydraulic cabinet. Connector for compressed air Technical data Maximum input pressure:... -
Page 17: Information About Encoders
Information about encoders 6 Information about encoders Regarding the encoders that are used for a high-speed application, there are two limitations to be considered. The first one is the maximum output frequency of the encoder and the other one is the maximum input frequency of the X1 encoder input interface of the printer. -
Page 18: The Specifications Of The Encoder Input Of The Printer
Information about encoders 6.3 The specifications of the encoder input of the printer The RAPID printer offers 3 different signal inputs: An input for RS422 signals An input for HTL signals An input for TTL signals Each type of input has its own specifications regarding the voltage levels, the input resistance and the maximum frequency. -
Page 19: Recommendations Regarding The Encoder / Printer Combination For High-Speed Applications
6.5 Example for an encoder / printer combination The encoder with the LEIBINGER article number 54-002352 K is designed for the use with LEIBINGER printers. The encoder has a TTL compatible RS 422 interface and a resolution of 2500 pulses/rotation. -
Page 20: Appendix
Information Regarding the graphic user interface there is no differences between the JET3up and the printers of the RAPID series. The difference occur with the available type of inks and print modes. The main difference regarding the service work are the adjustments of the Printhead and the ink jet. - Page 21 The following examples shows the differences between an approved- and an not approved ink: 1. Select the option <HydraulicSettings> from the drop-down menu „Settings“ With an ink approved With the ink 70000-00134, an ink approved for all printers of the RAPID series is selected. The appropriate default values for: Max. Frequency (KHz)
-
Page 22: Print Modes
Appendix 7.1.2 Print modes Depending on the printer type, there are certain print modes available. 7.1.2.1 Available print modes for the RAPID Universal The following steps show how to get to the <Printstyle> tab in the <Job settings> dialog box. •... -
Page 23: Available Print Modes For The Rapid Highspeed
Appendix 7.1.2.2 Available print modes for the Rapid Highspeed The following steps show how to get to the <Printstyle> tab in the <Job settings> dialog box. • Select <Settings> in the menu of the job editor and then select the <Printstyle> tab. Information Depending on the selected oscillator frequency, a different number of print modes are available. -
Page 24: Available Print Modes For The Rapid Wire
Appendix 7.1.2.3 Available print modes for the Rapid Wire The following steps show how to get to the <Printstyle> tab in the <Job settings> dialog box. • Select <Settings> in the menu of the job editor and then select the <Printstyle> tab. Information Depending on the selected oscillator frequency, a different number of print modes are available. -
Page 25: Print Head Adjustment: Rapid Wire And Highspeed
Appendix 7.2 Print head adjustment: RAPID Wire and Highspeed There are some significant differences between the JET3up and the printers of the RAPID series regarding the print head adjustments 7.2.1 Adjustment of the ink jet Tools required: six-fold magnifier, 2mm hex key, T6x50 Torx. - Page 26 Appendix 5. Remove the head cover and press the button <Jet Adjust>. The nozzle seal opens automatically to the <Jet adjust position> (4200) Unfix mounting screws by one rotation with hex key and take off the inside cover. 6. Switch to the tab <Printhead> (1) and touch on the button <Jet Adjust> (2). The nozzle seal opens automatically to the <head adjustment position>.
- Page 27 Appendix 8. Use the two adjusting screws of the nozzle retainer to adjust the ink jet. For this, the 1,5 mm Allen key is required. Screw 1 Screw 2 Attention • It is important to adjust the ink jet as close as possible to the edge of the gutter tube but the ink jet must not touch the gutter tube! Correct adjustment ...
-
Page 28: Adjustment Of The Drop Production Unit
Appendix 7.2.2 Adjustment of the drop production unit Attention • The following steps are only necessary after the entire drop production unit was disassembled and reassembled e.g. after exchanging defective parts. Do not carry out these steps for a standard ink jet adjustment! 1. - Page 29 Appendix 3. For the adjustment of the swivel mechanic of the RAPID Wire and RAPID Highspeed printhead, it is recommended using a feeler gauge. The distance between the nozzle plate and the charging electrode has to be 0,1 mm. Use a feeler gauge with a 0,1 mm blade. Bring the printhead in adjustment position and switch off the ink jet.
- Page 30 Appendix 5. Turn on the Ink flow sensor by touching the button <Ink flow sensor> (1). Then open the nozzle seal completely by using the <arrow key> (2). Check whether the ink jet is in the middle of the charging tunnel and in parallel to the inner edge of the charging tunnel. Readjust the position if necessary.
-
Page 31: Adjusting The Distance Between Ink Jet And Ink Drop Voltage Detector
Appendix 7.2.3 Adjusting the distance between ink jet and ink drop voltage detector Attention • The following steps are only necessary after the entire drop production unit was disassembled and reassembled e.g. after exchanging defective parts. Do not carry out these steps for a standard ink jet adjustment! After a reassembling of the drop production unit, it may be necessary to adjust the distance between the ink drop voltage detector and the ink jet.
Need help?
Do you have a question about the RAPID Series and is the answer not in the manual?
Questions and answers