
Related Manuals for Datapath VSN400 Series


Summary of Contents for Datapath VSN400 Series
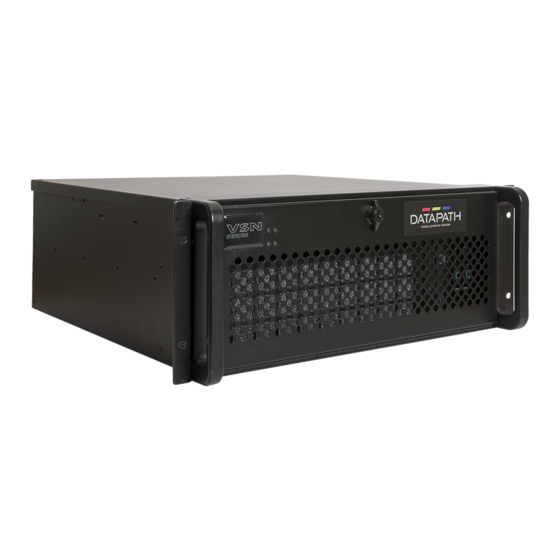
- Page 1 Quick Start Guide VSN400 Series of Wall Controllers Engineering the world’s best visual solutions...
- Page 2 PCIe card product leaflets Cables/Adapters as specified in the product leaflets Each Datapath system is custom built, therefore the number and type of input and output cards will differ from system to system. Accompanying this Quick Start Guide are PCIe...
-
Page 3: Step 1 Keyboard And Mouse
VSN400 Quick Start Guide STEP 1 KEYBOARD AND MOUSE Connect Keyboard and Mouse to USB Ports. USB ports can be found on the front and rear of the chassis. STEP 2 CONNECT TO A NETWORK (OPTIONAL) If the VSN400 is to be used over a network, connect it to a network point (cables not supplied) using one of the LAN connectors on the rear panel. -
Page 4: Step 3 Connect Input Source
VSN400 Quick Start Guide STEP 3 CONNECT INPUT SOURCE Each Datapath system is custom built. The number and type of inputs will differ from system to system. Contained within the documentation pack are PCIe card product leaflets which give details on how the cards are connected. -
Page 5: Step 4 Powering Up The System
VSN400 Quick Start Guide STEP 4 POWERING UP THE SYSTEM RPSU System ATX System Connect power cables then plug into a mains supply. Switch on the power supply units. Switch on the system. -
Page 6: Step 5 Windows 10 Setup
VSN400 Quick Start Guide STEP 5 WINDOWS 10 SETUP Once the system has been configured in our factory the operating system is resealed, meaning that when switching on the system for the first time the operating system setup commences. You will be prompted to enter information to set up your wall controller. There is no requirement for users to enter a product key to activate Windows 10, activation is done automatically when connected to the internet. -
Page 7: Step 7 Wallcontrol 10 (Optional)
VSN400 Quick Start Guide STEP 7 WALLCONTROL 10 (OPTIONAL) Before opening the Client interface you may need to start the Server by clicking on it in the Programs menu. The WallControl 10 Client will only detect servers that are running. Start | All Programs | WallControl 10 - Server When WallControl 10 is opened for the first time it is strongly recommended that you take a look through the help files prior to using the application. - Page 8 VSN400 Quick Start Guide Display Wall Tab Display Wall Sources When opened, the display wall tab shows a live representation of the physical wall and the sources available to display on it. To place a source on the video wall, simply click on the required source in the sources tab and drag it onto the display wall representation.
- Page 9 VSN400 Quick Start Guide Start | All Programs | WallControl 10 - Security Administration Client A WallControl 10 Pro serial dongle must be inserted into a vacant USB port. If the dongle is removed or swapped, the Security Administration Client will not open and an error message is displayed, therefore it is important the dongle is not removed.
- Page 10 VSN400 Quick Start Guide STEP 8 CREATE A RESTORE USB FLASH DRIVE To create your Restore USB Flash Drive you will need a USB memory stick with a minimum capacity of 16GB. It is recommended that once your Restore USB Flash Drive has been created, it is stored in a safe place accessible to personnel who may be required to restore the system.
- Page 11 VSN400 Quick Start Guide This will lead you to the Windows 10 Restore Menu as shown below: Click on the ‘Create Restore Media’ icon then insert the USB flash drive into a vacant USB slot (min capacity 16GB).
- Page 12 VSN400 Quick Start Guide It should be noted that any data currently stored on the USB Flash Drive will be deleted permanently during this process. Click on ‘Scan for USB’ . The application will now scan the system USB ports to detect your USB flash drive.
-
Page 13: Copyright Statement
COPYRIGHT STATEMENT © Datapath Ltd., England, 2020 Datapath Limited claims copyright on this documentation. No part of this documentation may be reproduced, released, disclosed, stored in any electronic format, or used in whole or in part for any purpose other than stated herein without the express permission of Datapath Limited. - Page 14 VSN400 Quick Start Guide NOTES...
- Page 15 VSN400 Quick Start Guide NOTES...
- Page 16 Datapath UK and Corporate Headquarters Bemrose House, Bemrose Park, Wayzgoose Drive, Derby, DE21 6XQ, United Kingdom +44 (0) 1332 294 441 sales-uk@datapath.co.uk Datapath North America 2490 General Armistead Avenue, Suite 102, Norristown, PA 19403, USA +1 484 679 1553 sales-us@datapath.co.uk...
Need help?
Do you have a question about the VSN400 Series and is the answer not in the manual?
Questions and answers