Table of Contents
Advertisement
Quick Links
Item Checklist
Completely check your package. If you discover damaged or missing items, contact your
retailer.
SynactiX 2EP mainboard
QDI Driver Utility CD
I/O shield(optional)
1 ATA 100/66 cable
1 FDD cable
1 COM2 cable(optional)
QDI Serial Product R.M.A. Warranty Card
User's manual
Notice
The information in this document is subject to change in order to improve reliability, design,
or function without prior notice and does not represent a commitment on the part of this
company. In no event will we be liable for direct, indirect, special, incidental, or consequen-
tial damages arising out of the use or the possibility of such damages.
All trademarks are the property of their respective owners.
If you require further information, please visit our web-site: "www.qdigrp.com".
Advertisement
Table of Contents

Related Manuals for QDI SynactiX 2EP


Summary of Contents for QDI SynactiX 2EP
- Page 1 I/O shield(optional) 1 ATA 100/66 cable 1 FDD cable 1 COM2 cable(optional) QDI Serial Product R.M.A. Warranty Card User’s manual Notice The information in this document is subject to change in order to improve reliability, design, or function without prior notice and does not represent a commitment on the part of this company.
- Page 2 EN 50082-1 Generic immunity standard Part 1: Residential, commercial and light industry European Representative: QDI COMPUTER ( UK ) LTD QDI COMPUTER ( SCANDINAVIA ) A/S QDI SYSTEM HANDEL GMBH QDI COMPUTER ( NETHERLANDS) B. V. QDI COMPUTER (FRANCE) SARL QDI COMPUTER HANDELS GMBH QDI COMPUTER (ESPANA) S.A.
- Page 3 Declaration of conformity Trade Name: QDI Computer ( U. S . A. ) Inc. Model Name: SynactiX 2EP Responsible Party: QDI Computer ( U. S. A.) Inc. Address: 41456 Christy Street Fremont, CA 94538 Telephone: (510) 668-4933 Facsimile: (510) 668-4966...
-
Page 4: Table Of Contents
C O N T E N T S BootEasy(English).................S.1 BootEasy ................S.2 SpeedEasy Quick Setup(English) ............ S.3 SpeedEasy ............... S.5 Facilité de vitesse Initialisation(Francais) .......... S.7 1. Introduction ..............Overview .................... 1 Key Features ..................1 Introduction to New Features .............. 4 2. - Page 5 PNP/PCI Configuration Setup ............33 Integrated Peripherals ..............34 PC Health Status ................36 Password Setting ................38 Boot with BIOS defaults ..............38 Appendix A QDI Driver Utility CD ..........39 Appendix B Boot Logo ............... 40 RecoveryEasy ..............41...
- Page 6 If the LED is on, adding or removing devices like SDRAM memory is prohib- ited. Caution 2 Be sure to add some Silicone Grease between the PentiumIII (Coppermine) CPU and the FAN to keep them fully contact , meanwhile to meet the heat sink requirement. Manual for SynactiX 2EP...
- Page 7 SynactiX 2EP QDI BootEasy BootEasy is a new member of legend QDI Easy series, which is the latest innovation comes from legend QDI. Figure - 1 BootEasy Setup Menu BootEasy technology enormously improves the long BOOT process time of com- puters.
-
Page 8: Booteasy(English)
BootEasy QDI BootEasy BootEasy QDI Easy 1 BootEasy BootEasy BootEasy BootEasy BIOS BootEasy Advanced BIOS Features QDI BootEasy Feature BootEasy Enabled BIOS BootEasy BIOS BootEasy Enabled BIOS RESET QDI BootEasy Feature Disabled Enabled Manual for SynactiX 2EP... -
Page 9: Speedeasy Quick Setup(English)
100MHz host bus speed, 200MHz for processor with 66MHz host bus speed, for bus ratio locked processor, run its real speed. 5. Save and exit BIOS Setup, your system will now boot successfully. Manual for SynactiX 2EP... - Page 10 The processor speed can be manually selected on the “CPU SpeedEasy SETUP” menu screen. Warning: Do not set CPU frequency higher than its working frequency. If you do, we will not be responsible for any damages caused. Manual for SynactiX 2EP...
- Page 11 Intel® Pentium III FC-PGA, Celeron FC-PGA Celeron PPGA 370 BIOS CPU SpeedEasy Setup 1 3 3 C P U 4 0 0 1 0 0 C P U 3 0 0 C P U 2 0 0 C P U BIOS Manual for SynactiX 2EP...
-
Page 12: Speedeasy
SpeedEasy SpeedEasy CPU SpeedEasy Setup SpeedEasy BIOS jumper SpeedEasy Setup Manual for SynactiX 2EP... - Page 13 SynactiX 2EP Installation de la carte mère SynactiX 2EP Assurez-vous que votre ensemble est complet: carte mère, câbles IDE et FLOPPY, notice d’utilisation et CD-ROM d’installation. Vérifiez que l’alimentation est débranchée et reliez-vous à la terre par une courroie à votre poignet. A défaut, maintenez le contact de vos deux mains avec un objet lui- même relié...
- Page 14 Installation du SynactiX 2EP système Effectuez les autres réglages du BIOS selon votre configuration (nous vous conseillons fortement de maintenir les réglages par défaut afin d’éviter toute manipulation hasardeuse pouvant résulter en un dysfonctionnement). Pour plus d’informations sur les fonctions du BIOS, vous pouvez consulter la version française du manuel sur le CD-ROM.
- Page 15 - Echec au démarrage du PC à 3 reprises N’arrêtez pas ou ne redémarrez pas le système lorsque BootEasy s’initialise Placez «QDI BootEasy Feature» sur «Disabled» avant de changer un composant du système Placez «QDI BootEasy Feature» sur «Enabled» après avoir effectué le changement.
- Page 16 Installation du SynactiX 2EP système Le menu SpeedEasy Insérez le processeur correctement. Connectez les autres éléments du système (voir Installation). III. Au démarrage du système, pressez la touche <Suppr> pour entrer dans le Bios Entrez dans le menu «CPU SpeedEasy setup»...
-
Page 17: Introduction
Introduction Introduction Overview SynactiX 2EP green mainboard utilizes Intel® 815EP chipset, 815EP contains two components:the 82815EP Memory Controller Hub(MCH) and the 82801BA I/O Controller Hub2(ICH2). providing a fully compatible, high performanced and cost-effective PC/ATX platform. The new integrated technologies, together with AGP 4X support, the software configurable AC’97 audio(support up to 6 channels by CNR), integrated LAN(optional), 4... - Page 18 18bit stereo codec. Multiple stereo input mixer. Mono and stereo volume control. Provides onboard Line-in Jack, Microphone-in Jack, Speaker-out Jack and MIDI/Joy- stick Connector. AGP Interface AGP Universal Connector supports AGP 2.0 including 4x AGP data transfers. Manual for SynactiX 2EP...
- Page 19 Provides onboard 3.3V regulator to support ATX power supply without 3.3V output. (Optional) Provides onboard 1.5V, 1.8V, 2.5V and 3.3V standby regulator. Supports management applications such as QDI’s ManageEasy or LDCM (LANDesk Client Manager). (optional) Providing QDI’s innovations such as SpeedEasy, RecoveryEasy, BIOS-ProtectEasy(to protect the system BIOS from being attacked by severe virus such as CIH ), LogoEasy, ManageEasy and BootEasy(new feature).
-
Page 20: Introduction To New Features
Navigate to the CD-ROM drive from the MS-DOS Command Prompt and enter the following from the Win98 directory on the CD: D:\SETUP /P J (This manual assumes that your CD-ROM device driver letter is D:) Windows 98 will be installed with ACPI enabled. Manual for SynactiX 2EP... - Page 21 CRC to the hard drive, and the hard drive compares it to its own CRC value. If the hard drive reports errors to the host, then the host retries the command containing the CRC error. Manual for SynactiX 2EP...
- Page 22 This enables the integrated LAN Controller to transmit data with minimum interframe spacing(IFS). The integrated LAN Controller also includes an interface to a serial (4-pin) EEPROM. The EEPROM provides power-on initialization for hardware and software configuration pa- rameters. Manual for SynactiX 2EP...
-
Page 23: Installation Instructions
The Microphone-in jack can be connected to a microphone for voice input. The Speaker-out jack allows you to connect speakers or headphones for audio output from the internal amplifier.The MIDI/Joystick connector allows you to connect a game joystick or a MIDI device for entertainment. Manual for SynactiX 2EP... -
Page 24: Uart2, Usb3,4
If you change “Soft-off by PWR-BTTN” from default “Instant-off” to “De- lay 4 Secs” in the “POWER MANAGEMENT SETUP” section of the BIOS, the power switch should be pressed for more than 4 seconds before the system pow- ers down. Manual for SynactiX 2EP... -
Page 25: Hard Disk Led Connector (Hd_Led)
The connector can be connected to the keyboard lock switch on the case for locking the keyboard. HD_LED HDD LED(+) HDD LED(-) ORANGE(-) GREEN(-) LED+(VCC) POWER SPKDATA RESET EMPTY EMPTY EMPTY LED+ SLEEP LED- LED- LED+ LED+ LED- KEYLOCK Manual for SynactiX 2EP... -
Page 26: Infrared Header (Irda)
LAN adapter, set “Wake-Up by LAN/Ring” as Enabled in the “POWER MANAGEMENT SETUP” section of the BIOS. Save & exit, then boot the operating system once to make sure this function takes effect. +5V standby Signal for waking up (active high) Manual for SynactiX 2EP... -
Page 27: Wake-Up On Internal Modem (Wom)
Sound Connector (PC-PCI) This connector provides a bridge between the mainboard and PCI sound card to deliver sound compatibility under DOS real-mode environment. PC-PCI DMA REQUEST SERIAL INTERRUPT REQUEST 2 4 6 1 3 5 PC-PCI DMA ACKNOWLEDGE Manual for SynactiX 2EP... -
Page 28: Pin Smbus Connector(Smbus)
Indicate signal Communication and Networking Riser Interface Connector(CNR) SynactiX 2EP maiboard provides this Communication and Networking Riser(CNR) interface which can support audio and/or modem functions . Furthermore, it provides a LAN interface for networking functions. What its superiority compared with AMR is being able to support plug-and-play function. -
Page 29: Expansion Slots & I/O Ports Description
By using an audio codec, the AC’97 digital link providing by CNR allows for cost-effective, high-quality, integrated audio on the SynactiX 2EP platform. In addition, an AC’97 soft modem can be implemented with the use of a modem codec. AC’97 digital link allows several external codecs to be connected to the ICH2. -
Page 30: Clear Cmos
The mainboard provides the advanced keyboard password power-on function. Before using this function, set JKB with pin1 & pin2 closed. Otherwise, set JKB with pin2 & pin3 closed for disabling. Disable: 1 2 3 Enable: 1 2 3 Manual for SynactiX 2EP... -
Page 31: Connect Pci 3.3Vsb Voltage Jumper (Jsb)
Jumpers labeled JFS0 and JFS1 are located on the mainboard providing users with CPU overclocking feature. The host bus speed can be set as 66/100/133MHz or AUTO select. Refer to the chart below for the location of these jumpers, and the table for information on how to set them. Manual for SynactiX 2EP... -
Page 32: Bios Protection Jumper (Jav)
ROM in FWH. Whenever the system hardware configuration is changed, DMI informa- tion will be updated automatically. However, setting jumper JAV as closed makes flashing BIOS and updating DMI information impossible. Refer to page 4 for the two choices to implement BIOS-ProtectEasy. Manual for SynactiX 2EP... -
Page 33: Onboard Lan Jumper(Jp25)
& pin3 closed for disabling. Furthermore, the item “Wake-Up From S3 by USB”in BIOS setup should also be set corespondingly to enable or disable this function. JFUSB/JUSB JUSB Disable: 1 2 3 Enable: 1 2 3 JFUSB Manual for SynactiX 2EP... -
Page 34: Memory Configuration
Installation of All Drivers (EASY!) A QDI Driver Utility CD is supplied with this mainboard, all drivers can be installed from this CD-ROM. Before installing the drivers, check the system requirements such as the enough system memory (at least 32MB for Windows 95/98 system or 64MB for Windows 2000 system) and enough disk space. -
Page 35: Pc-Cillin
Today, it is possible to monitor and manage your complex hardware from Windows 9X and Windows NT. QDI ManageEasy is a system tool, like a bridge between the complex hardware and OS, used to access hardware status and to execute some control functions. - Page 36 --This page is intentionally left blank-- Manual for SynactiX 2EP...
-
Page 37: Bios Description
If you require more detailed information concerning AWDFLASH Utility, for example, the different usage of parameters, please type A:\>AWDFLASH /? Note: AWDFLASH.EXE (version>7.71) utility must be used to upgrade the SynactiX 2EP mainboard BIOS instead of QDI flash utility. Manual for SynactiX 2EP... -
Page 38: Entering Setup
The basic CMOS settings included in “Standard CMOS Features” are Date, Time, Hard Use the arrow keys to Disk Drive Types, Floppy Disk Drive Types, and VGA etc. highlight the item, then use the <PgUp> or <PgDn> keys to select the value desired in each item. Manual for SynactiX 2EP... - Page 39 ‘user’, the related information should be entered regarding the follow- ing items. Enter the information directly from the keyboard and press < Enter>: CYLS number of cylinders HEAD number of heads PRECOMP write pre-compensation LANDZ landing zone SECTOR number of sectors MODE HDD access mode Manual for SynactiX 2EP...
- Page 40 To support LBA or LARGE mode of HDDs, there must be some softwares involved which are located in Award HDD Service Routine(INT13h).It may fail to access a HDD with LBA (LARGE) mode selected if you are running under an Operating System which replaces the whole INT 13h. Manual for SynactiX 2EP...
- Page 41 The POST of the BIOS will determine the amount of base (or conventional) memory installed in the system. Extended Memory The BIOS determines how much extended memory is presented during the POST. Total Memory Total memory of the system equals the sum of the above memory. Manual for SynactiX 2EP...
-
Page 42: Cpu Speedeasy Setup
Host Clock Default Sets the bus frequency/Spread Spectrum/PC133 /Sprd Spec 66Mhz/0.60%/No support. /PC133 68Mhz/Off/No 100Mhz/0.60%/No 166Mhz/Off/No Warning: Be sure your selection is right. CPU over speed will be dangerous! Manual for SynactiX 2EP... -
Page 43: Advanced Bios Features Setup
Disabled The serial number is unreadable. Quick Power Enabled Allows the system to skip certain tests while On Self Test booting. This will decrease the time needed to boot the system. Disabled Normal POST. Manual for SynactiX 2EP... - Page 44 This option is for protecting the system BIOS, Protect Disabled when enabled, writing to BIOS area is to be discarded. Show Bootup Enabled The logo will be shown automatically when Disabled Logo system boots up, otherwise, no logo appears on the screen. Manual for SynactiX 2EP...
-
Page 45: Advanced Chipset Features Setup
ISA device in system. AGP Graphics 64MB Sets the effective size of the Graphics Aperture to Aperture Size 32MB be used in the particular GART Configuration. AGP Device 4X Enabled Support 4X mode support Disabled Not Support 4X mode Manual for SynactiX 2EP... - Page 46 133 MHz option will be hidden if the FSB is below 133MHz. Auto Enabled Close Empty Closes empty DIMM or PCI clock to reduce EMI. Disabled DIMM/PCI Clk Does not close empty DIMM or PCI clock. Manual for SynactiX 2EP...
-
Page 47: Power Management Setup
Note: When the green monitor does not detect the V/H-SYNC signals, the electron gun will be turned off. Video Off In The system will disable video when entering Suspend suspend mode. Does not turn off video when entering suspend mode. Manual for SynactiX 2EP... - Page 48 Reloads global timer, when there’s a FDD/COM/ Port LPT event. Disabled Does not reload global timer. PCI IRQ [ A - D ] # Enabled Reloads global timer, when there’s a PCI event. Disabled Does not reload global timer. Manual for SynactiX 2EP...
-
Page 49: Pnp/Pci Configuration Setup
BIOS automatically assigns them. PCI/VGA Palette Disabled Default setting. Snoop Enabled Non-standard VGA cards such as graphics accelerators or MPEG video cars may not show colors properly. Enabling this item can solve this problem. Manual for SynactiX 2EP... -
Page 50: Integrated Peripherals
Disabled Disables the AC97 Modem onboard. Onboard/CNR LAN Auto If a CNR Interface is enabled, the onboard LAN Selection will be automatically disabled. Otherwise, the onboard LAN is enabled. Onboard The onboard LAN is enabled. Manual for SynactiX 2EP... - Page 51 Game Port This option is used to configure Game Port Address Address. Midi Port Address Disabled This option is used to configure Midi Port Address. Midi Port IRQ This option is used to configure Midi Port IRQ. Manual for SynactiX 2EP...
-
Page 52: Pc Health Status
CHSFAN, CPUFAN Current CPUFAN or PWRFAN. Fan speed value is based on an Speed assumption that tachometer signal is two pulses Current PWRFAN per revolution. In other cases, you should regard Speed it relatively. Manual for SynactiX 2EP... - Page 53 F, 65 C/167 F, 70 C/158 F, 75 C/167 F, 80 C/176 F, 85 C/176 F, 90 C/194 F, 95 C/205 C/185 C/194 C/205 Disabled The system remains on regardless of how much the CPU temperature is. Manual for SynactiX 2EP...
-
Page 54: Password Setting
If you have made all the changes to CMOS values and the system can not boot with the CMOS values selected in setup, clear CMOS after power-down, then power on again. System will boot with BIOS default settings. Manual for SynactiX 2EP... -
Page 55: Appendix Aqdi Driver Utility Cd
Appendix A QDI Utility CD QDI Utility CD A QDI Utility CD is supplied with this mainboard, the contents contained in it are showed as below: 1. Driver Install Using this choice, you can install all the drivers for your mainboard easily. You should install the drivers in order, and you need to restart your computer until all the drivers are installed. -
Page 56: Appendix B Boot Logo
When you power on or reset your system, the picture shown below will be displayed on the screen. You can use “CBLOGO.EXE” (included on the QDI Mainboard Utility CD) to replace it by any other logo which you prefer. Please you follow these steps to use CBLOGO.EXE Utility: 1. -
Page 57: Recoveryeasy
Introduction: RecoveryEasy , the latest QDI innovation, is able to protect the system from being destroyed, by creating a so-called “mirror partition” for a current hard disk partition and backuping all the data to the mirror area. This ideal utility provides disk partition, disk data backup/recovery, CMOS settings backup/recovery and multi-boot functions. - Page 58 : After choosing this function, only the final partition can be deleted in order to keep the continuous disk space. If the warning message is confirmed, the partition will be deleted. By pressing “N” or “ESC” key, the system quits. Manual for SynactiX 2EP...
- Page 59 ESC : Exits from the Partition User Interface. If users made some mistakes, for example, wrongly delete a partition, do not press the “ESC” key, press the reset button on your system at once, in this way users can save their system. Manual for SynactiX 2EP...
- Page 60 The time when the latest backup was done will be displayed in the status line. After confirming the warning message, the system performs the content recovery. By pressing “N” or “ESC” key, the system quits. Manual for SynactiX 2EP...
- Page 61 : After choosing this function, the latest backup of the CMOS settings will be recovered. The system needs reboot in order to validate the new CMOS settings. Note : If users have never backuped the CMOS settings, a wrong message will be shown after choosing this function. Manual for SynactiX 2EP...
- Page 62 RecoveryEasy build-in BIOS means all functions of RecoveryEasy including creating partition, backuping and restoring partition are built in BIOS. Users just need to down load the latest BIOS from our Website (http://www.qdigrp.com) when wanting to upgrade (It’s free!). Manual for SynactiX 2EP...
- Page 63 What if partitions be wrongly deleted in RecoveryEasy? If users delete a partition in RecoveryEasy by mistake, they can save it by pressing the Reset button on their system at once. Do not press the “ESC” Manual for SynactiX 2EP...
- Page 64 Recovery User Interface. Remember to create a mirror partition and backup before virus attacks the system. Manual for SynactiX 2EP...
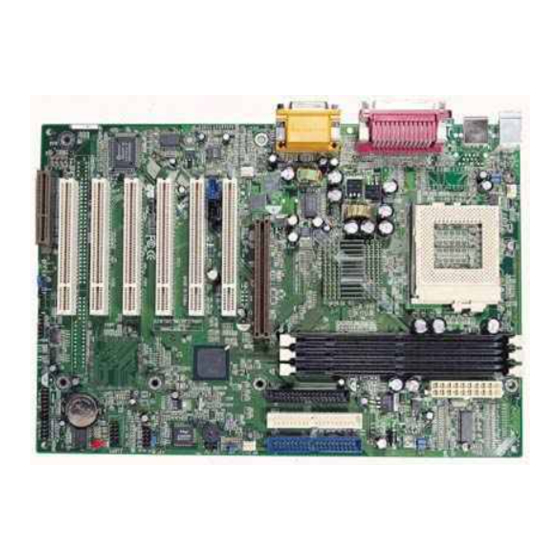
- Page 65 Board Layout of SynactiX 2EP V1.0 P/N: 430-01023-601-00 Manual SynactiX 2EP Ver 1.0 Manual for SynactiX 2EP...
Need help?
Do you have a question about the SynactiX 2EP and is the answer not in the manual?
Questions and answers